Consent optimization: Axeptio Server-Side with Addingwell
Introduction
In an ever-evolving digital environment, managing user consent is essential to ensure both compliance with regulations (GDPR, CCPA) and a smooth experience for internet users. Until now, this collection was done on the client-side, where Axeptio scripts were executed directly in the browser.
However, this approach presents several limitations. Ad blockers often block third-party scripts, which prevents the consent banner from being displayed. Some browsers, such as Safari, reduce the lifespan of cookies to seven days, which requires users to be asked for consent repeatedly.
To address these challenges, Addingwell offers an integration of Axeptio in server-side mode. By shifting cookie management from the browser to the server and loading Axeptio scripts via a first-party CDN, this solution bypasses these blockages and ensures a much longer persistence of consent. This article explores the limitations of current methods and explains how to implement Axeptio server-side with Addingwell.
Proposed solutions
Client-side option and its limitations
The traditional approach relies on directly loading Axeptio scripts in the browser. These scripts are fetched from the axept.io domain and display a consent popup. Once accepted, cookies are set via JavaScript to remember the user’s choice for future visits.
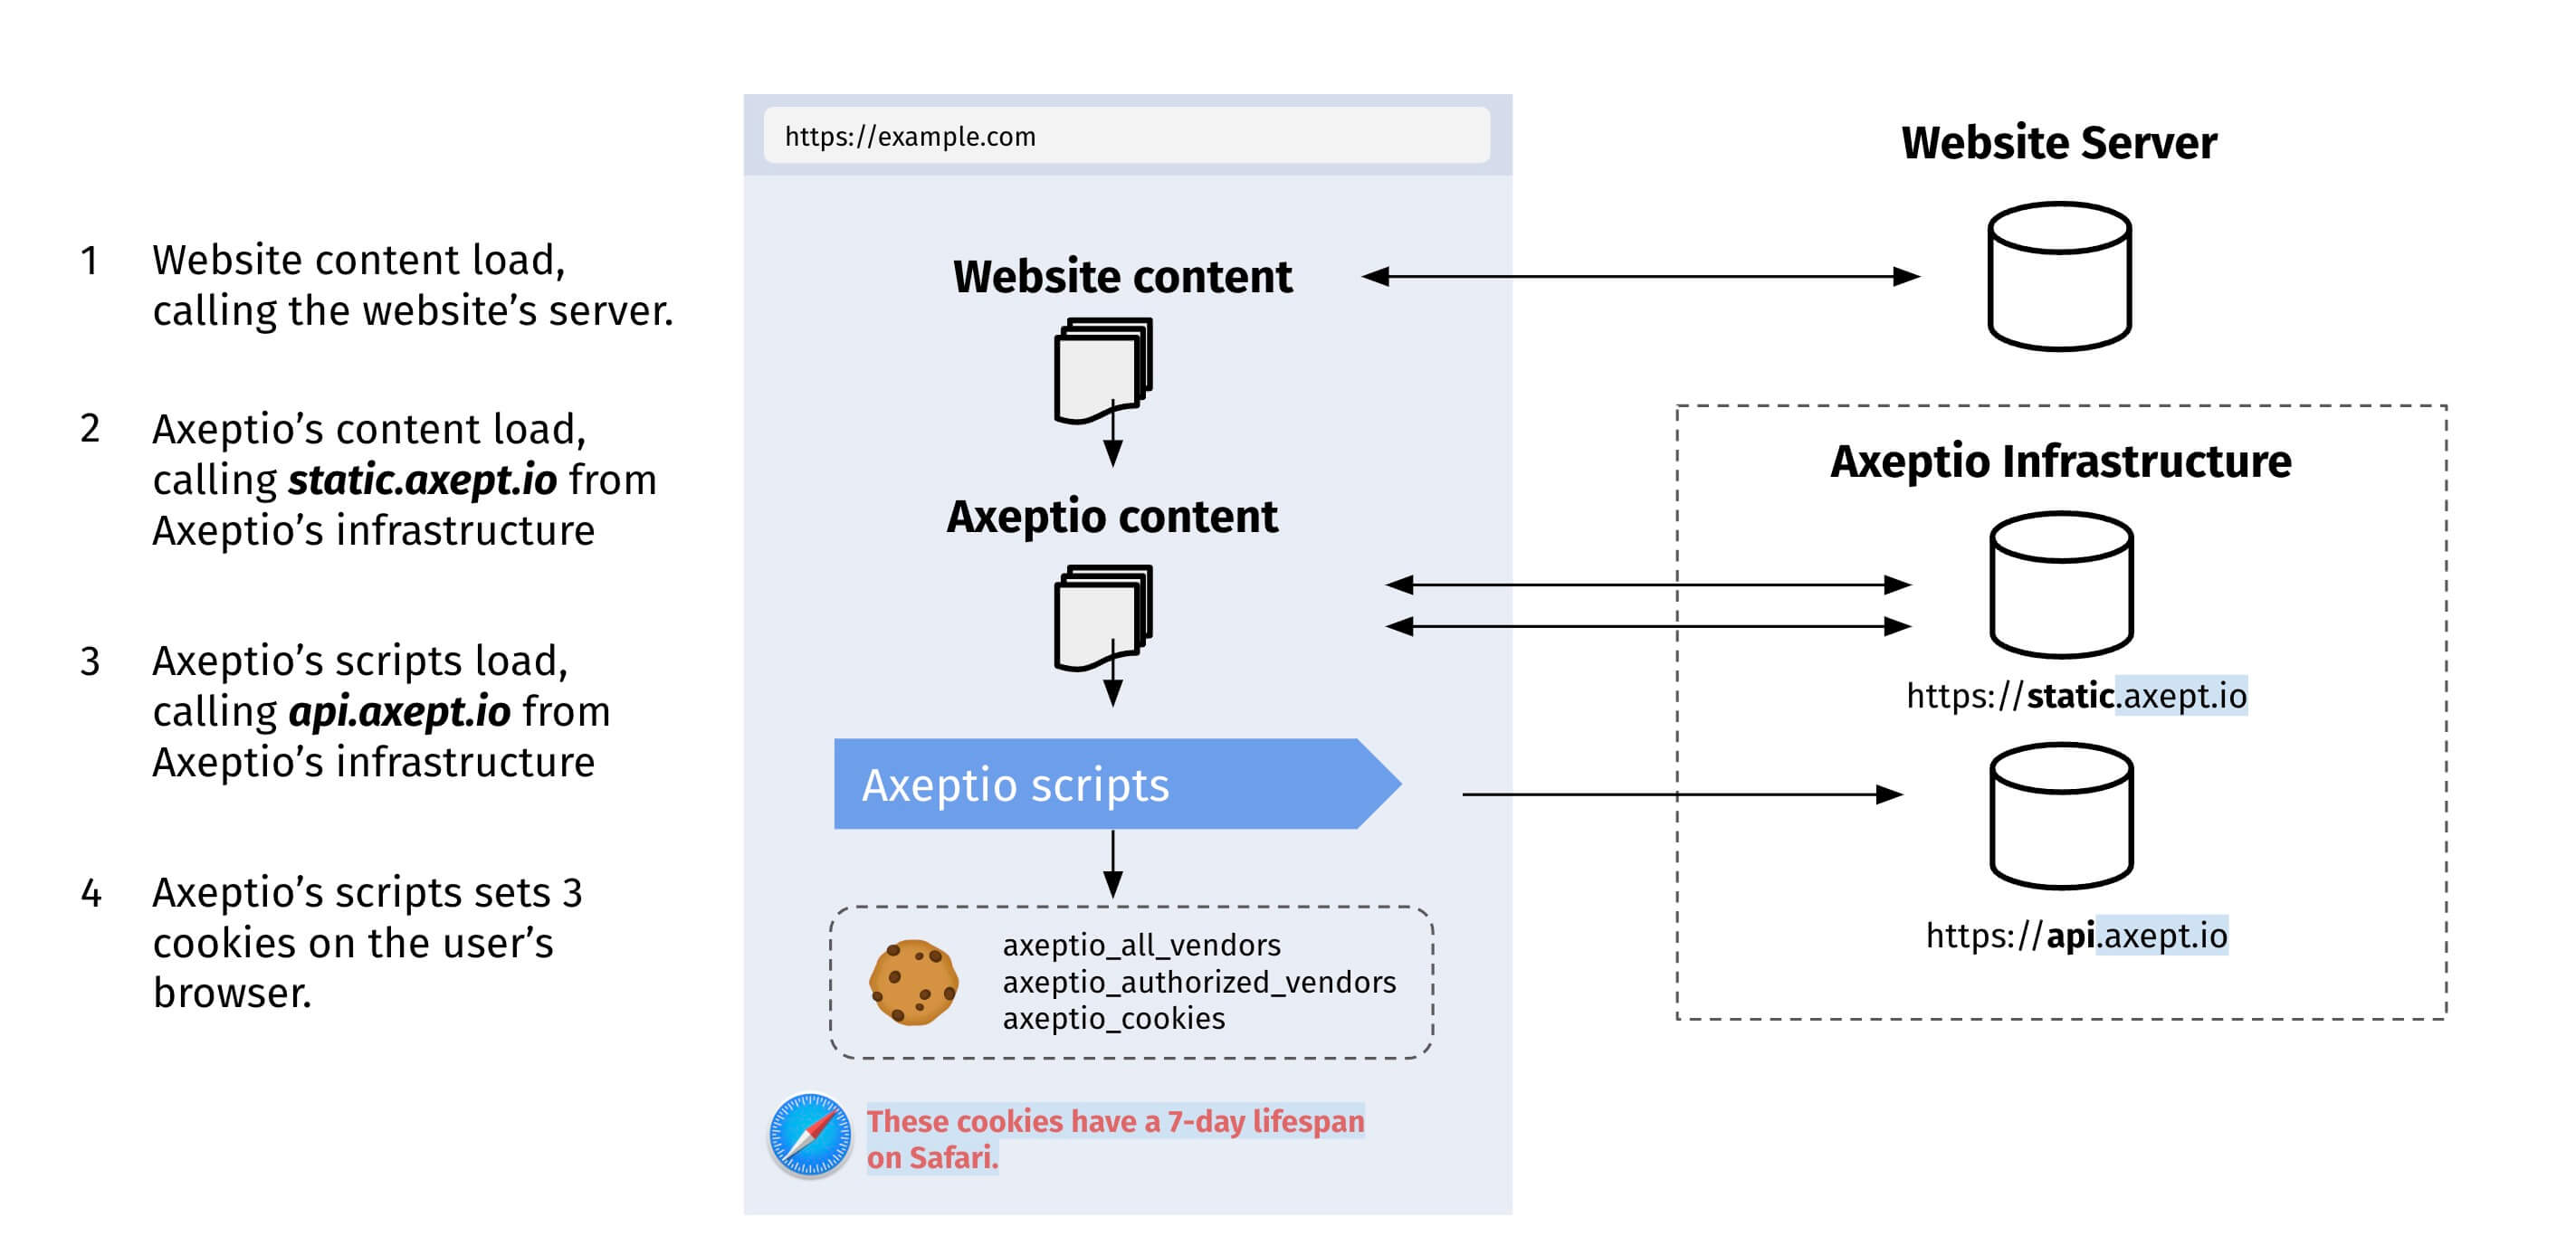
This solution has several drawbacks. Ad blockers and certain browser policies can sometimes prevent the loading of Axeptio scripts from a third-party domain like axept.io. When an ad blocker is enabled, the popup does not appear and the user cannot express their consent, resulting in a default rejection. Furthermore, Safari and other browsers limit cookie duration to seven days, forcing consent to be requested repeatedly.

Loading Axeptio via a first-party CDN with Addingwell
To overcome these restrictions, Addingwell proposes an alternative: hosting the Axeptio scripts via a first-party CDN. By placing these scripts on a trusted domain, the risk of interception by ad blockers is reduced. This approach ensures a reliable display of the consent popup and improves the acceptance rate.
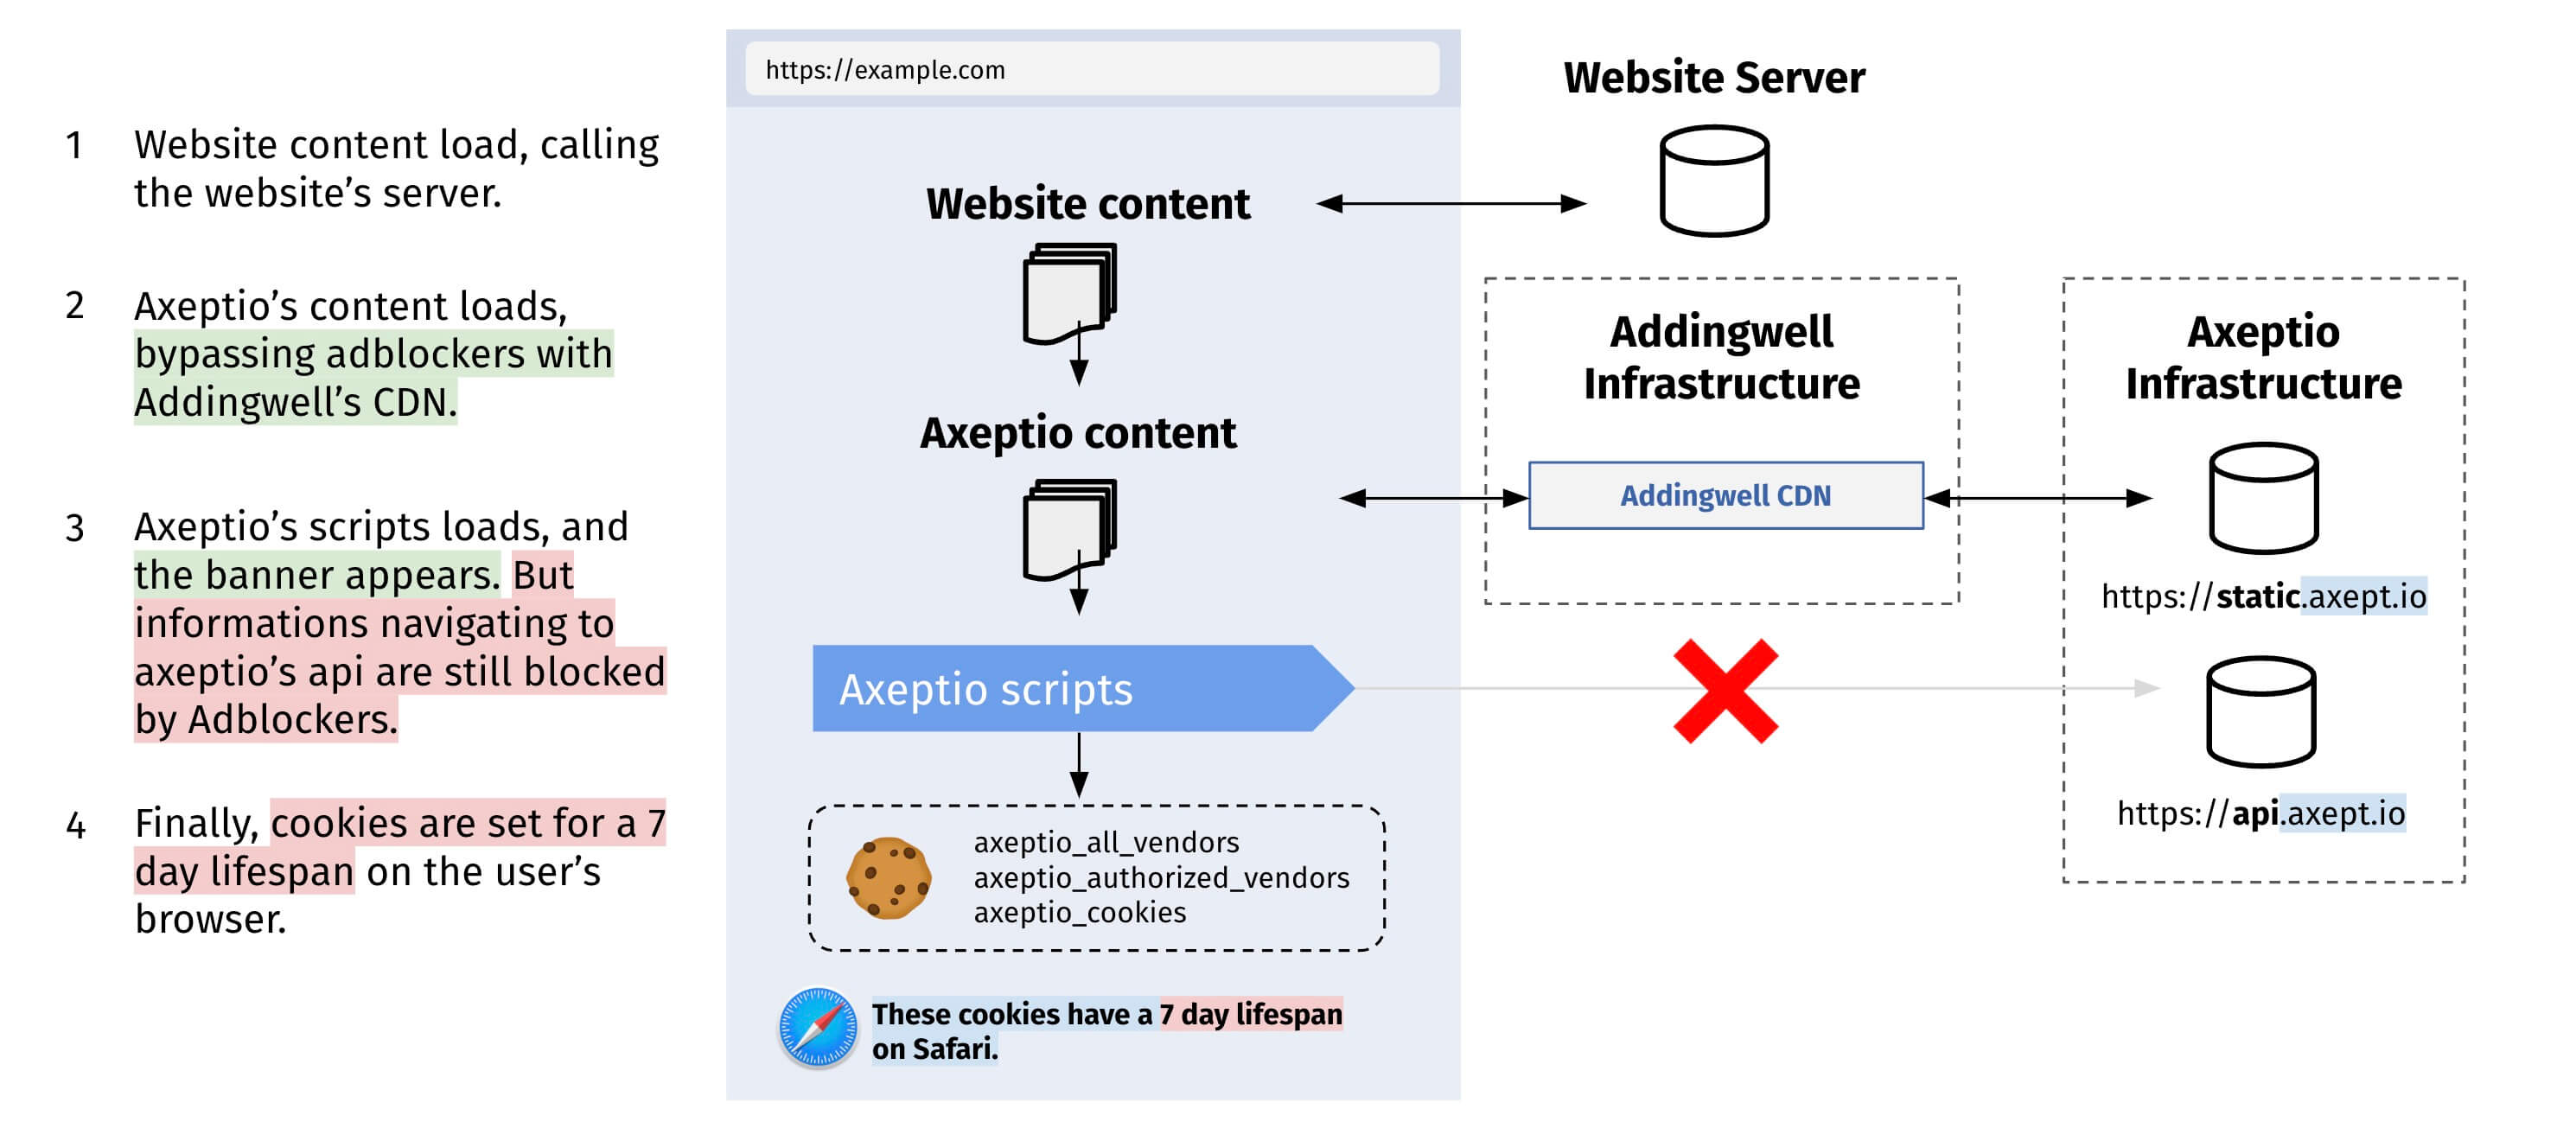
However, this solution does not fully resolve the issue of the limited cookie lifespan. Cookies are still set via JavaScript and remain subject to browser restrictions.
Server-side implementation with Axeptio client and tag
The server-side integration represents the most advanced solution to guarantee reliable and durable consent collection. This approach is based on a server-side client that intercepts consent requests, as well as an Axeptio tag on the server side that handles cookie setting.
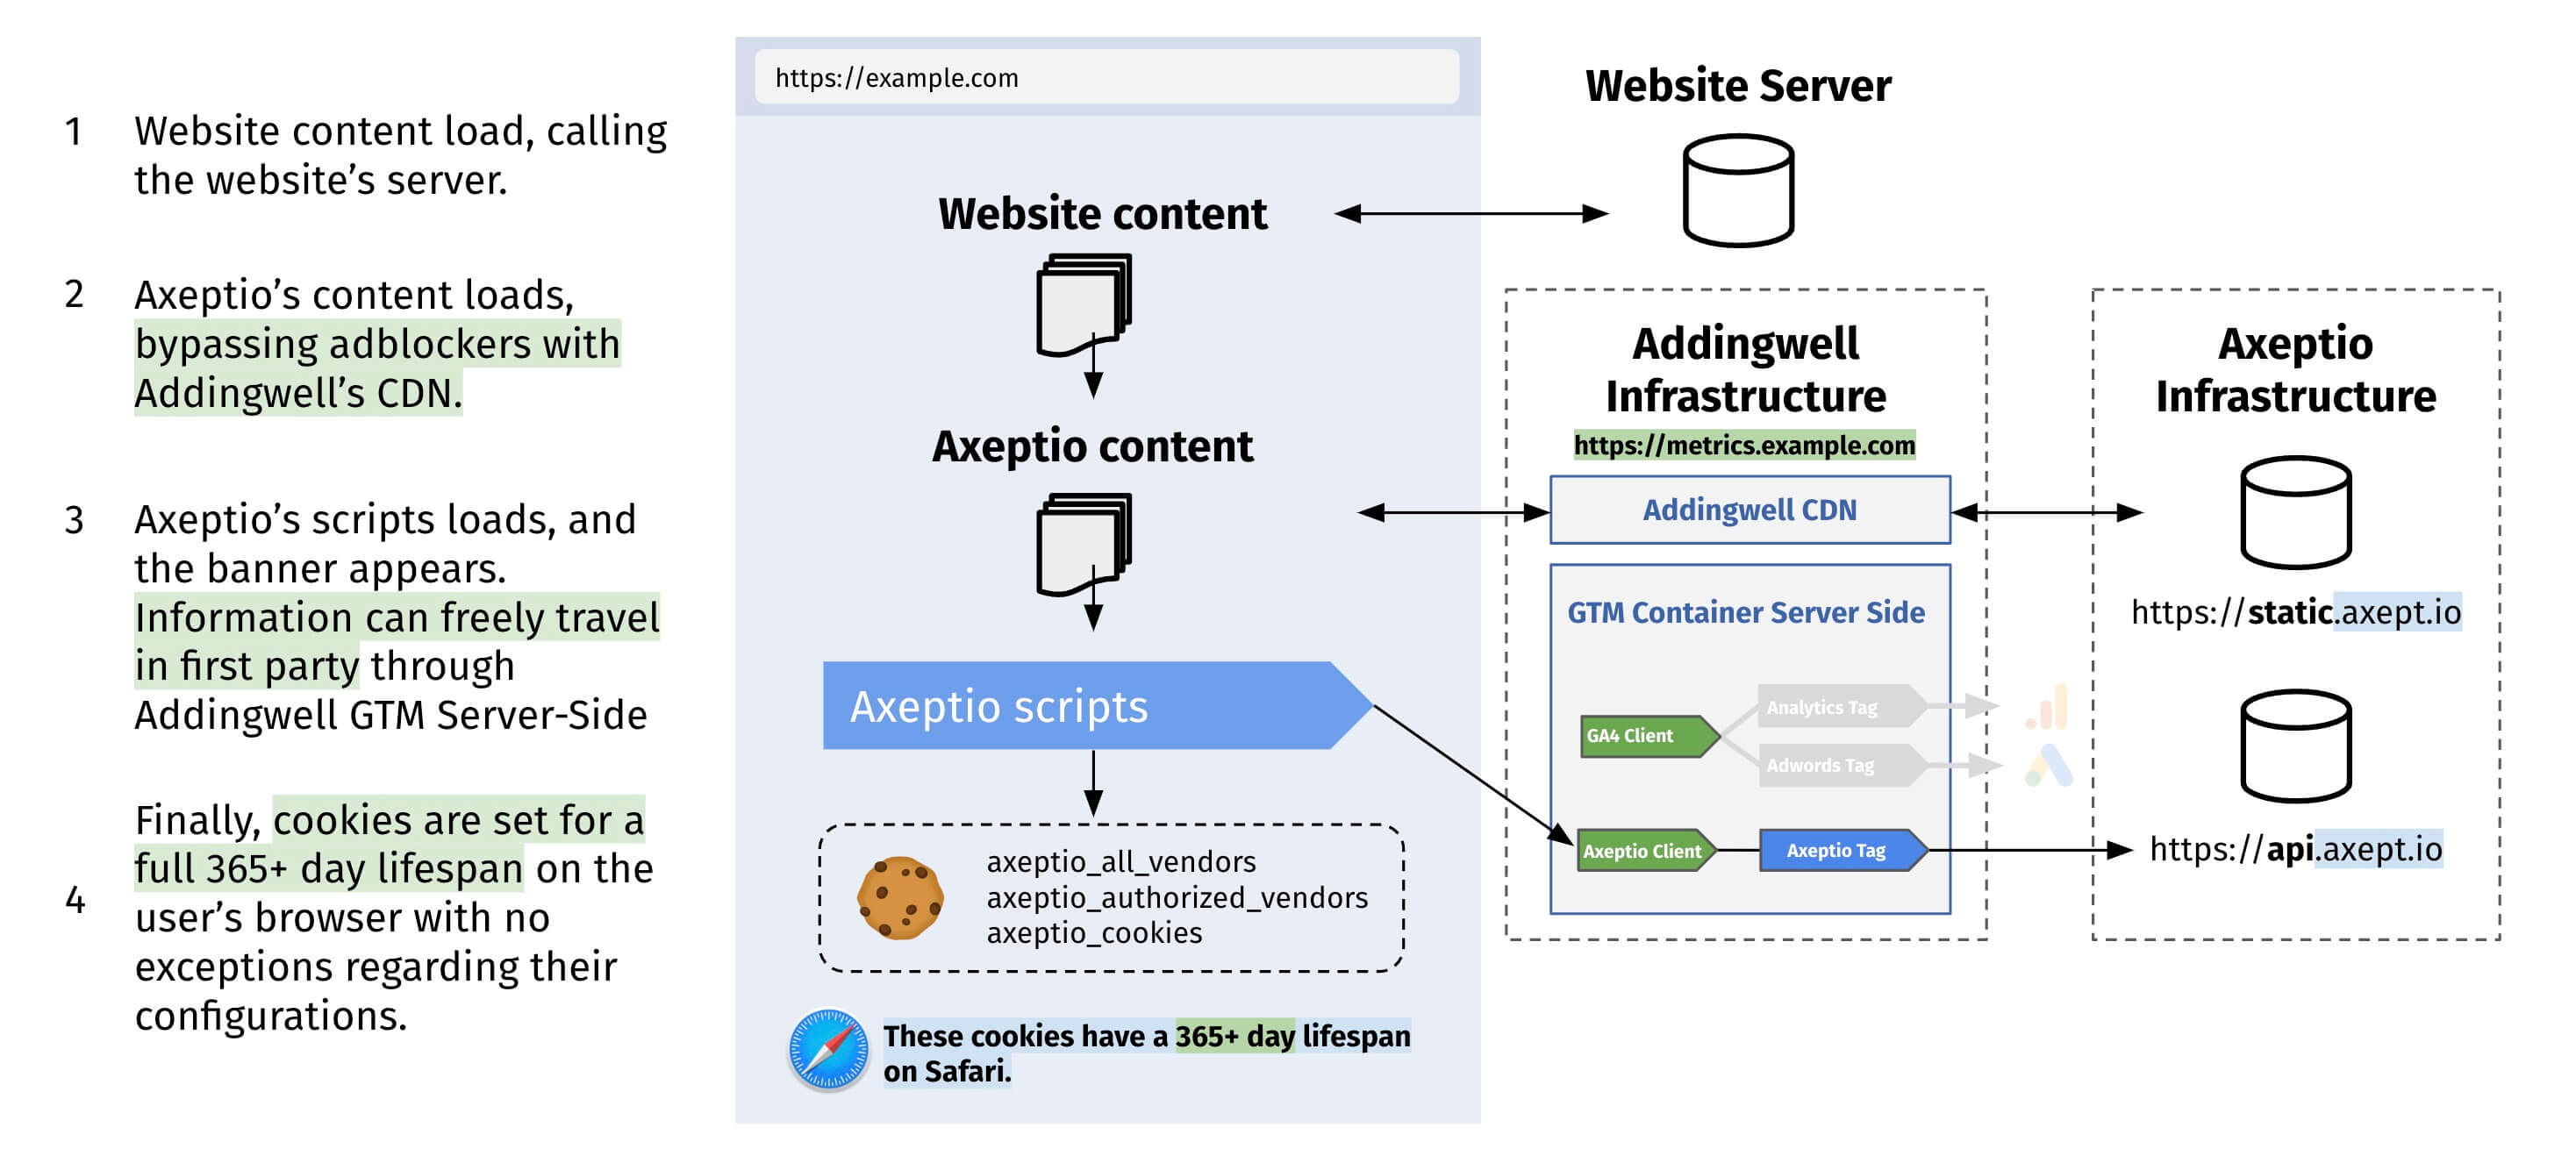
Thanks to this architecture, Axeptio scripts are still loaded in first-party via the Addingwell CDN, but cookie management is completely shifted to the server. This method eliminates browser restrictions and ensures consent persistence well beyond seven days. It also offers improved resistance to ad blockers, as consent-related interactions are no longer visible in the browser.
In the next section, we will detail the precise steps to implement Axeptio server-side with Addingwell, in order to help you effectively configure your server-side CMP.
Setting up Axeptio Server-Side
Axeptio client configuration
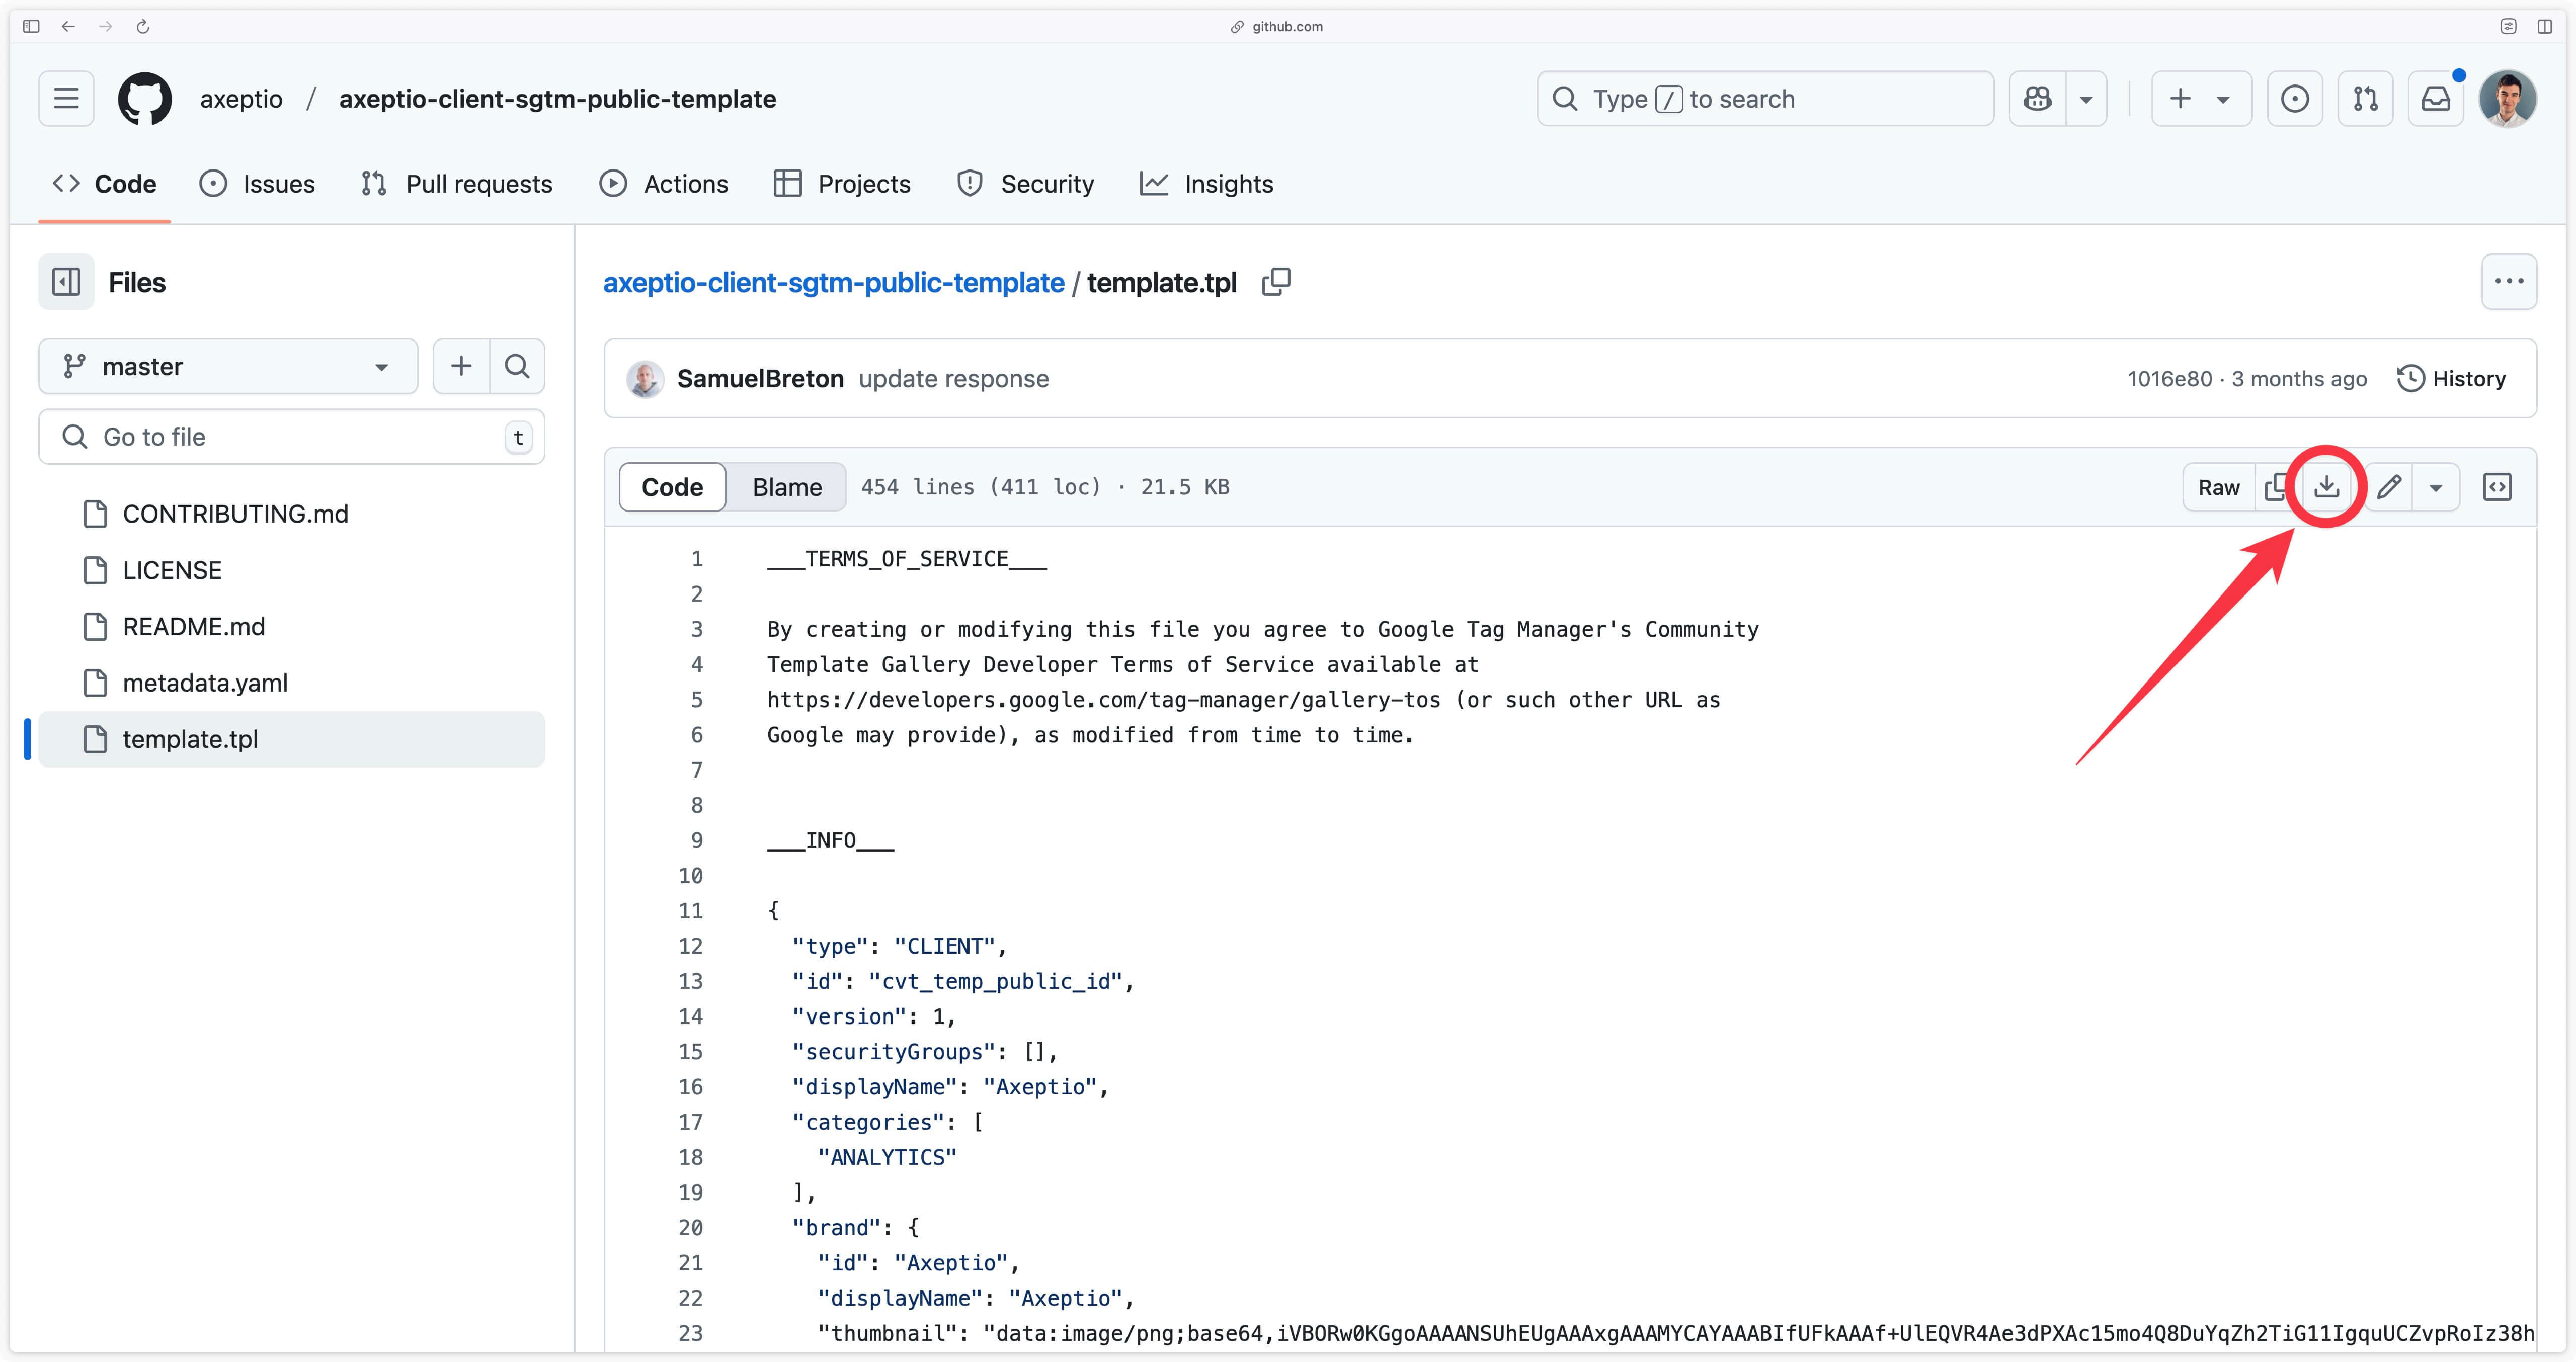
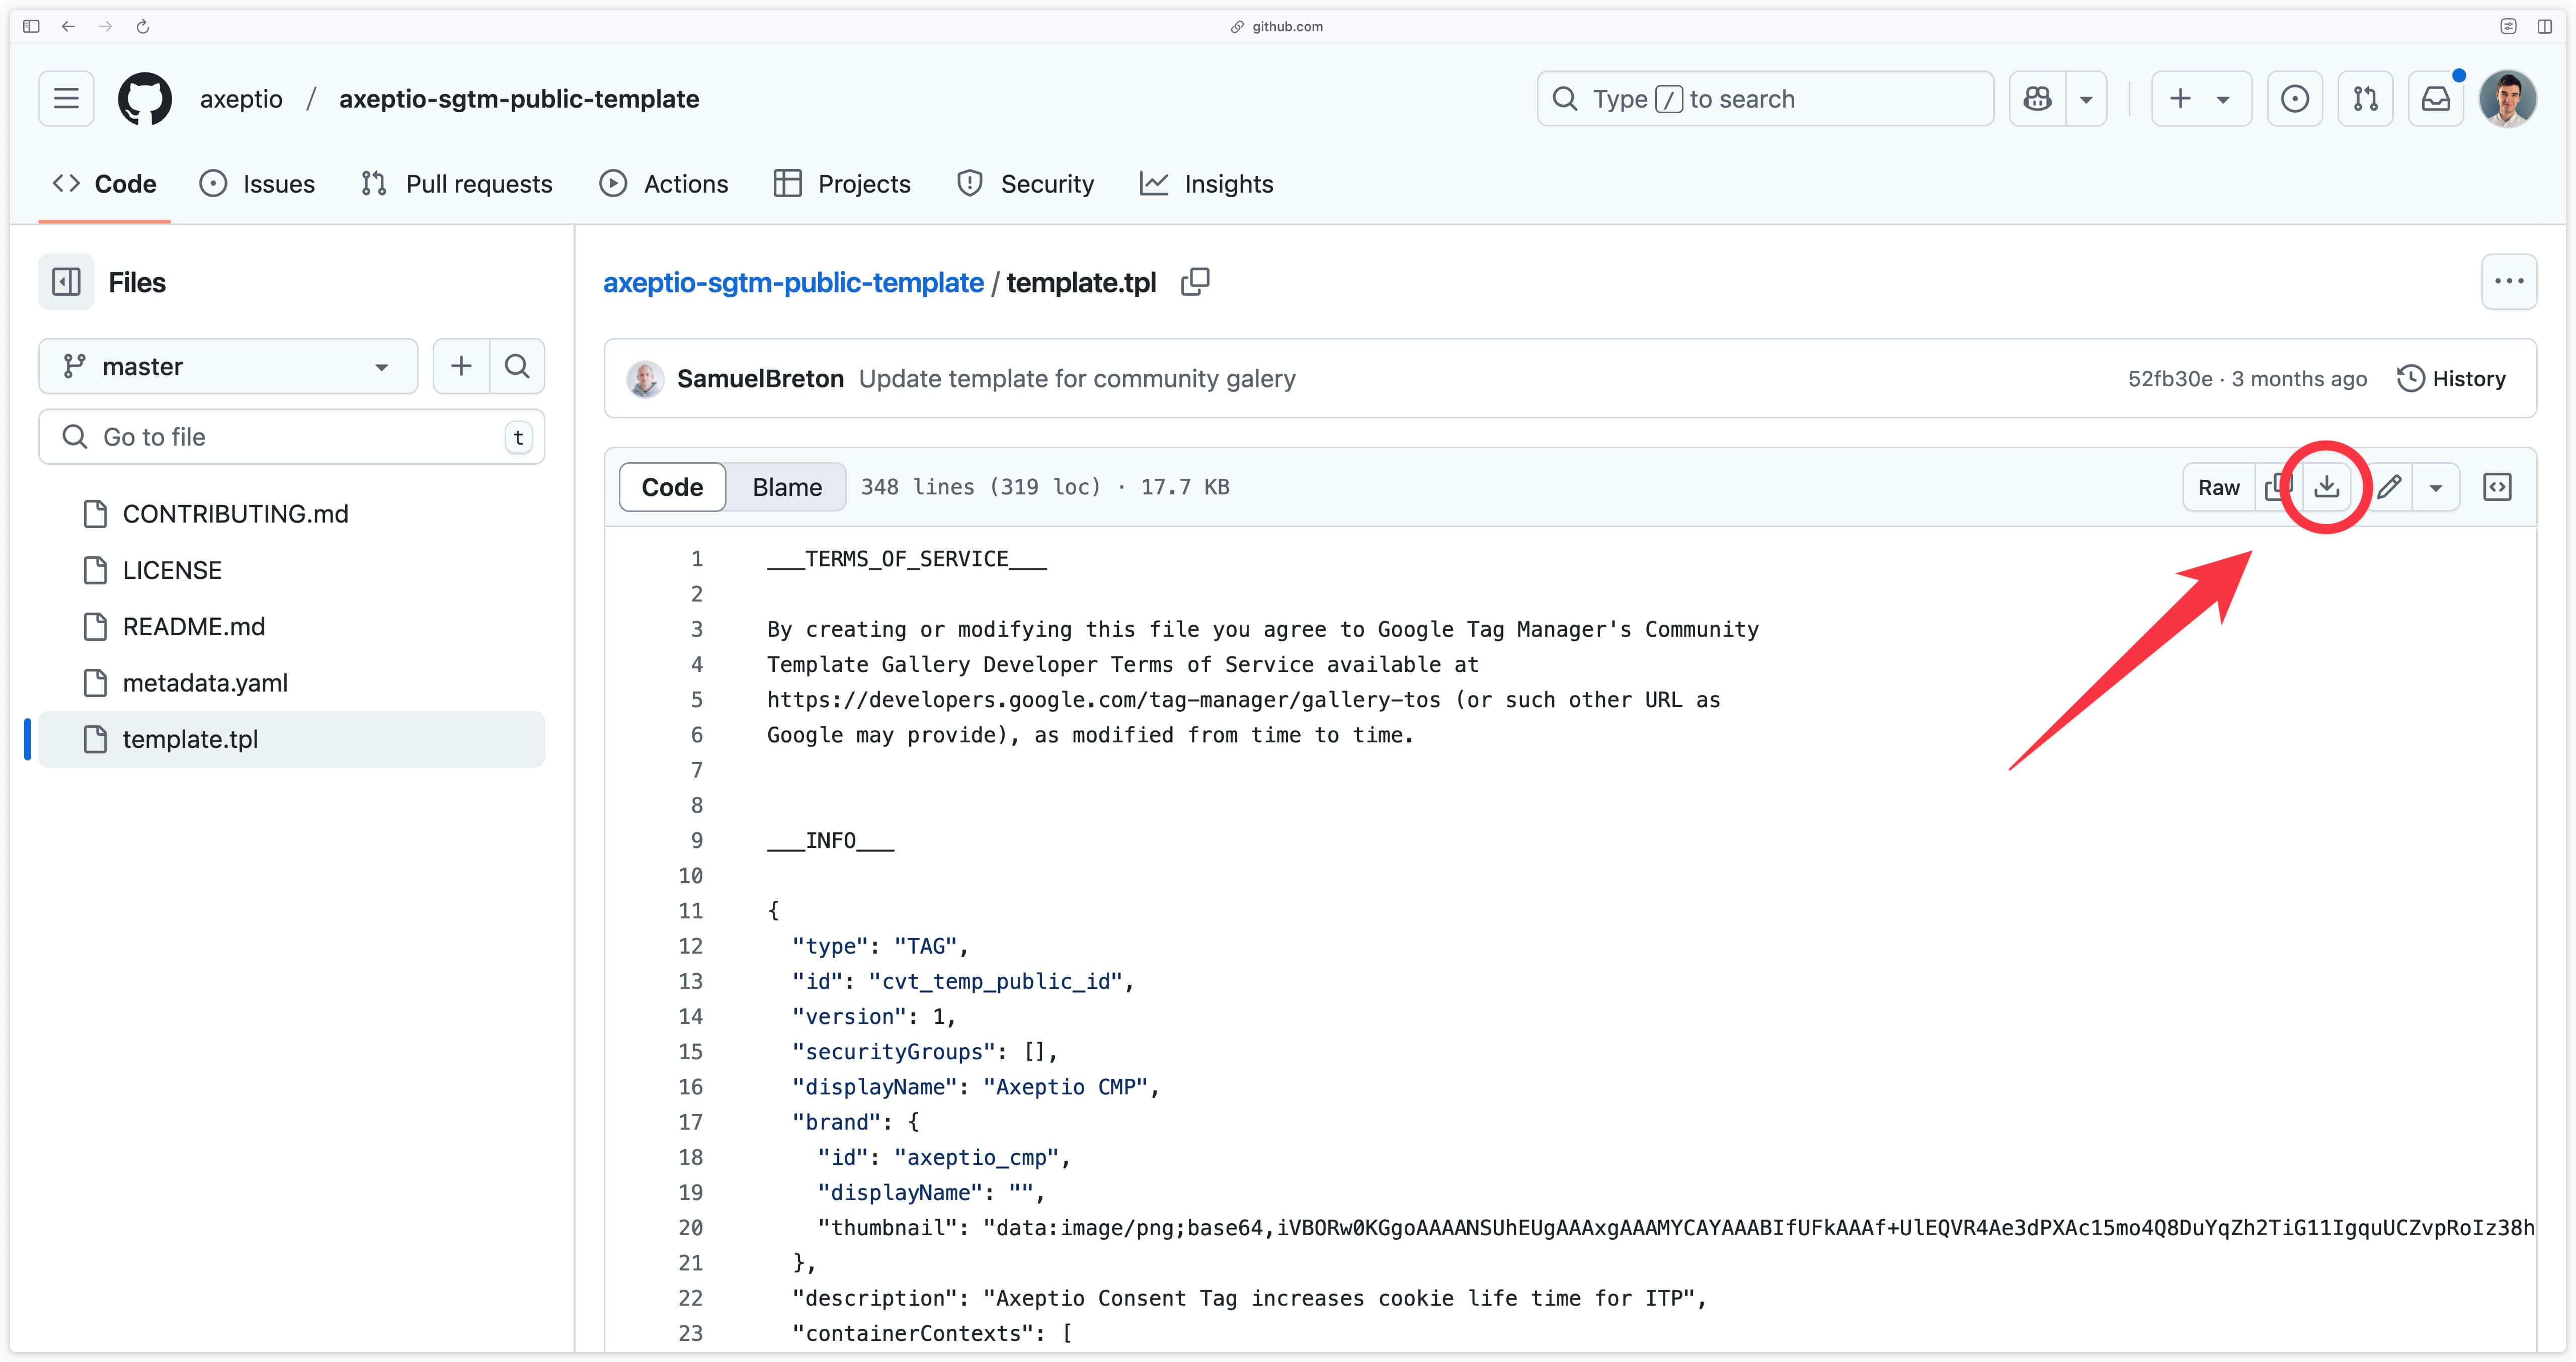
Download the Axeptio client here .
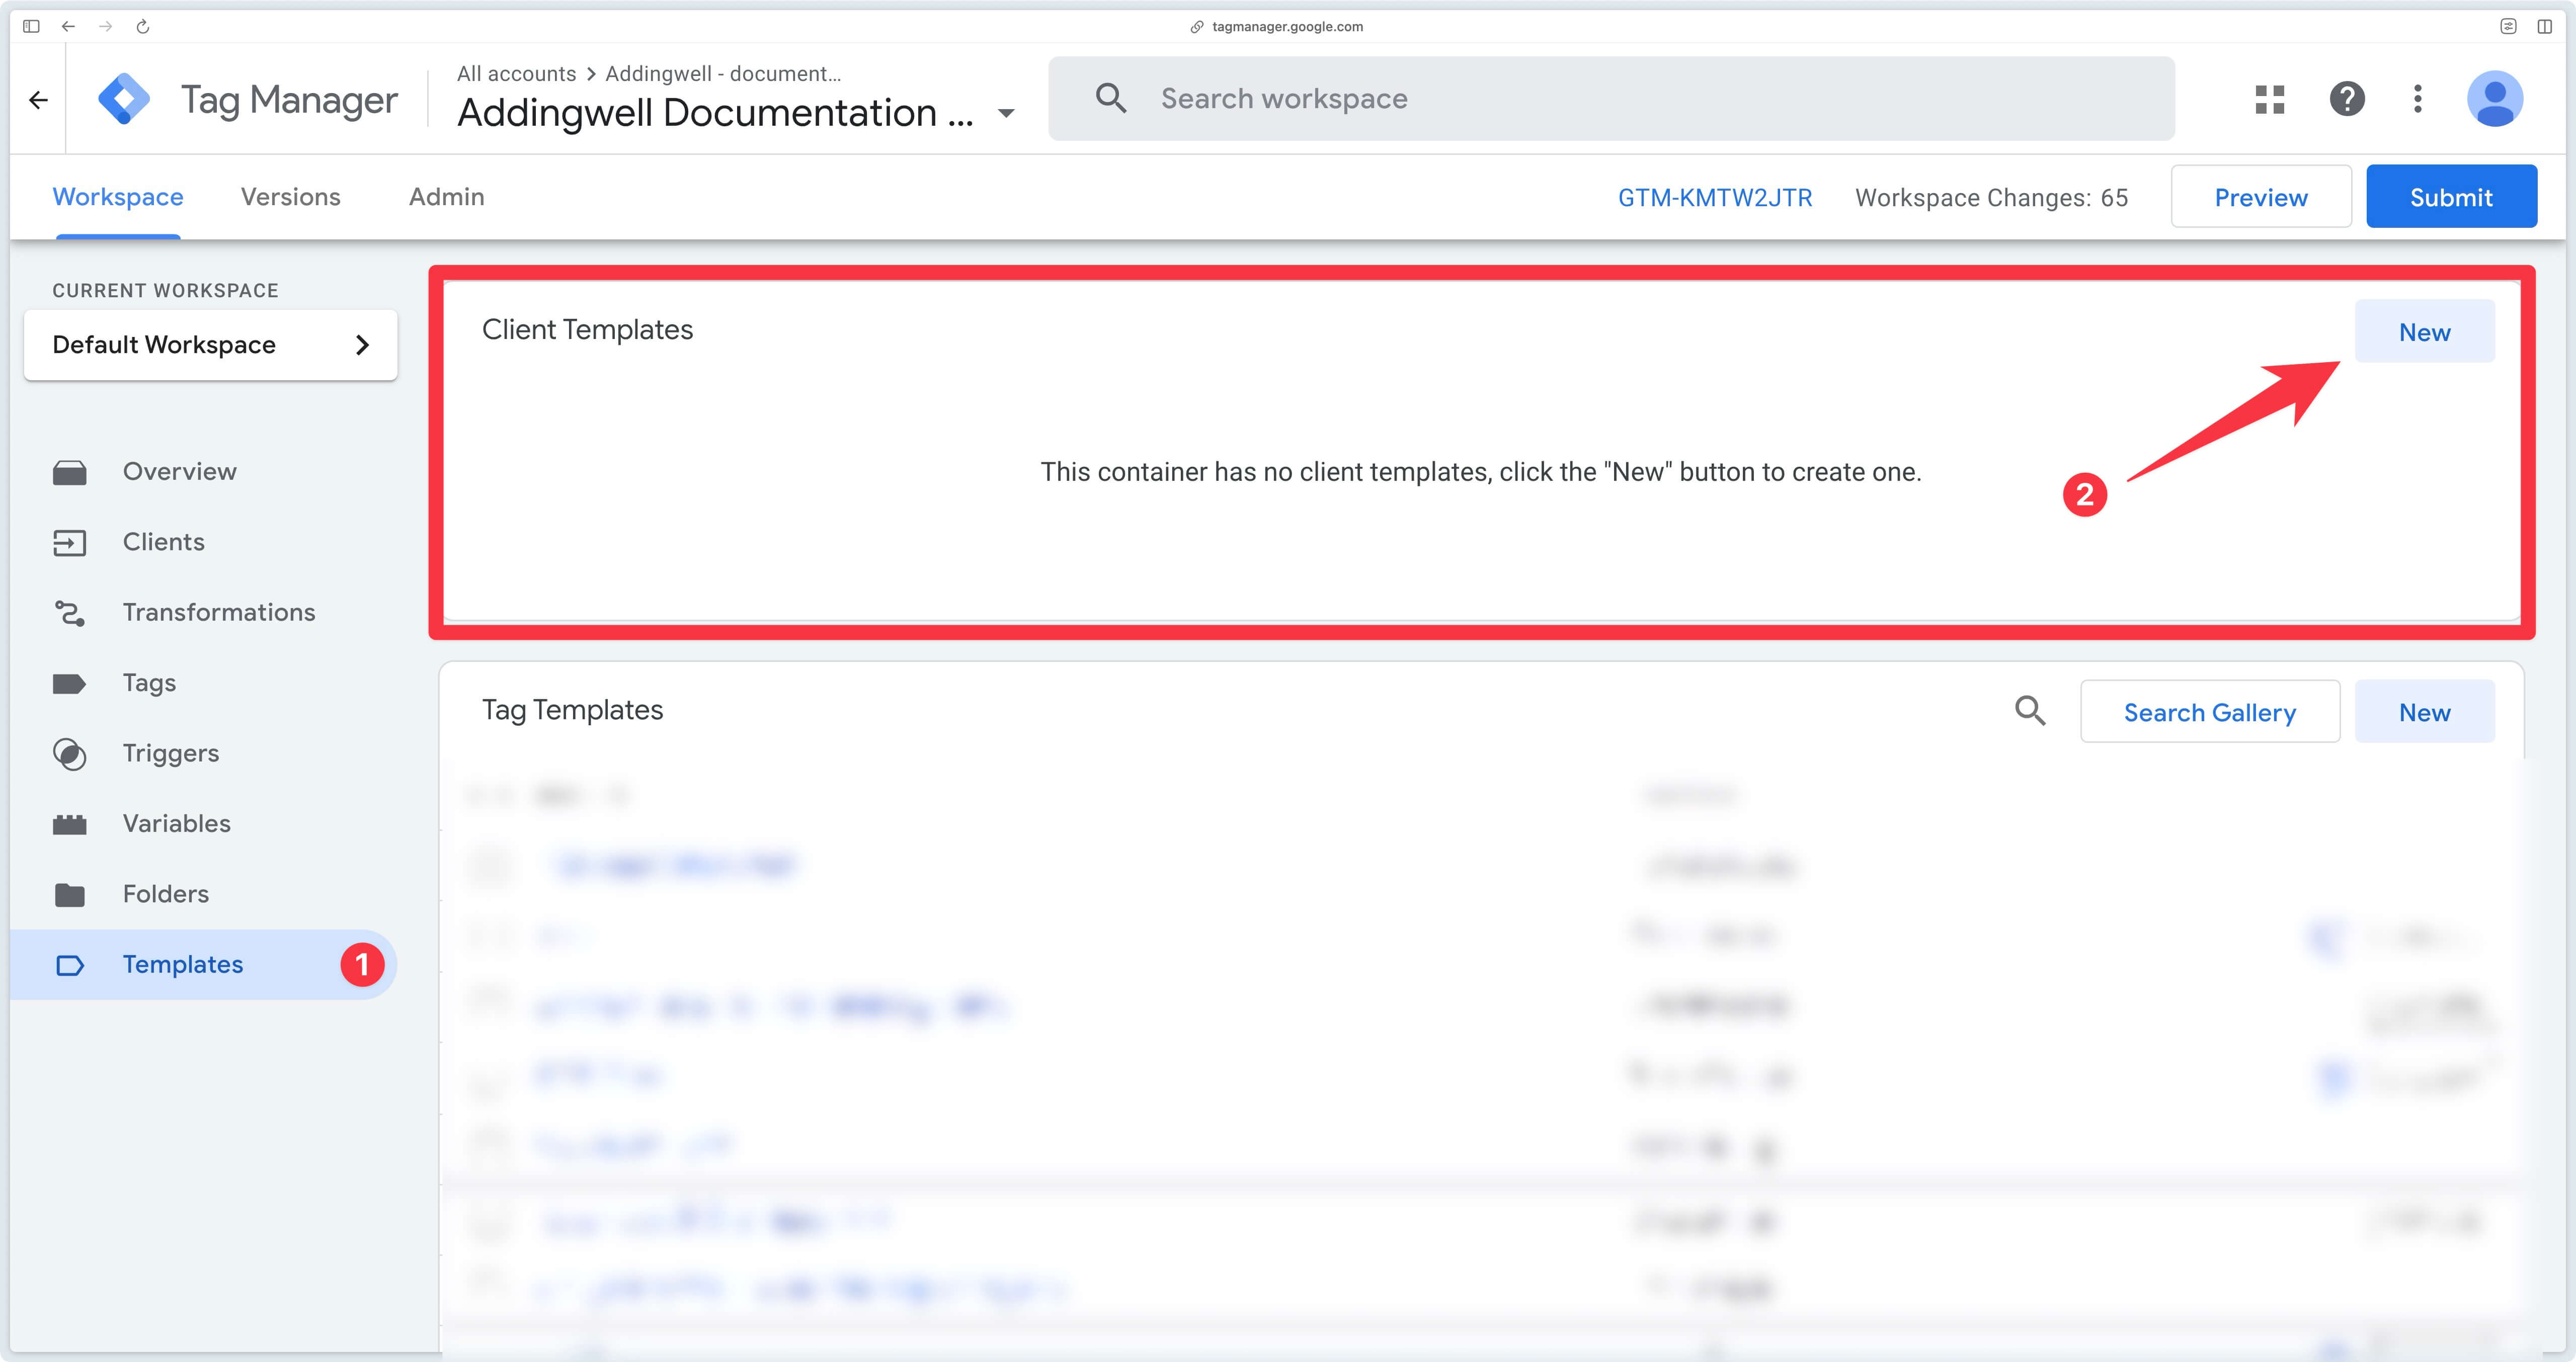
Go to your GTM Server container, in the Templates > Client Templates section, click on New.
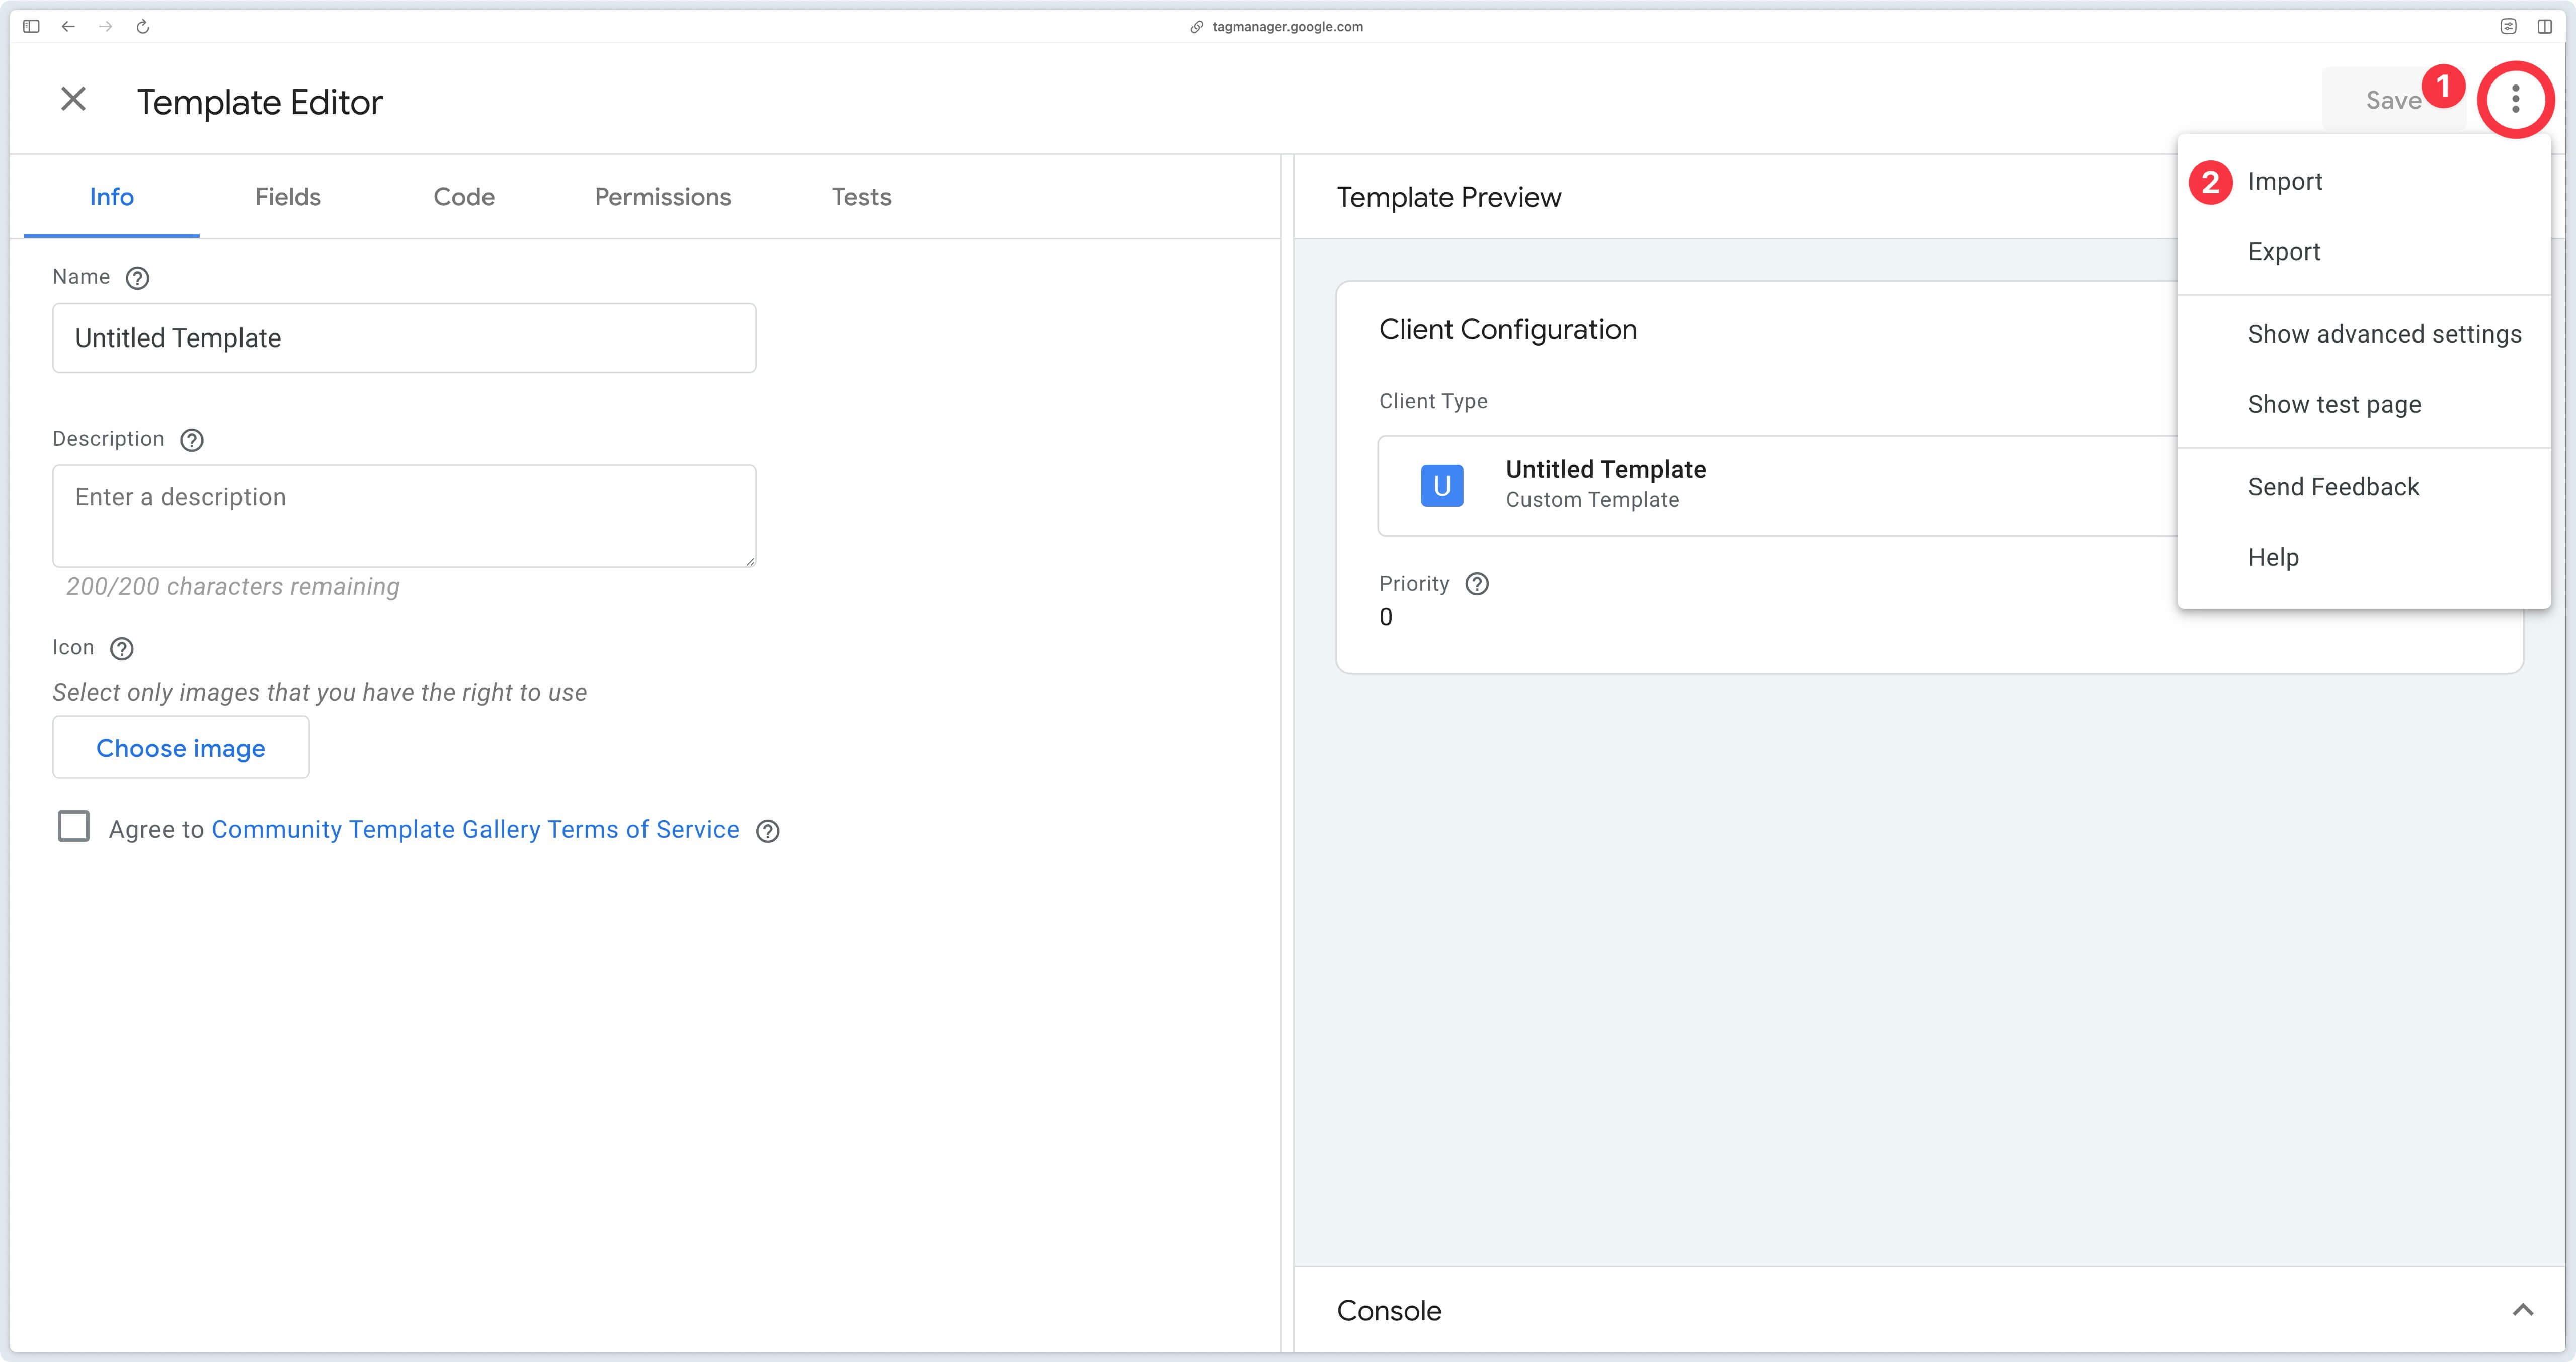
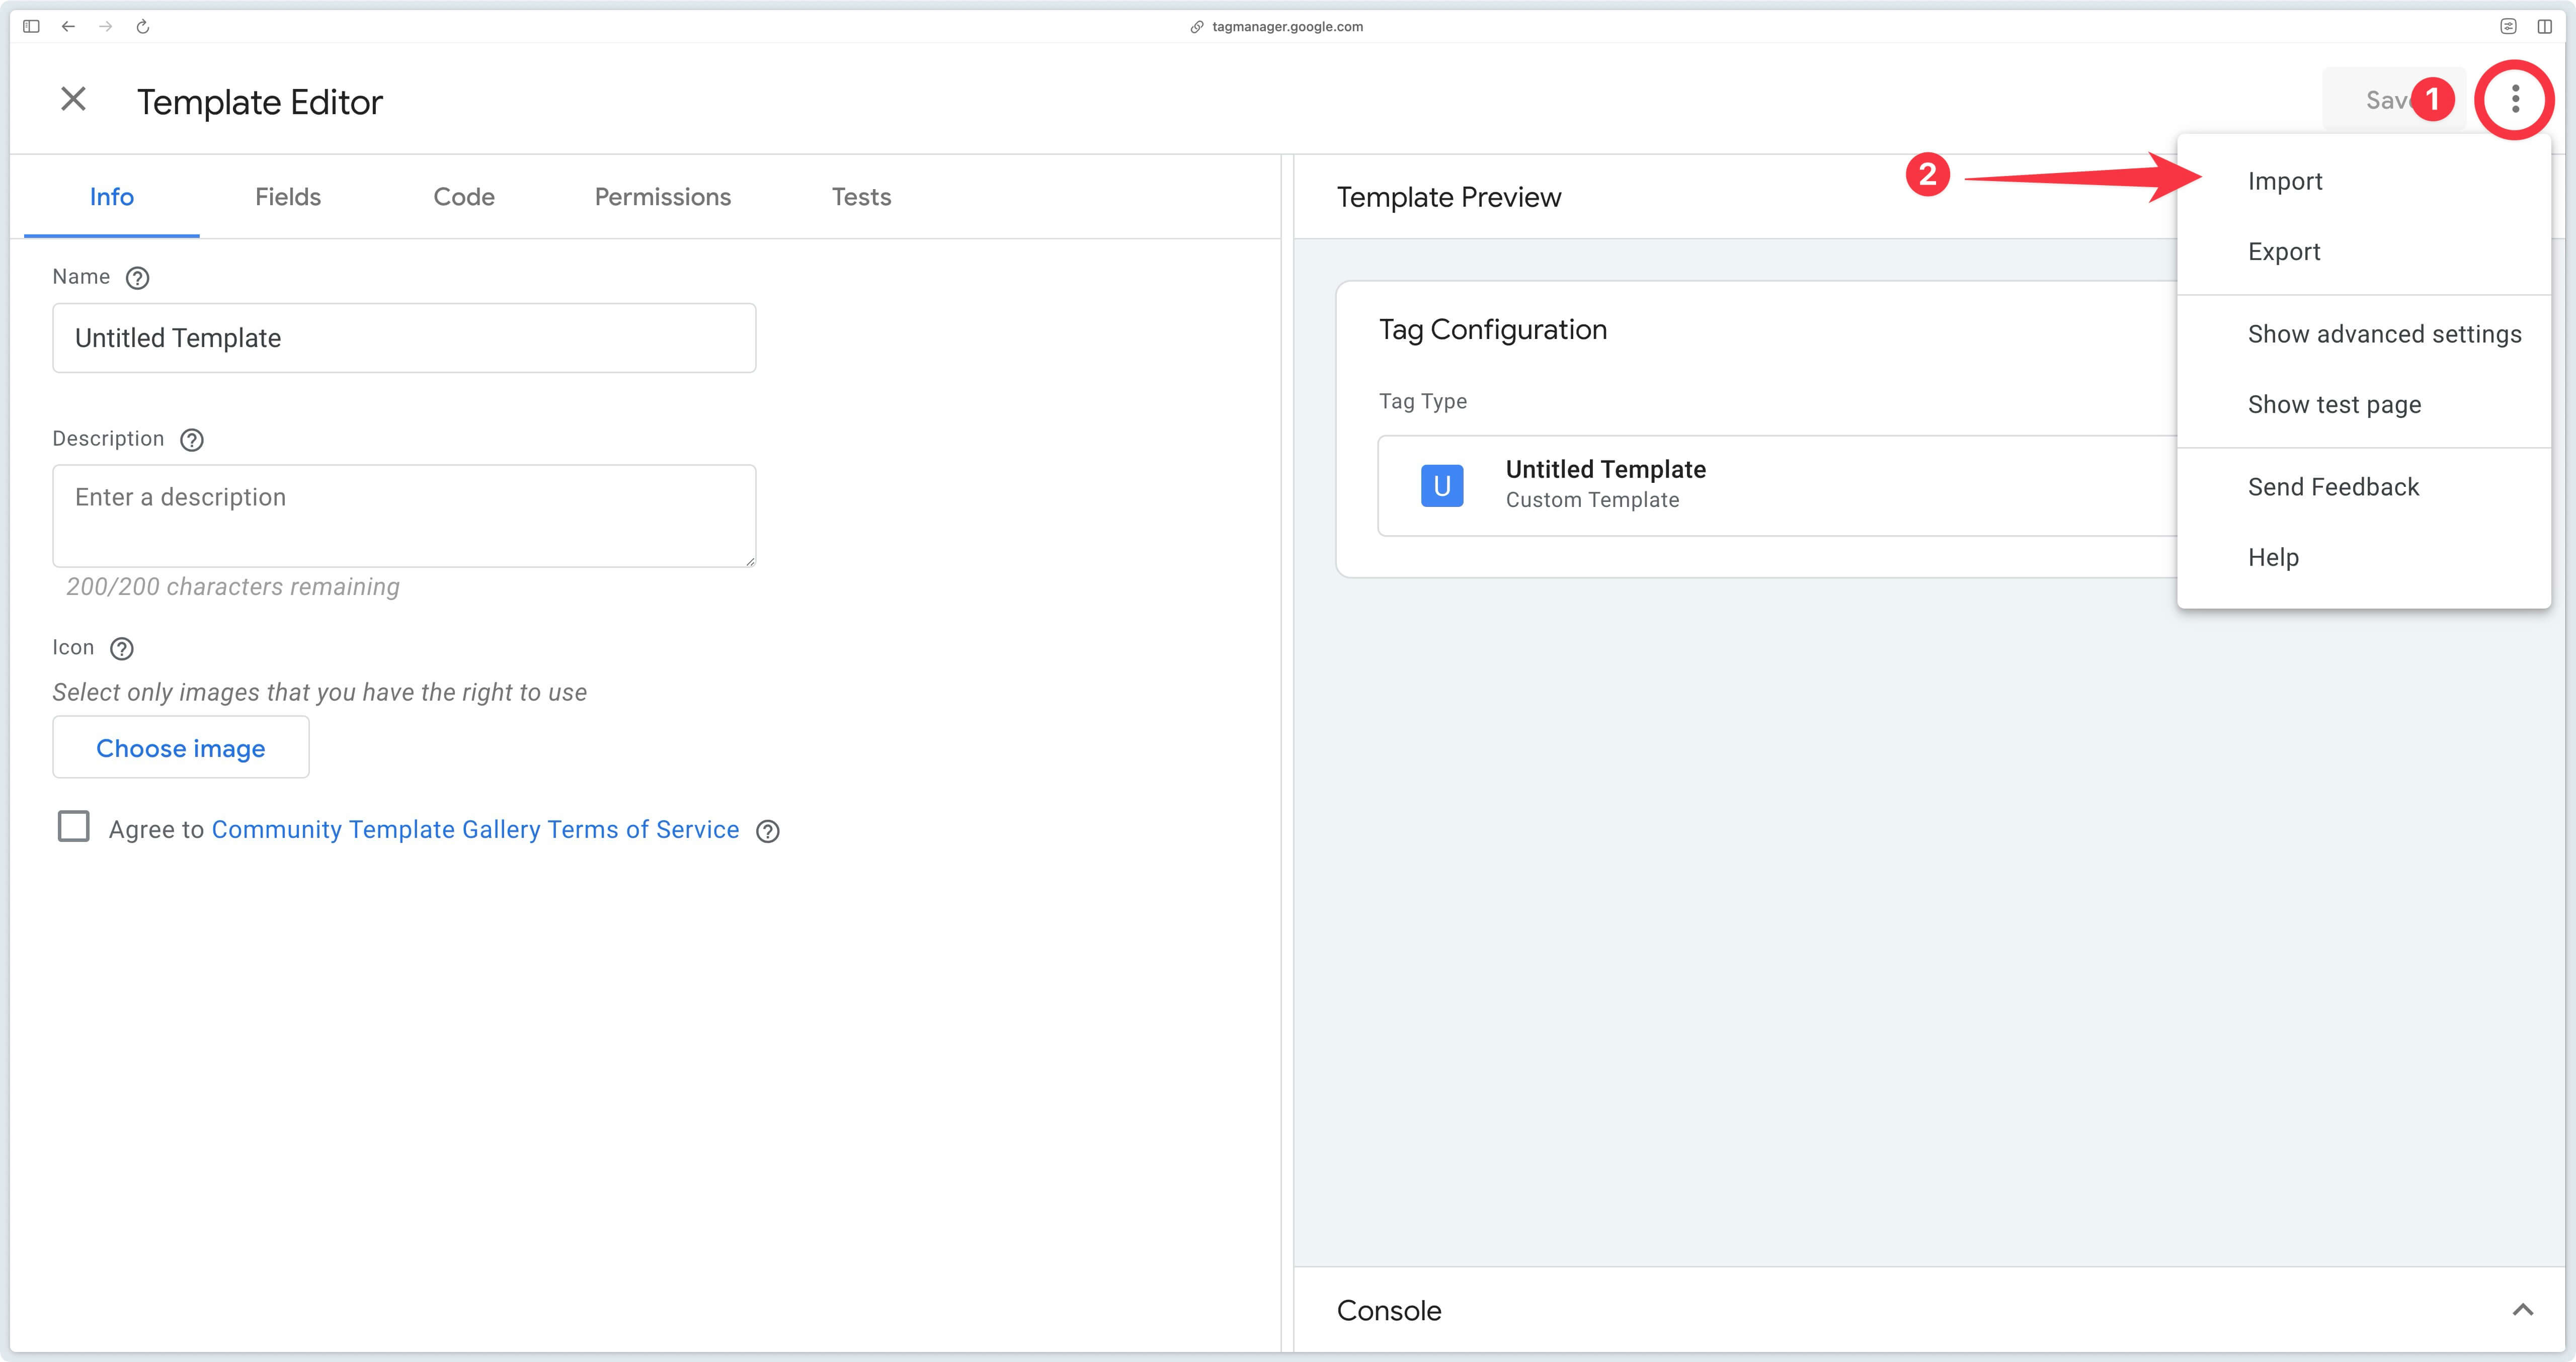
Then click on the 3 small dots at top right, then on Import.
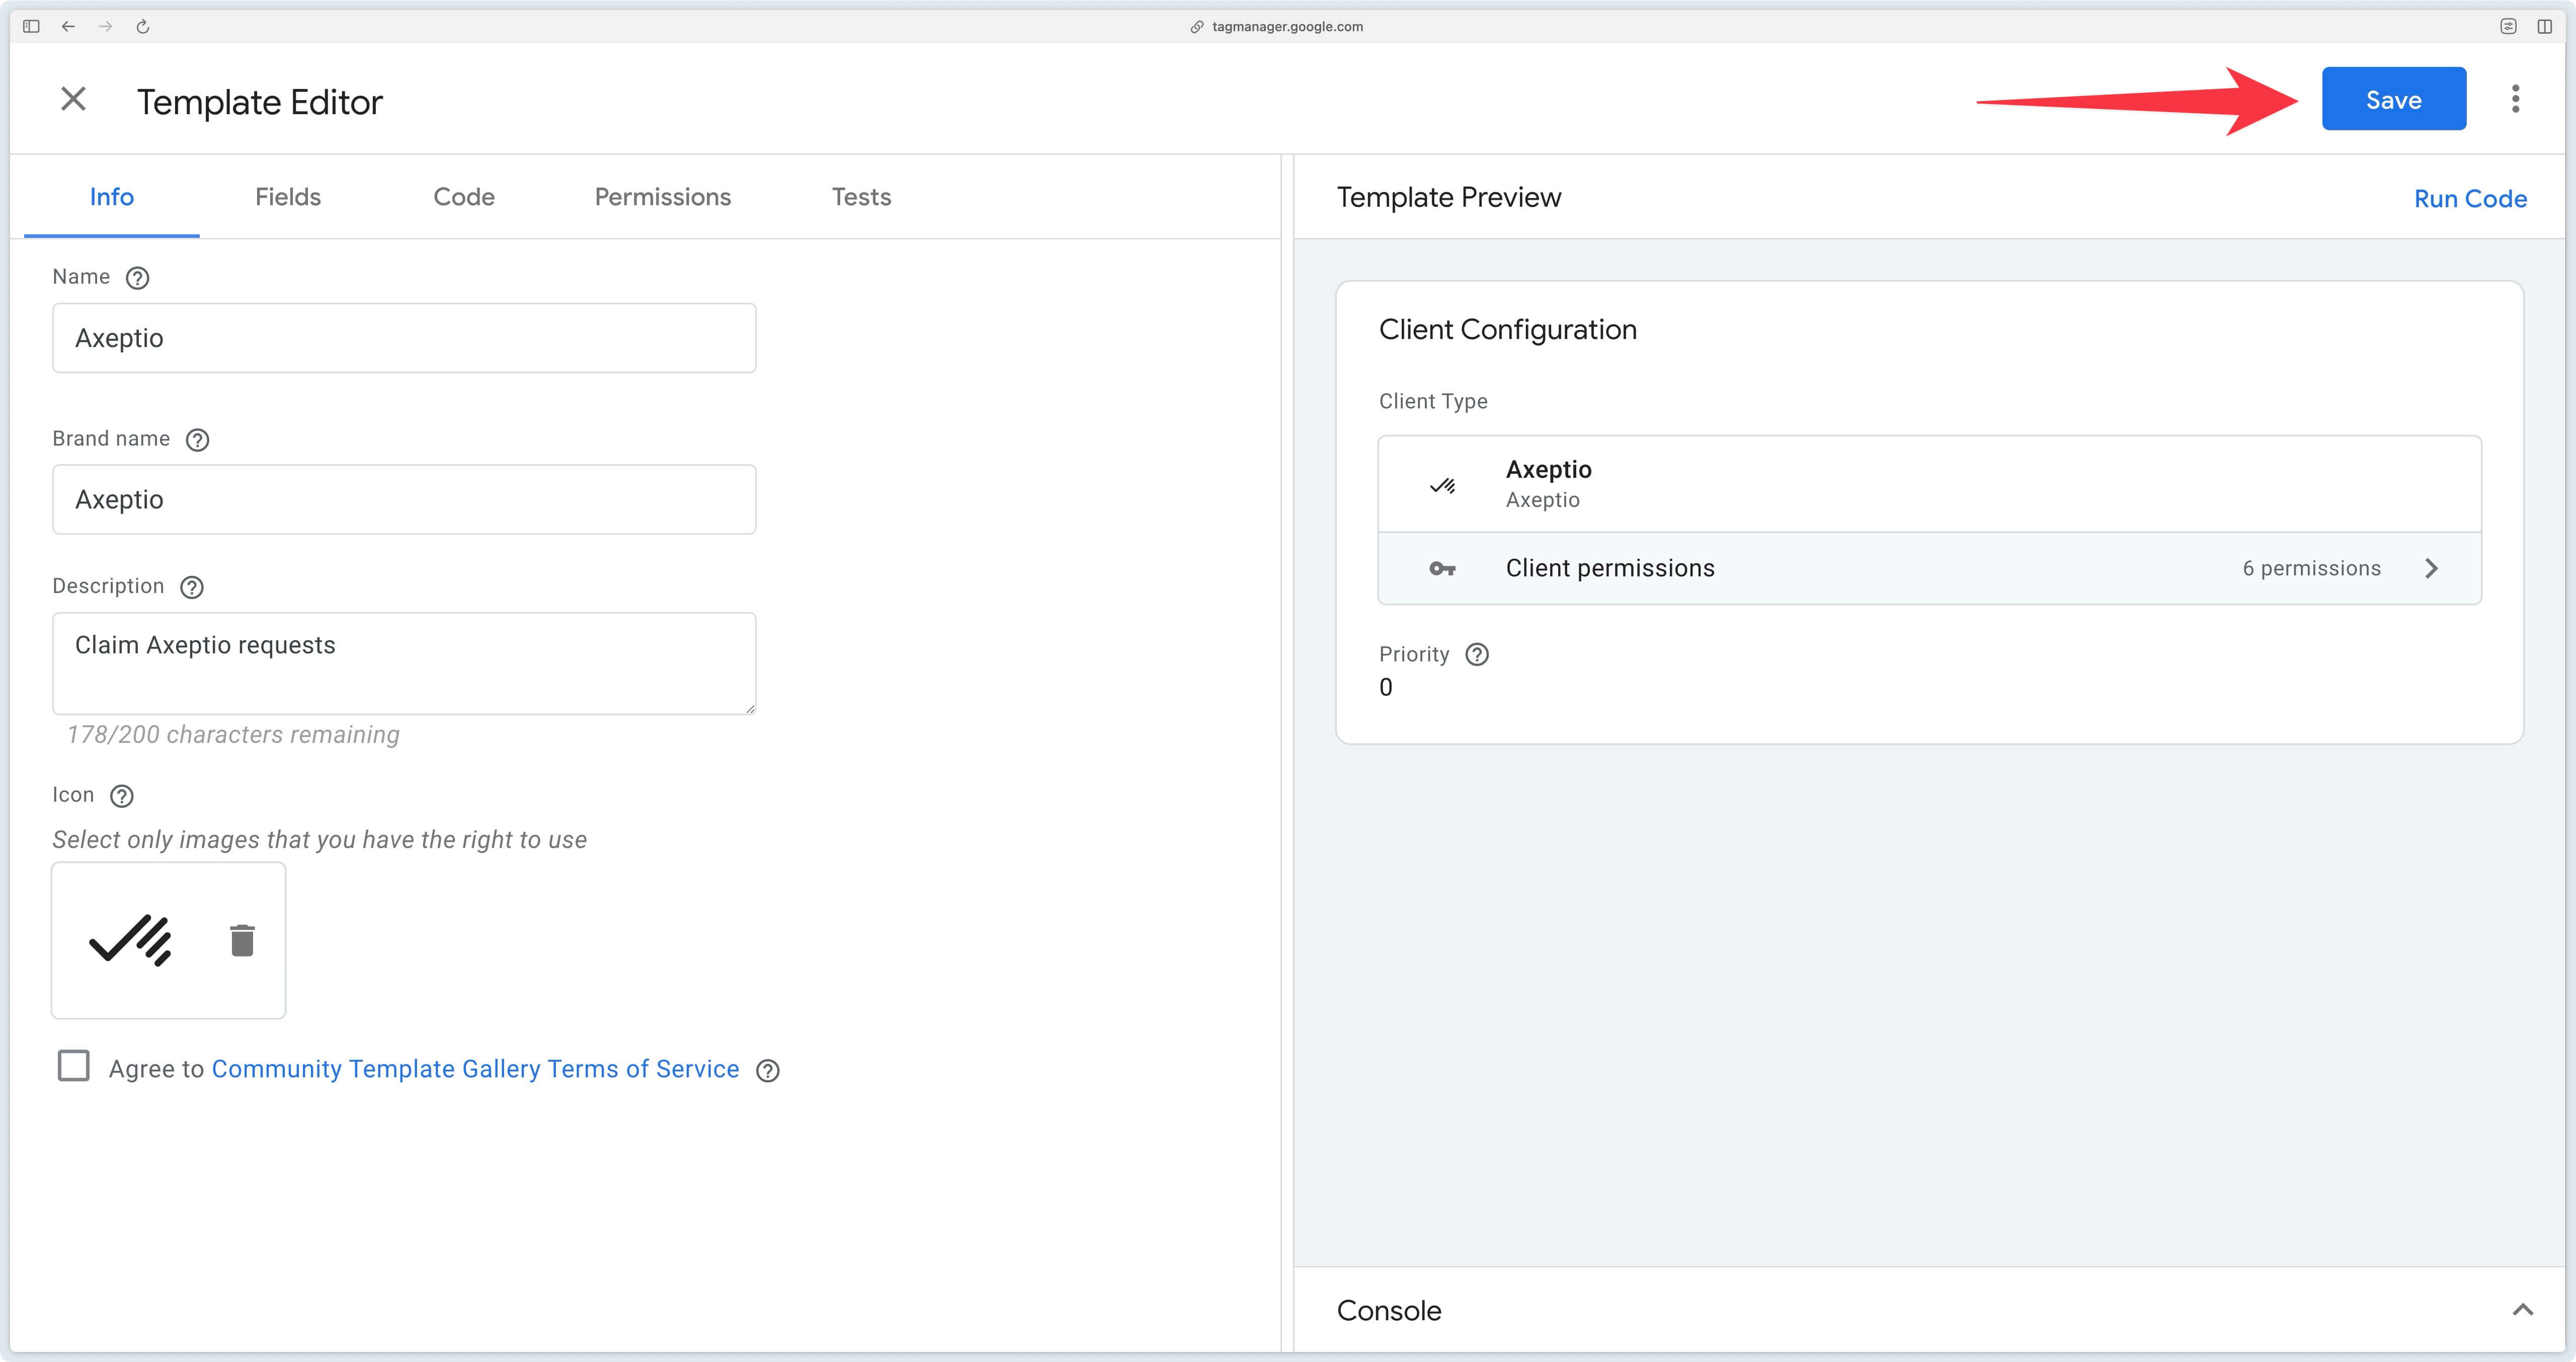
Then select the template.tpl file you’ve just downloaded and click Save.
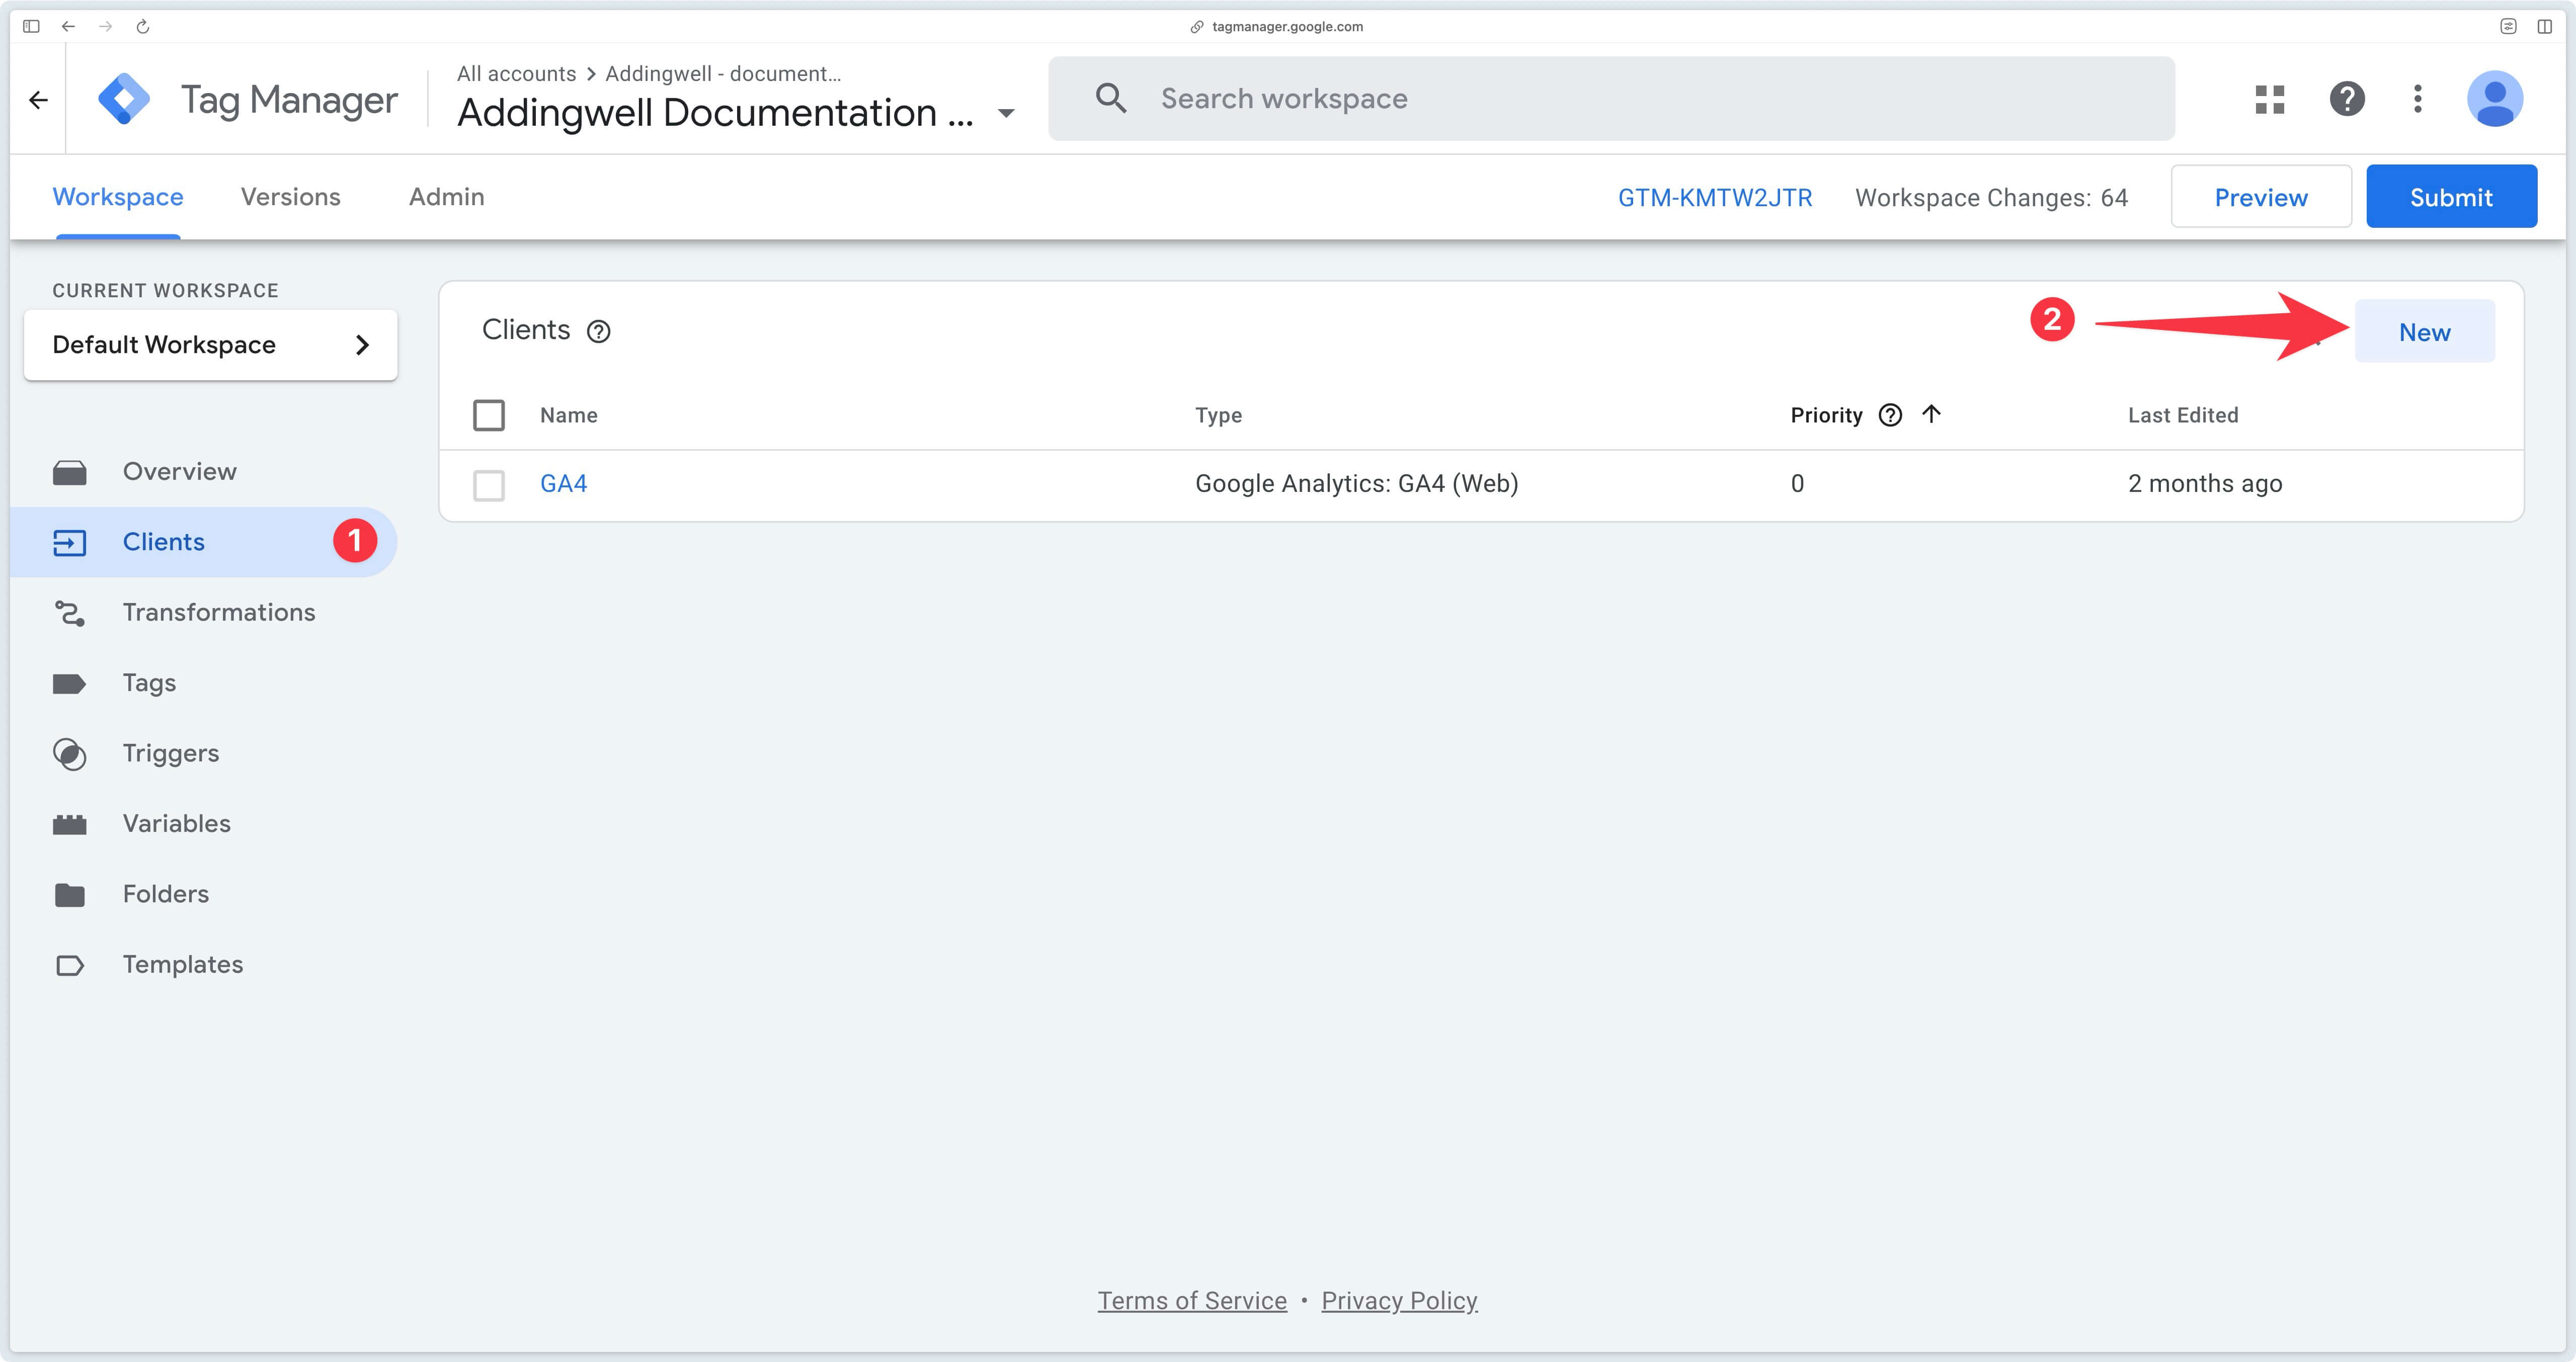
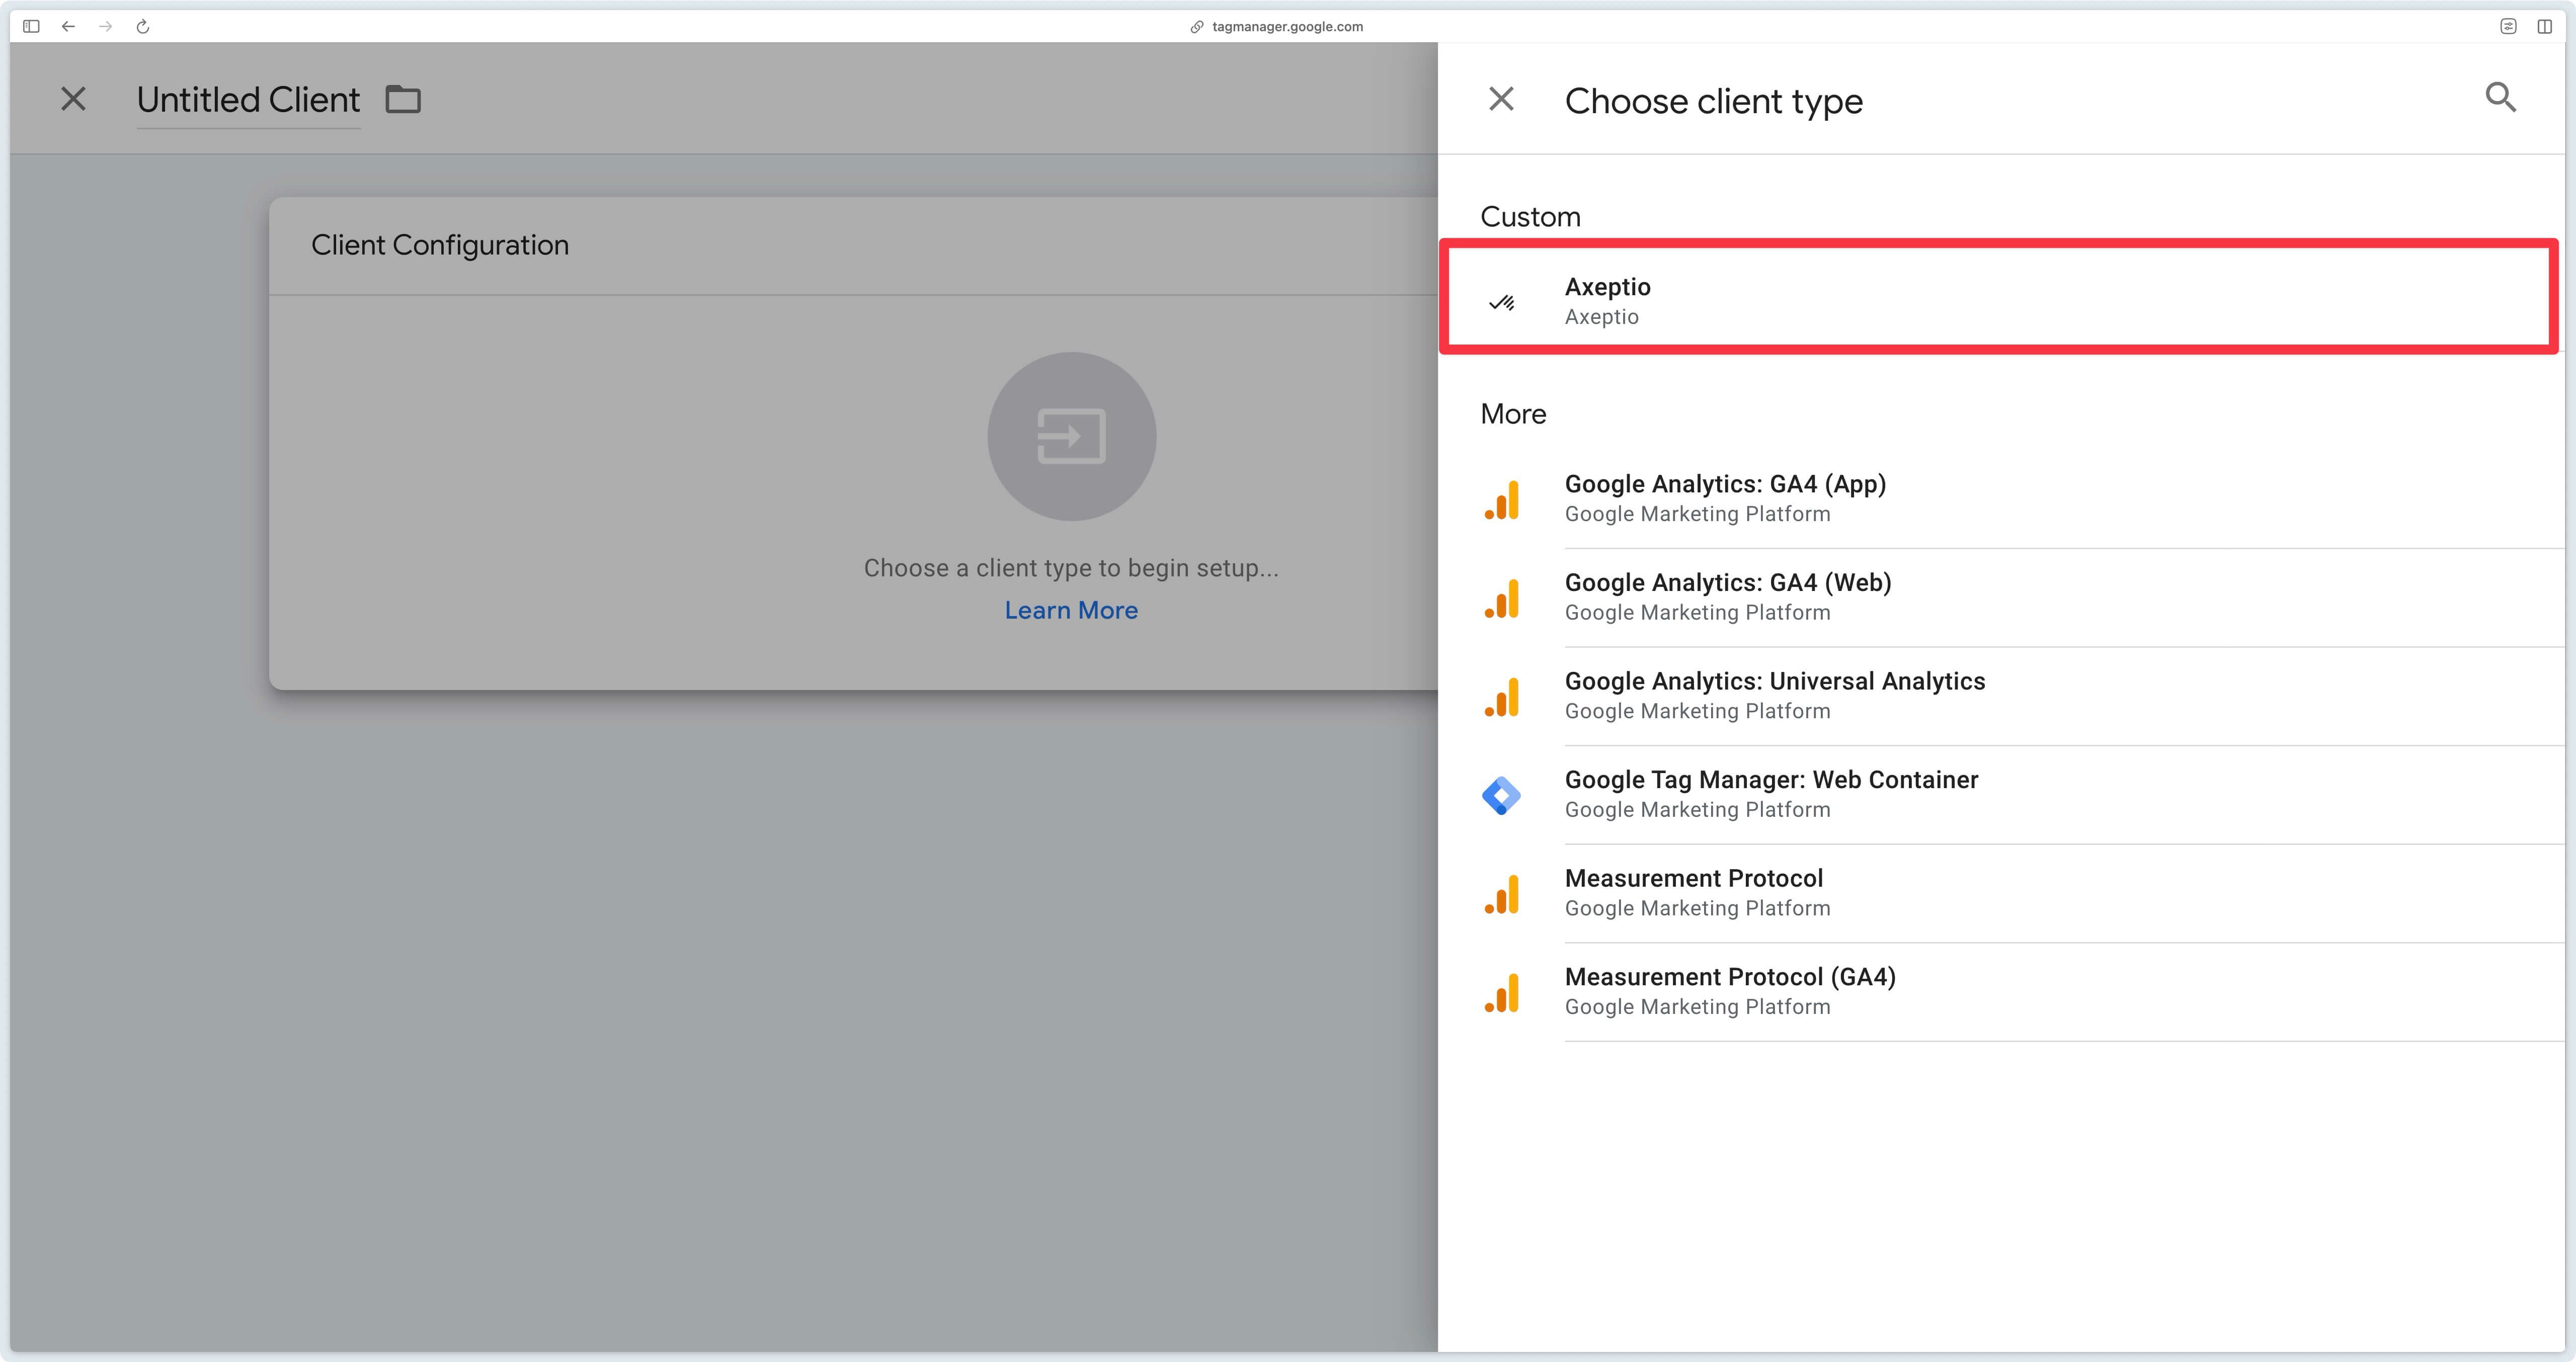
Now go to the Clients section of GTM Server and click on New.
Then select the Axeptio client, previously imported.
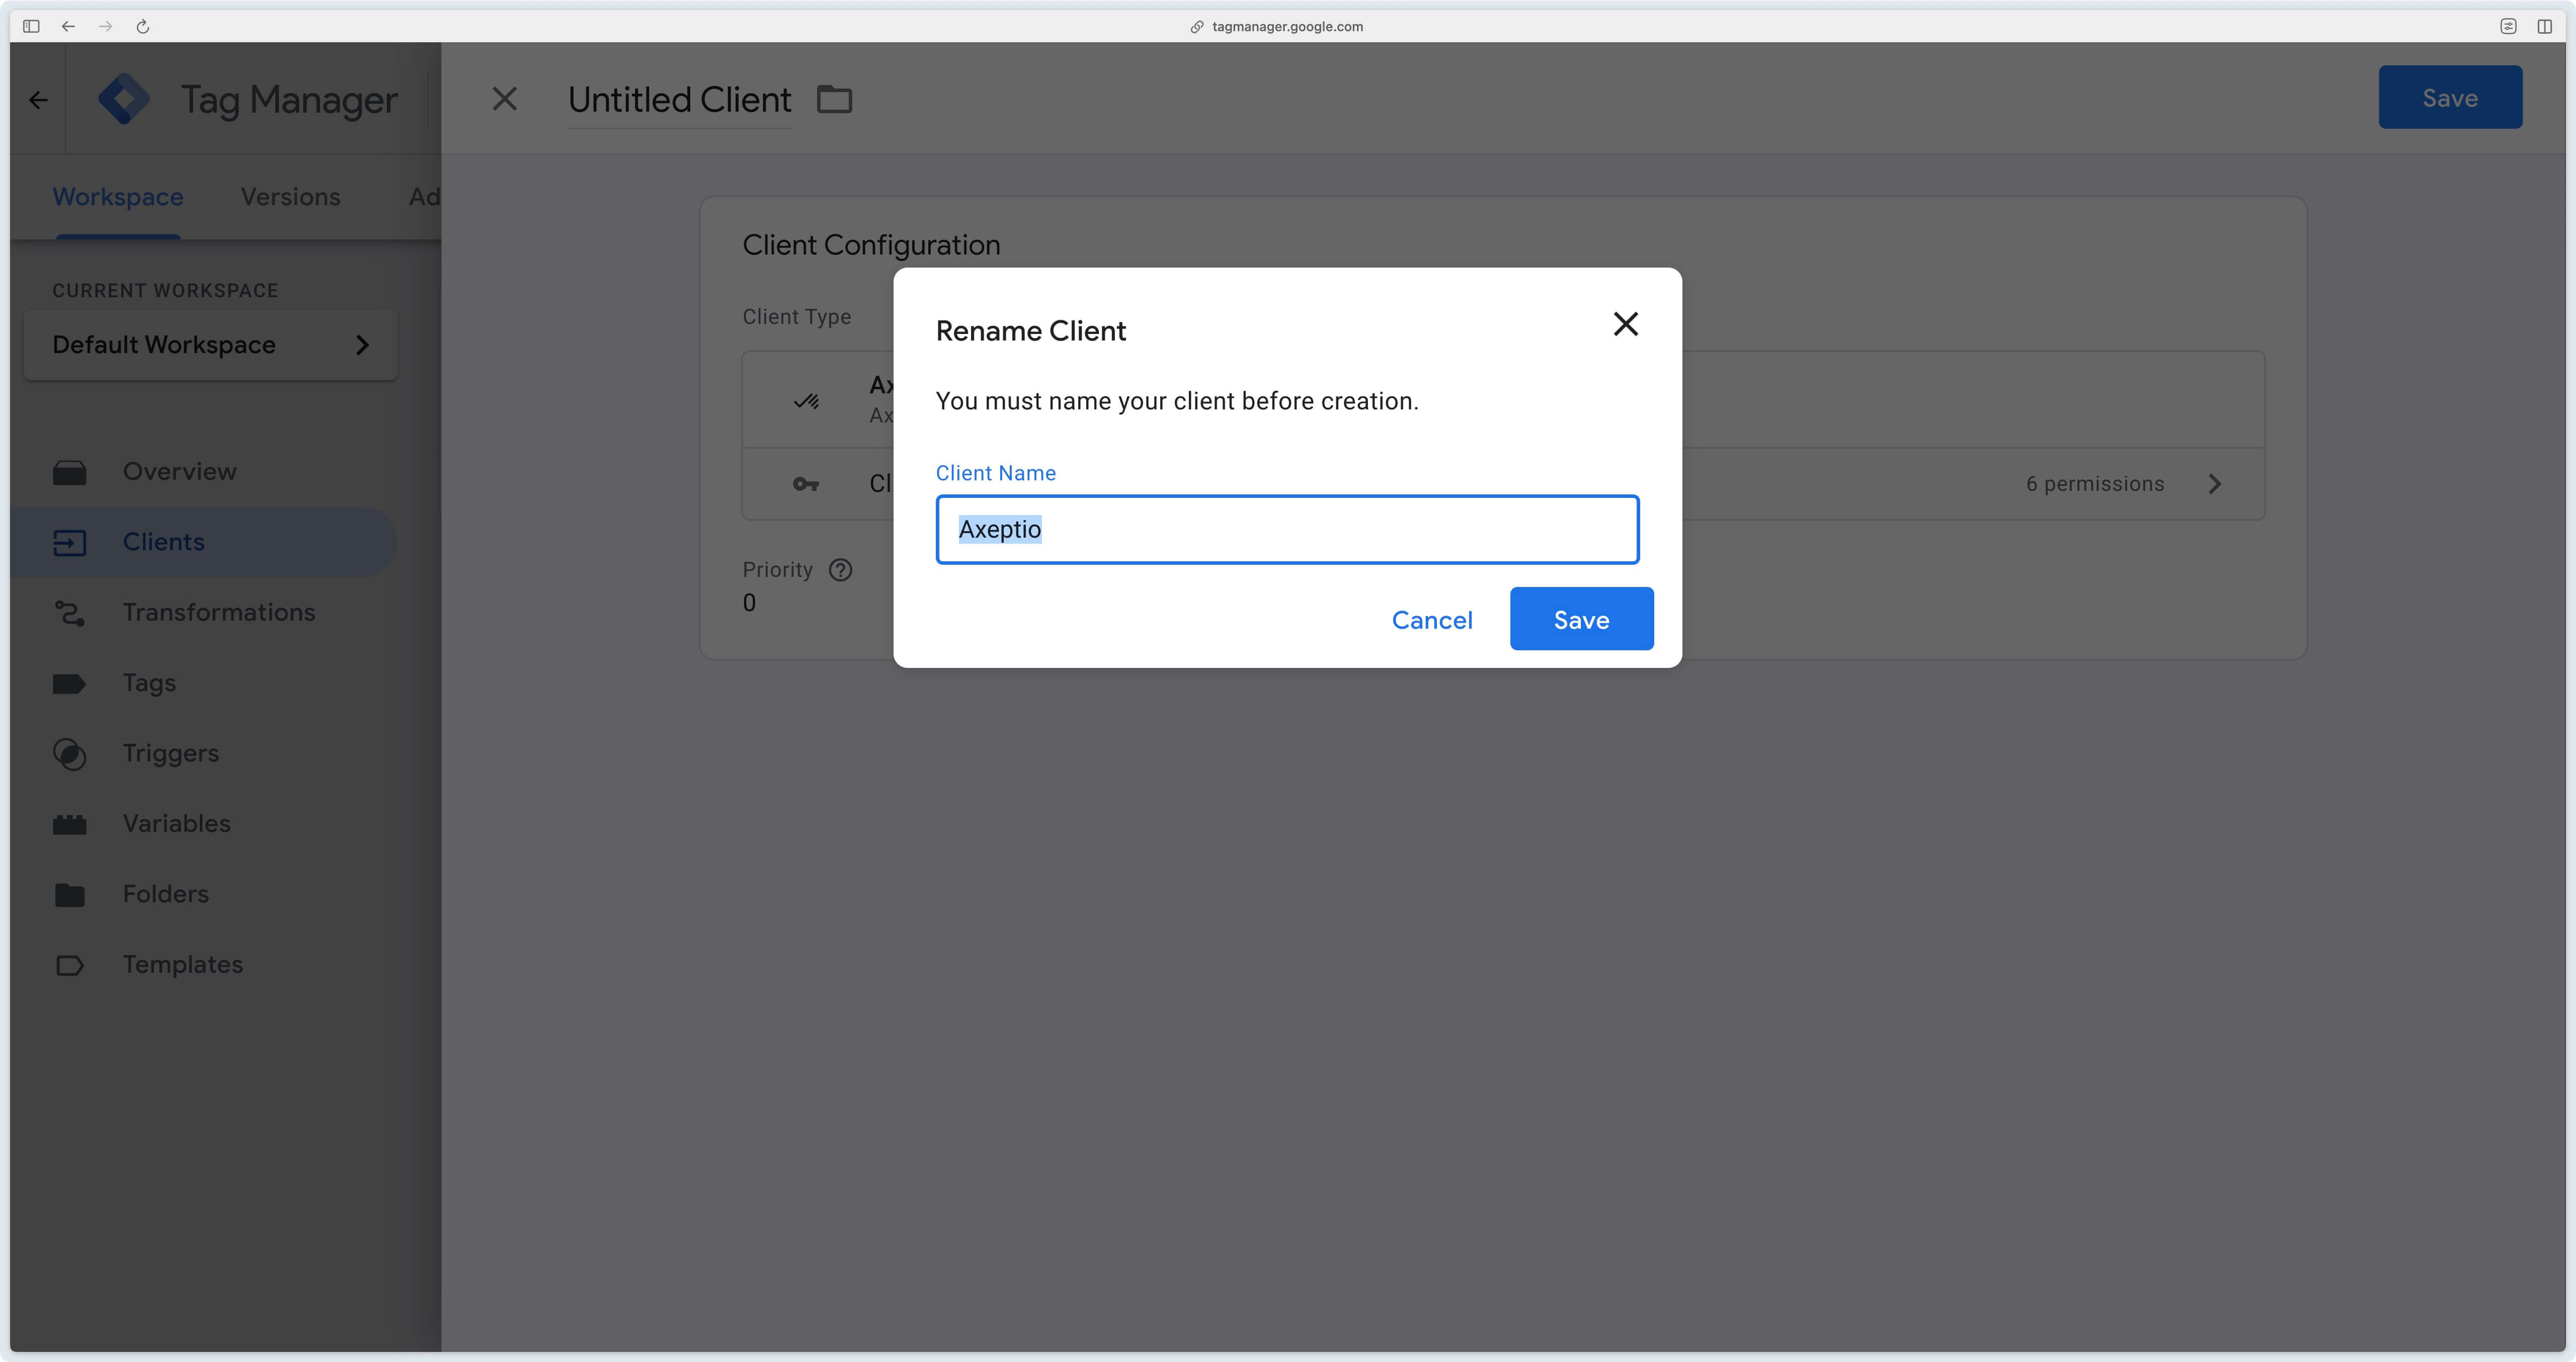
Click Save to save the client, the name Axeptio will then be proposed, click Save again.
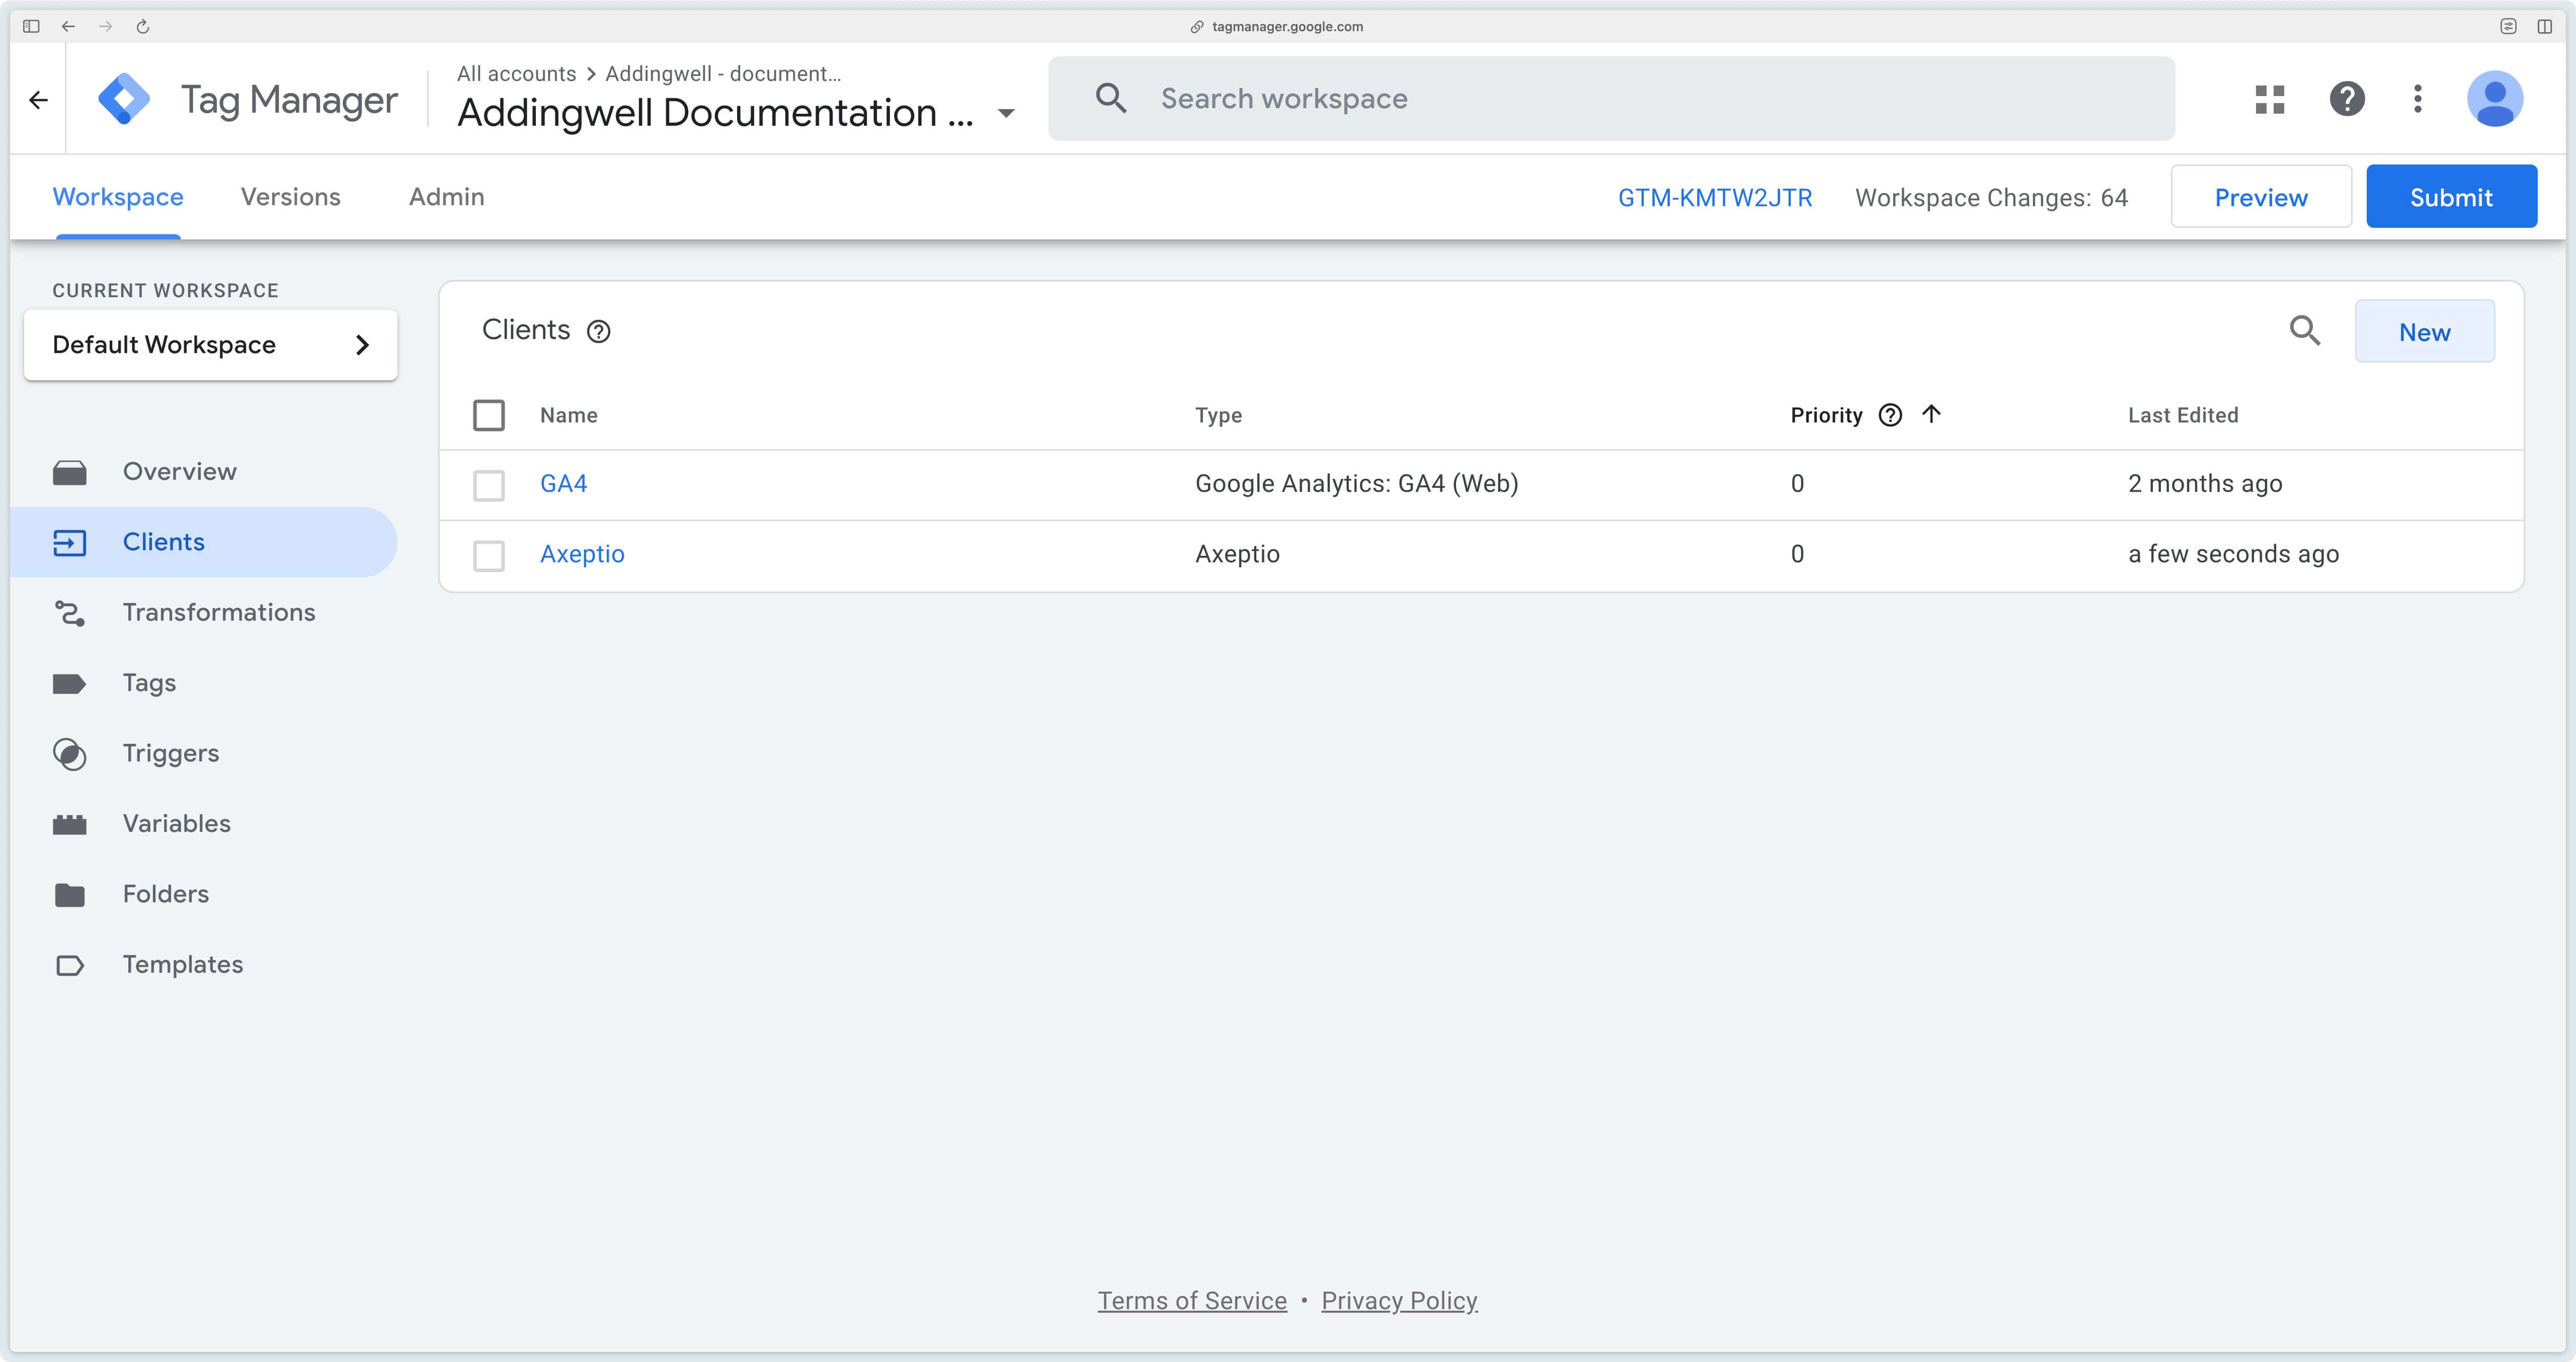
Congratulations, the Axeptio client is now installed in your GTM Server container.
We’ll now move on to configuring the Axeptio CMP tag, still on GTM Server.
Axeptio CMP tag configuration on GTM Server
Download the Axeptio CMP server tag here .
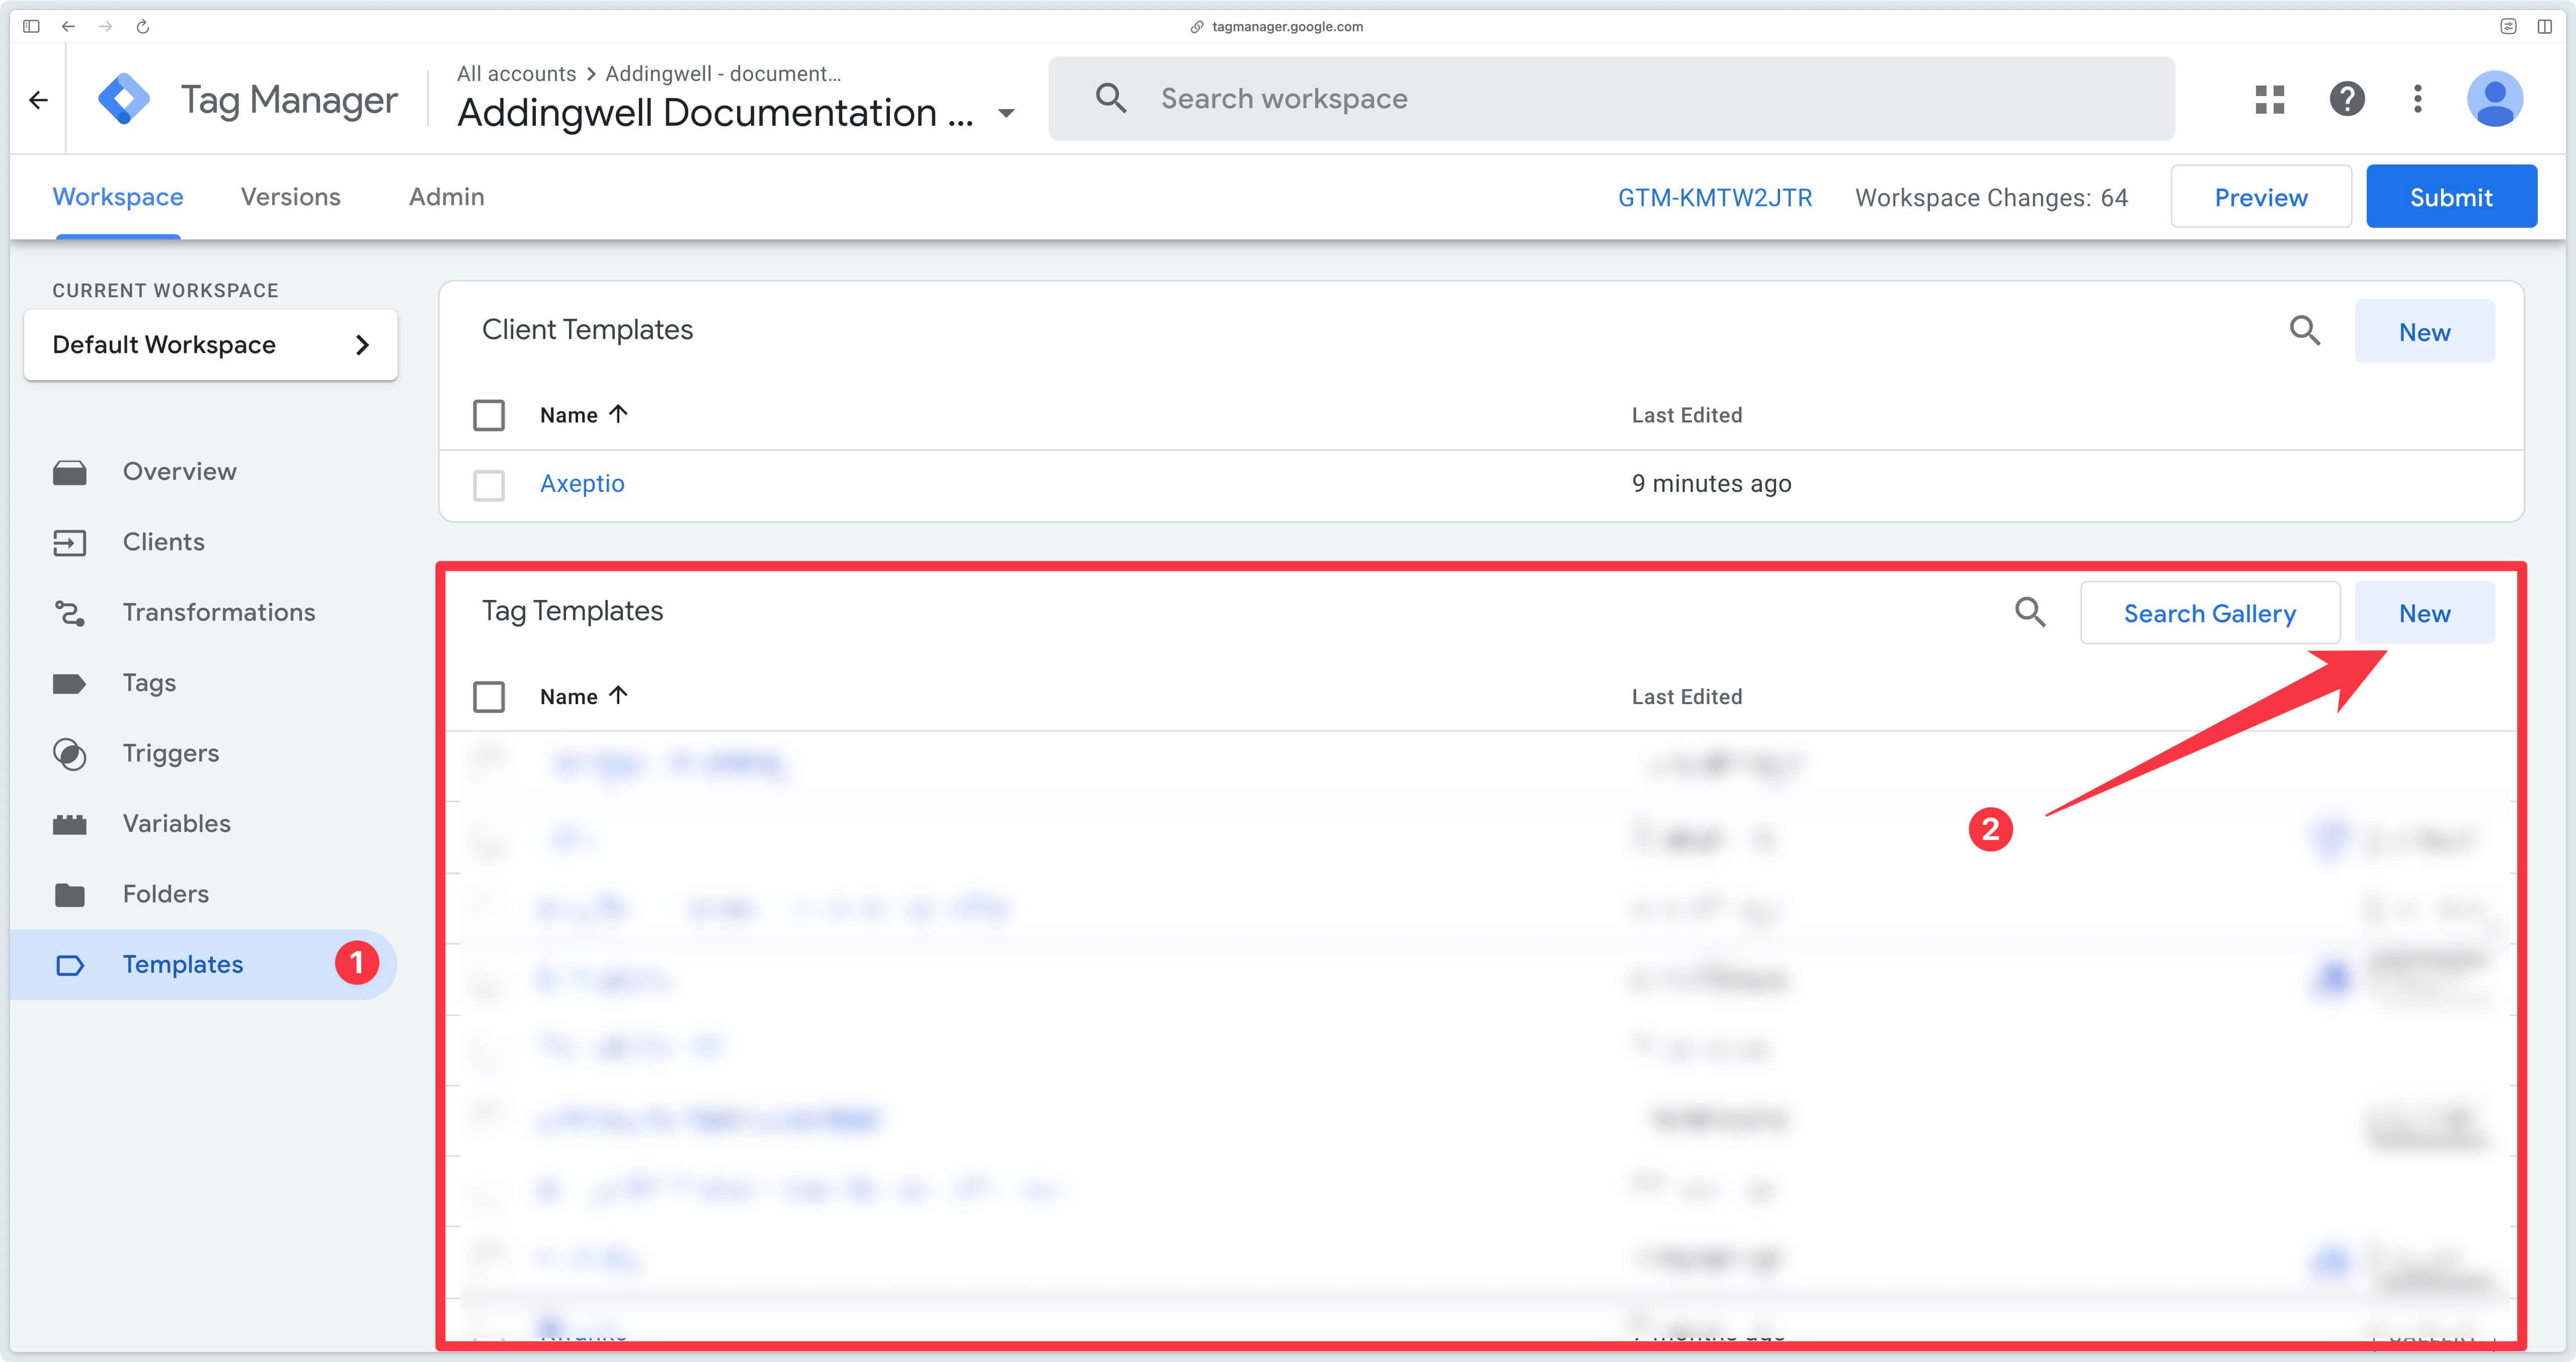
Go to your GTM Server container, in the Templates > Tag Templates section, click on New.
Then click on the 3 small dots at top right, then on Import.
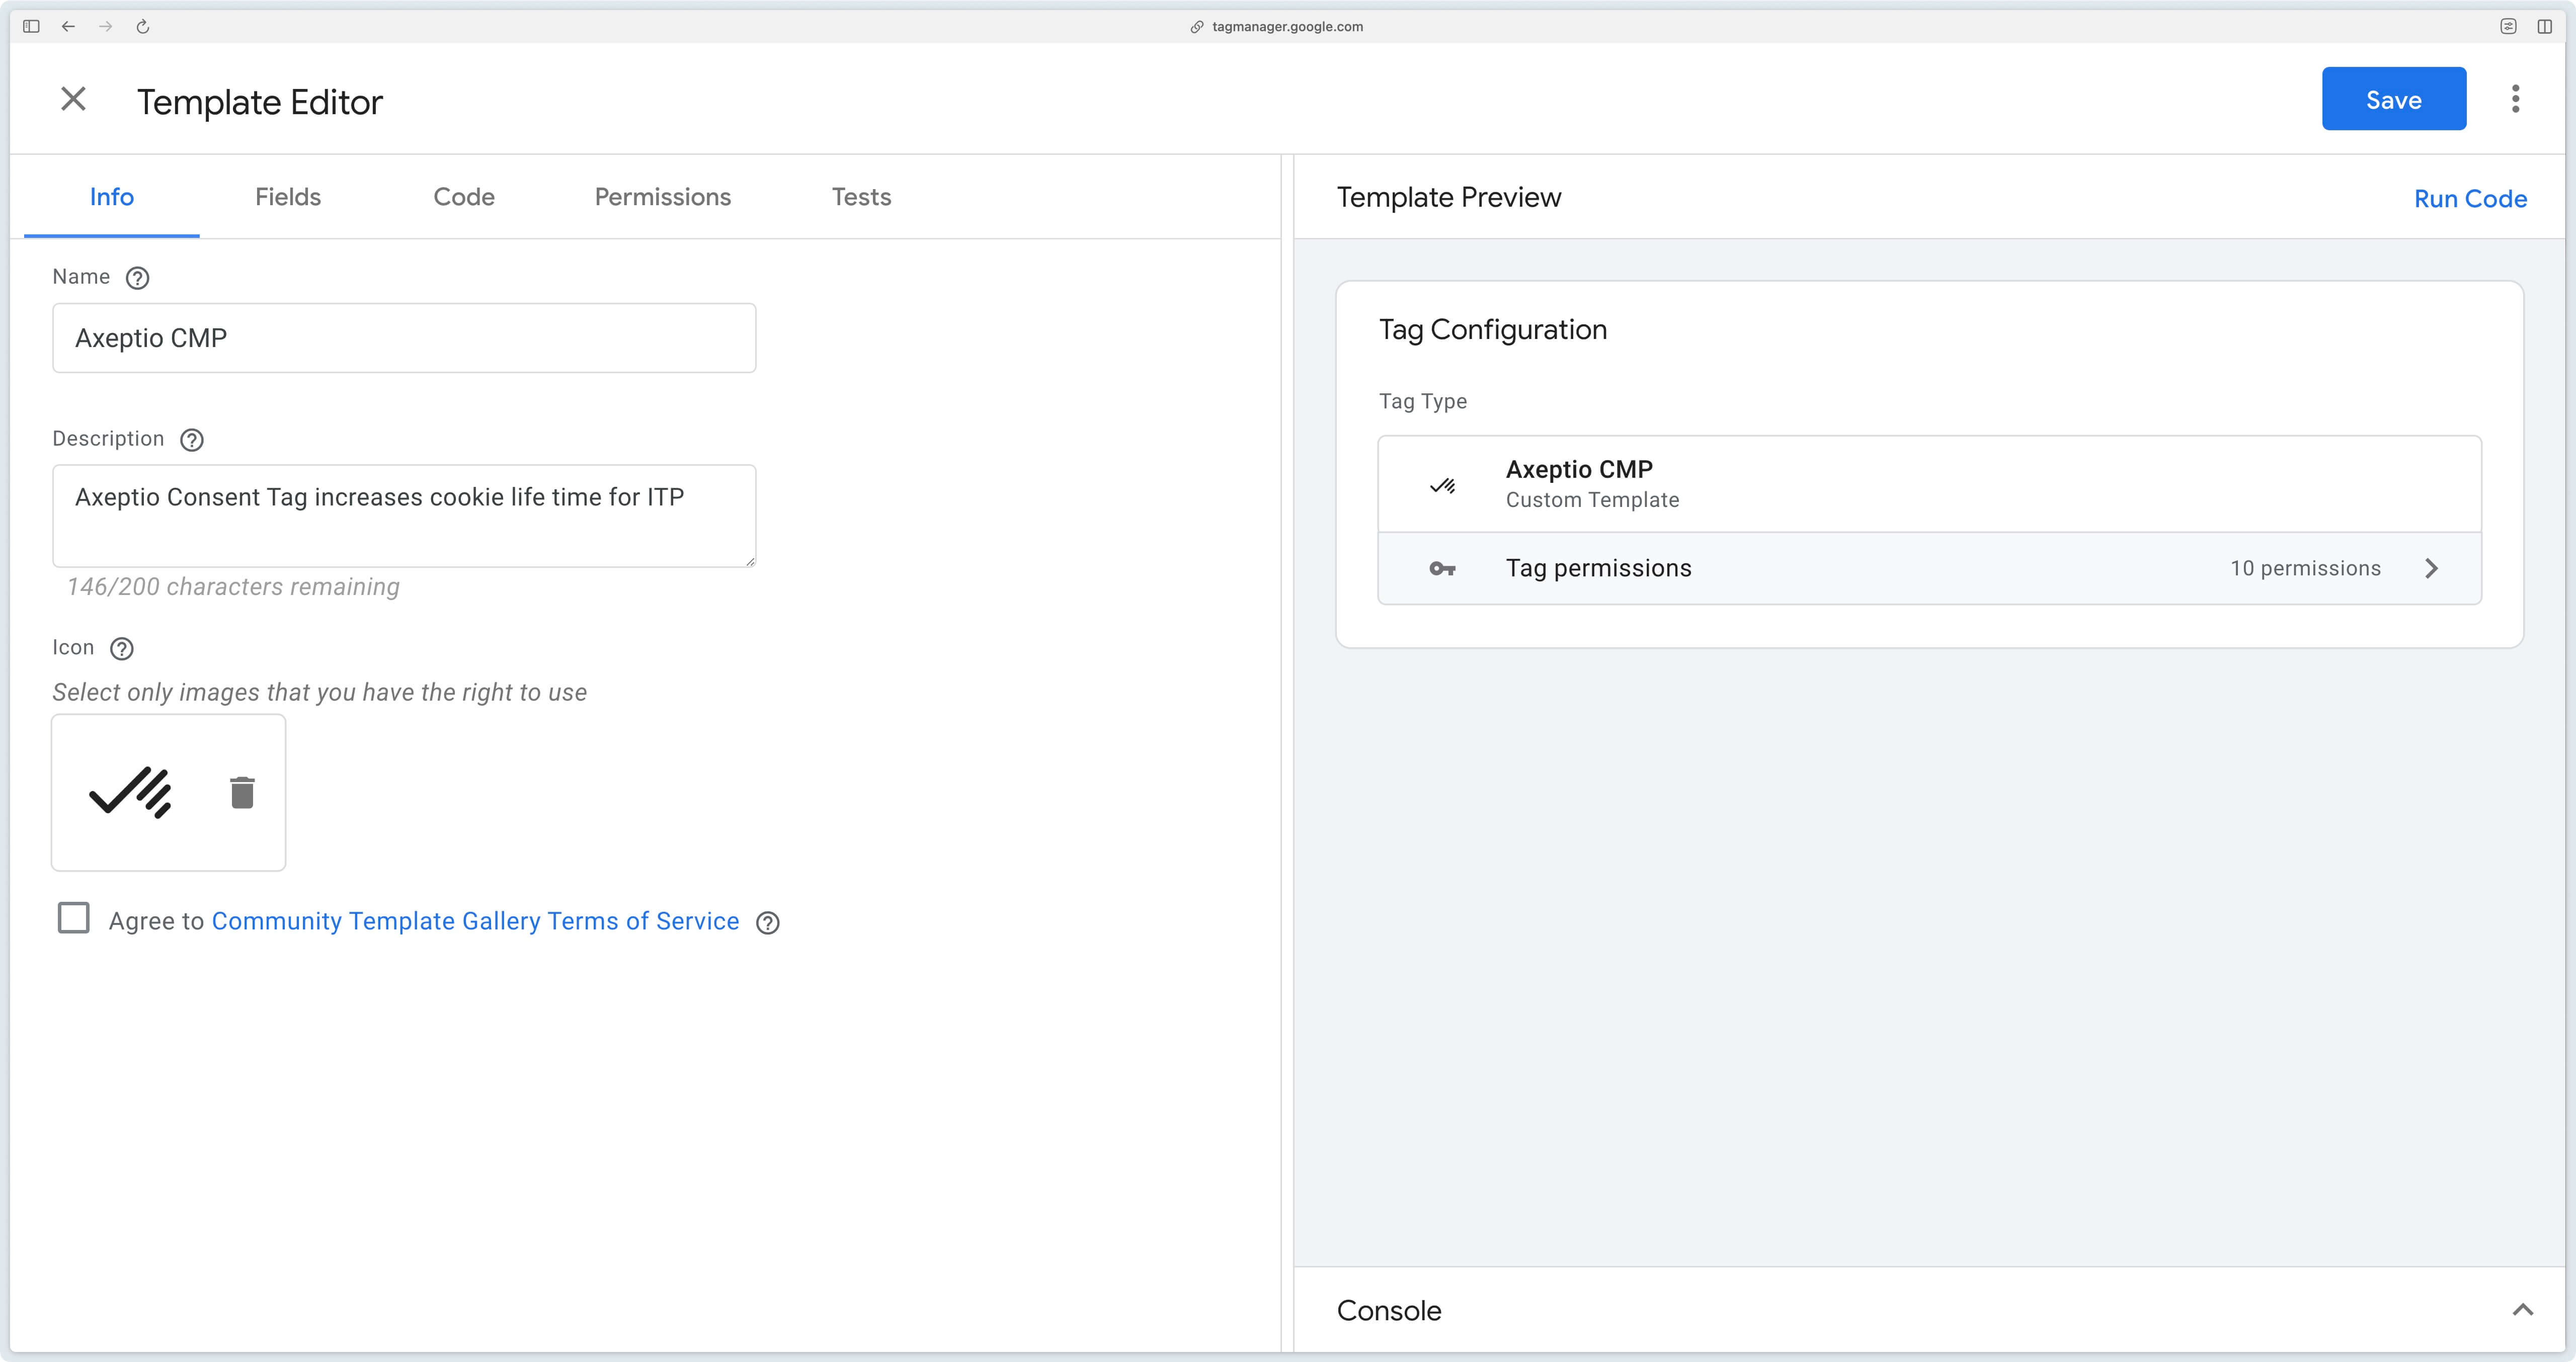
Then select the template.tpl file you’ve just downloaded and click Save.
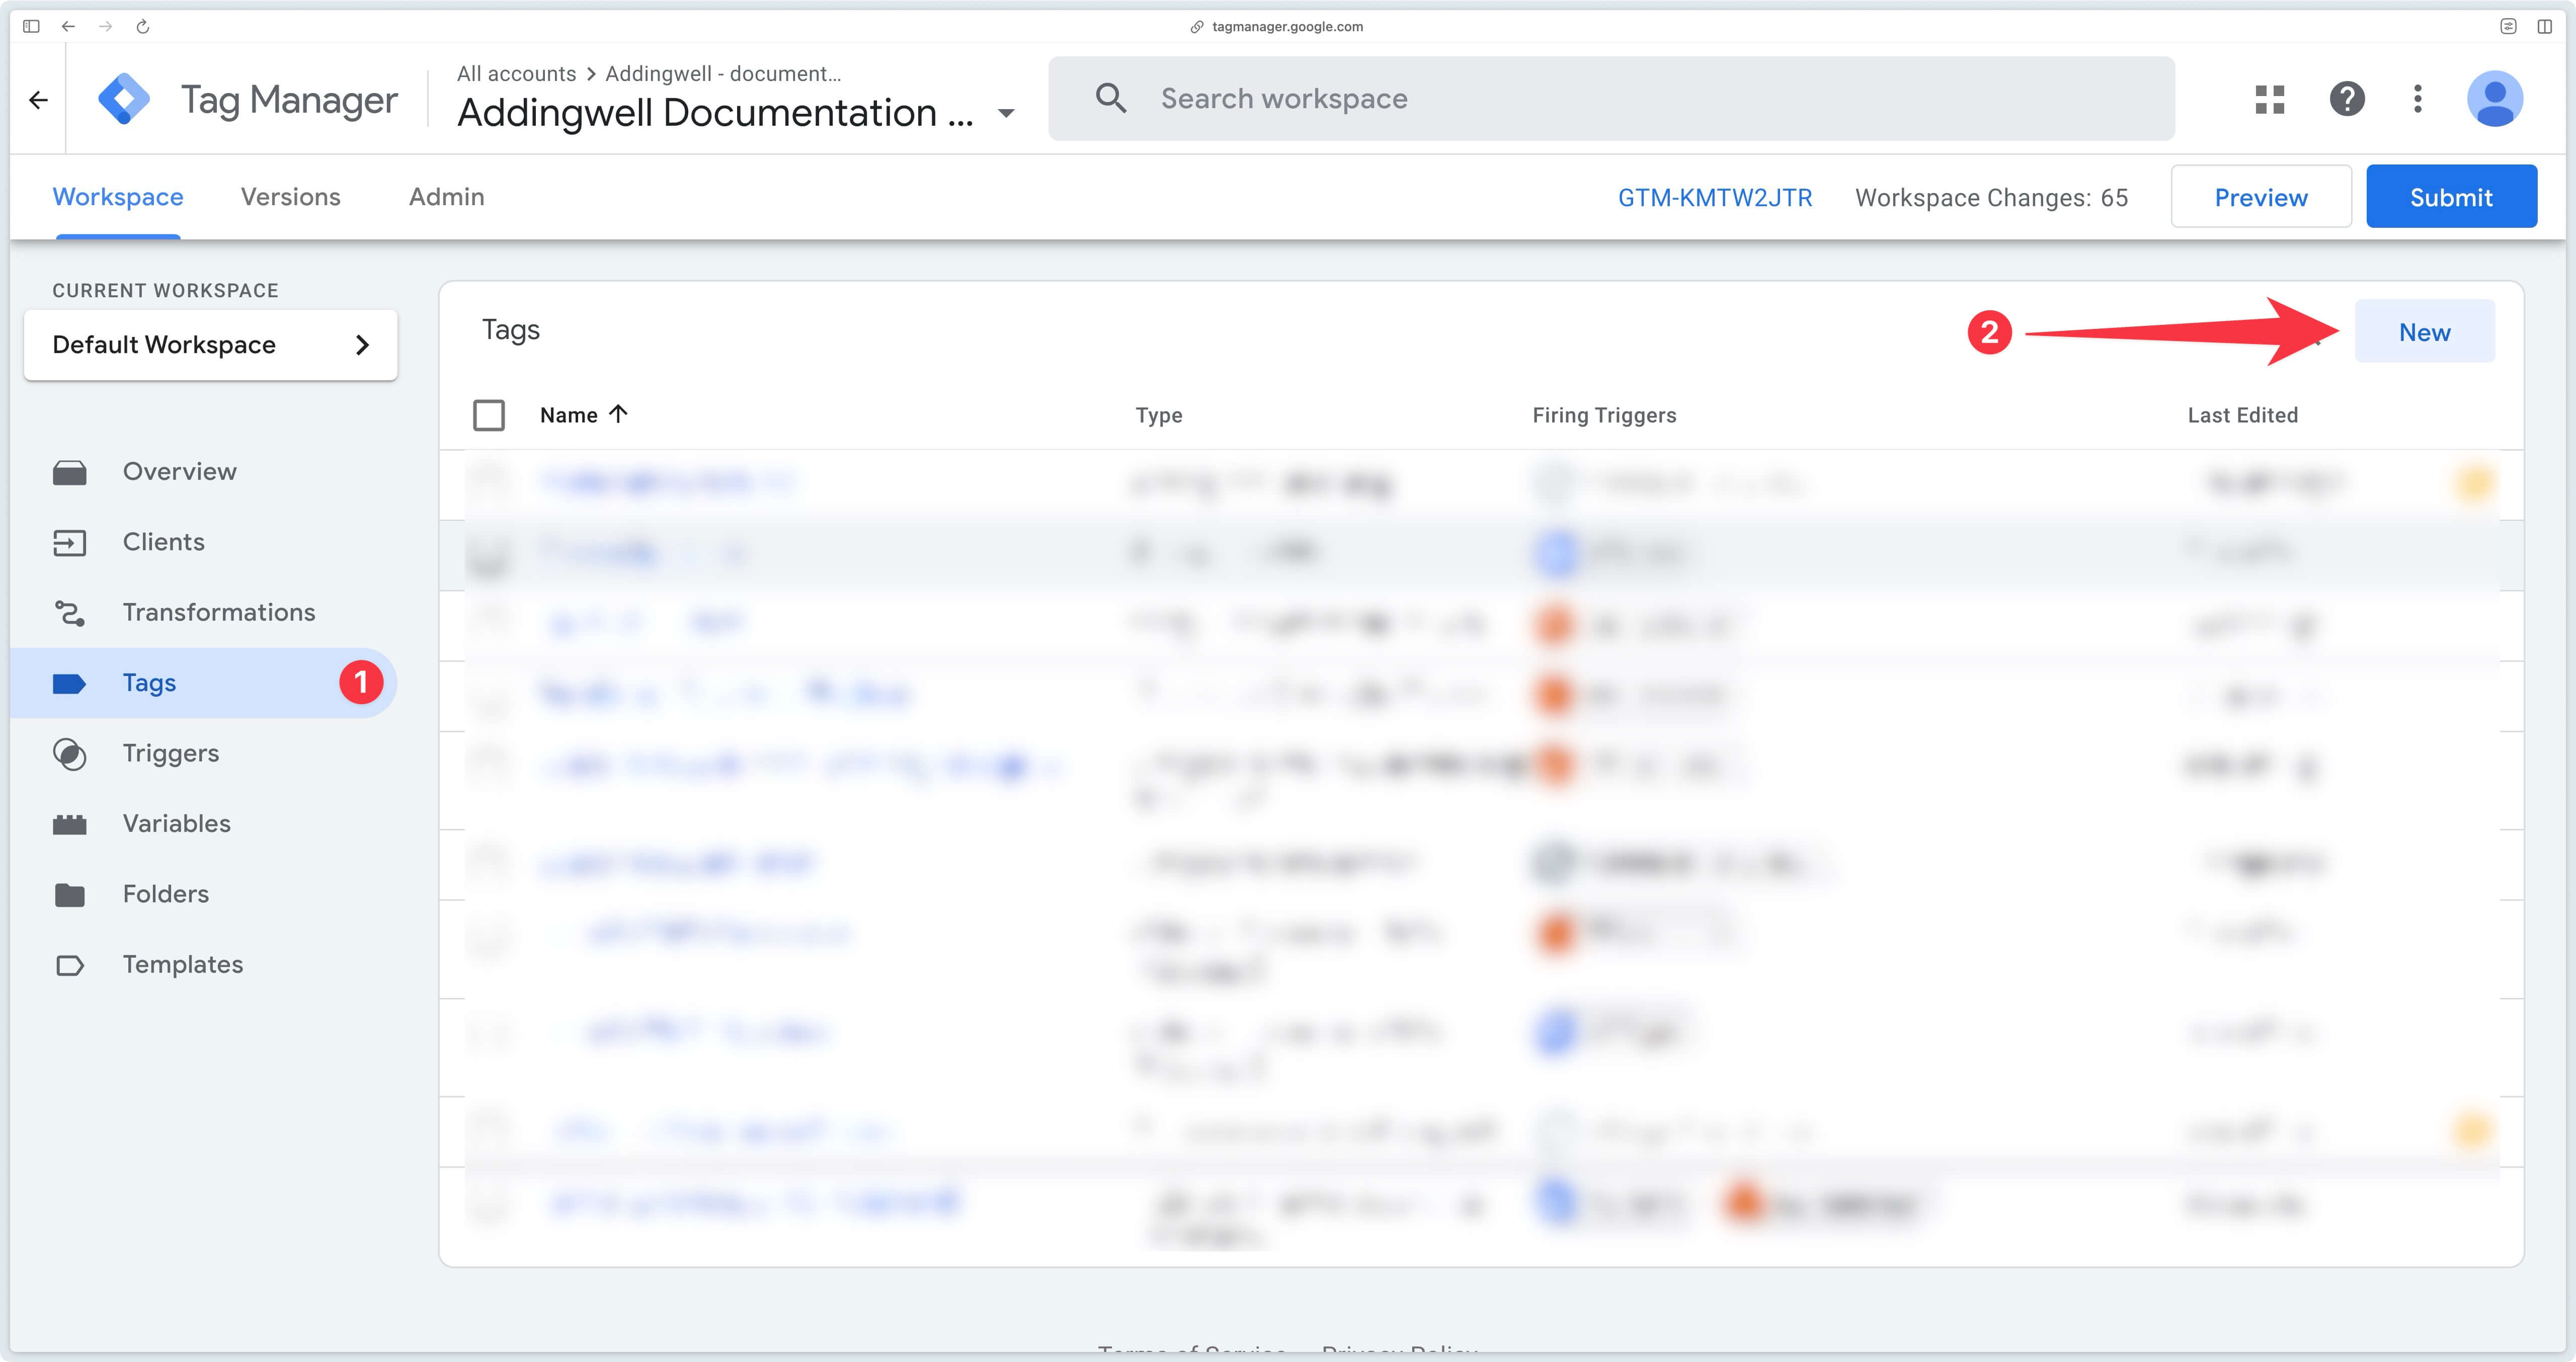
Now go to the Tags section of GTM Server and click on New.
Then select the previously imported Axeptio CMP tag.
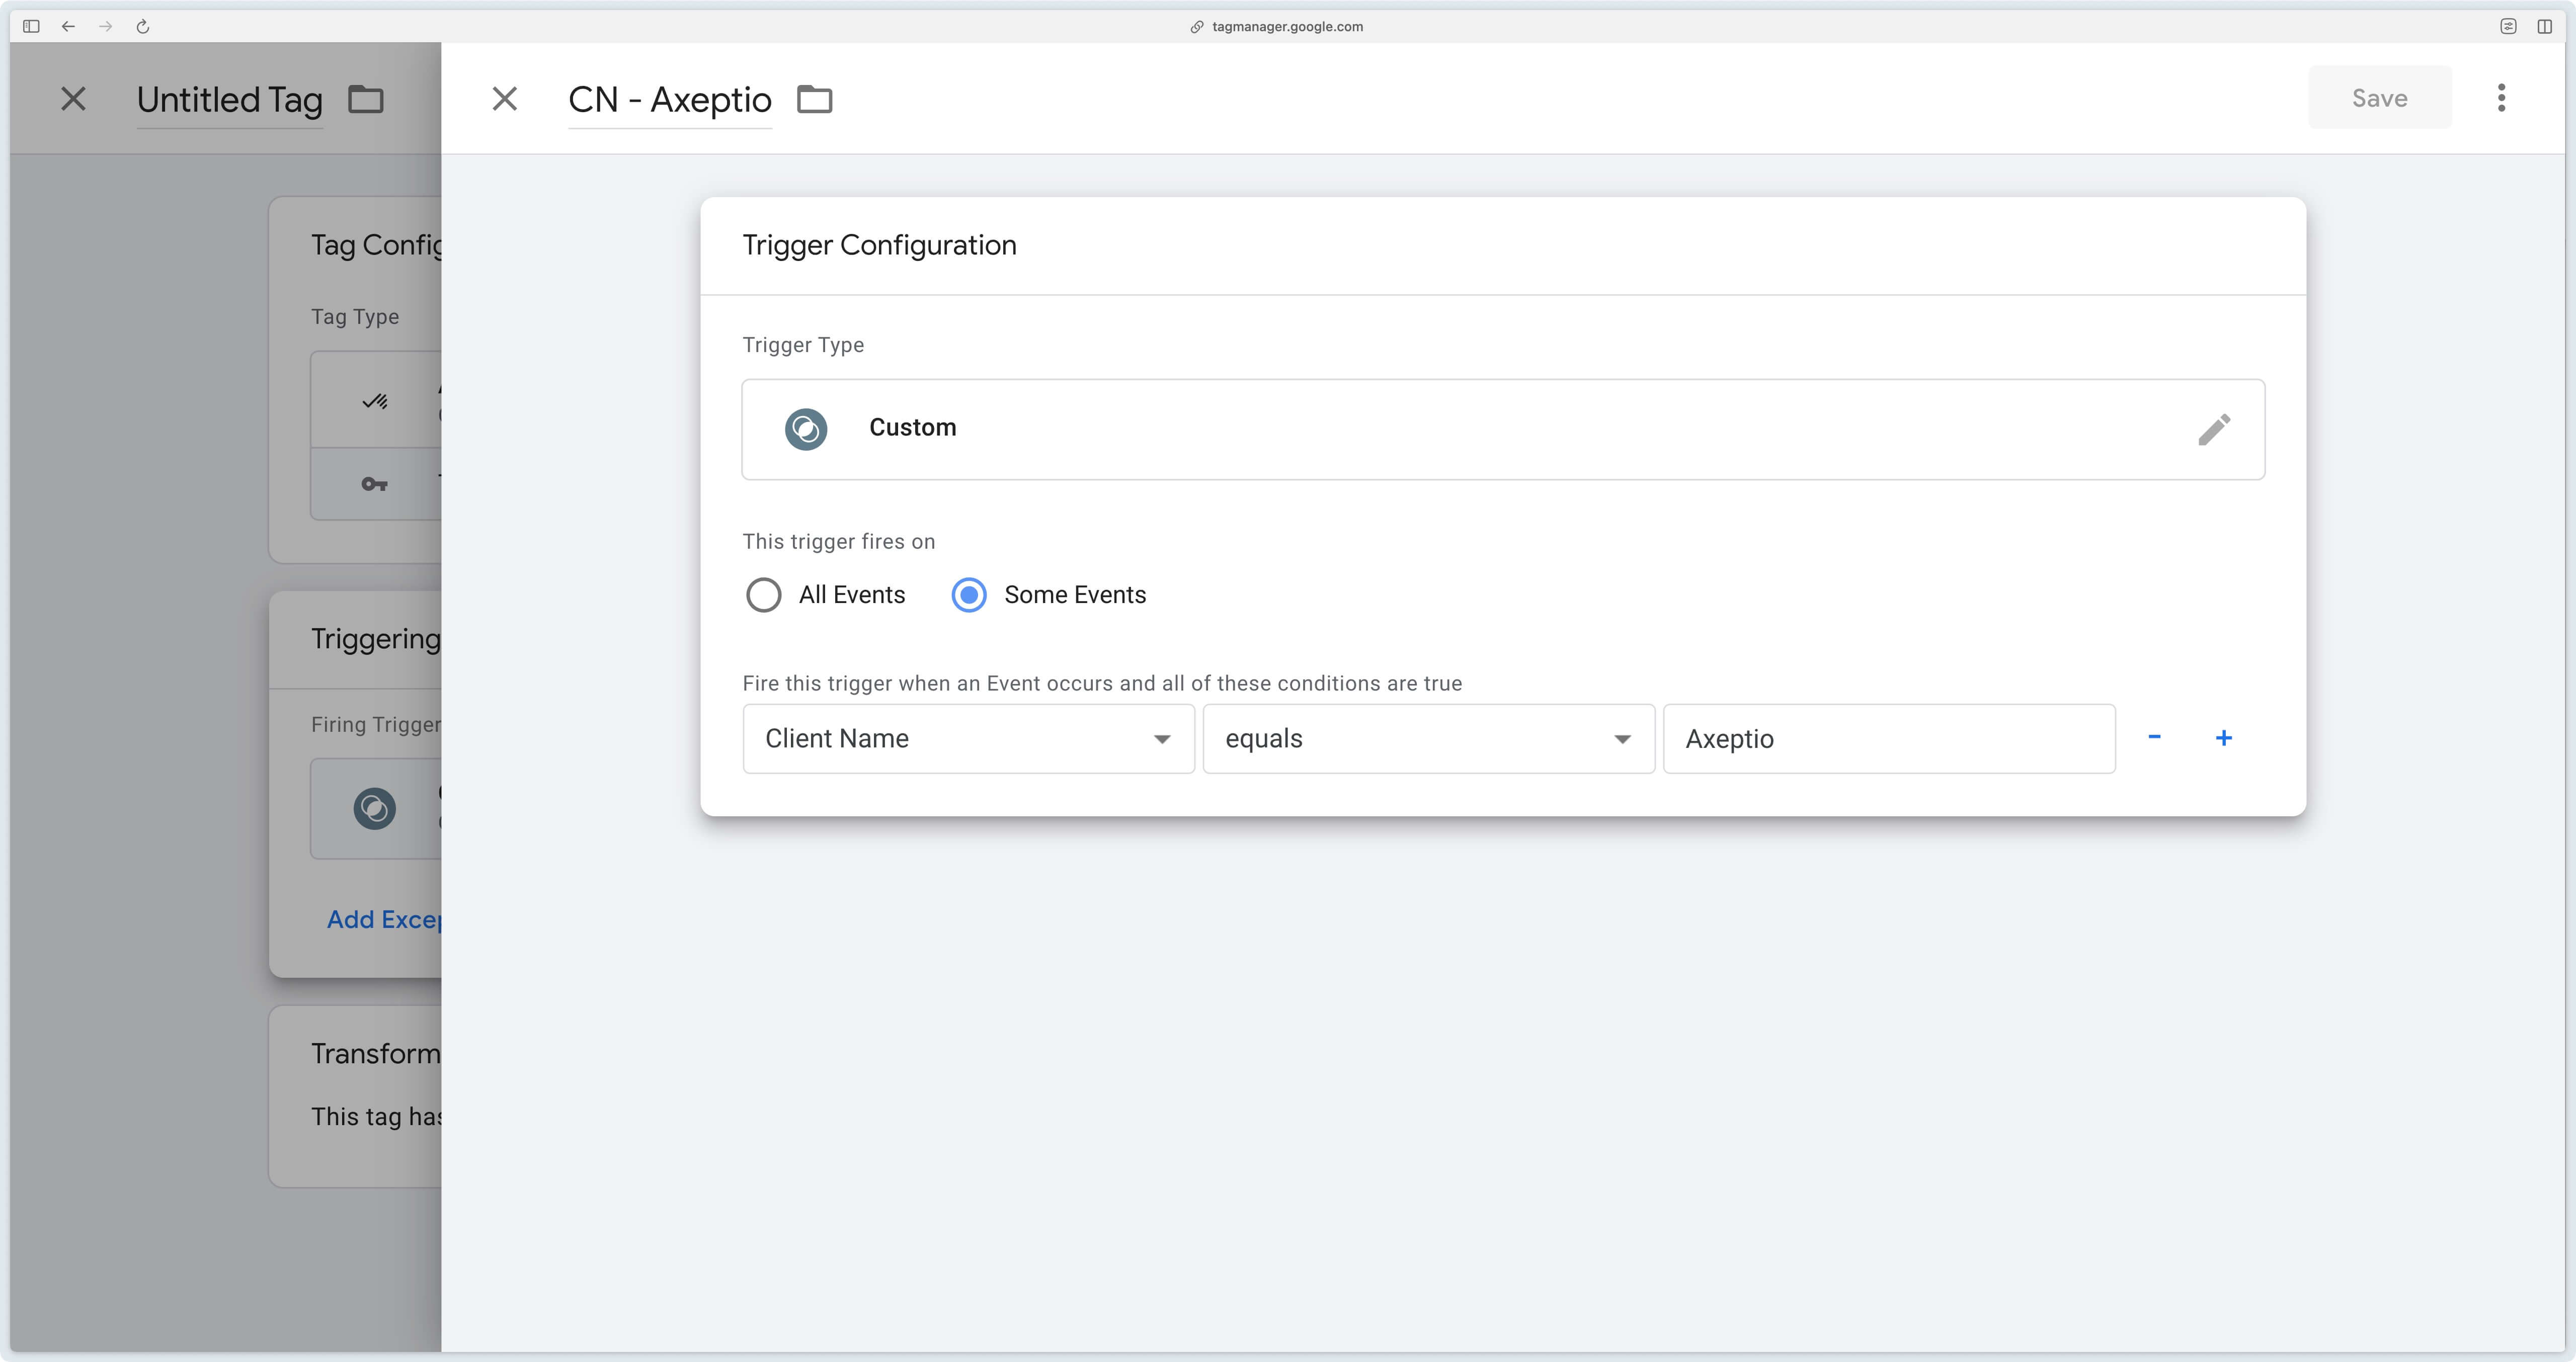
Trigger the tag when the client is equal to Axeptio.
Then click Save to save the Axeptio CMP tag.
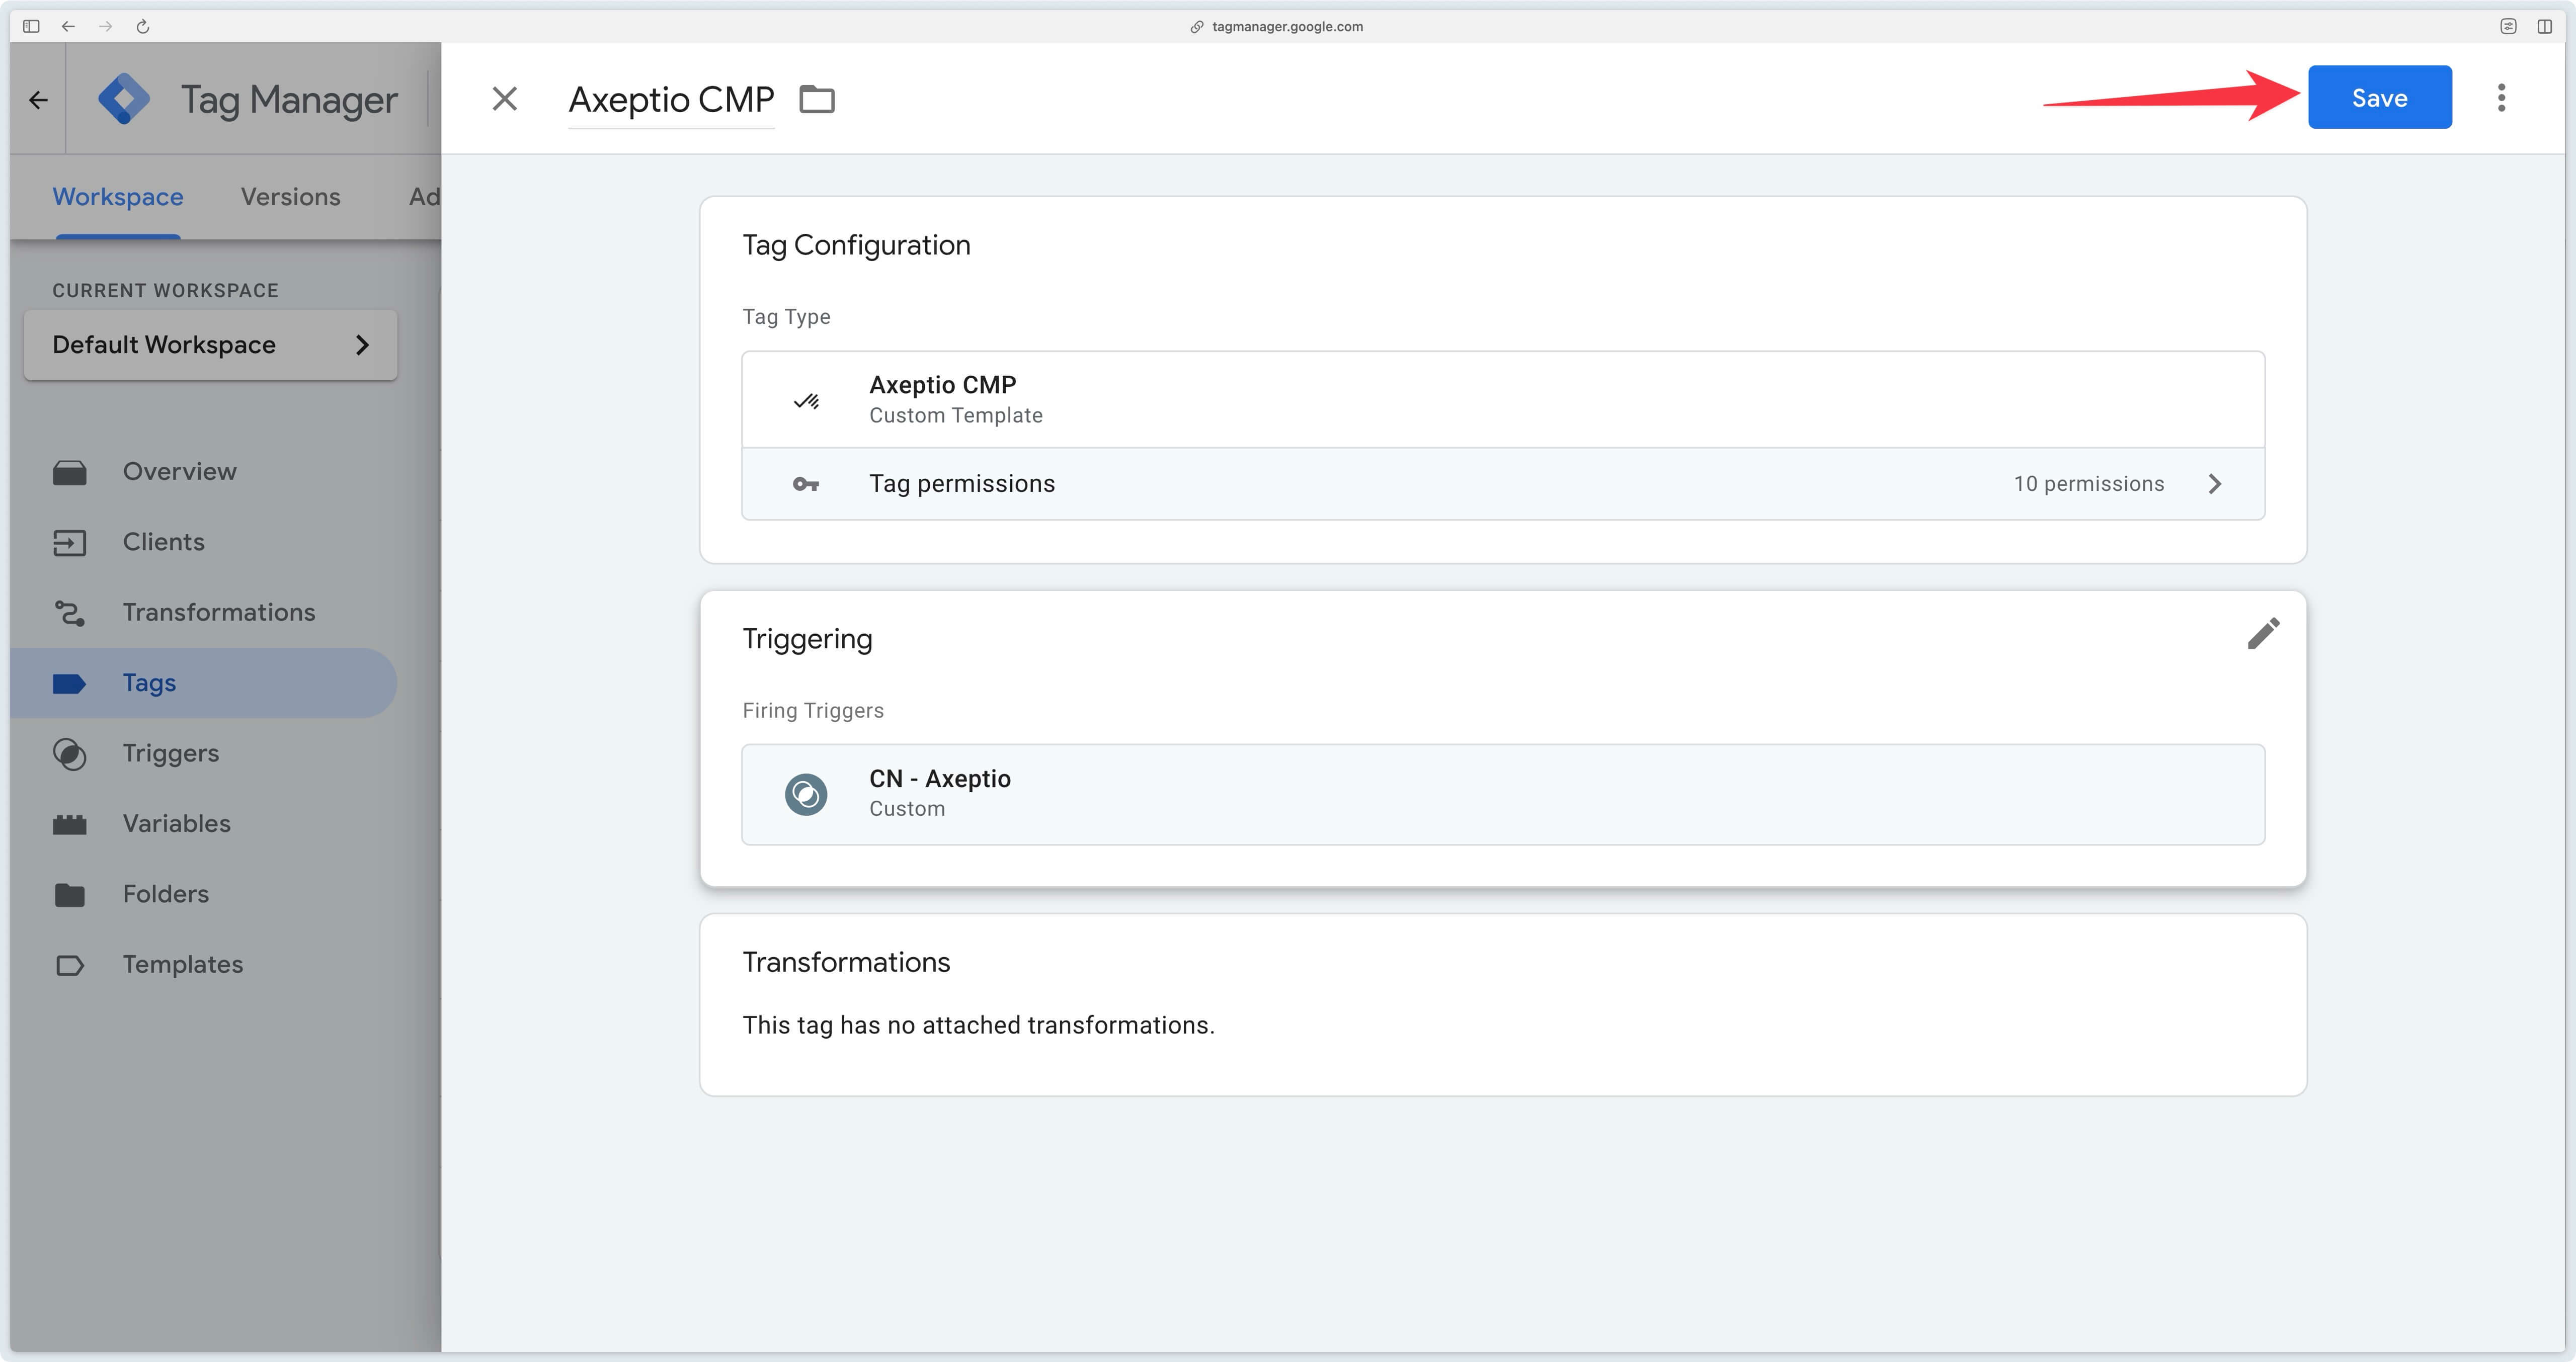
Congratulations, the Axeptio CMP tag is now installed in your GTM Server container. We’ll now move on to configuring the Axeptio CMP tag on GTM Web.
Load Axeptio from Addingwell
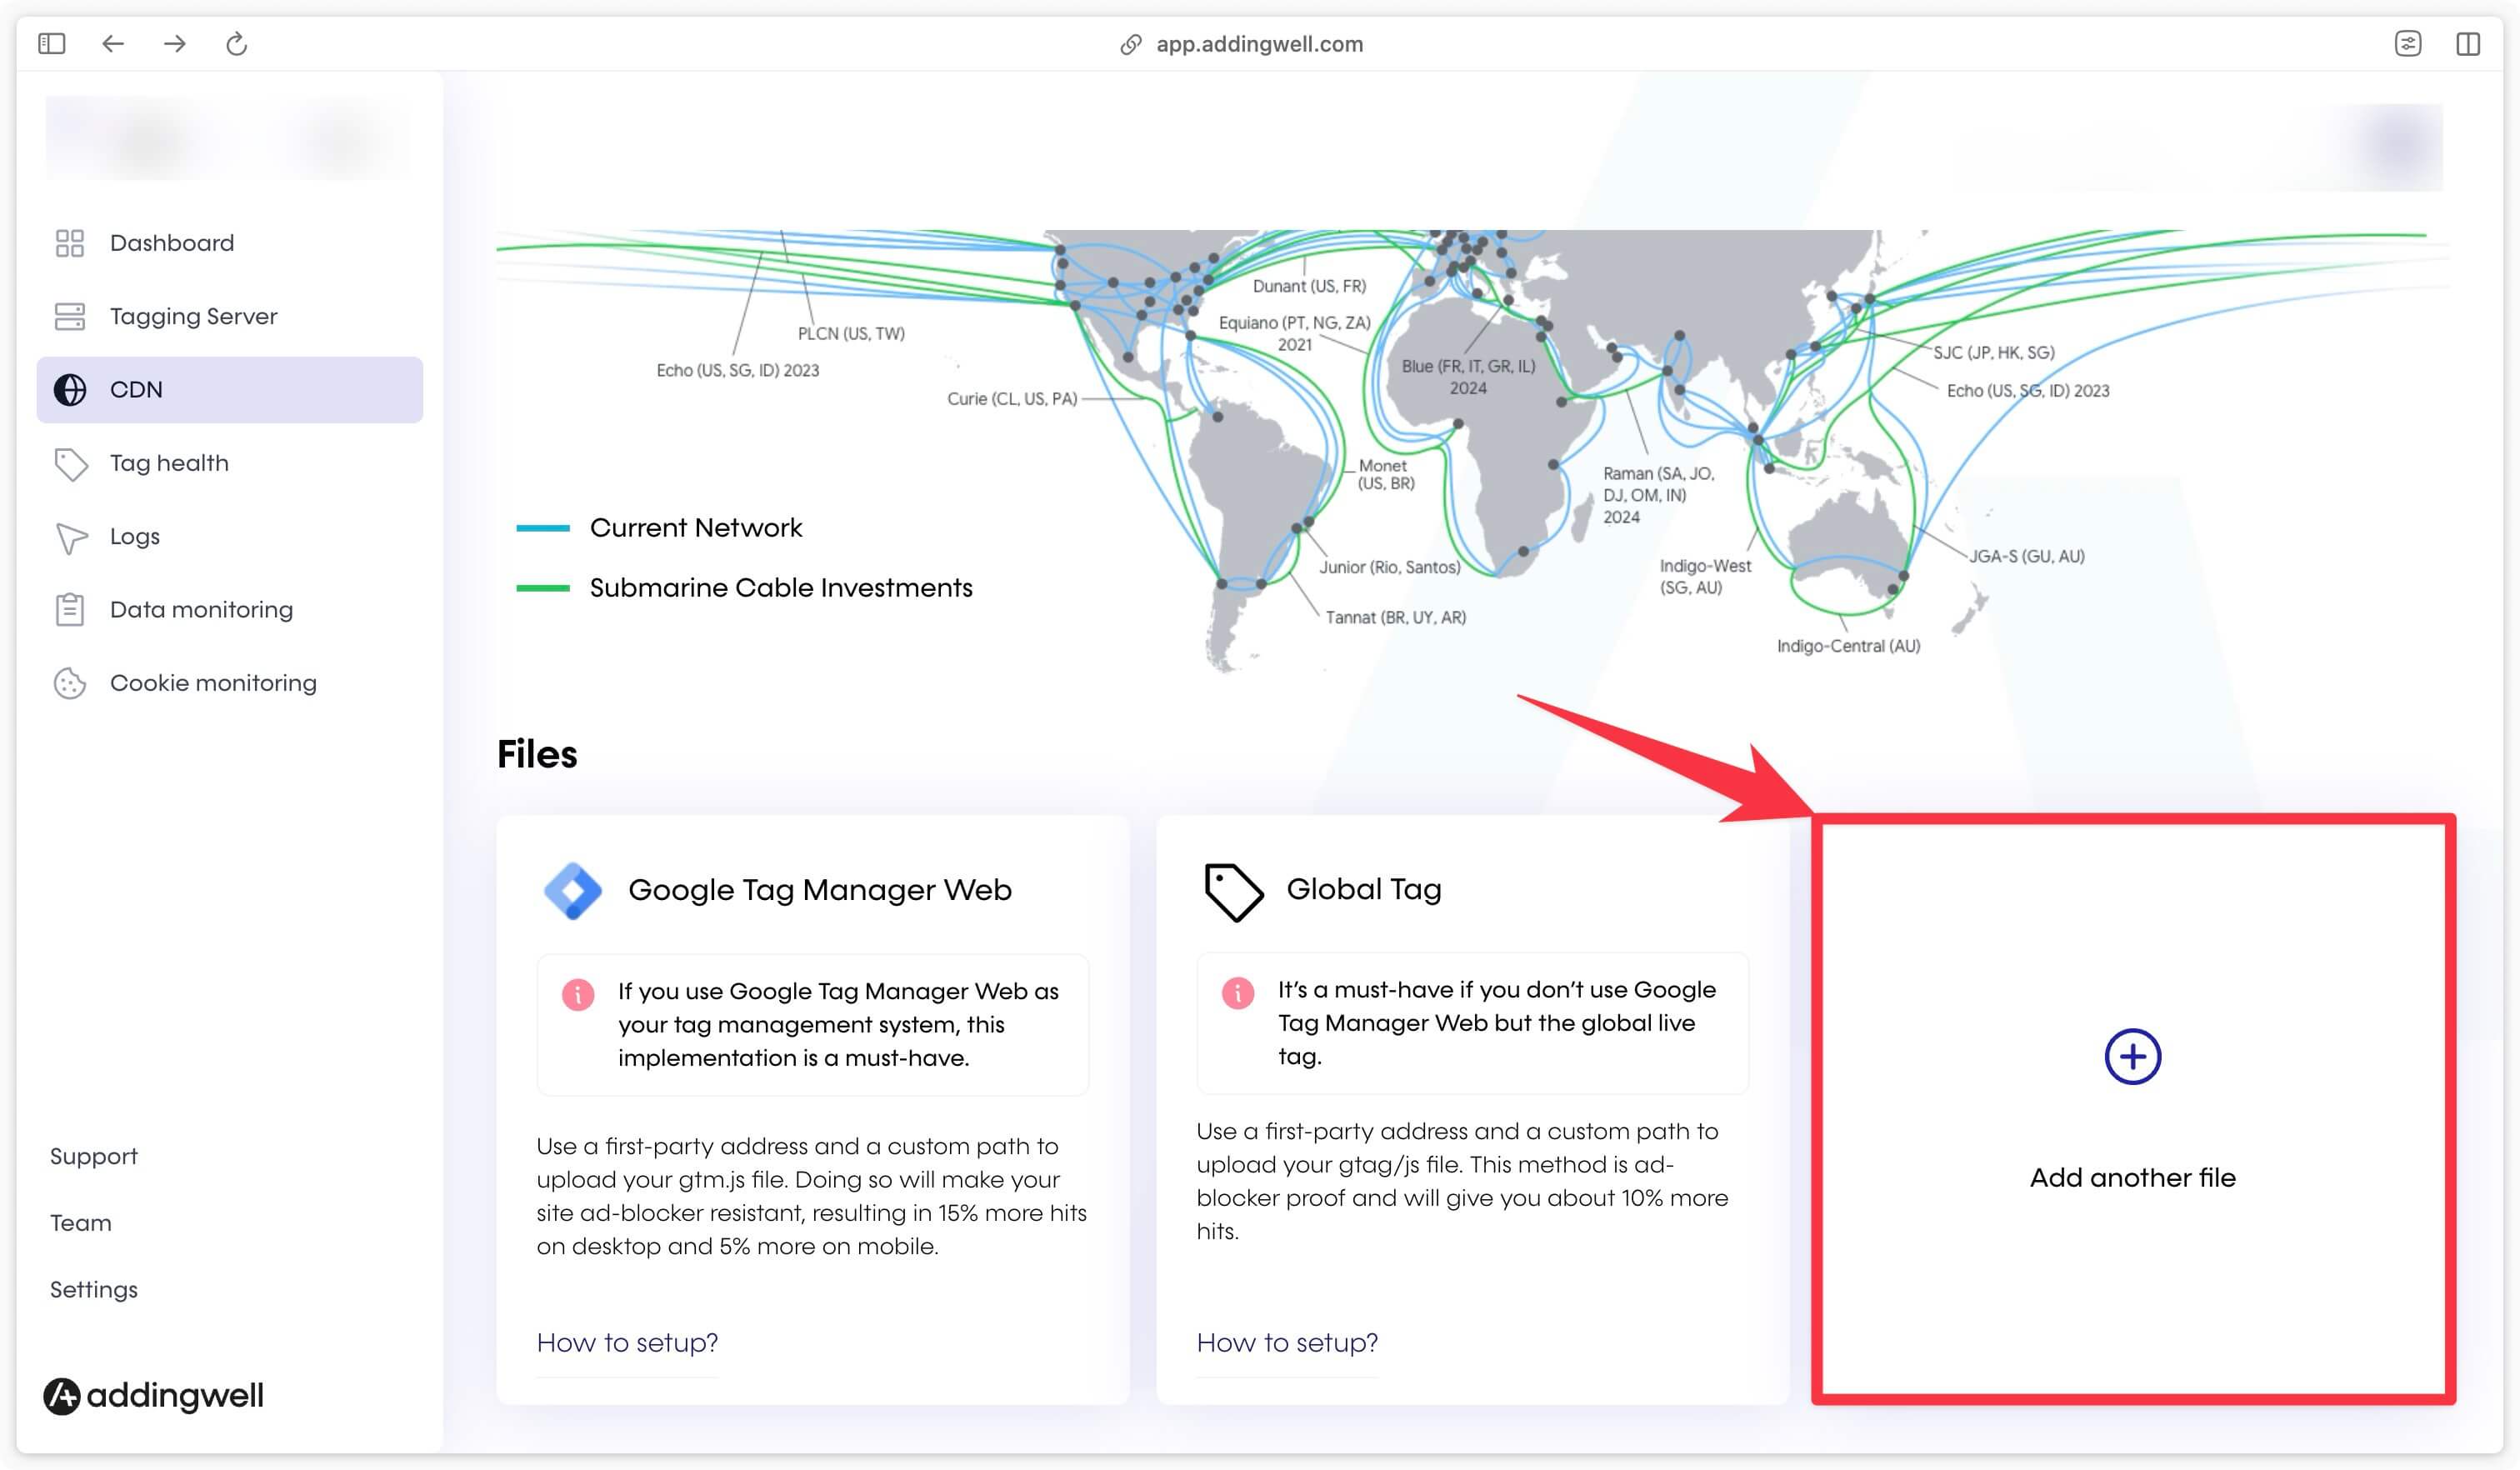
To be able to bypass ad-blockers, it’s necessary to load the Axeptio script from your Addingwell tagging server.
Go to Addingwell, then to the CDN section. Then click on Add another file.
Next, enter the URL of the Axeptio SDK.
https://static.axept.io/sdk.js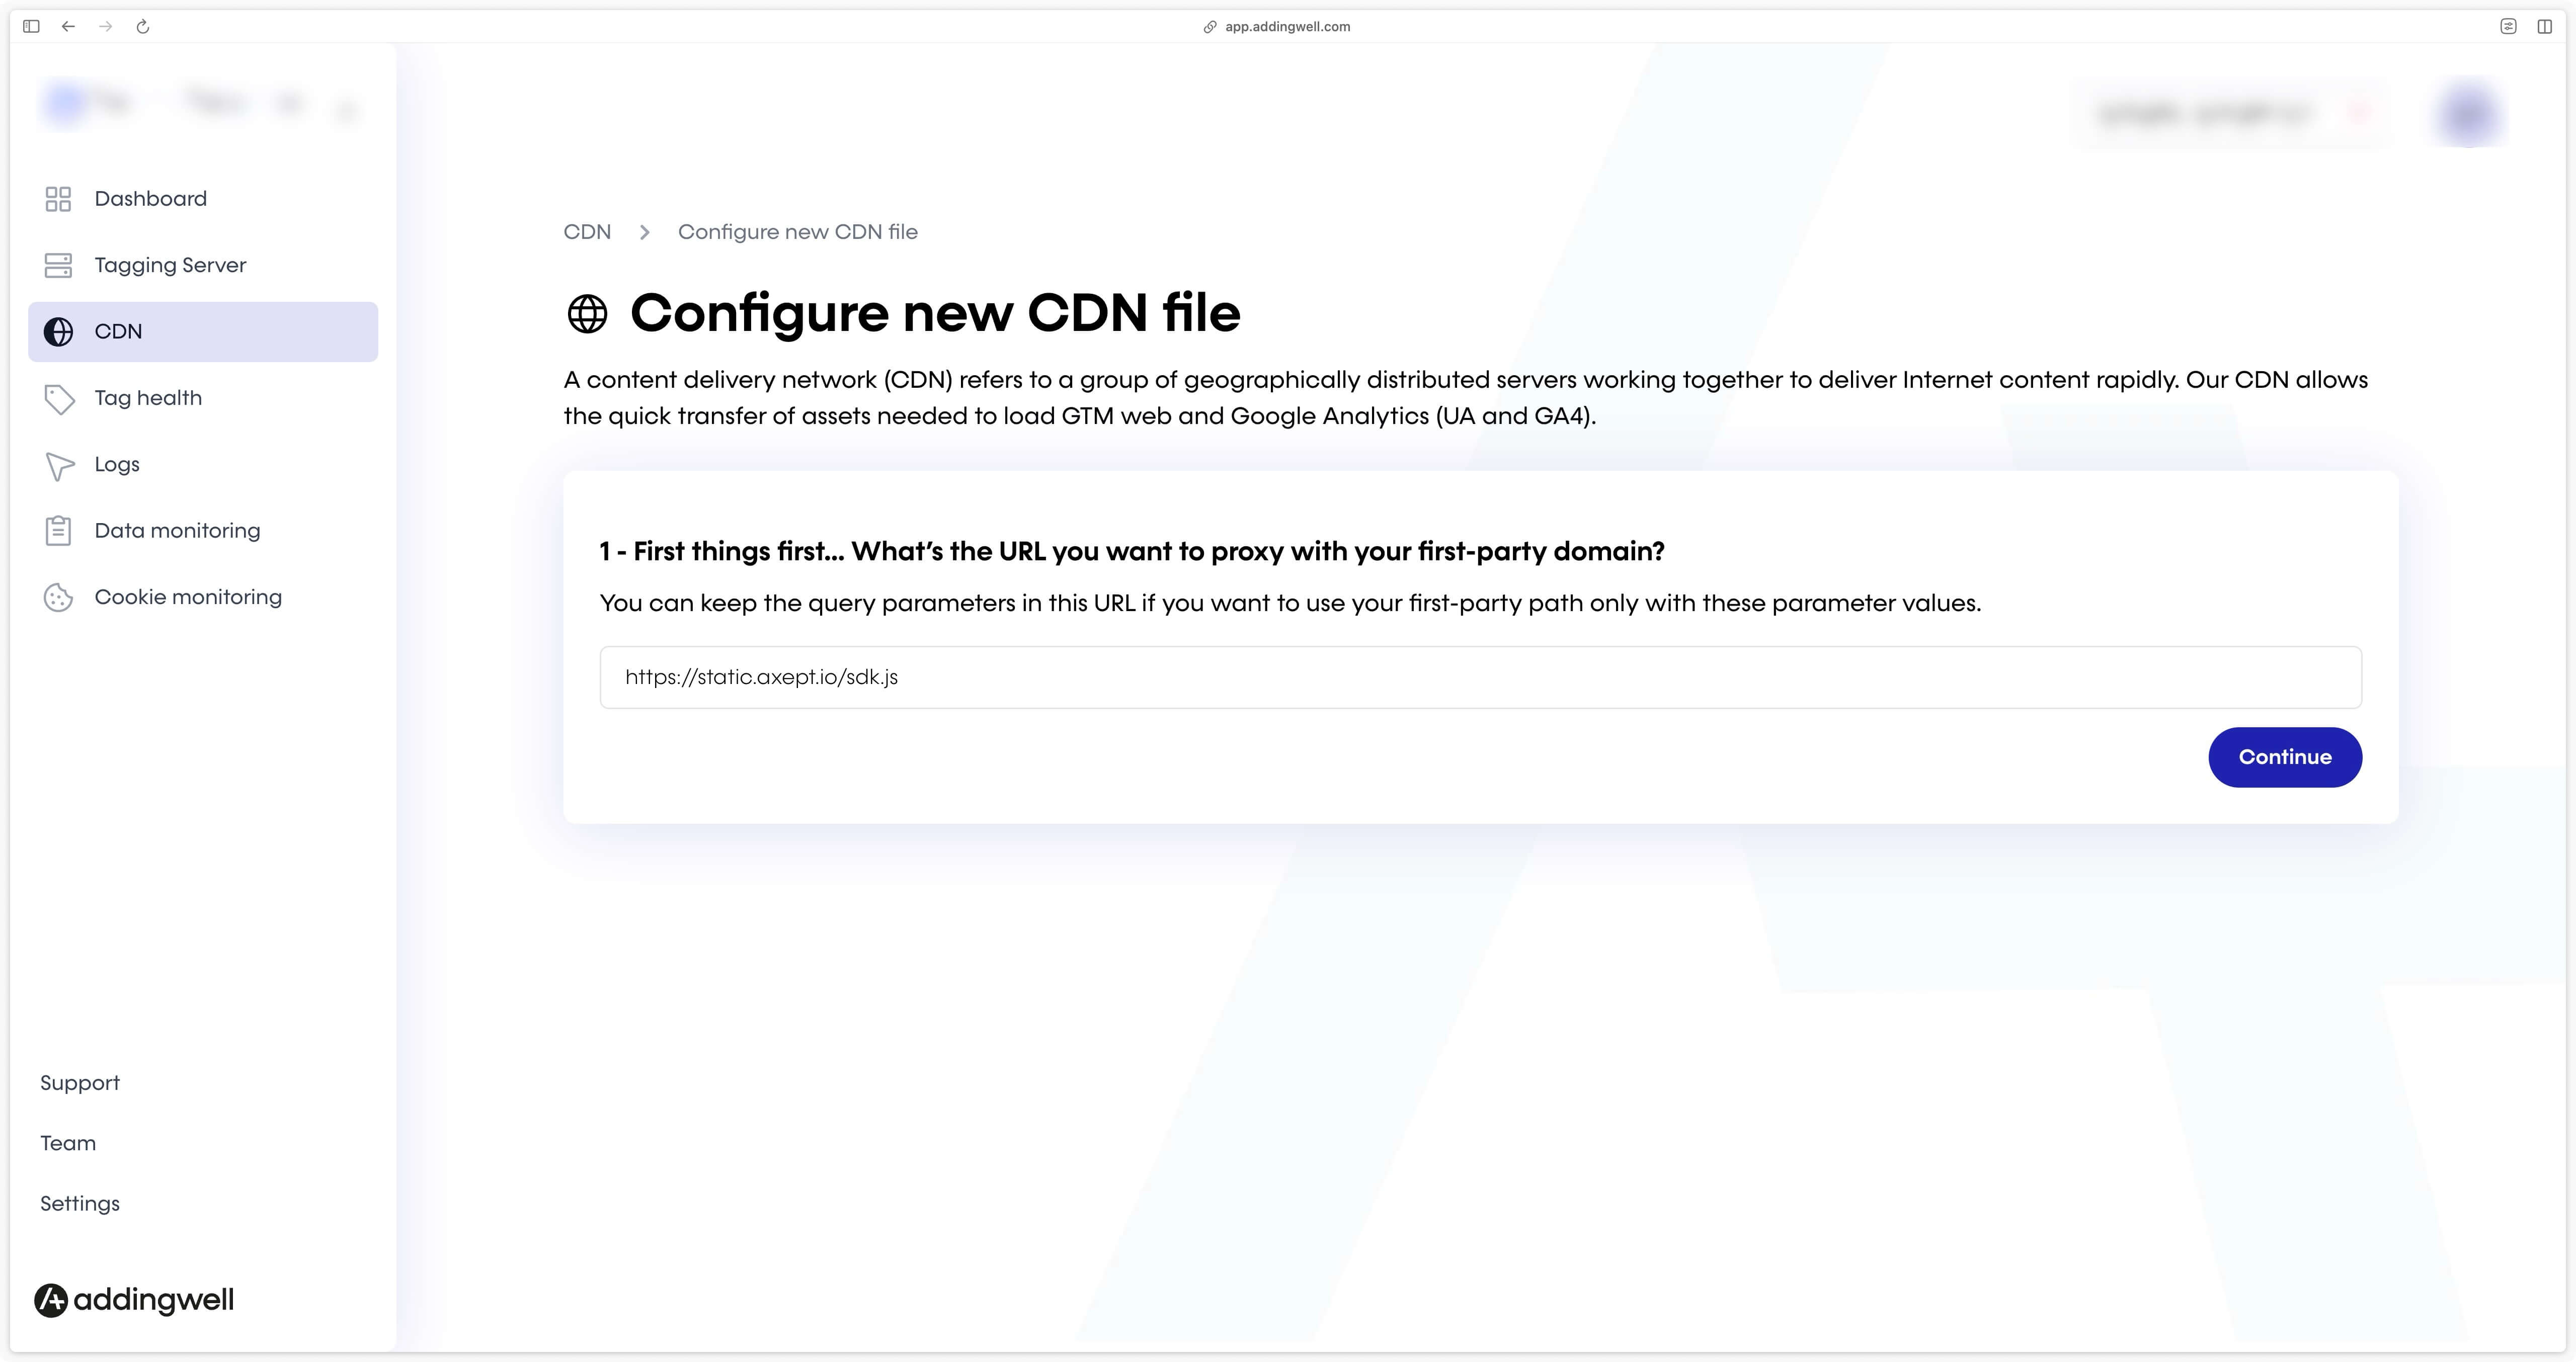
Next, enter the path to this file. For example, you could enter axpt.js.
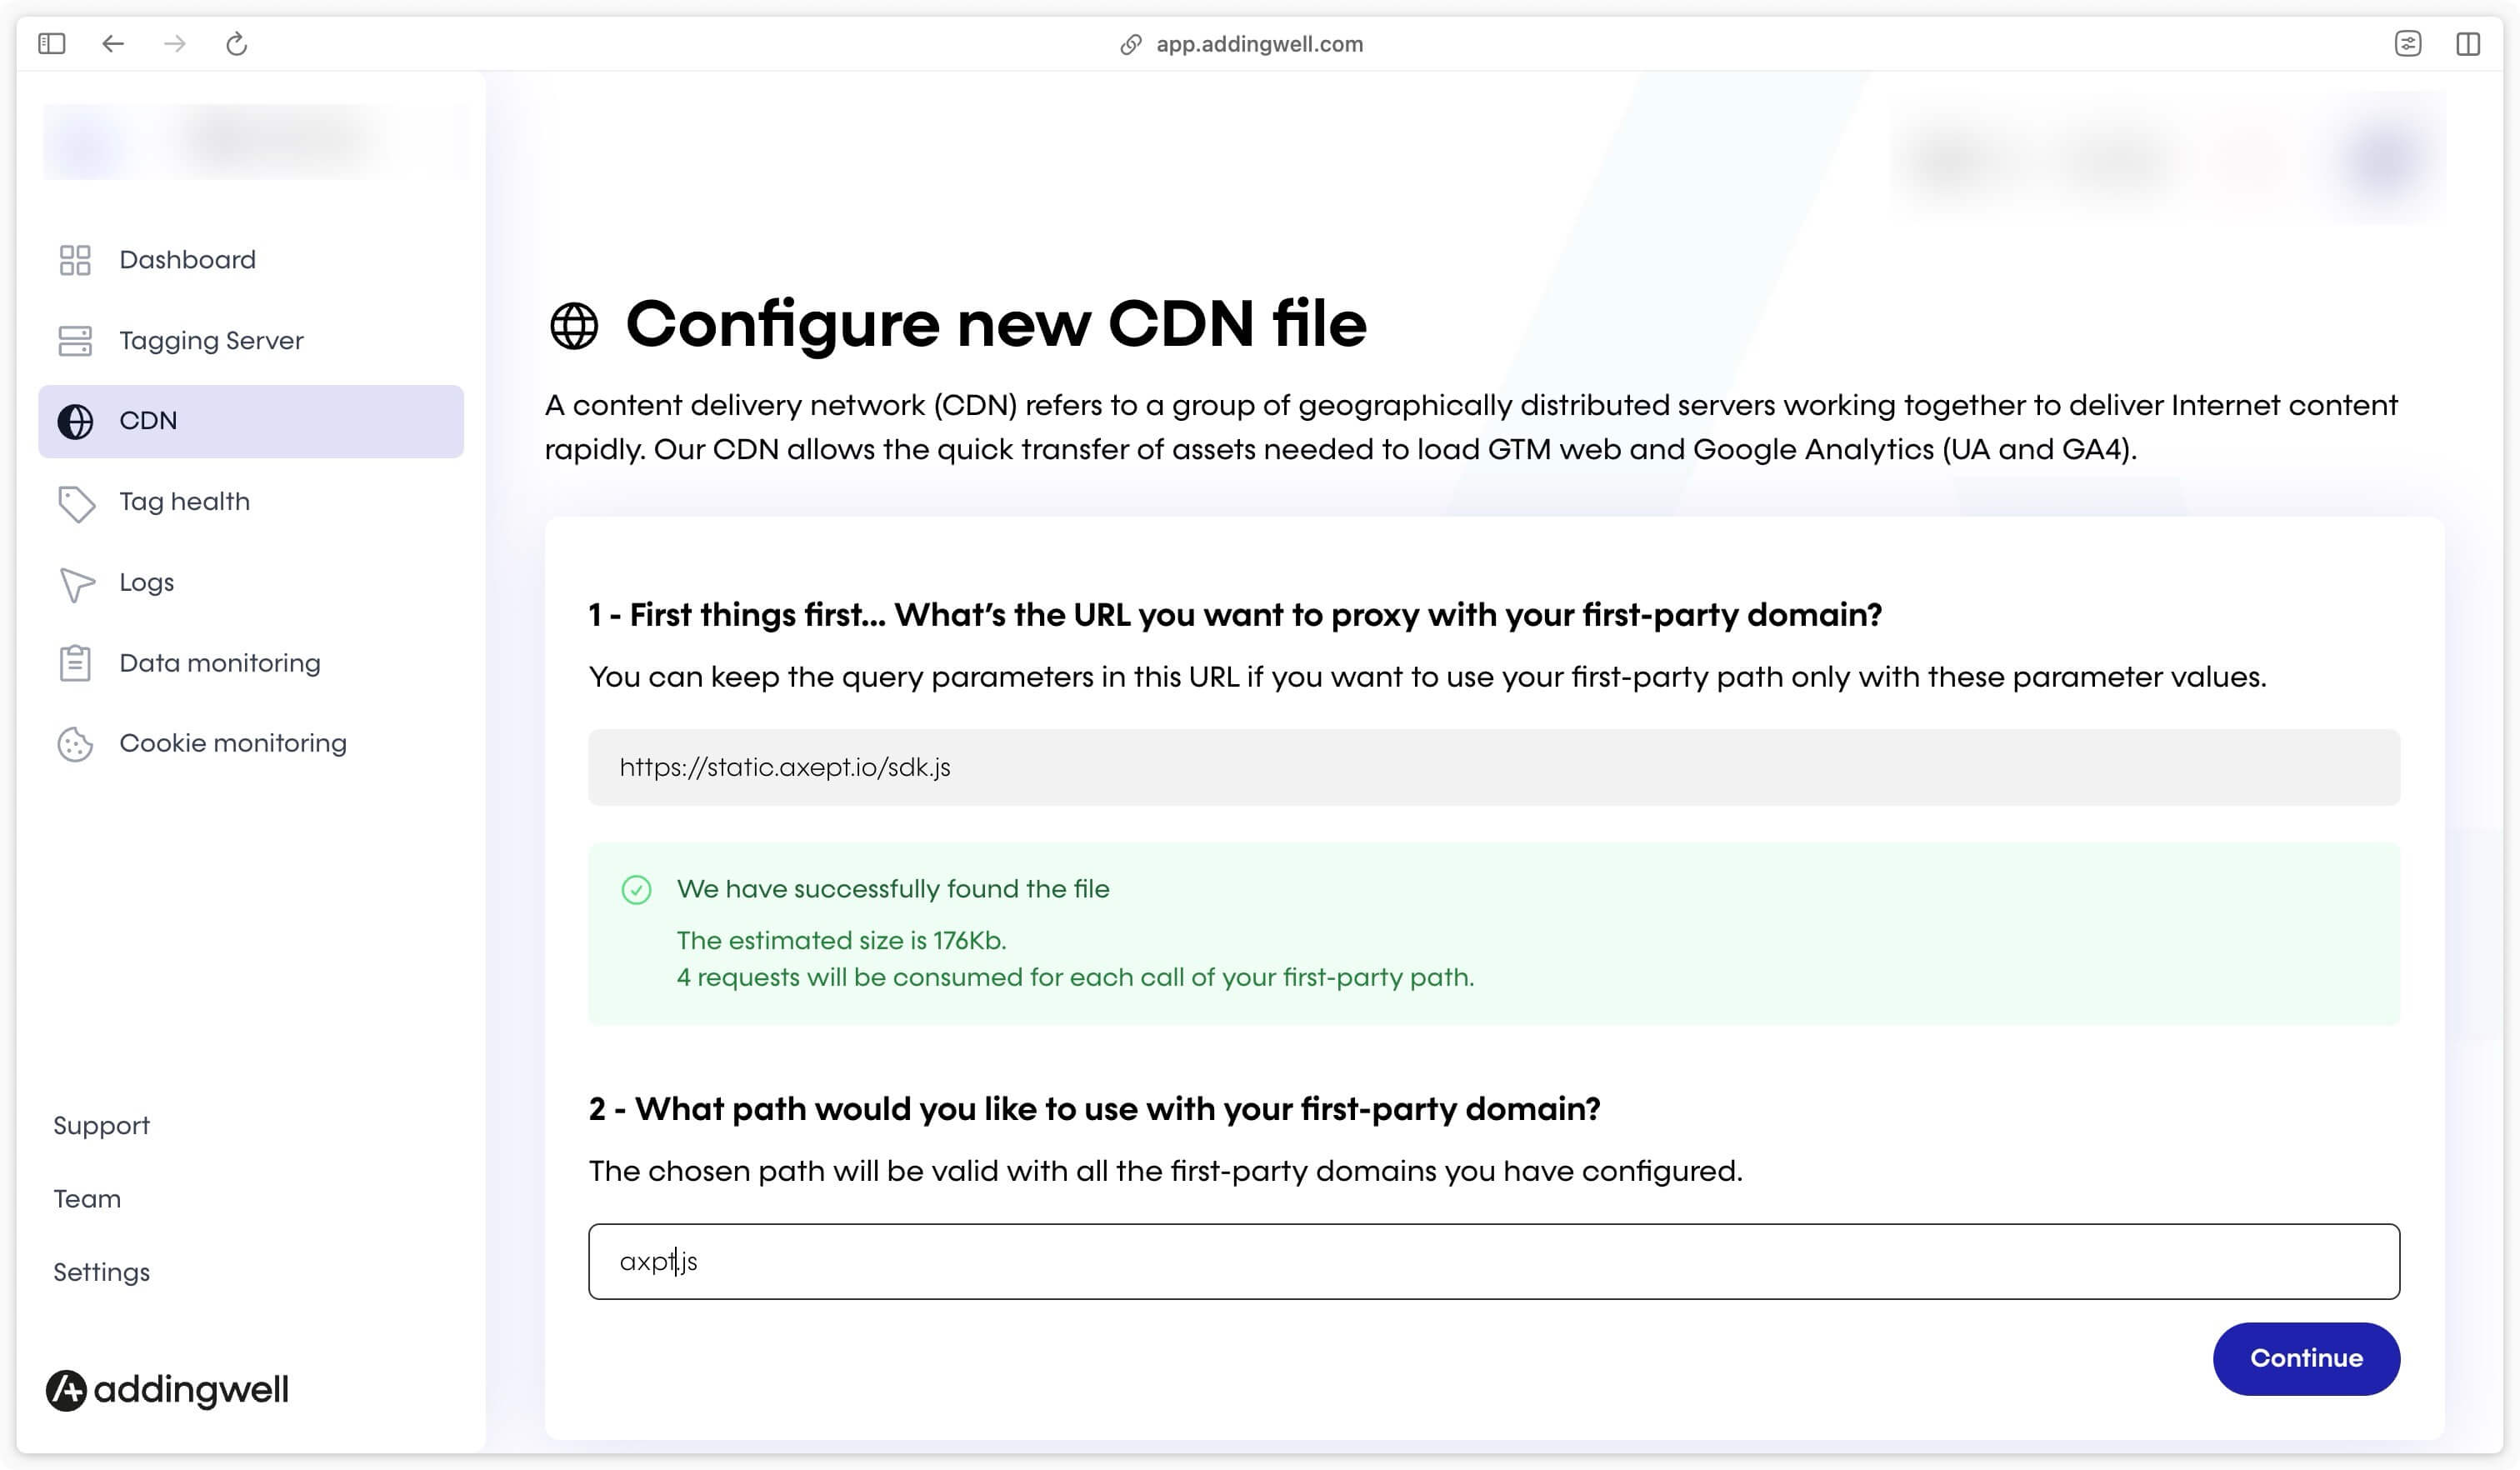
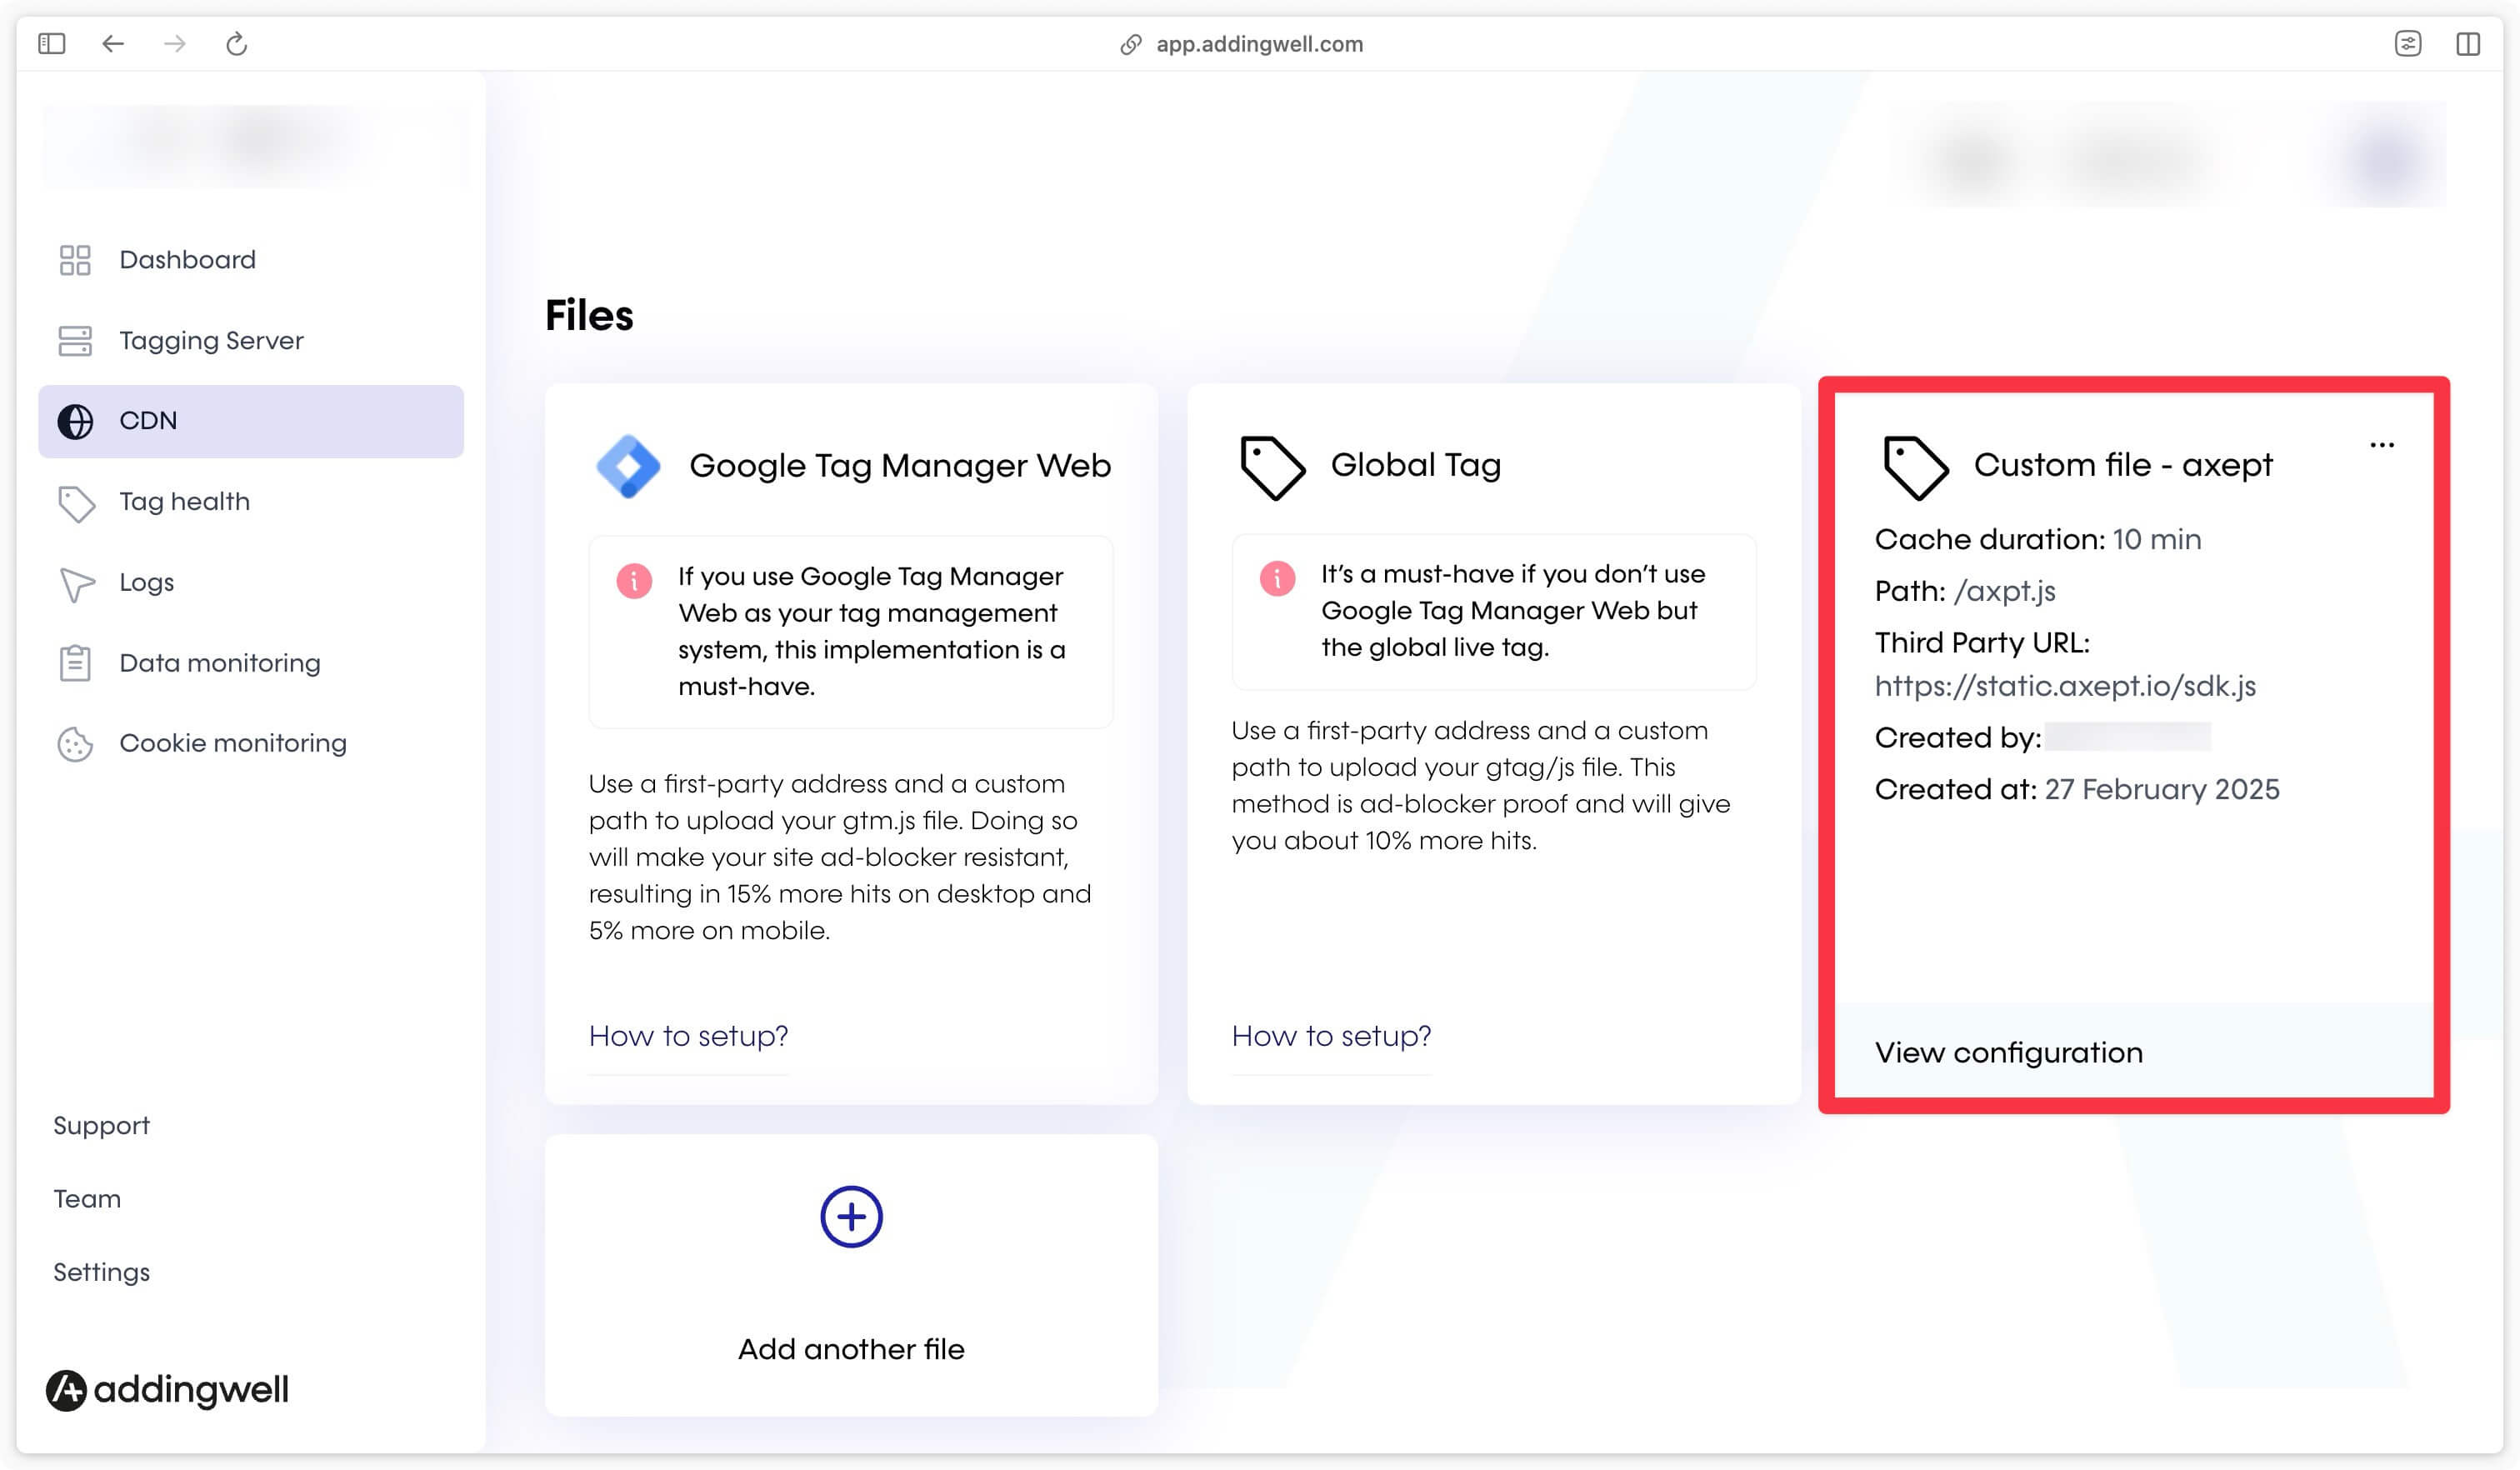
Select the cache of your choice (e.g. 10 minutes) then click Save.
You can control how long the Axeptio script remains cached in the CDN before sending a new request to obtain the latest version of the script.
Reducing this time allows you to obtain the latest version of the script more regularly.
Increasing the duration improves performance for your users, as your files are more likely to be served directly from the cache. A longer duration reduces the number of requests sent to Axeptio.

You can now access this file by calling the URL https://subdomain.domain.com/axpt.js.
Axeptio CMP configuration
With Axeptio CMP tag
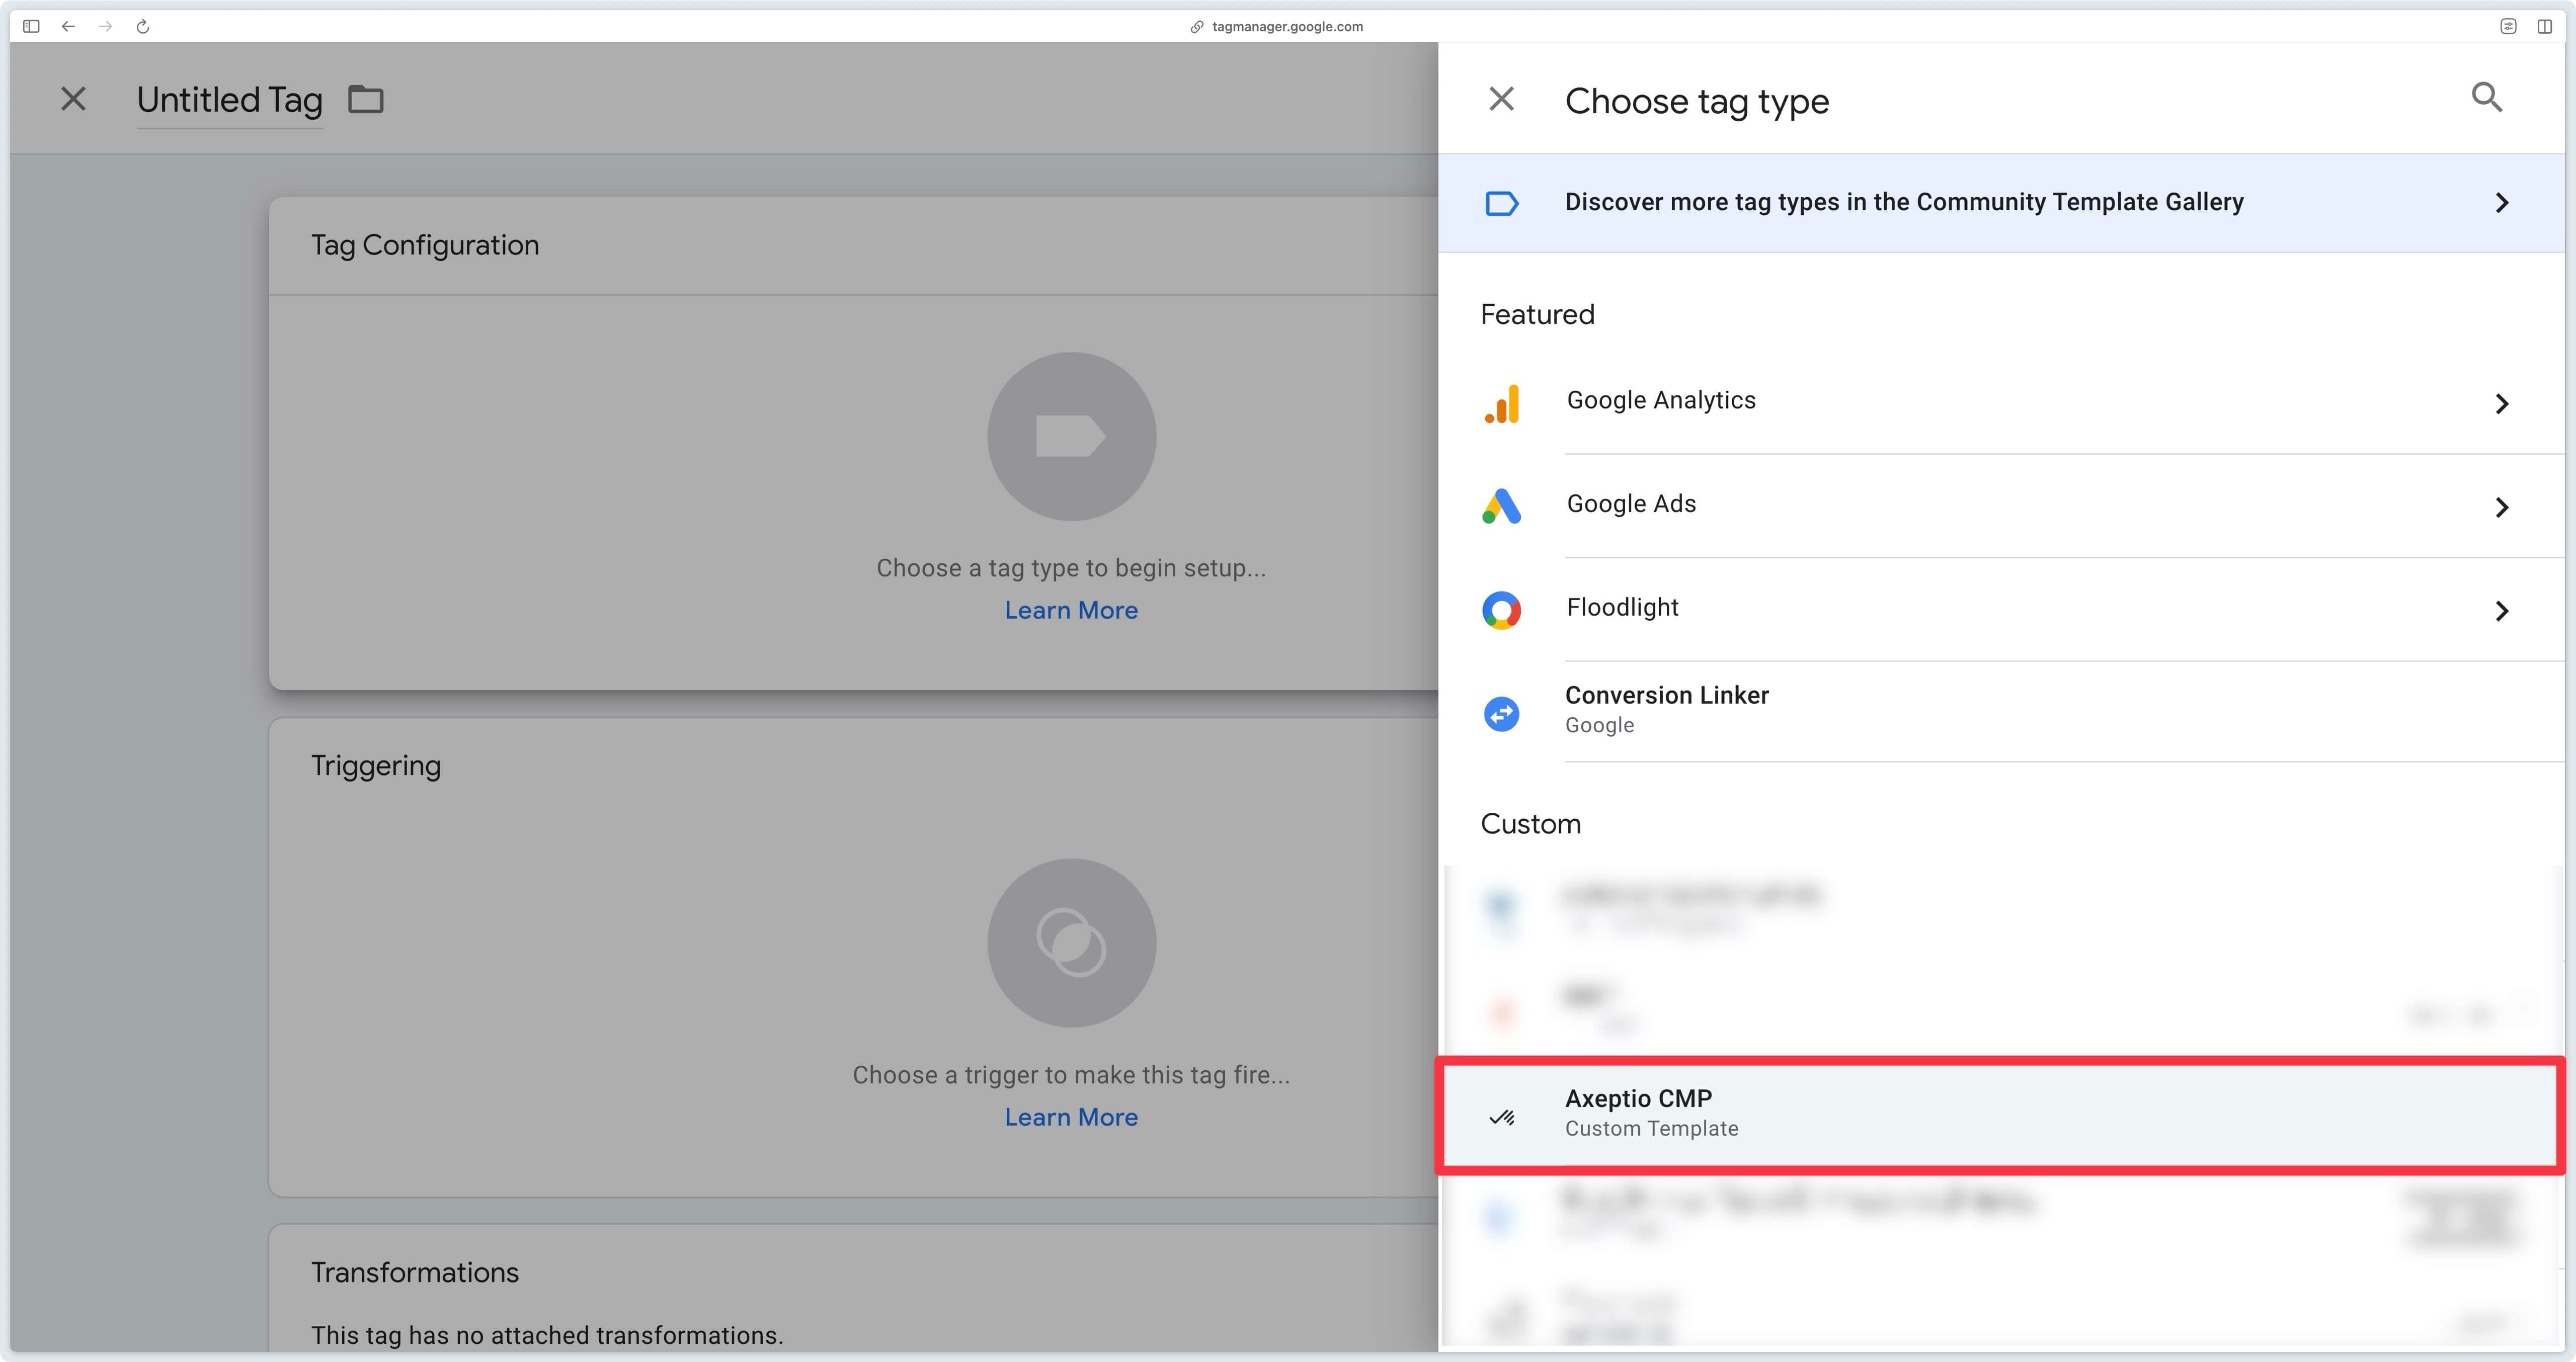
In your GTM Web container, in the Tags section, click on New.
In the gallery, search for the Axeptio CMP tag.
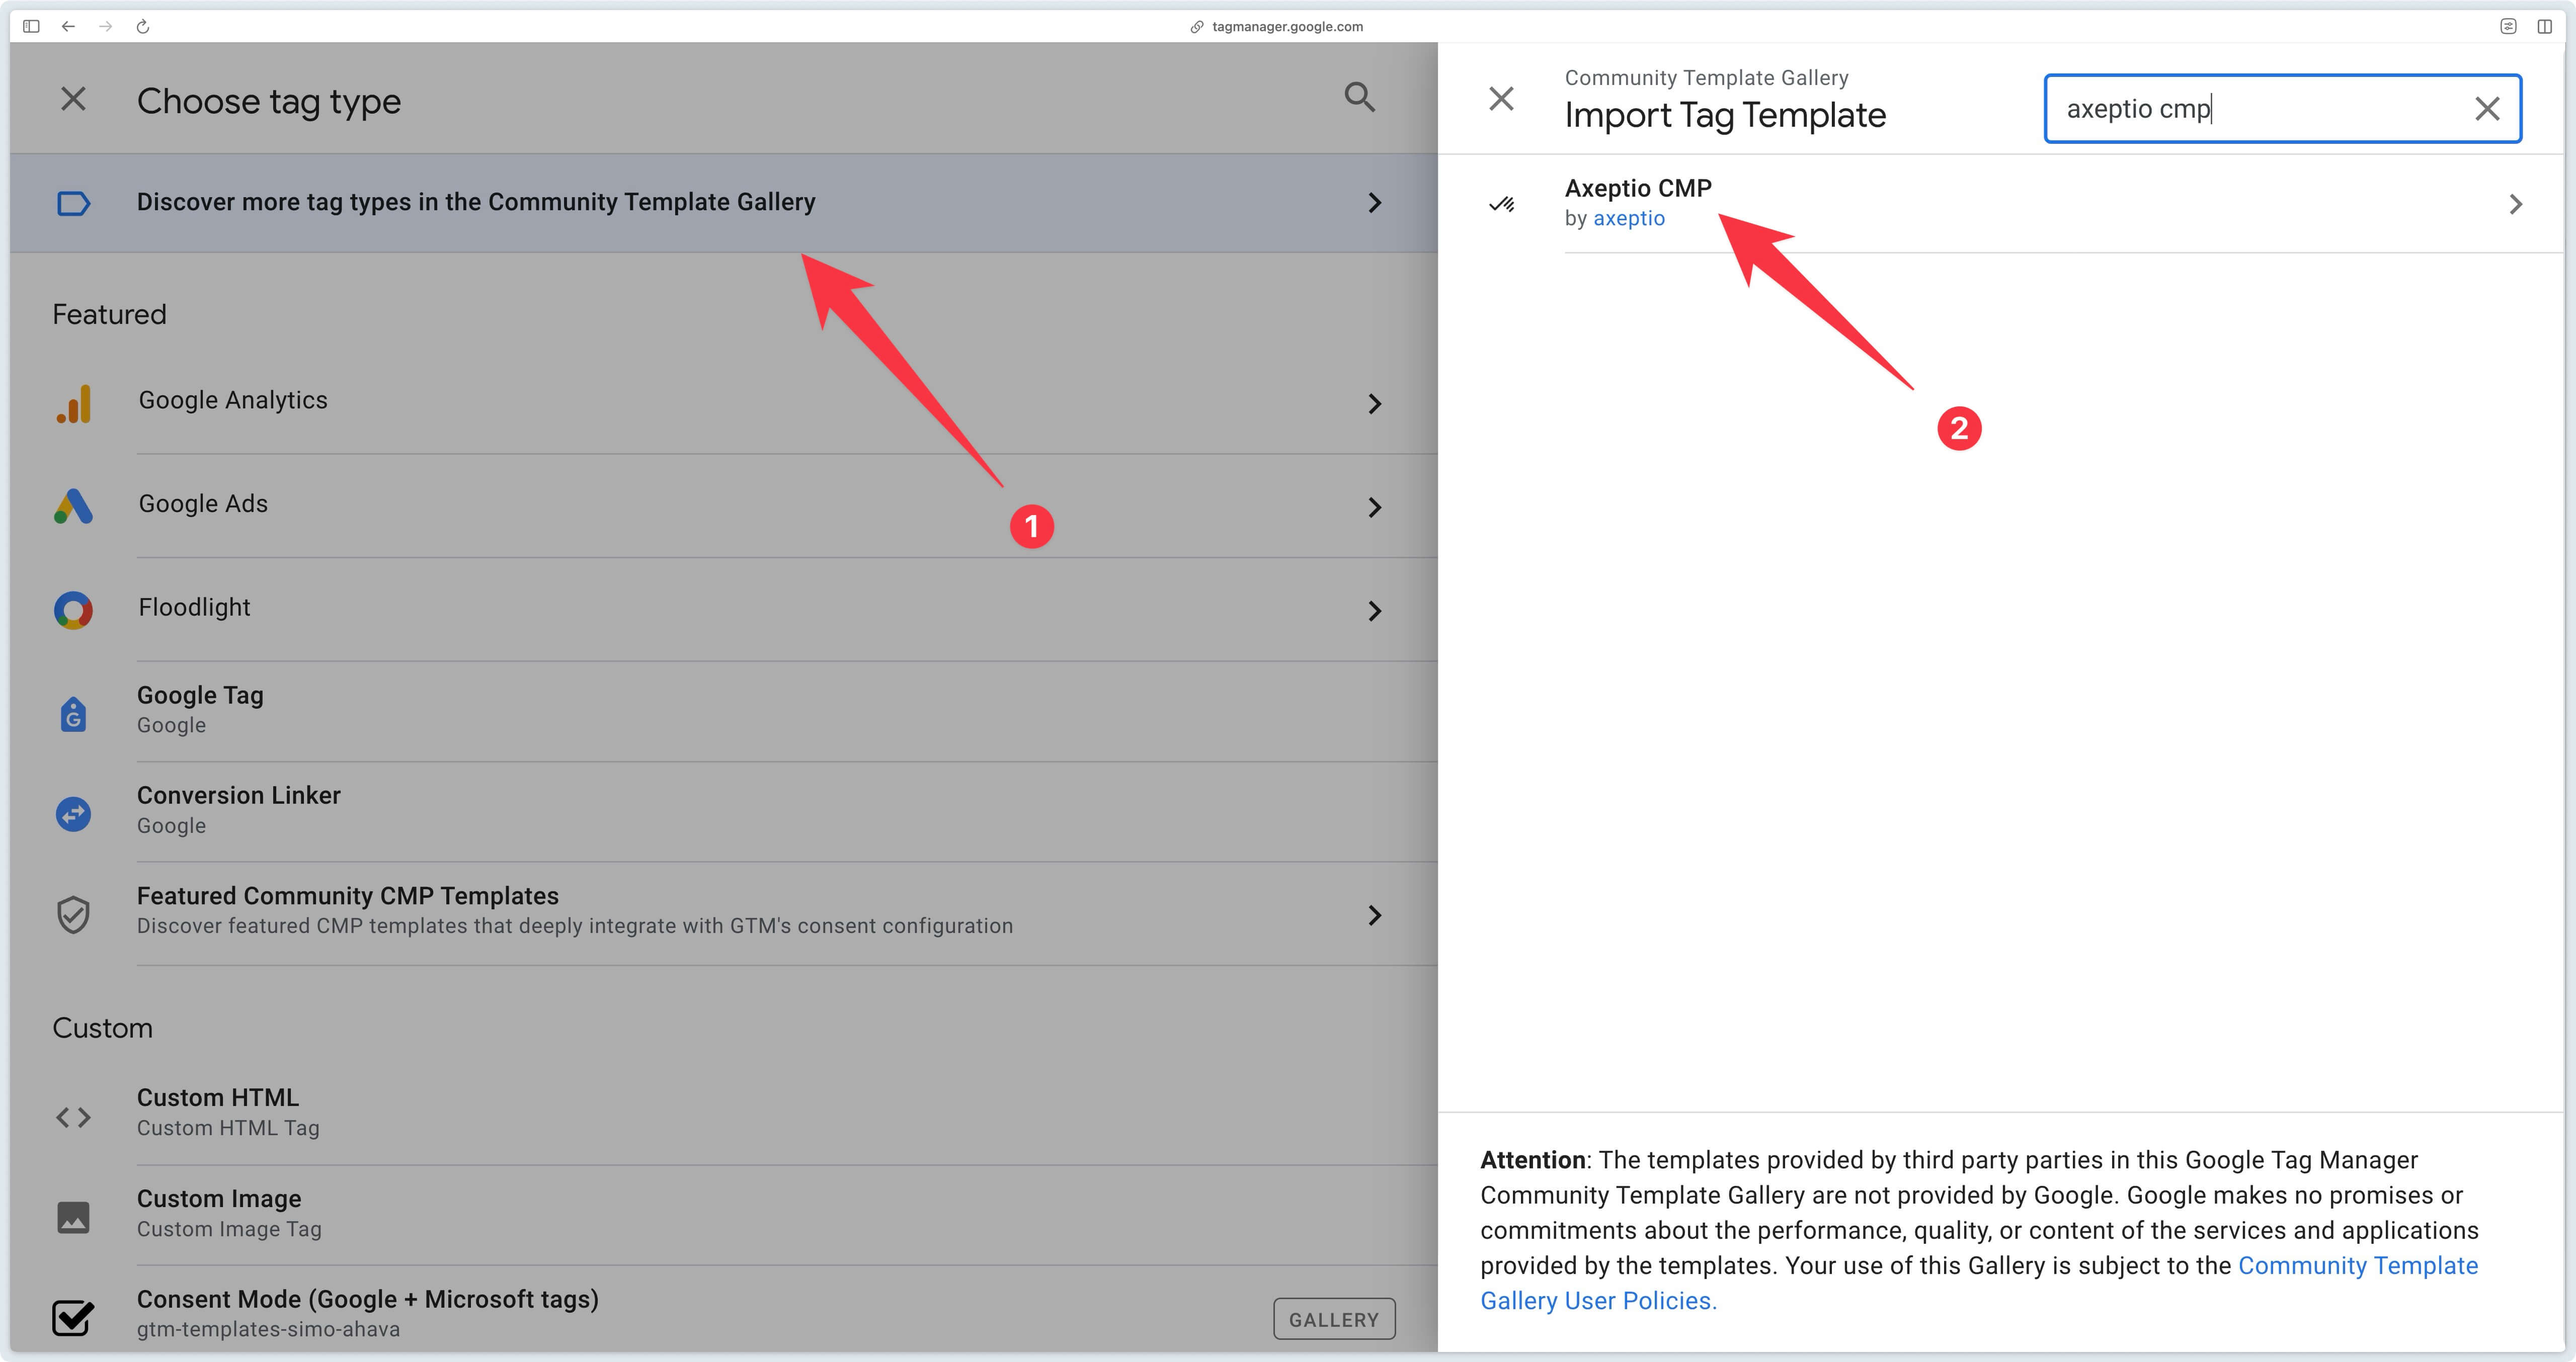
Then click on Add to workspace.
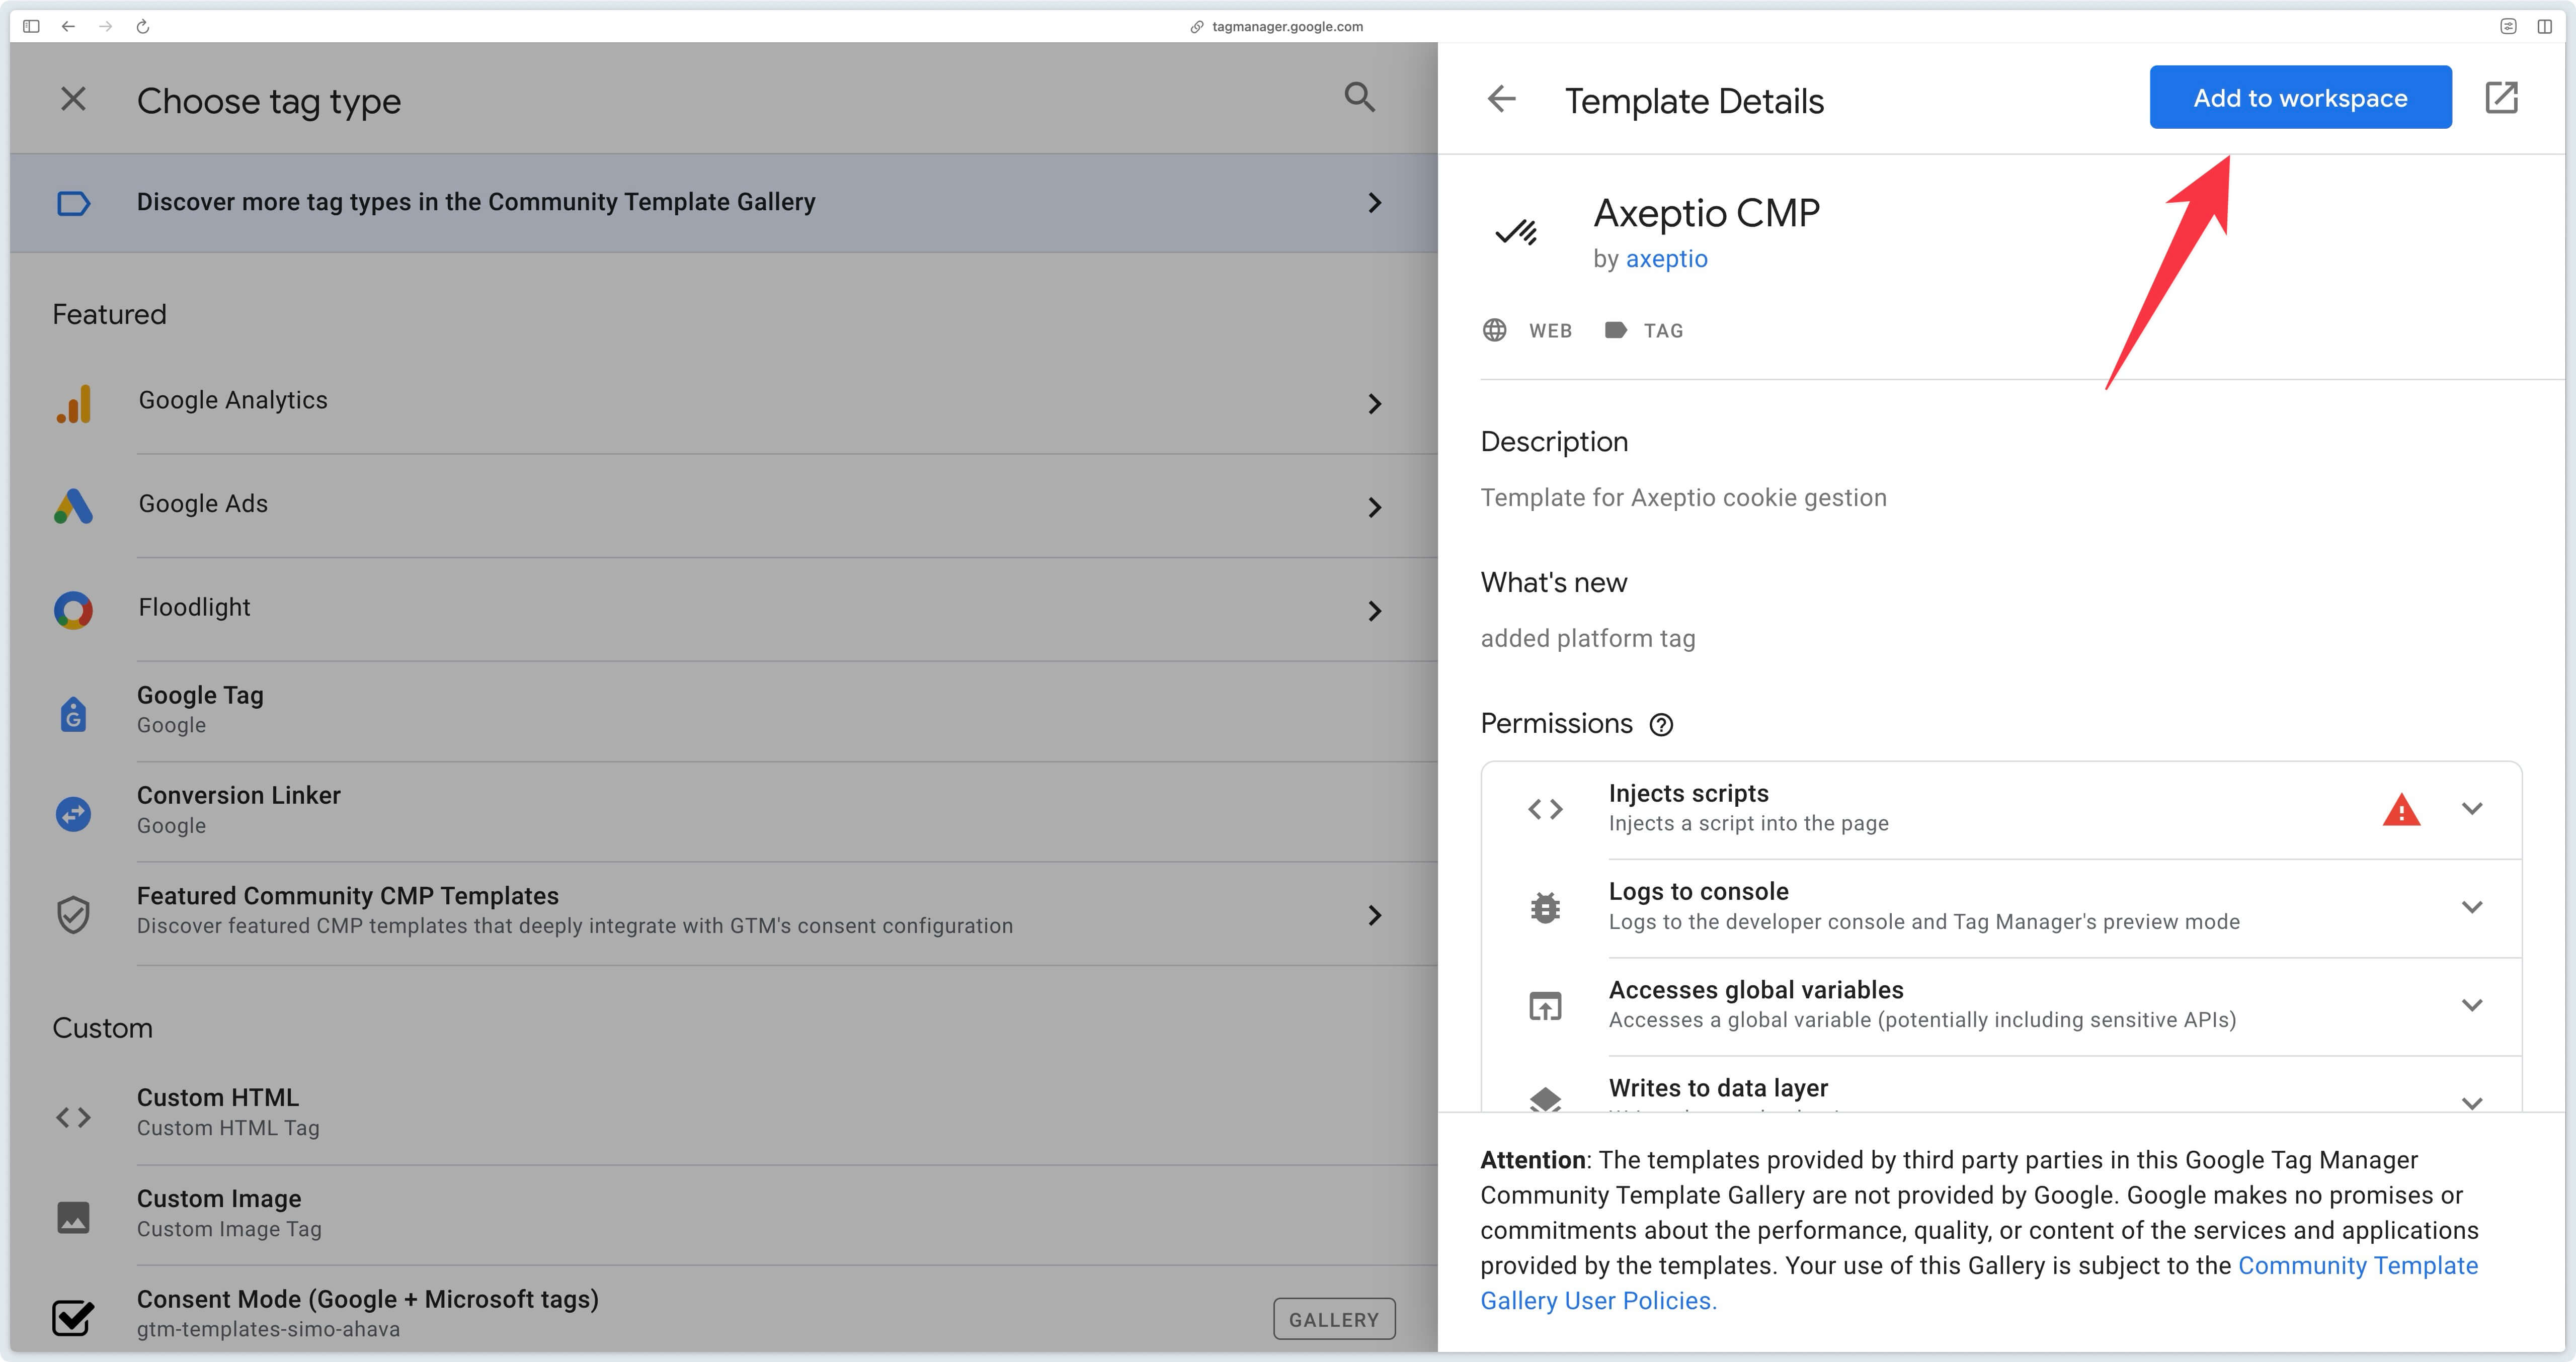
Go to the GTM Web gallery, add the Axeptio CMP tag.
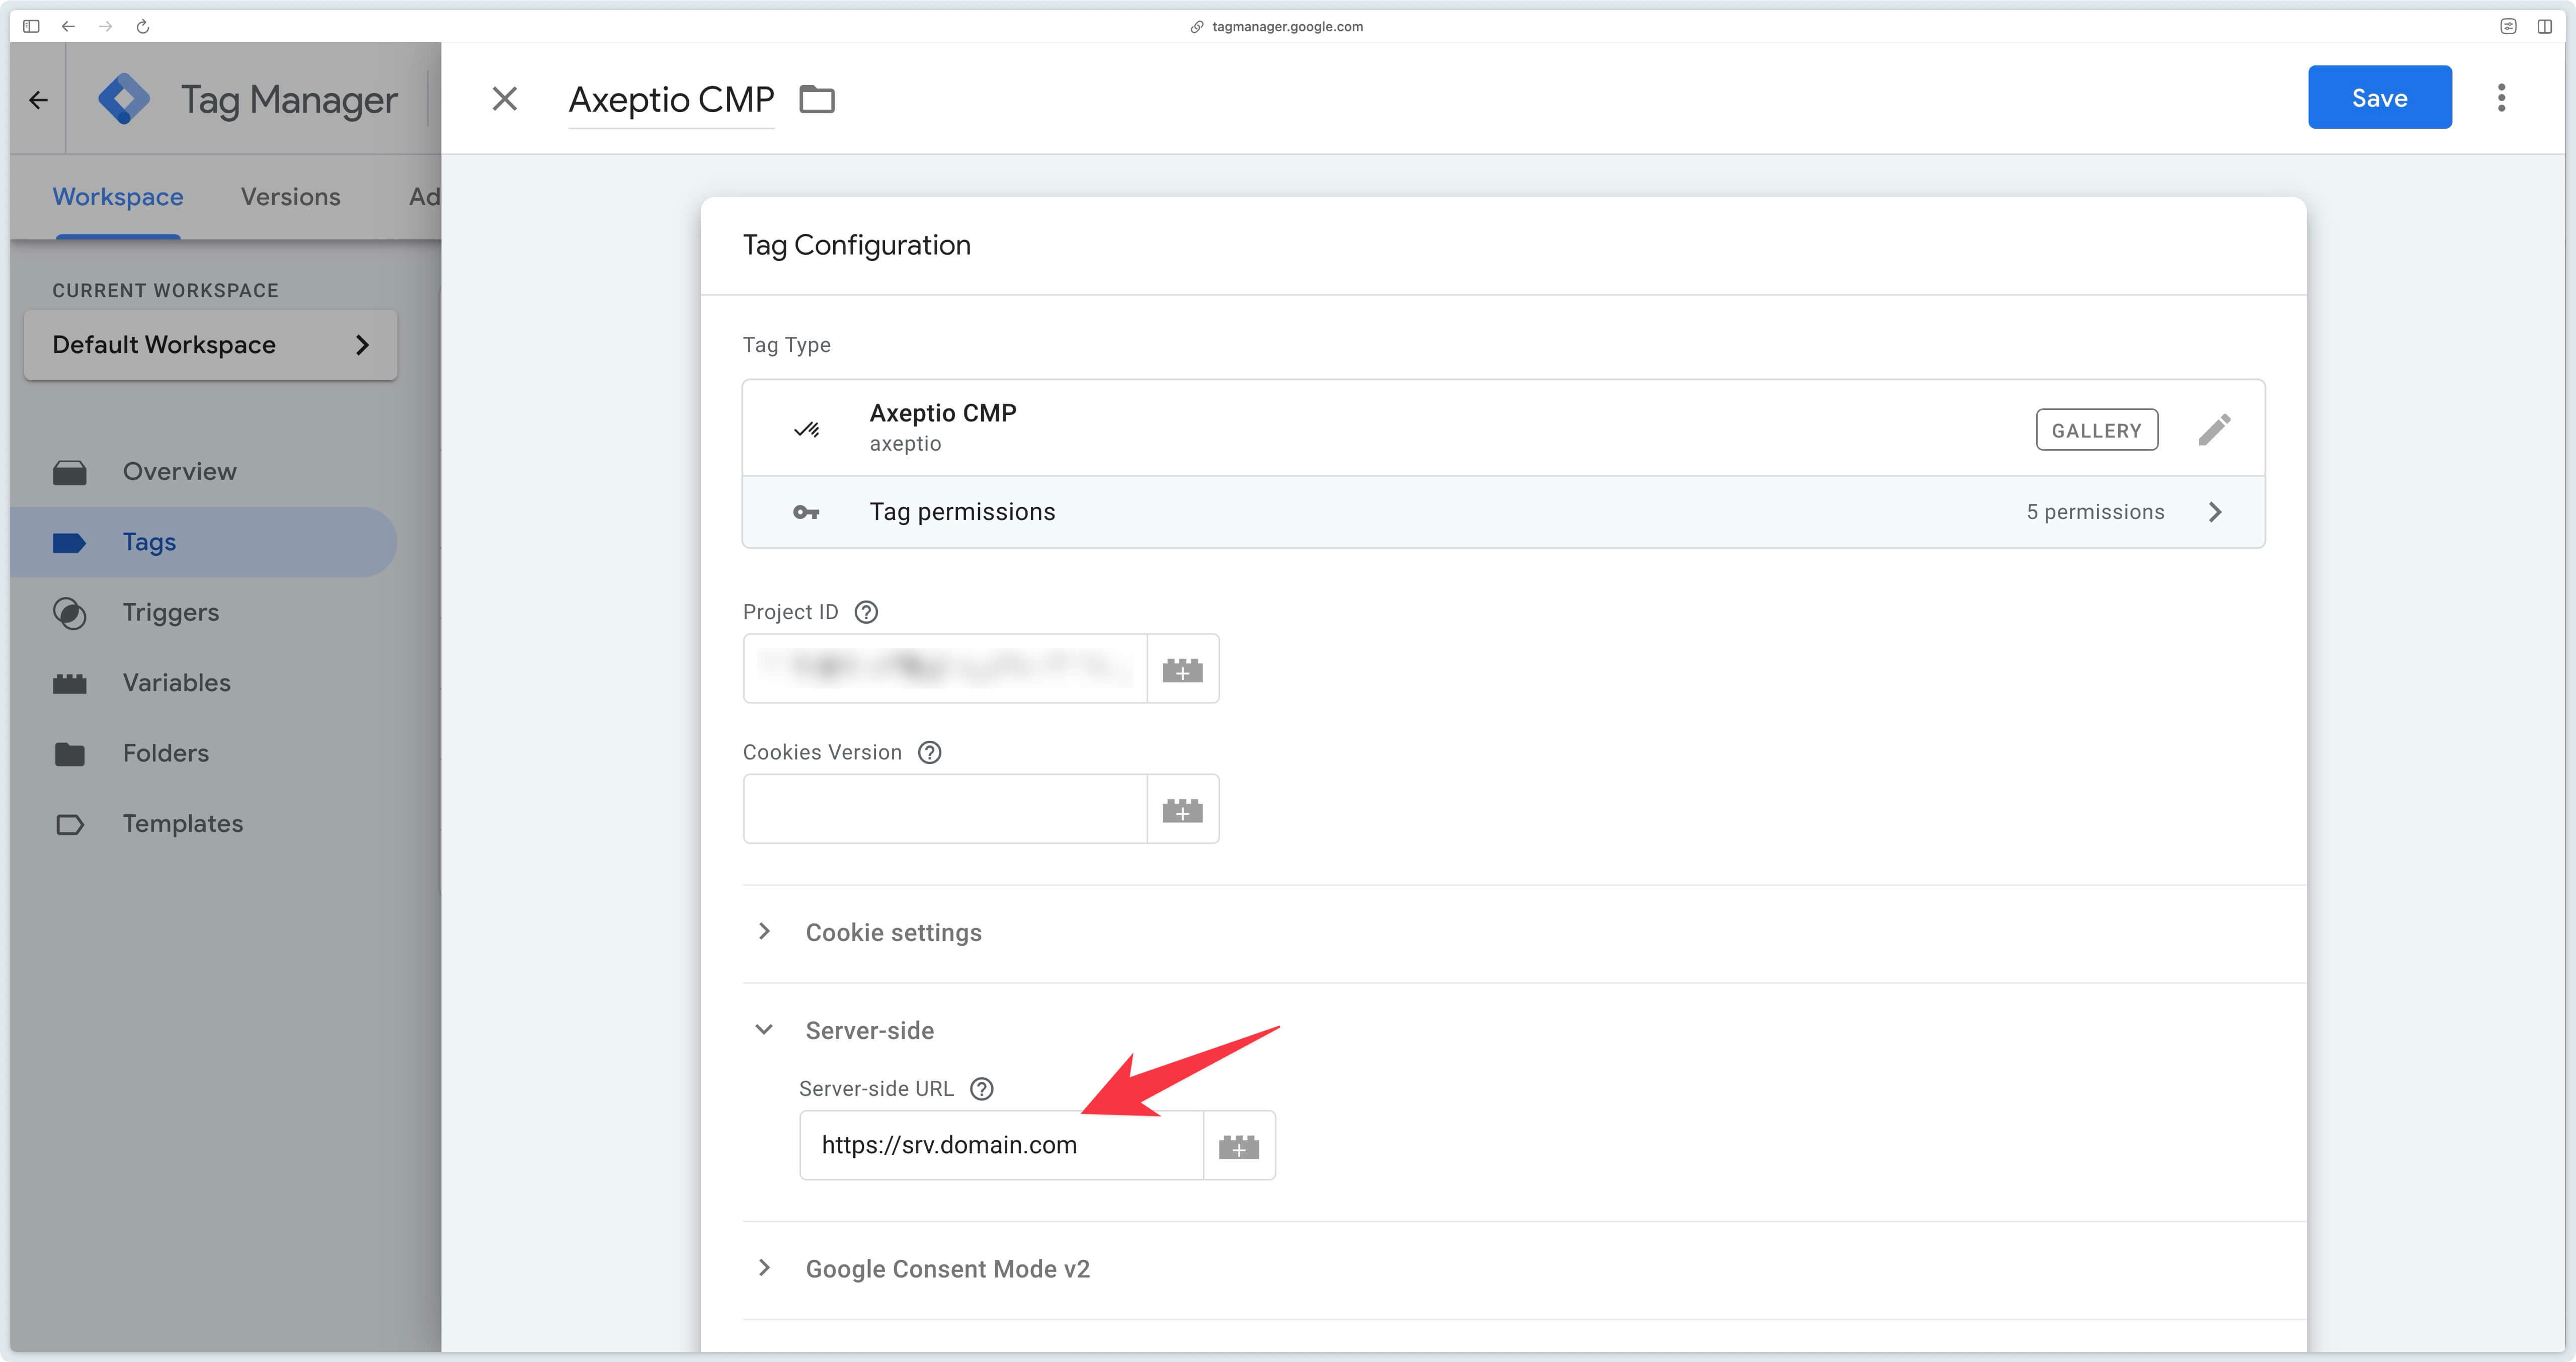
For this tag to communicate correctly with your server, you need to add your server’s URL (example: https://subdomain.domain.com) in the Server-side section.
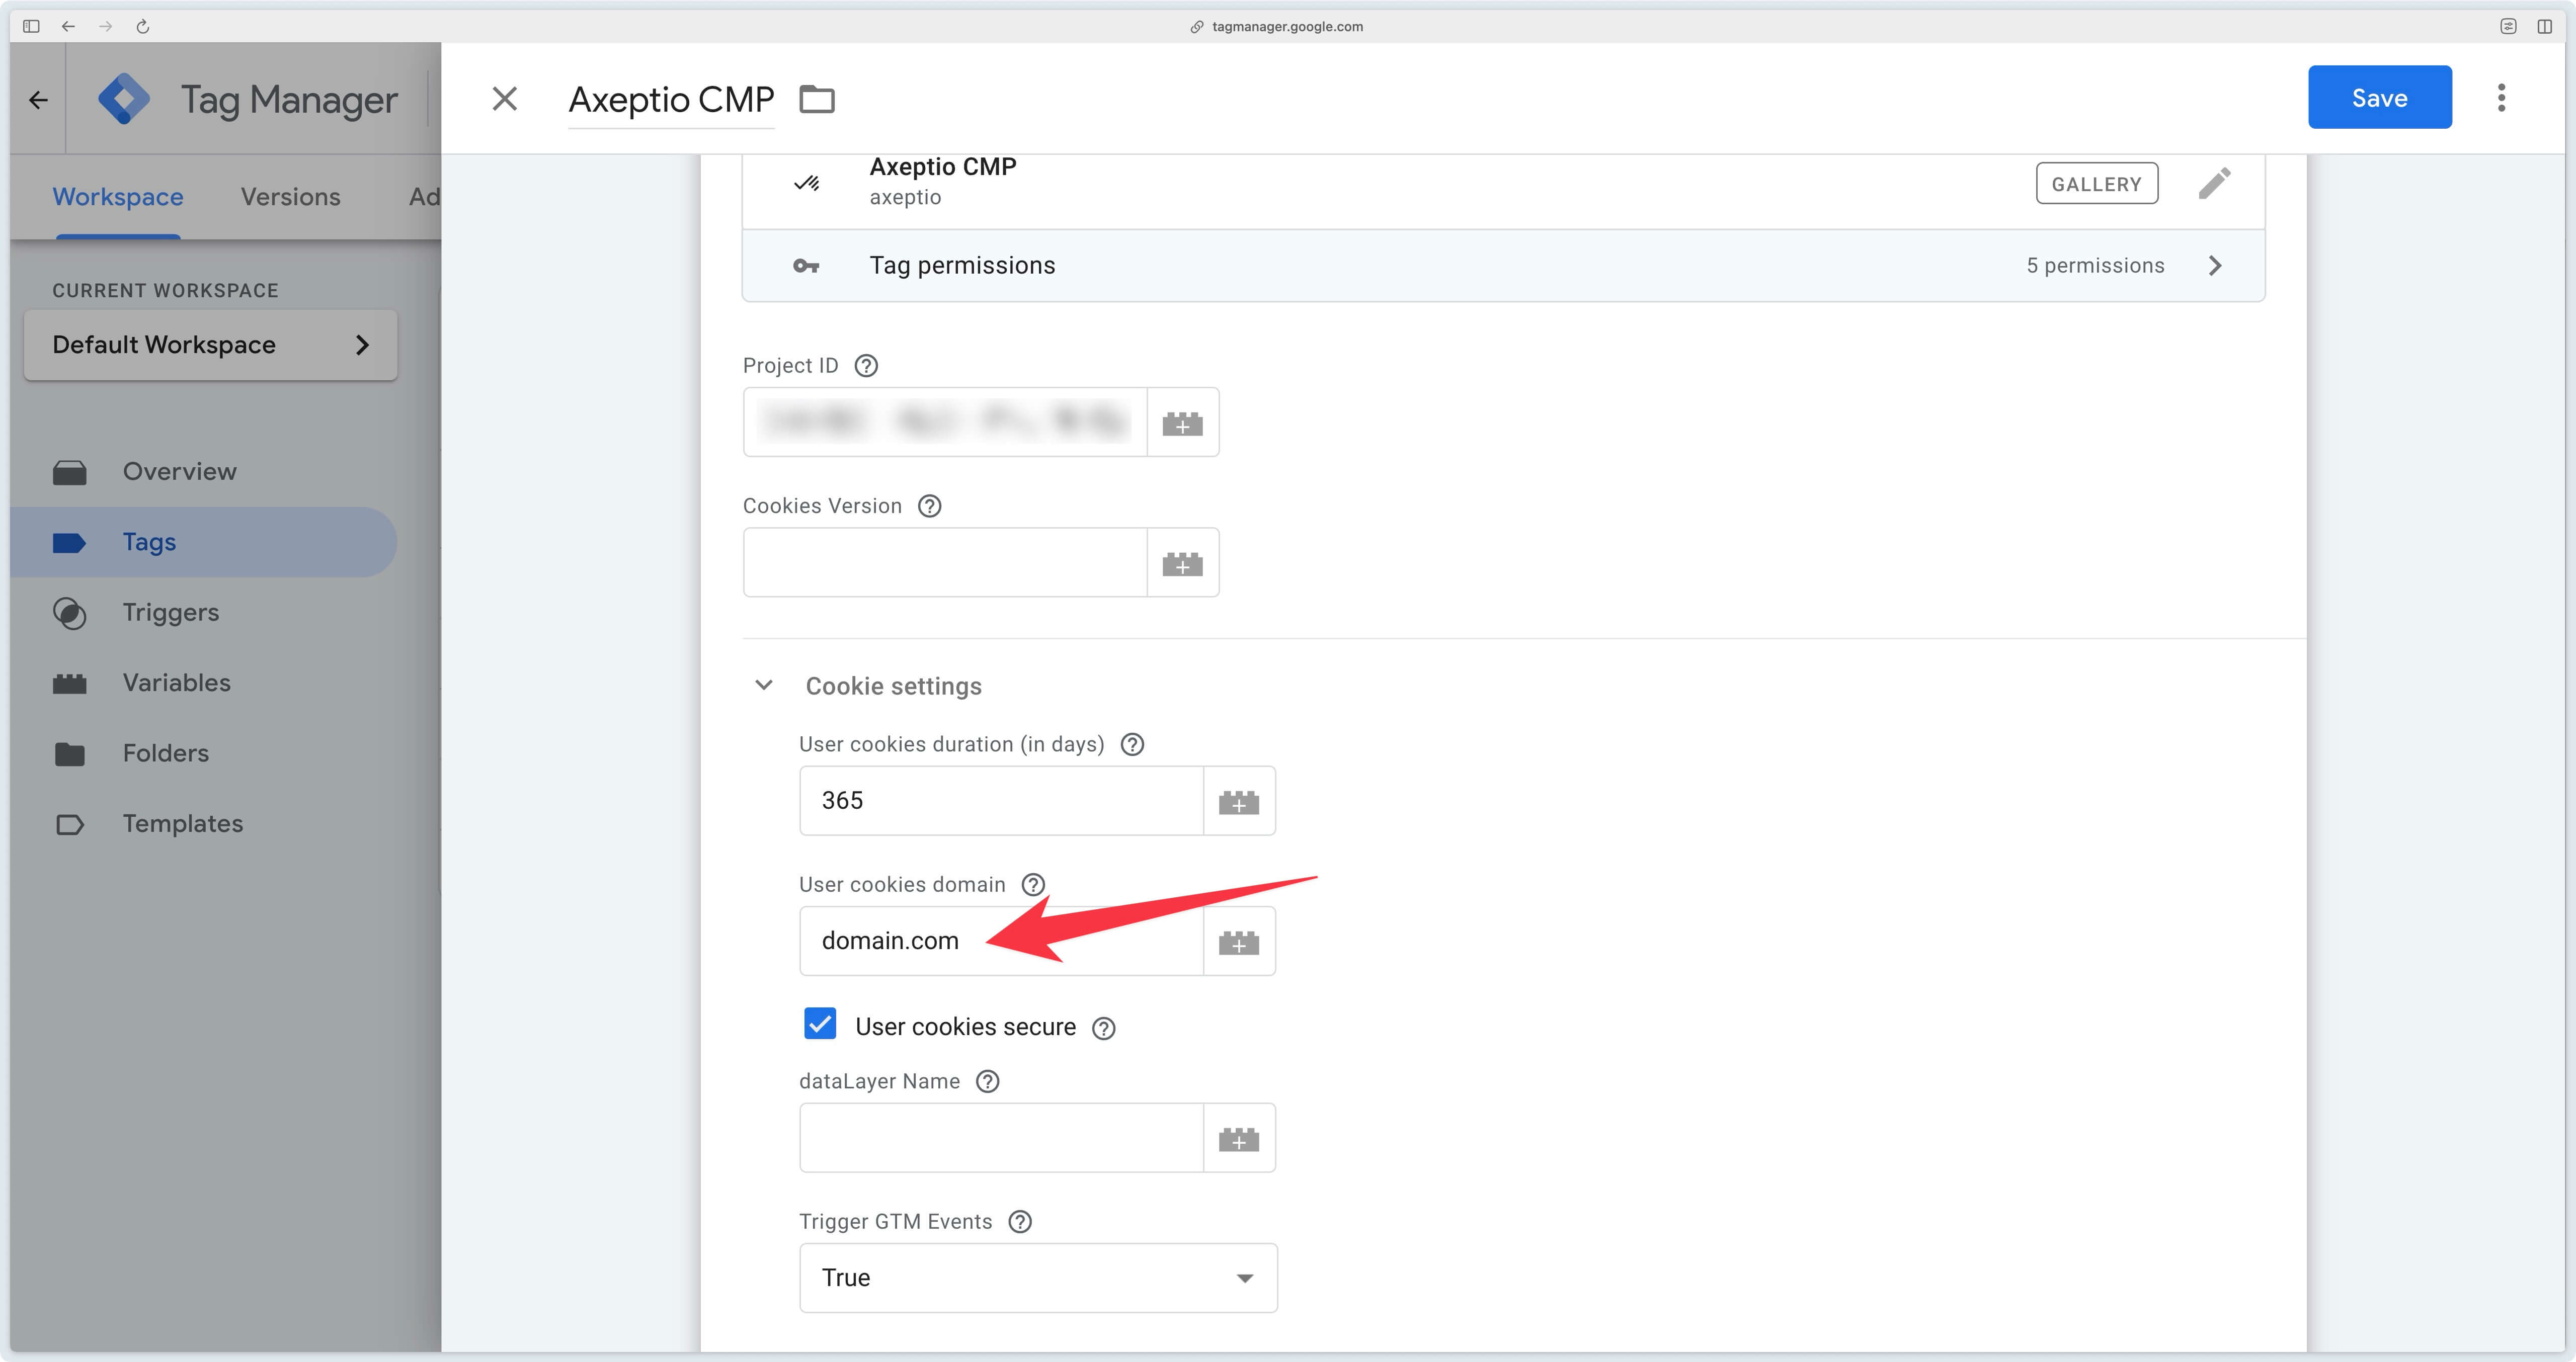
In the Cookie settings section, fill in the User cookies domain field with your main domain (e.g. domain.com).
This tag should be triggrered on Consent Initilization - All Pages.
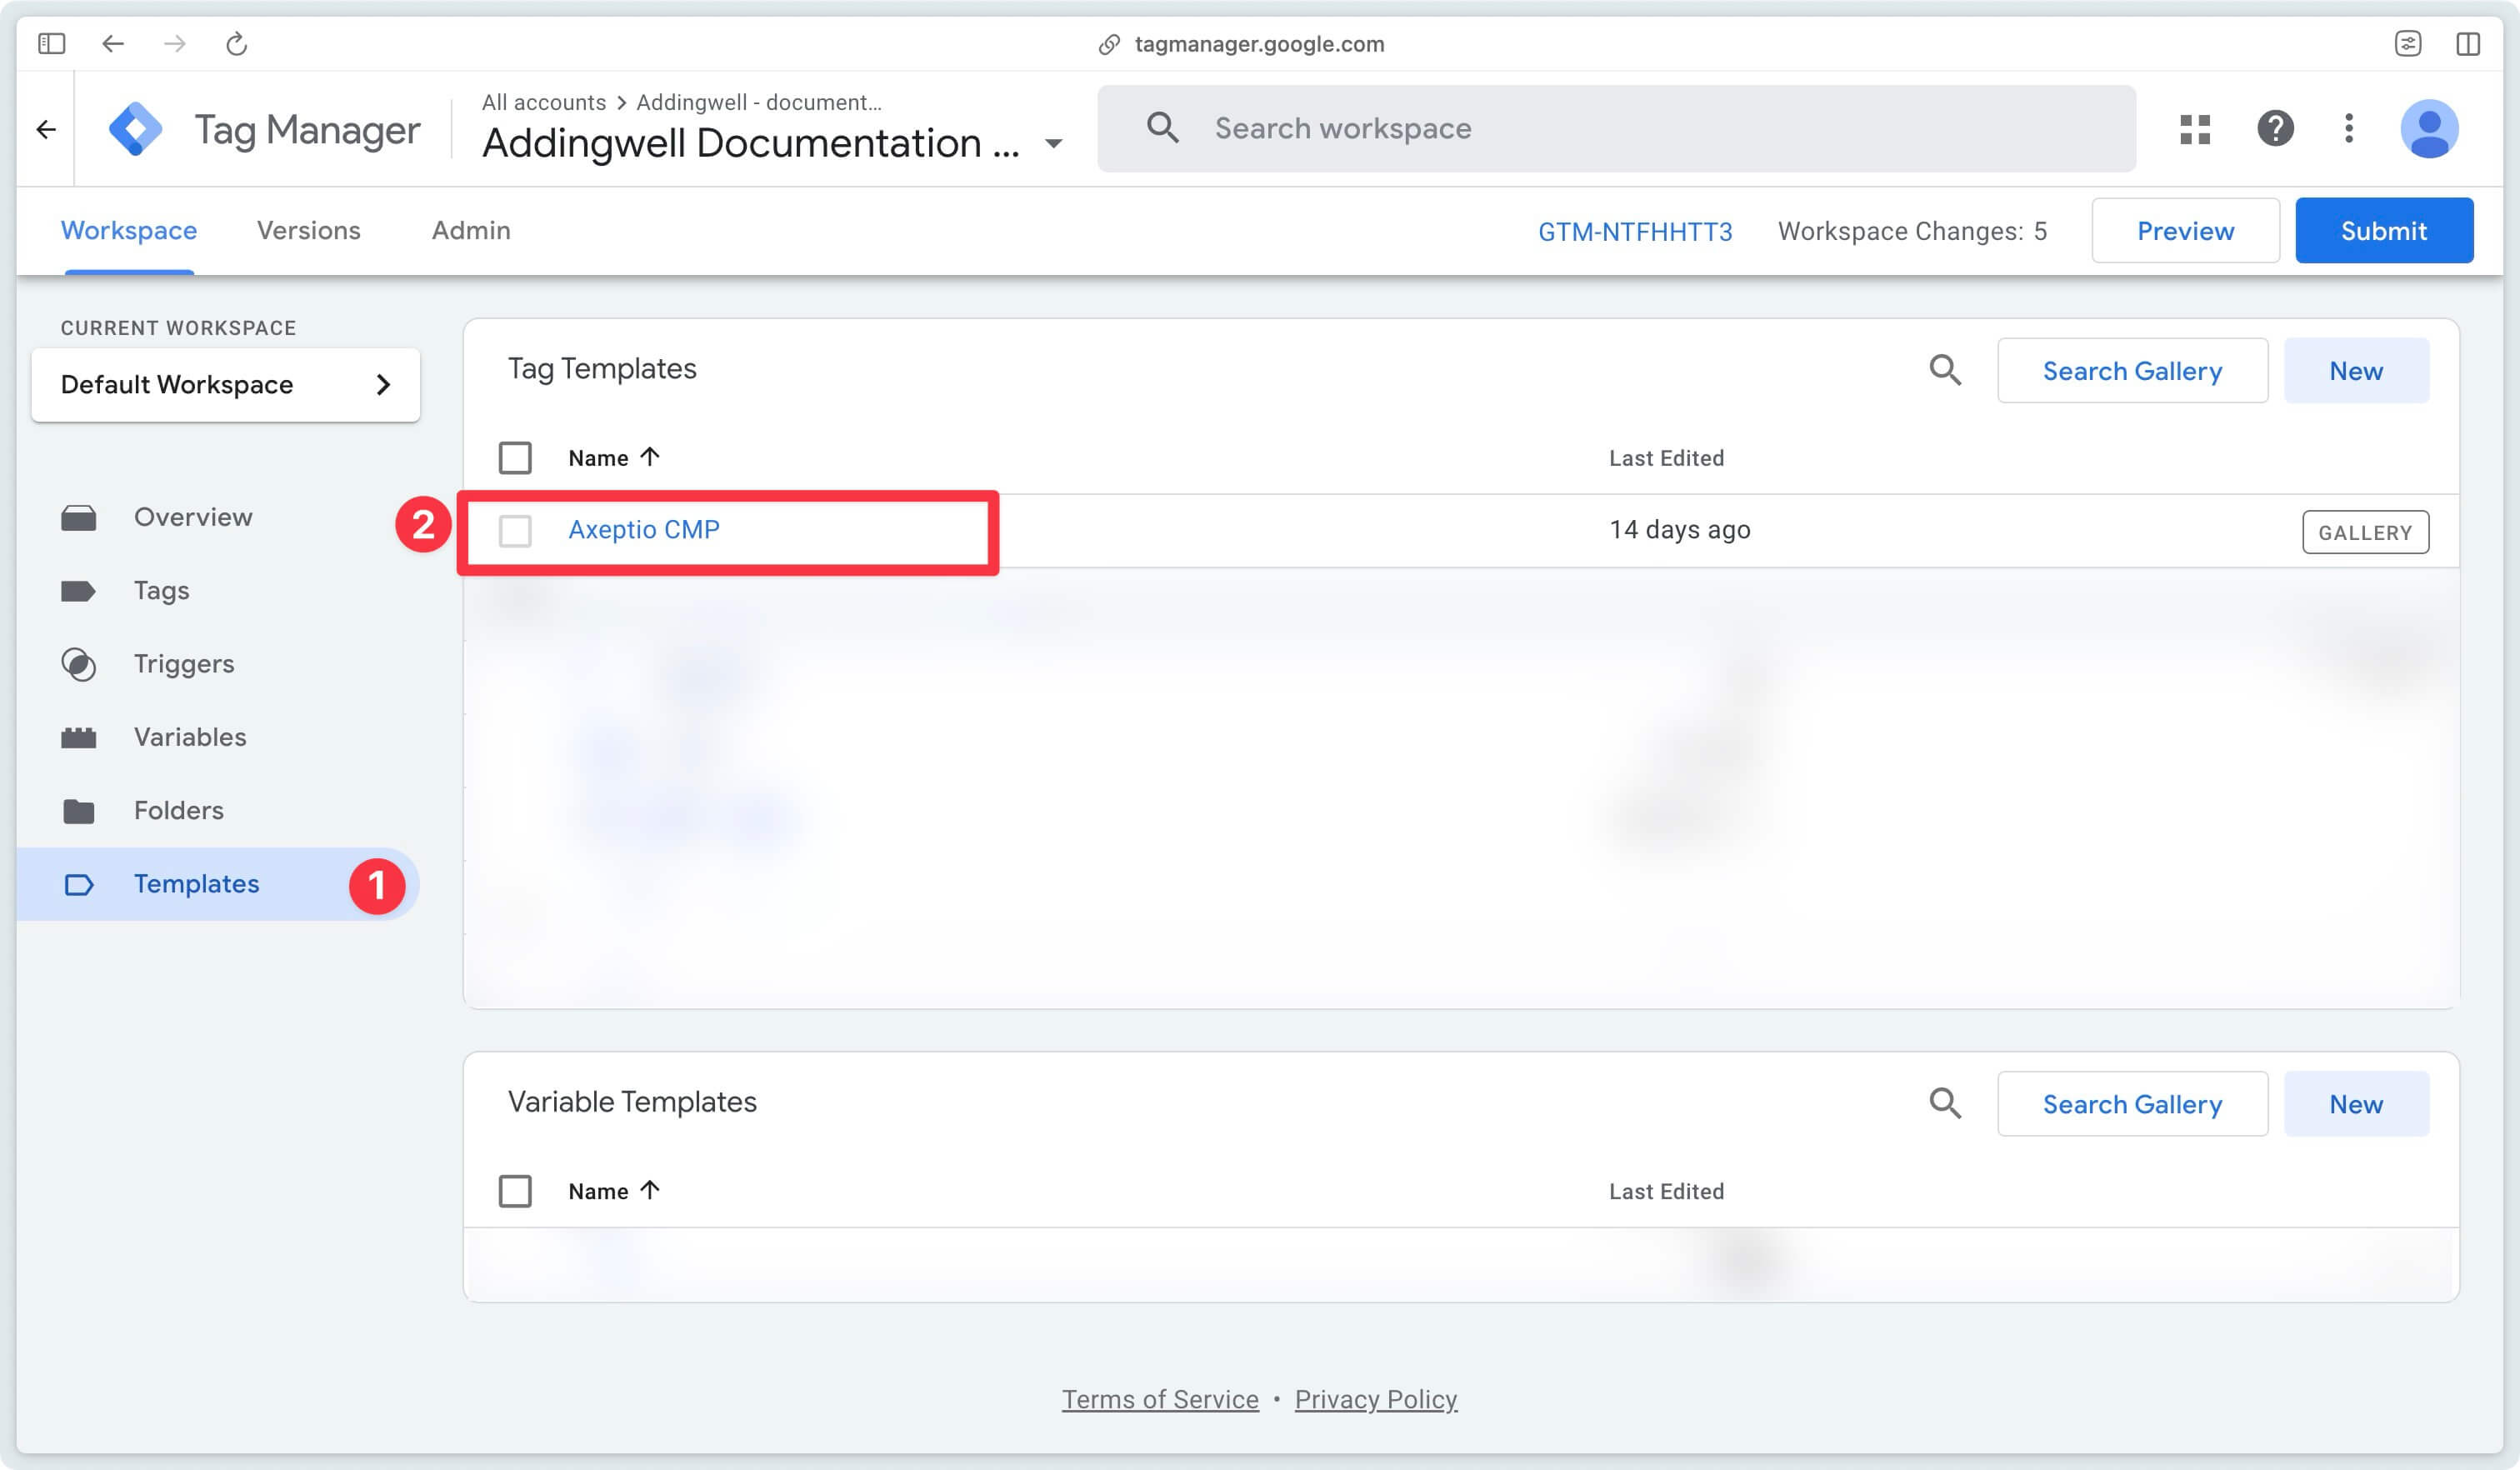
To modify the script loading URL, you need to modify the Axeptio CMP tag template. To do this, go to Templates on your GTM Web container and click on the Axeptio CMP template.
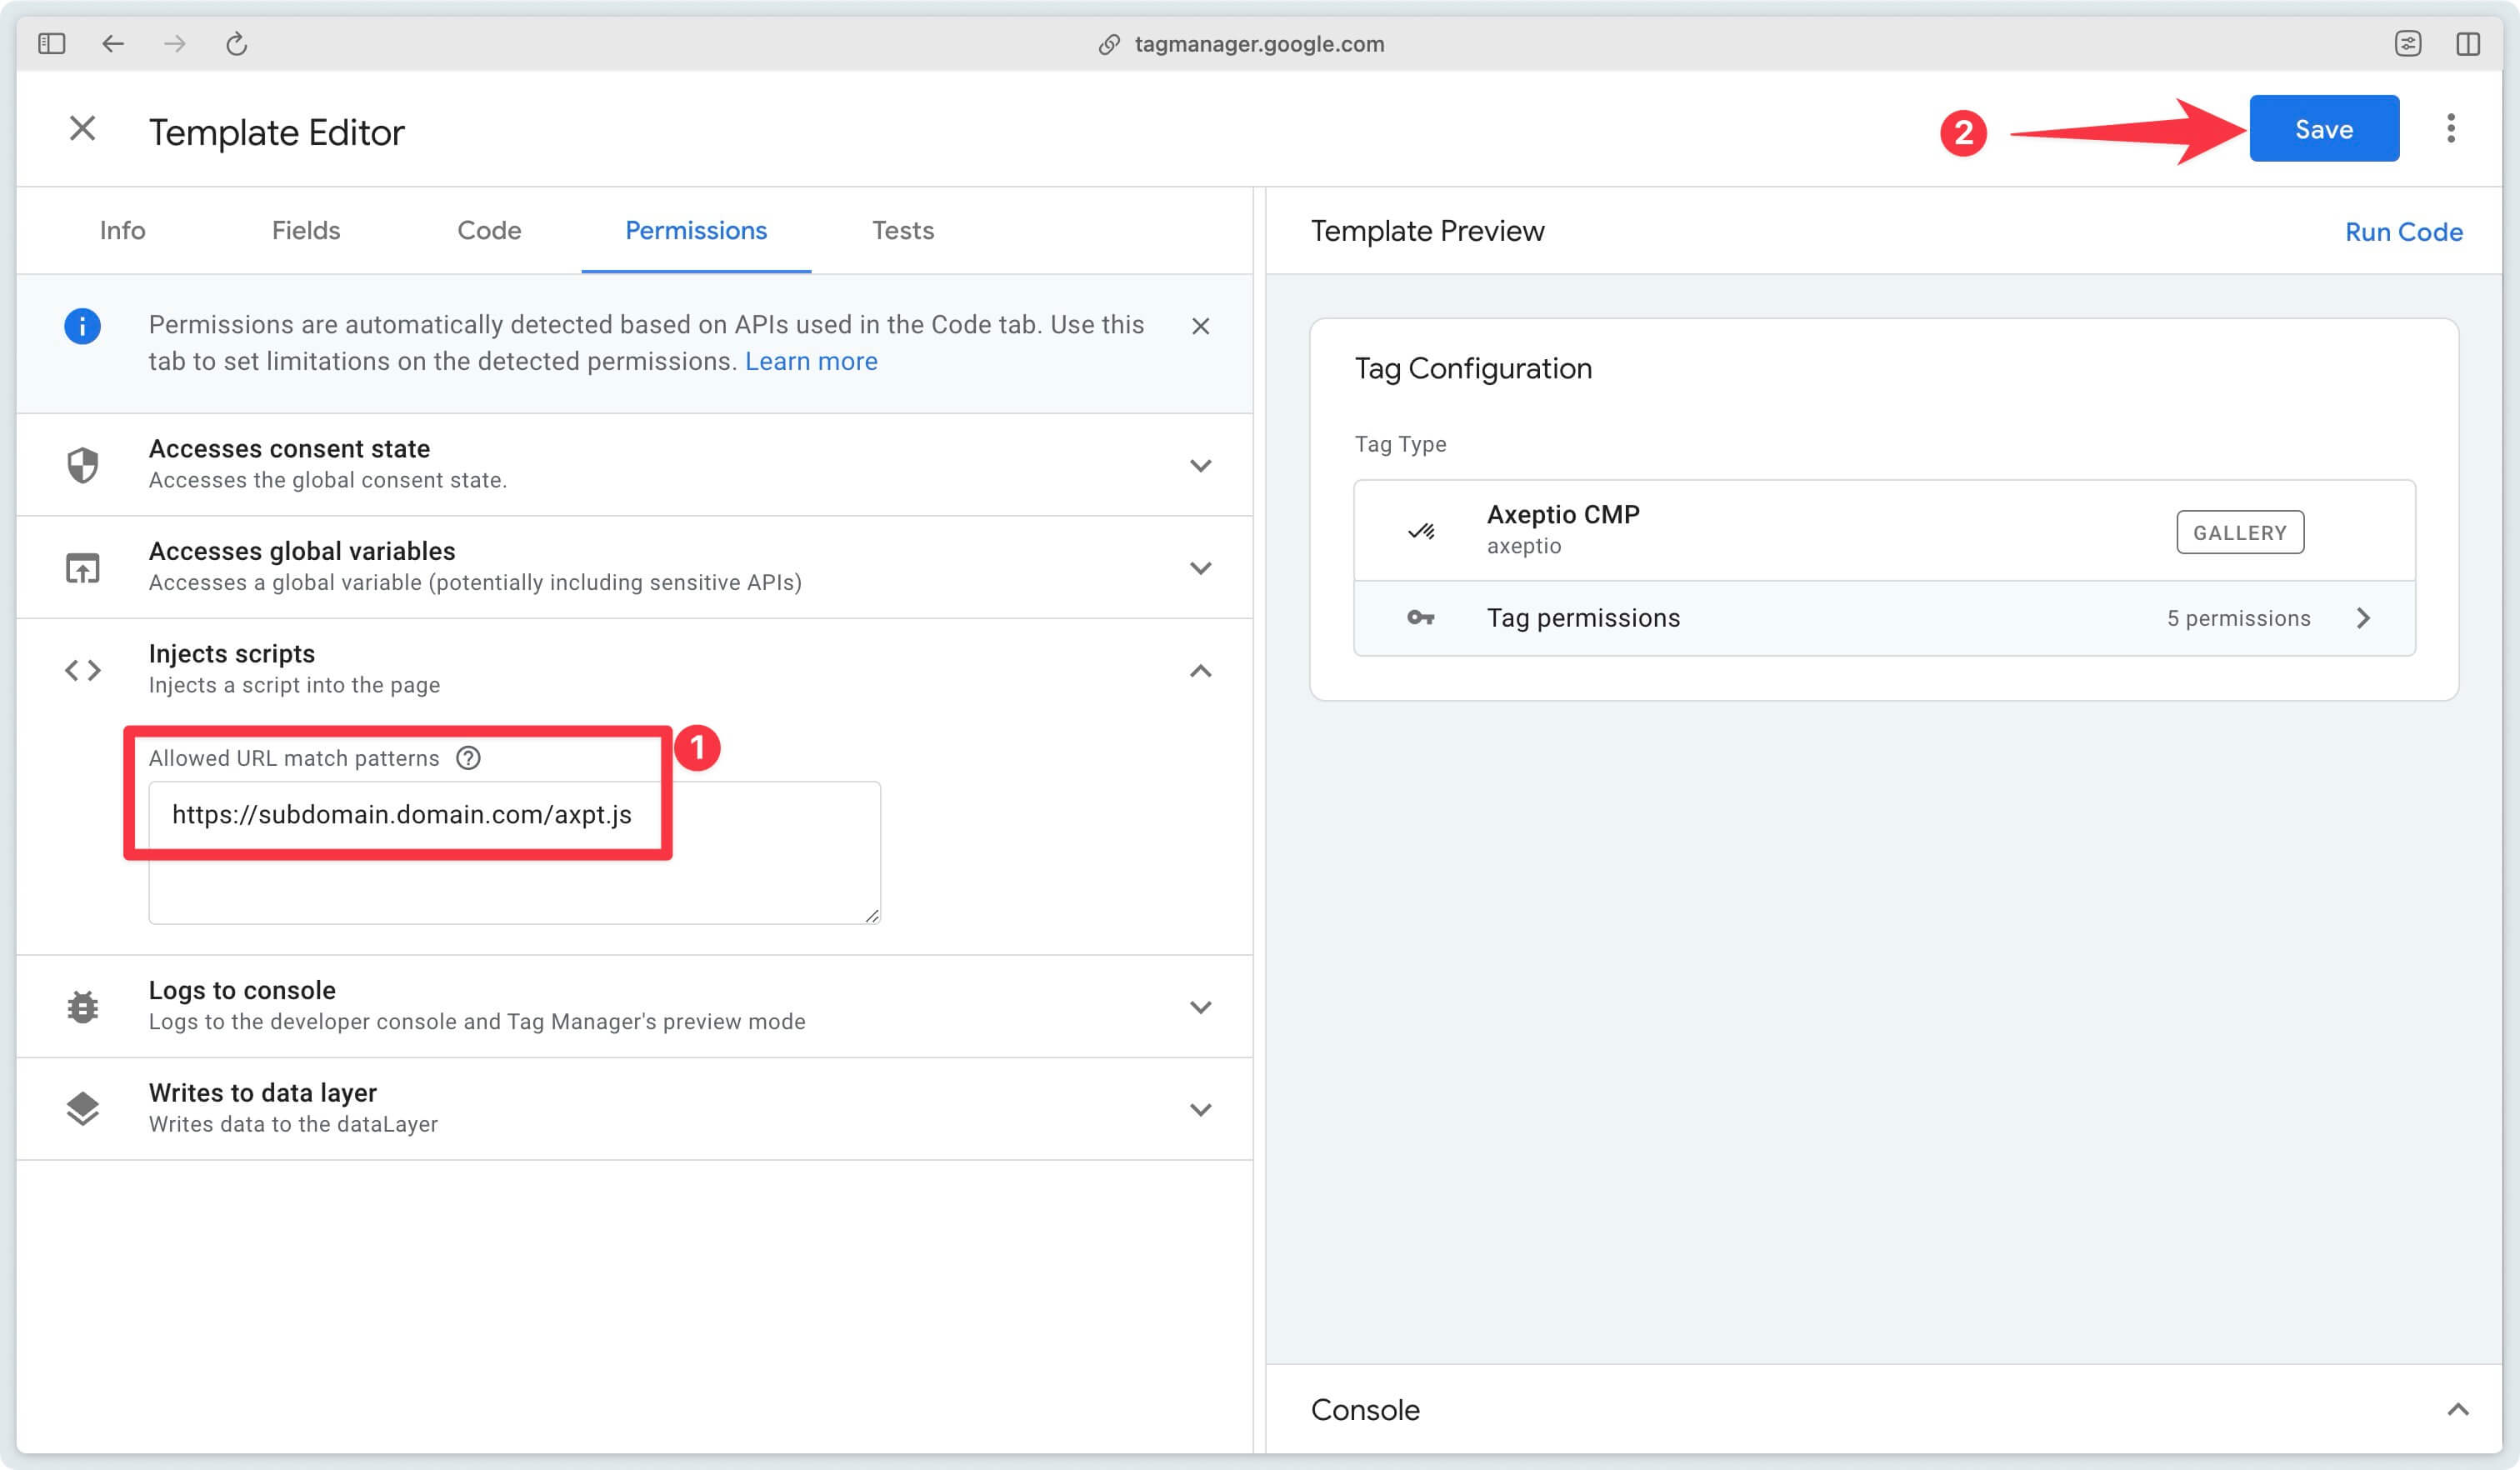
The template editor opens up, go to the Permissions tab and then to the Injects scripts section.
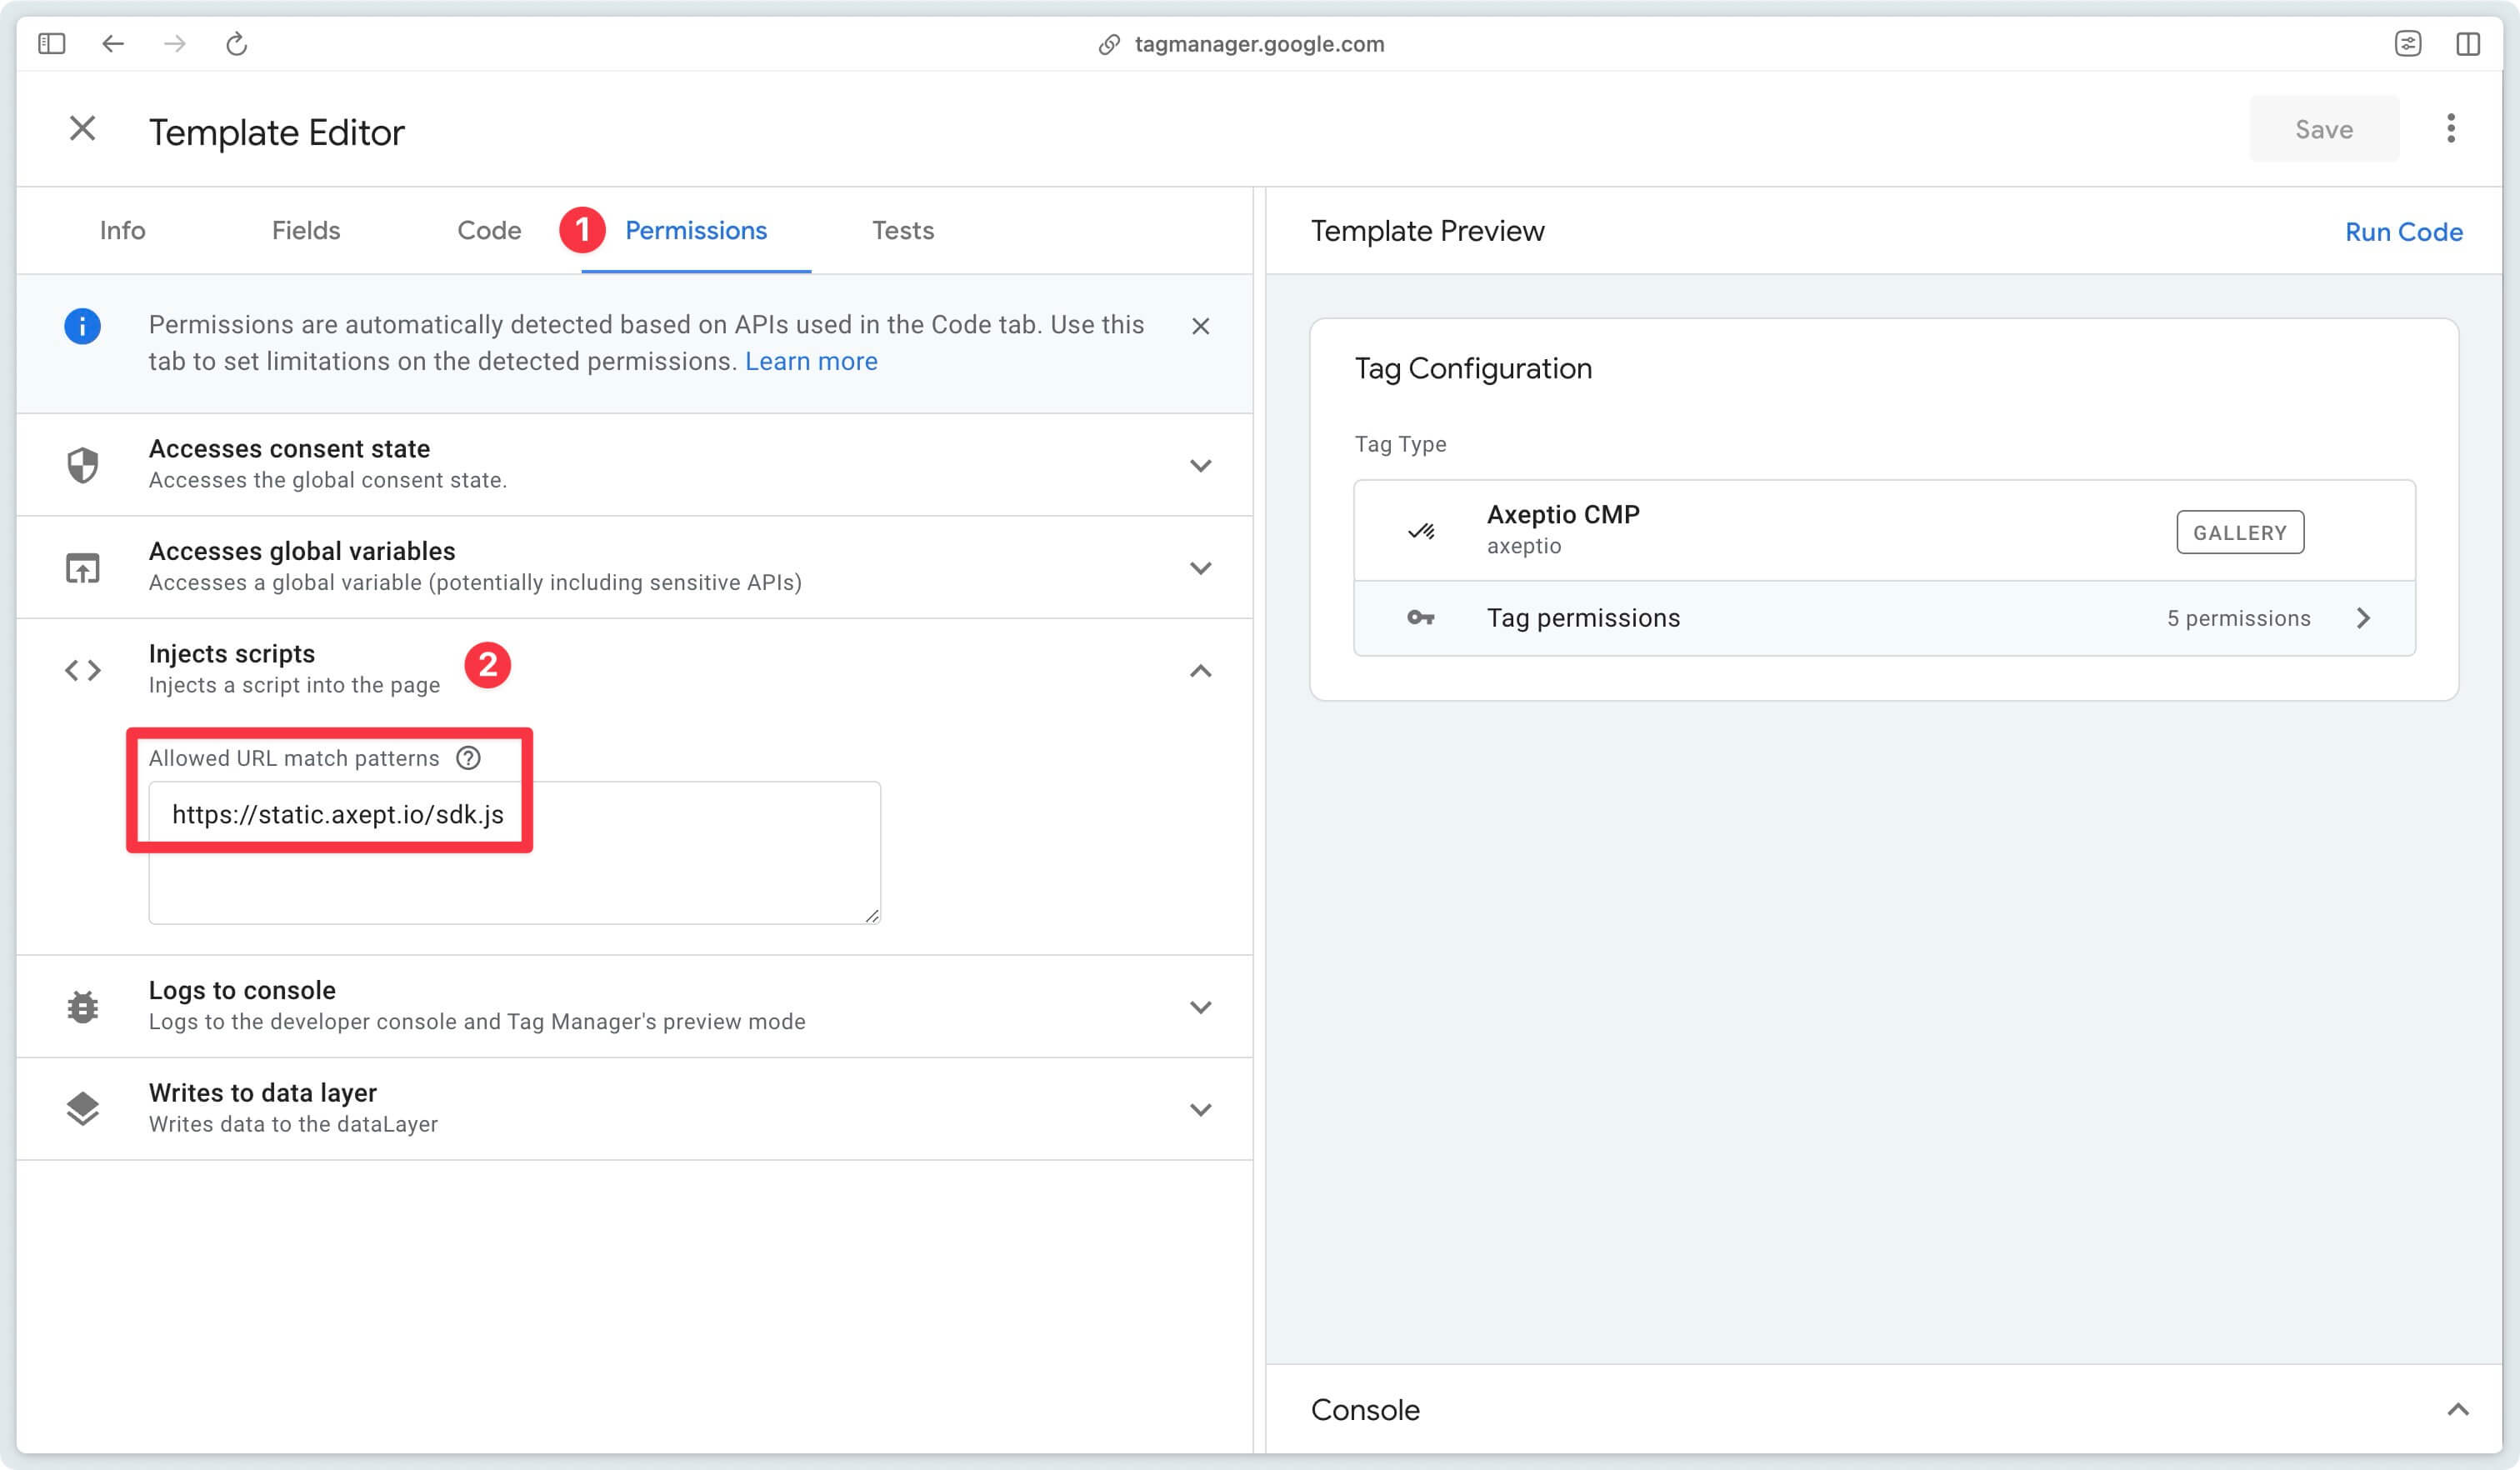
Replace the URL with the URL of your Axeptio file, previously added to the Addingwell CDN. In our example: https://subdomain.domain.com/axpt.js. Then click Save.
Go to the “Code” tab, scroll all the way down, then replace https://static.axept.io/sdk.js with your own URL (https://subdomain.domain.com/axpt.js ). Then click on Save.
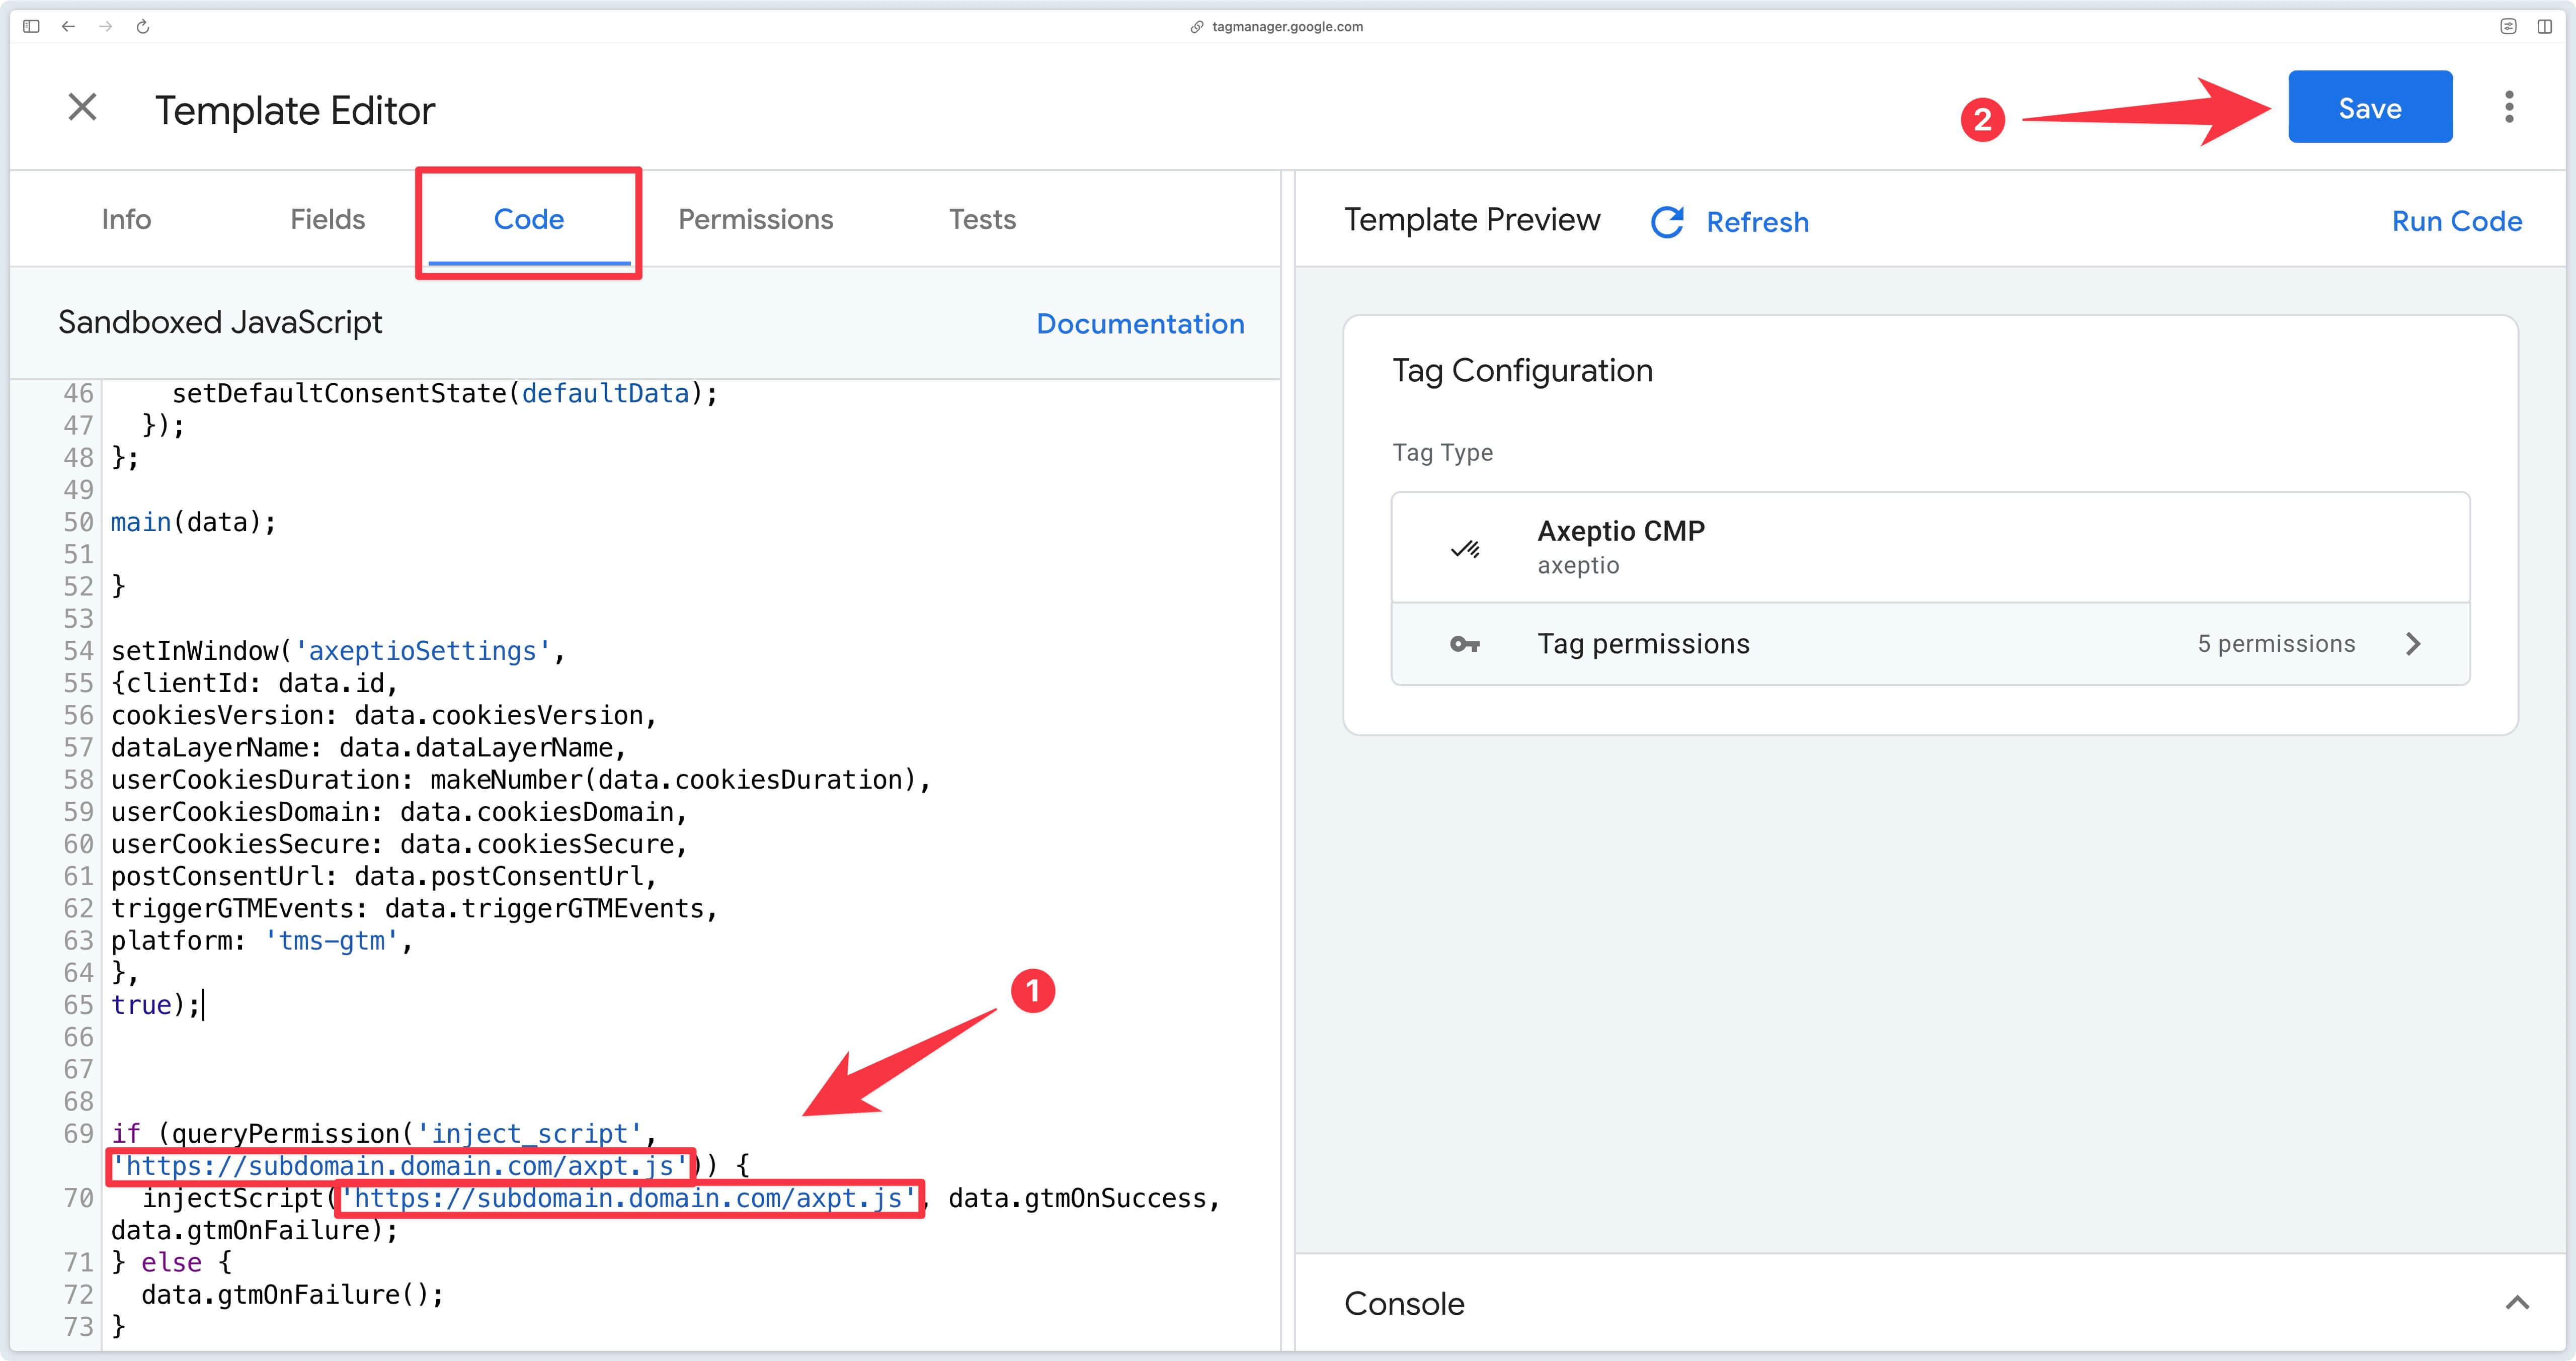
Congratulations, you’ve now completed the configuration of the Axeptio CMP tag.
In Javascript
If you don’t use the tag, here’s the JavaScript equivalent.
<script>
window.axeptioSettings = {
    clientId: "603a1qb689j987zx136324ha",
    postConsentUrl: "https://subdomain.domain.com",
    userCookiesDomain: "domain.com",
    googleConsentMode: {
        default: {
            analytics_storage: "denied",
            ad_storage: "denied",
            ad_user_data: "denied",
            ad_personalization: "denied",
            wait_for_update: 500
        }
    }
};

(function(d, s) {
  var t = d.getElementsByTagName(s)[0], e = d.createElement(s);
  e.async = true; e.src = "https://subdomain.domain.com/axpt.js";
  t.parentNode.insertBefore(e, t);
})(document, "script");
</script>
Test implementation
GTM Server-Side preview mode
To be able to test correctly in Preview mode, you need to set up the GTM Server-Side HTTP preview header (x-gtm-server-preview) in your Addingwell container.
This first preview test, although necessary, is a bit tedious to set up. To go faster, you can also publish your server container containing the Axeptio client and then run your preview again.
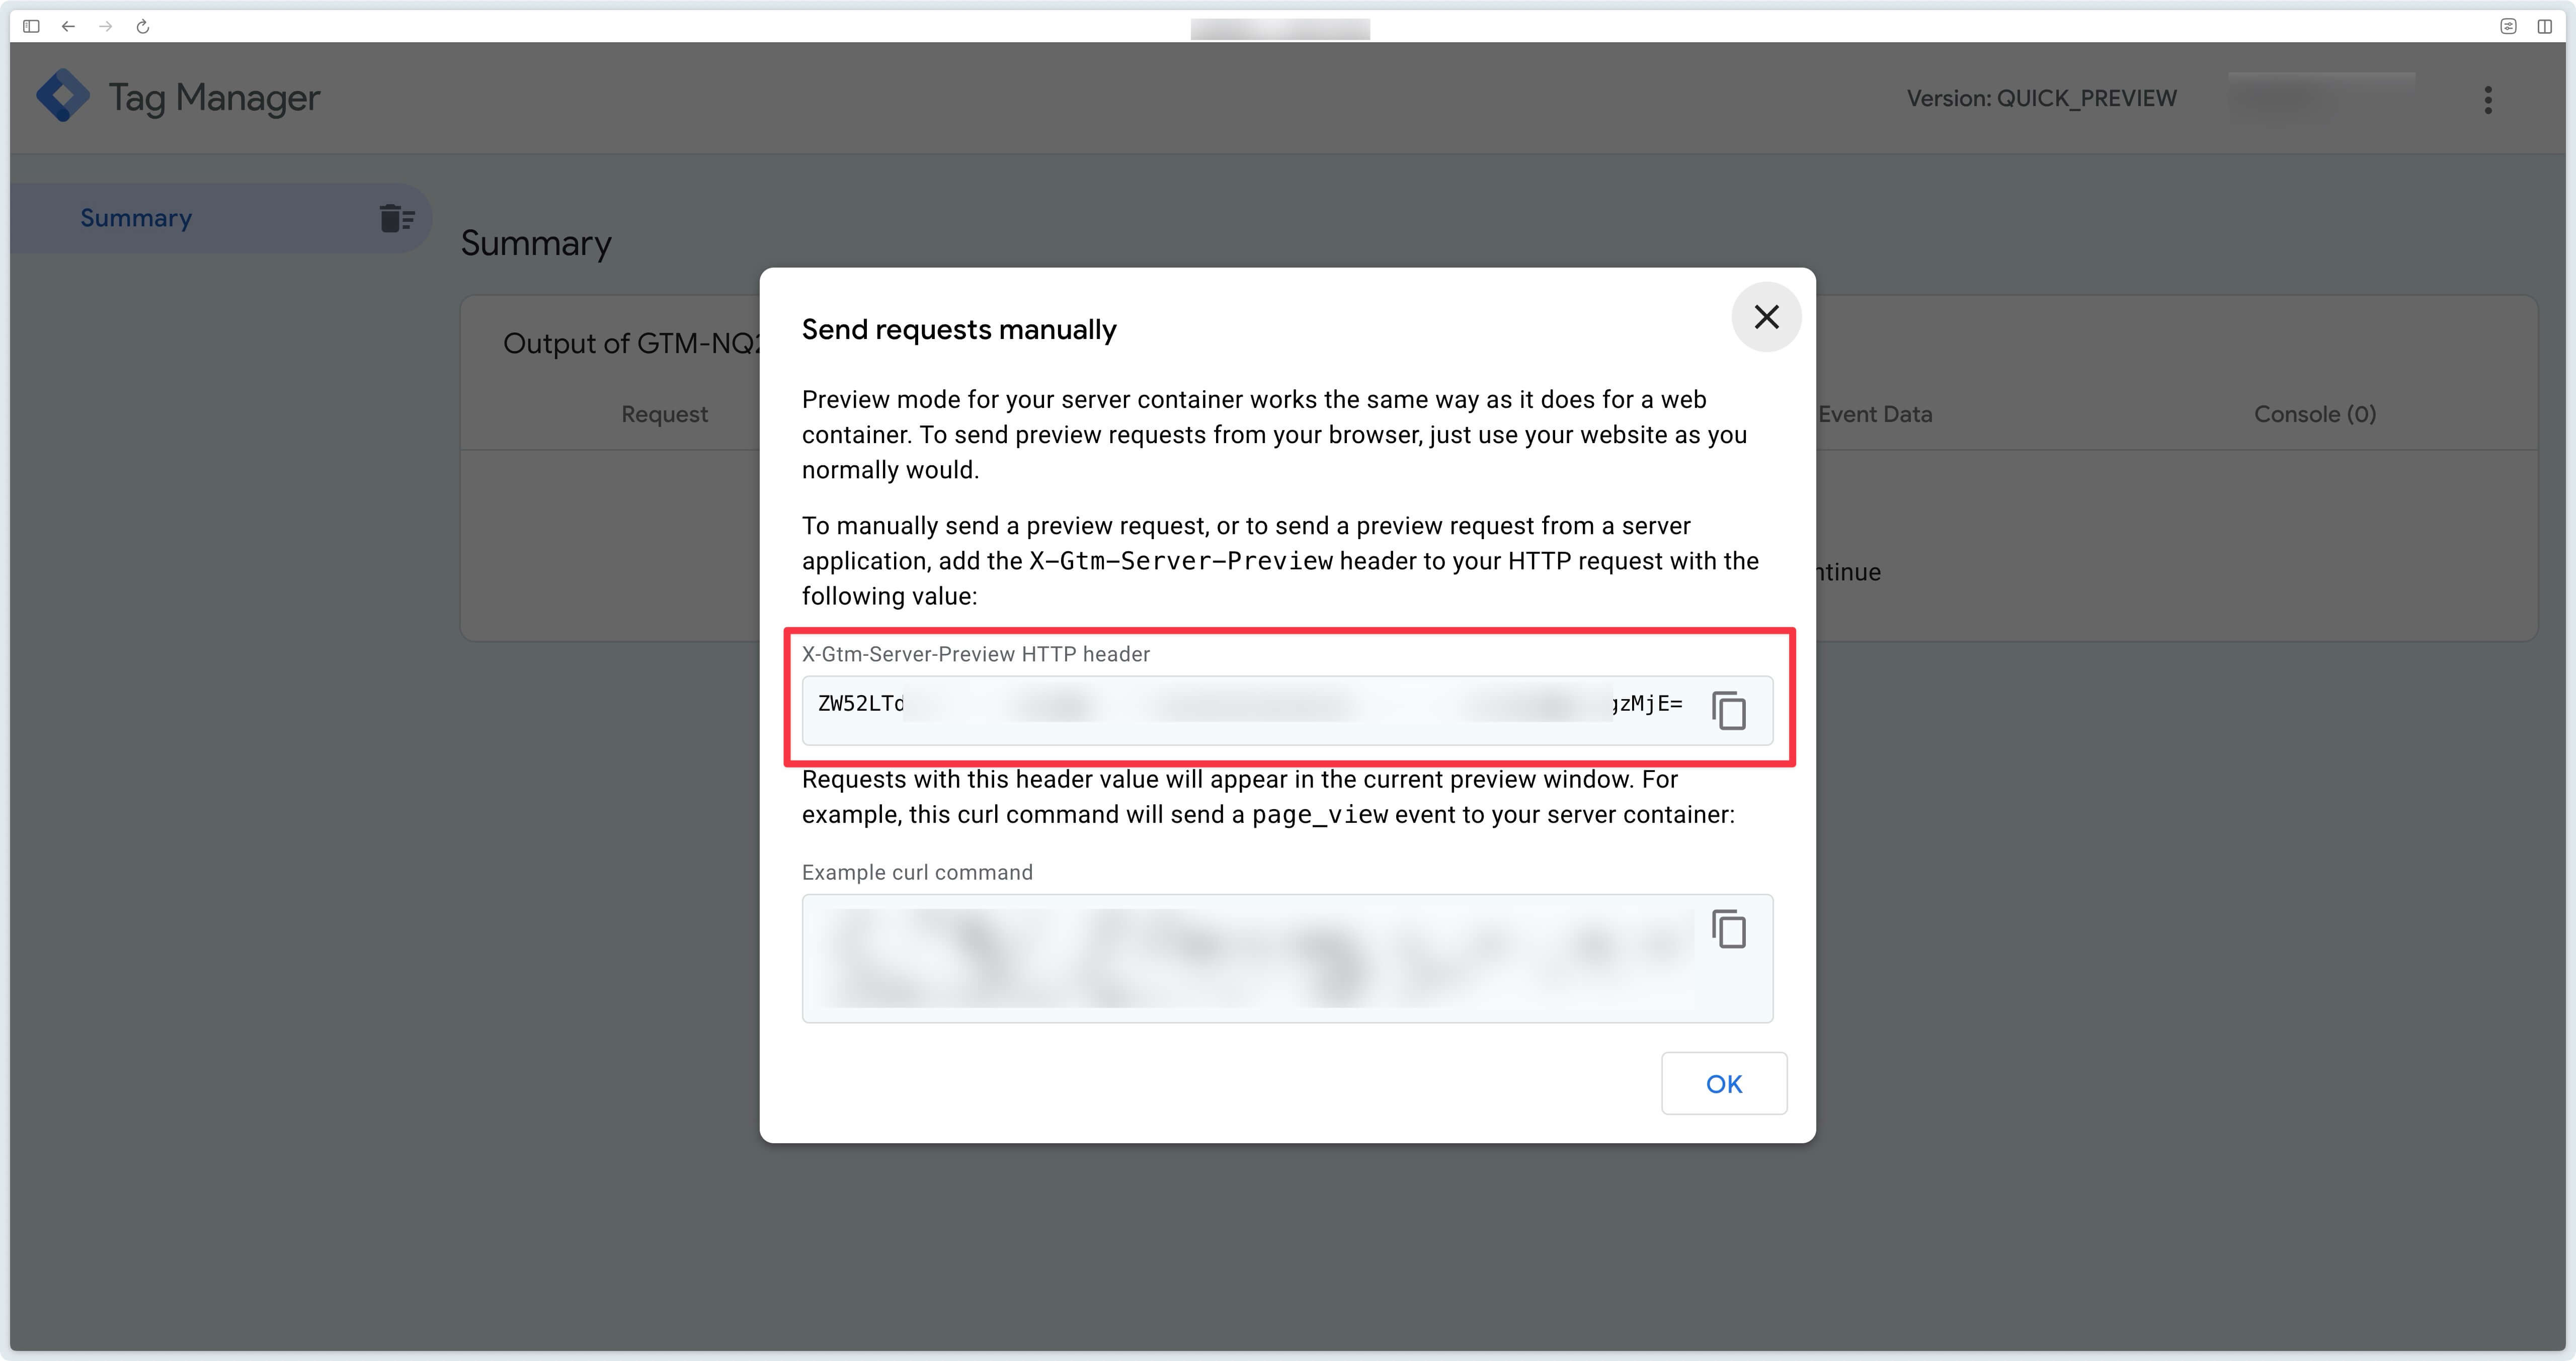
To get this header, start by opening your preview on GTM Server.

Then click on the 3 small dots at the top right of the preview and click on Send requests manually.
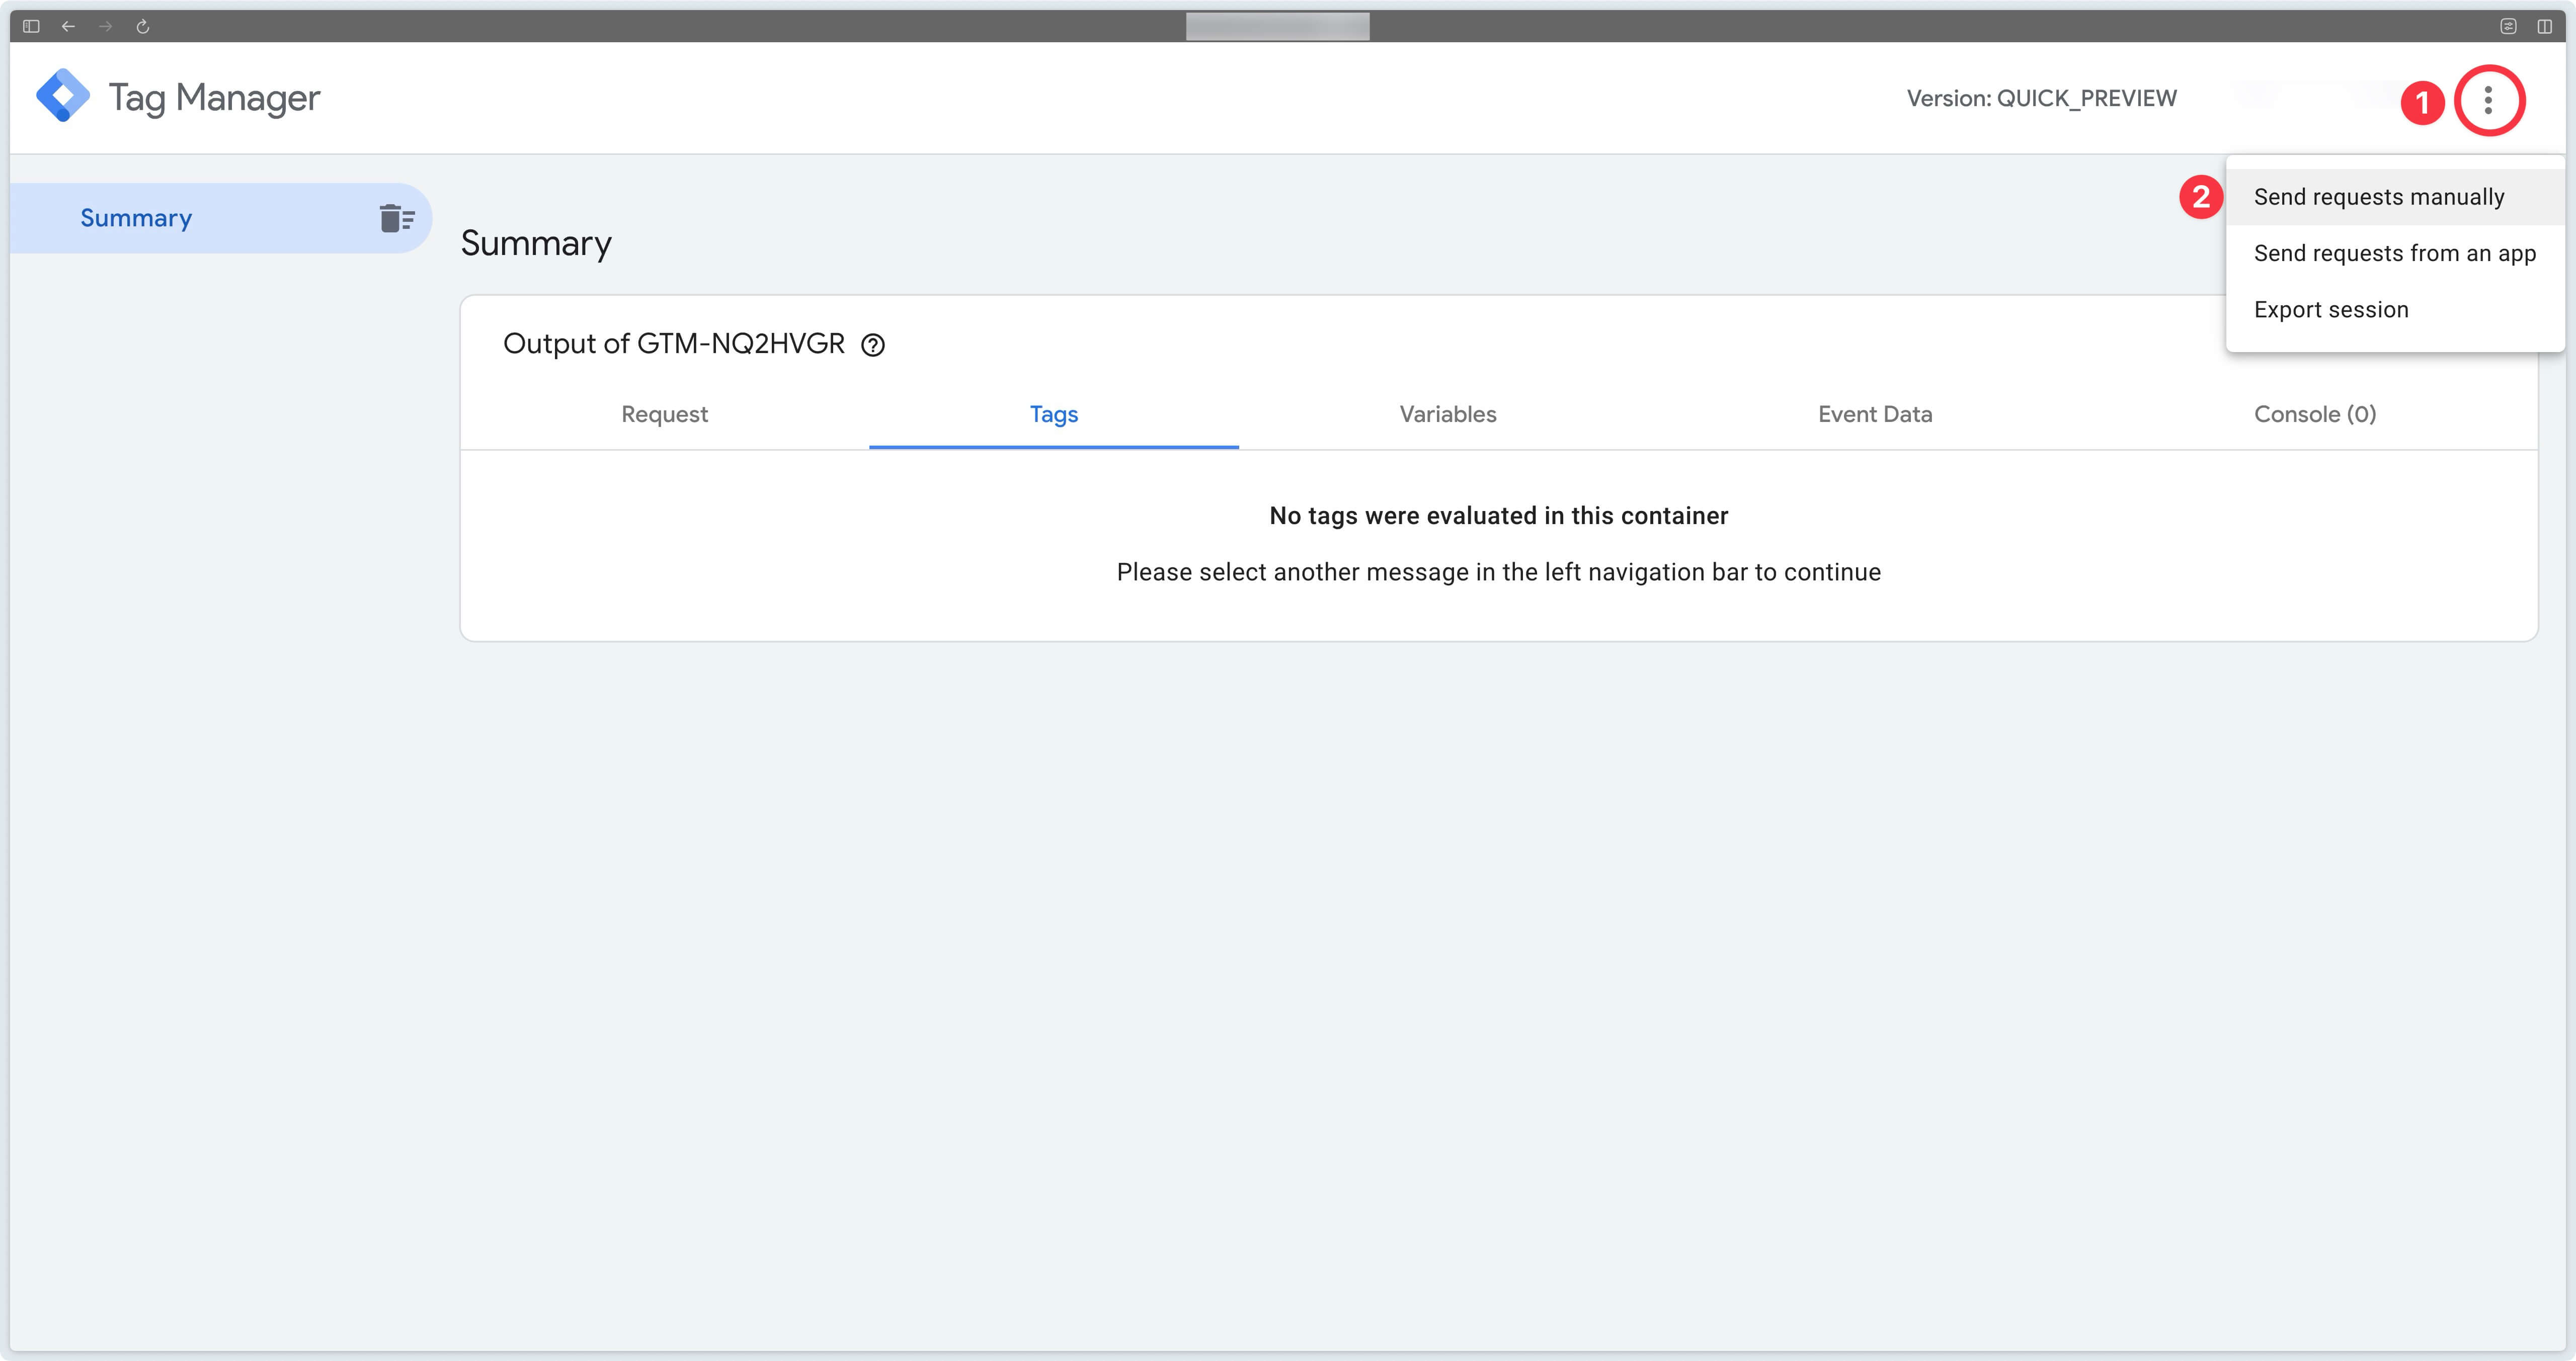
Then copy the preview header.
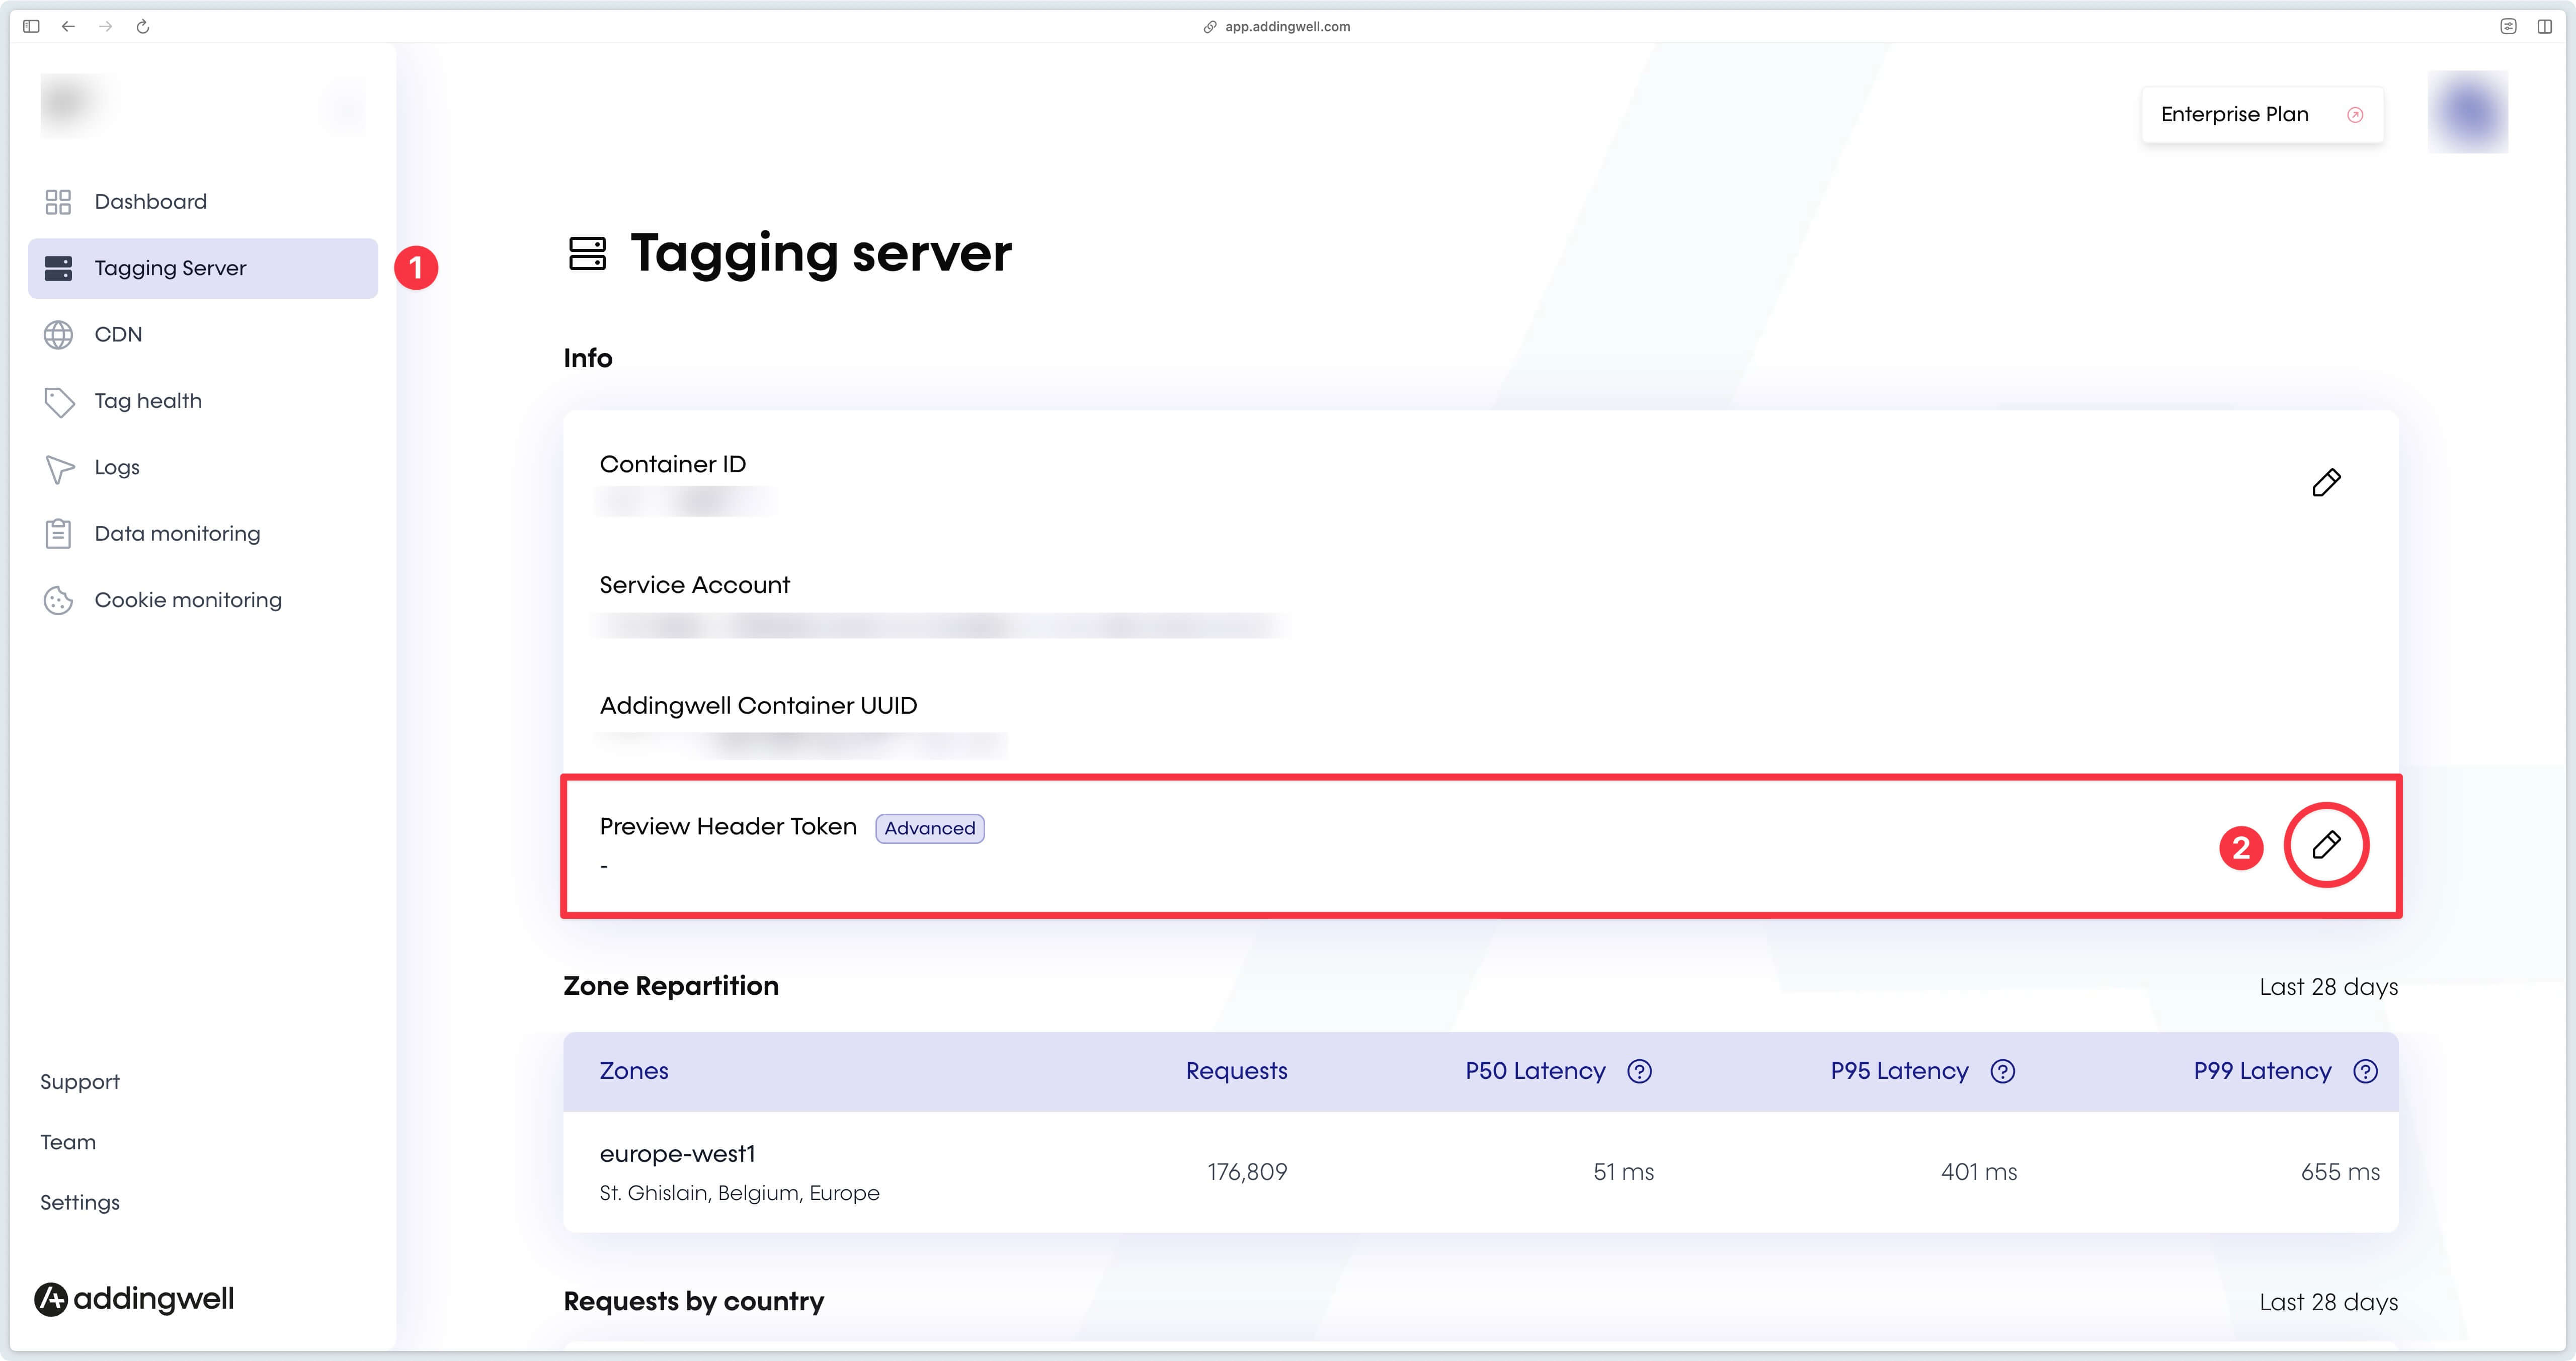
Then go to your Addingwell container, in the Tagging Server section.
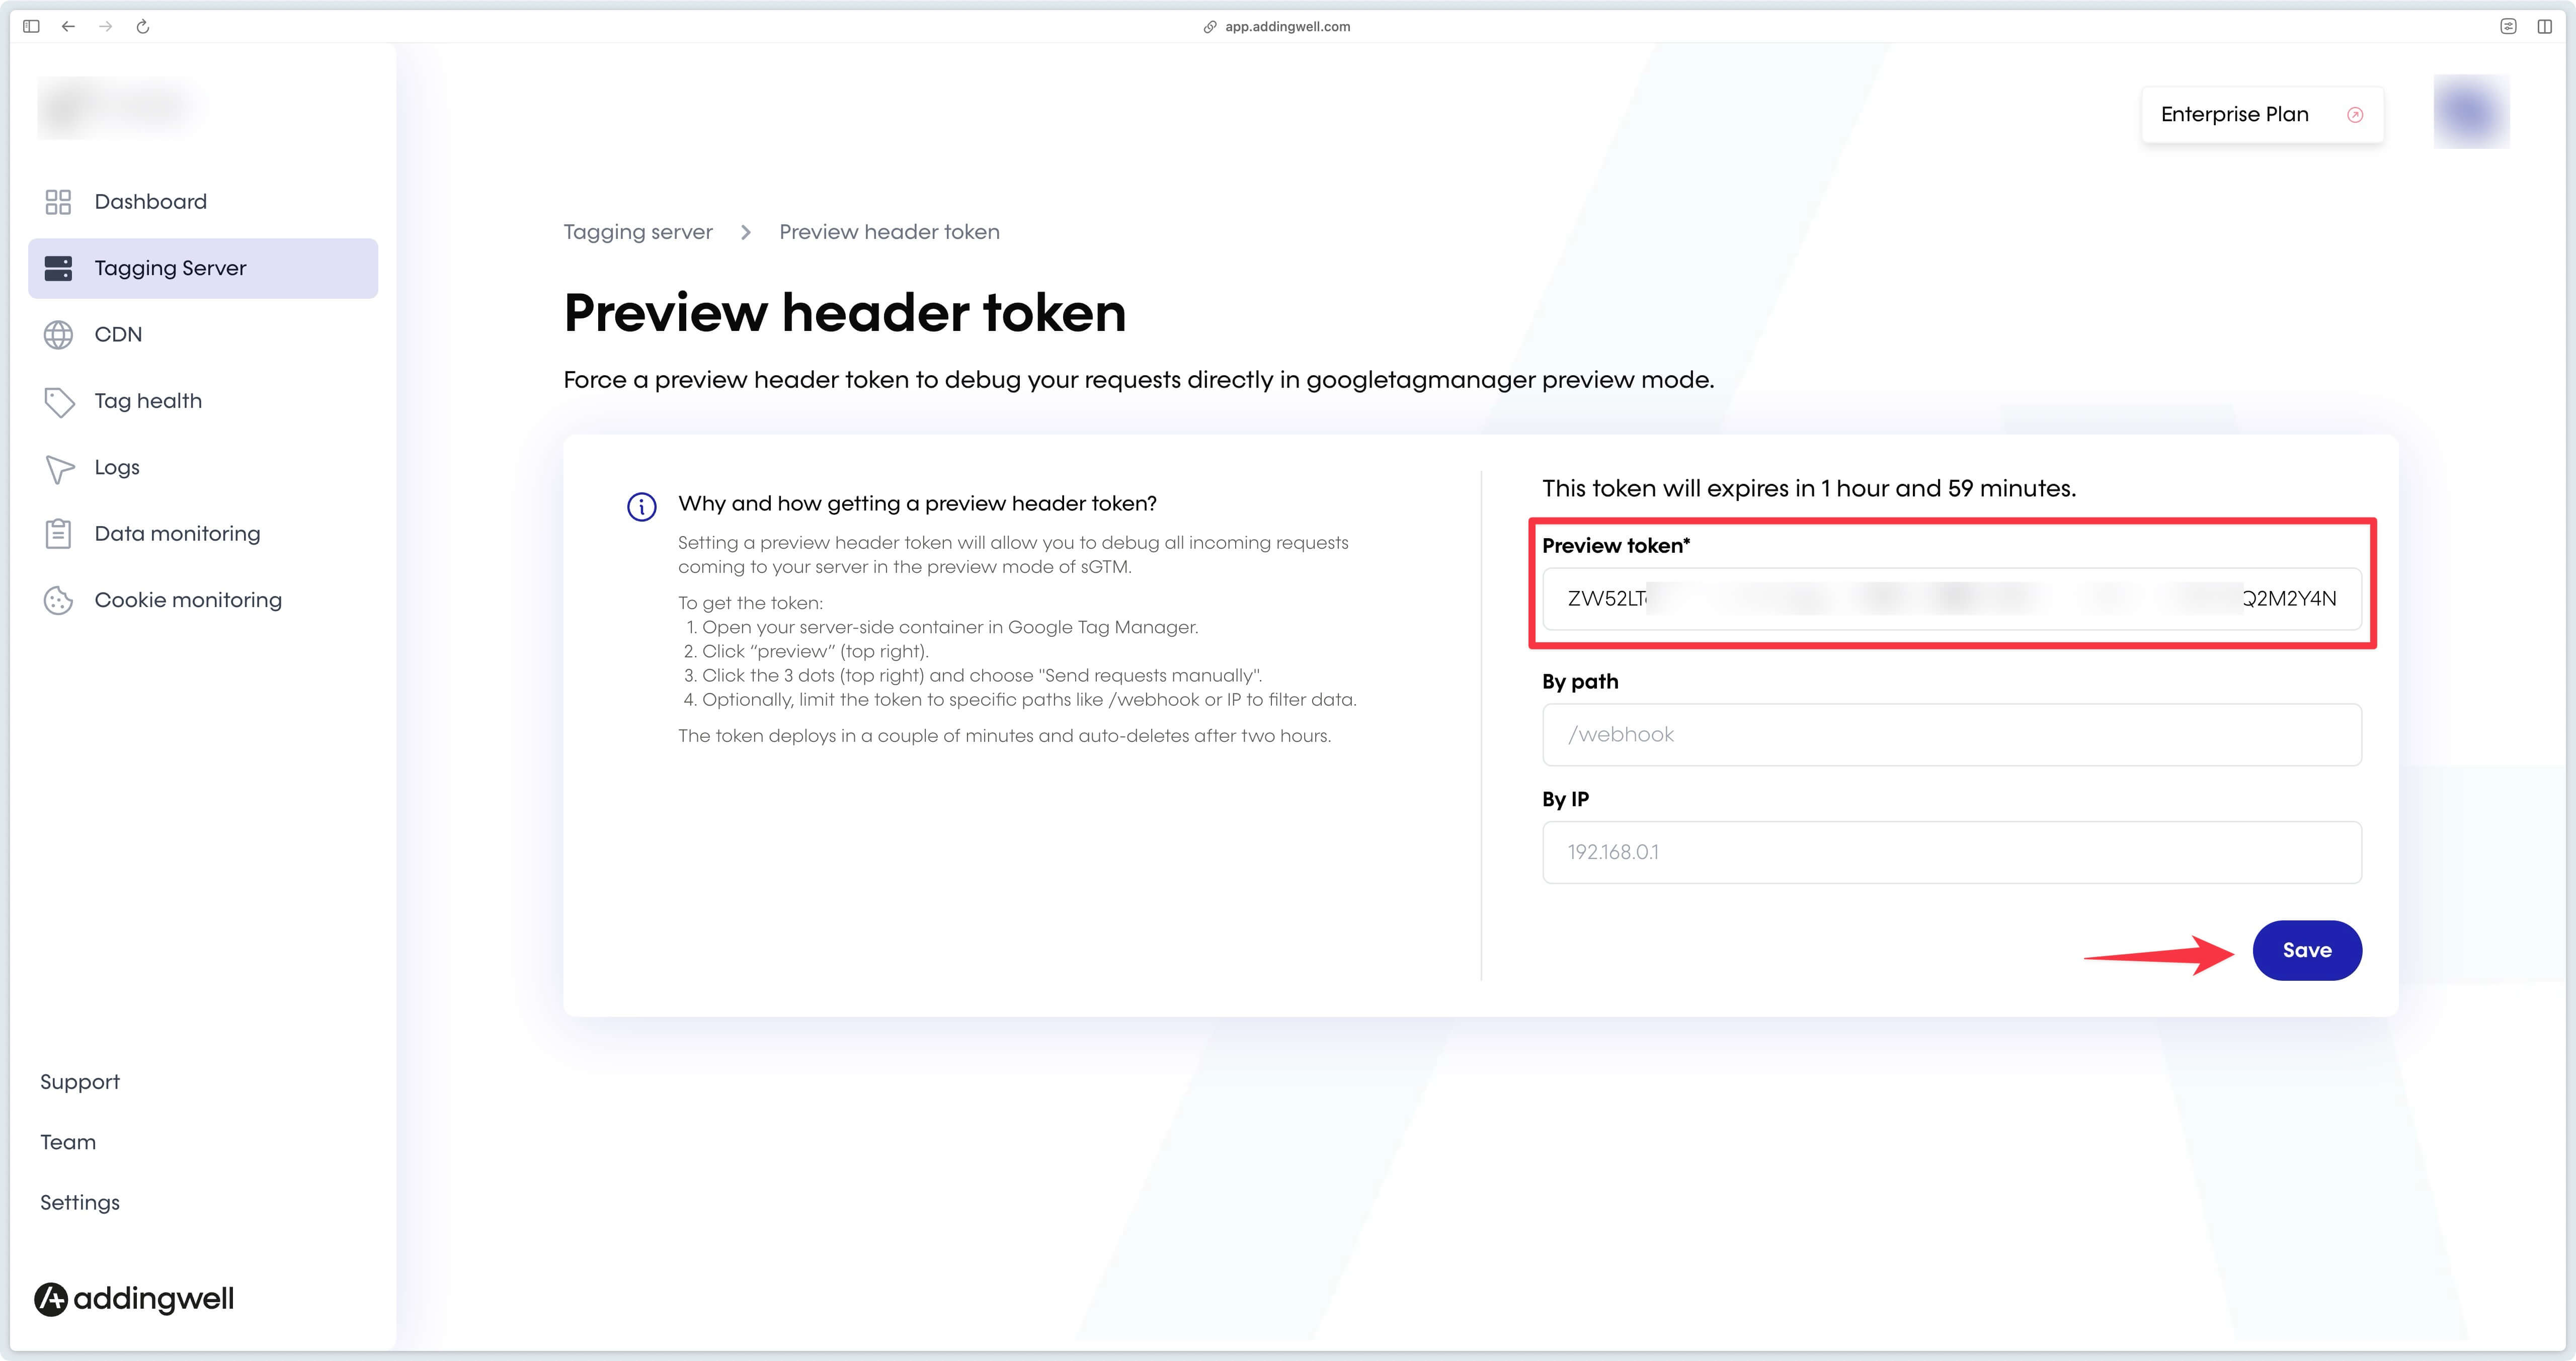
Paste the preview token and click Save.
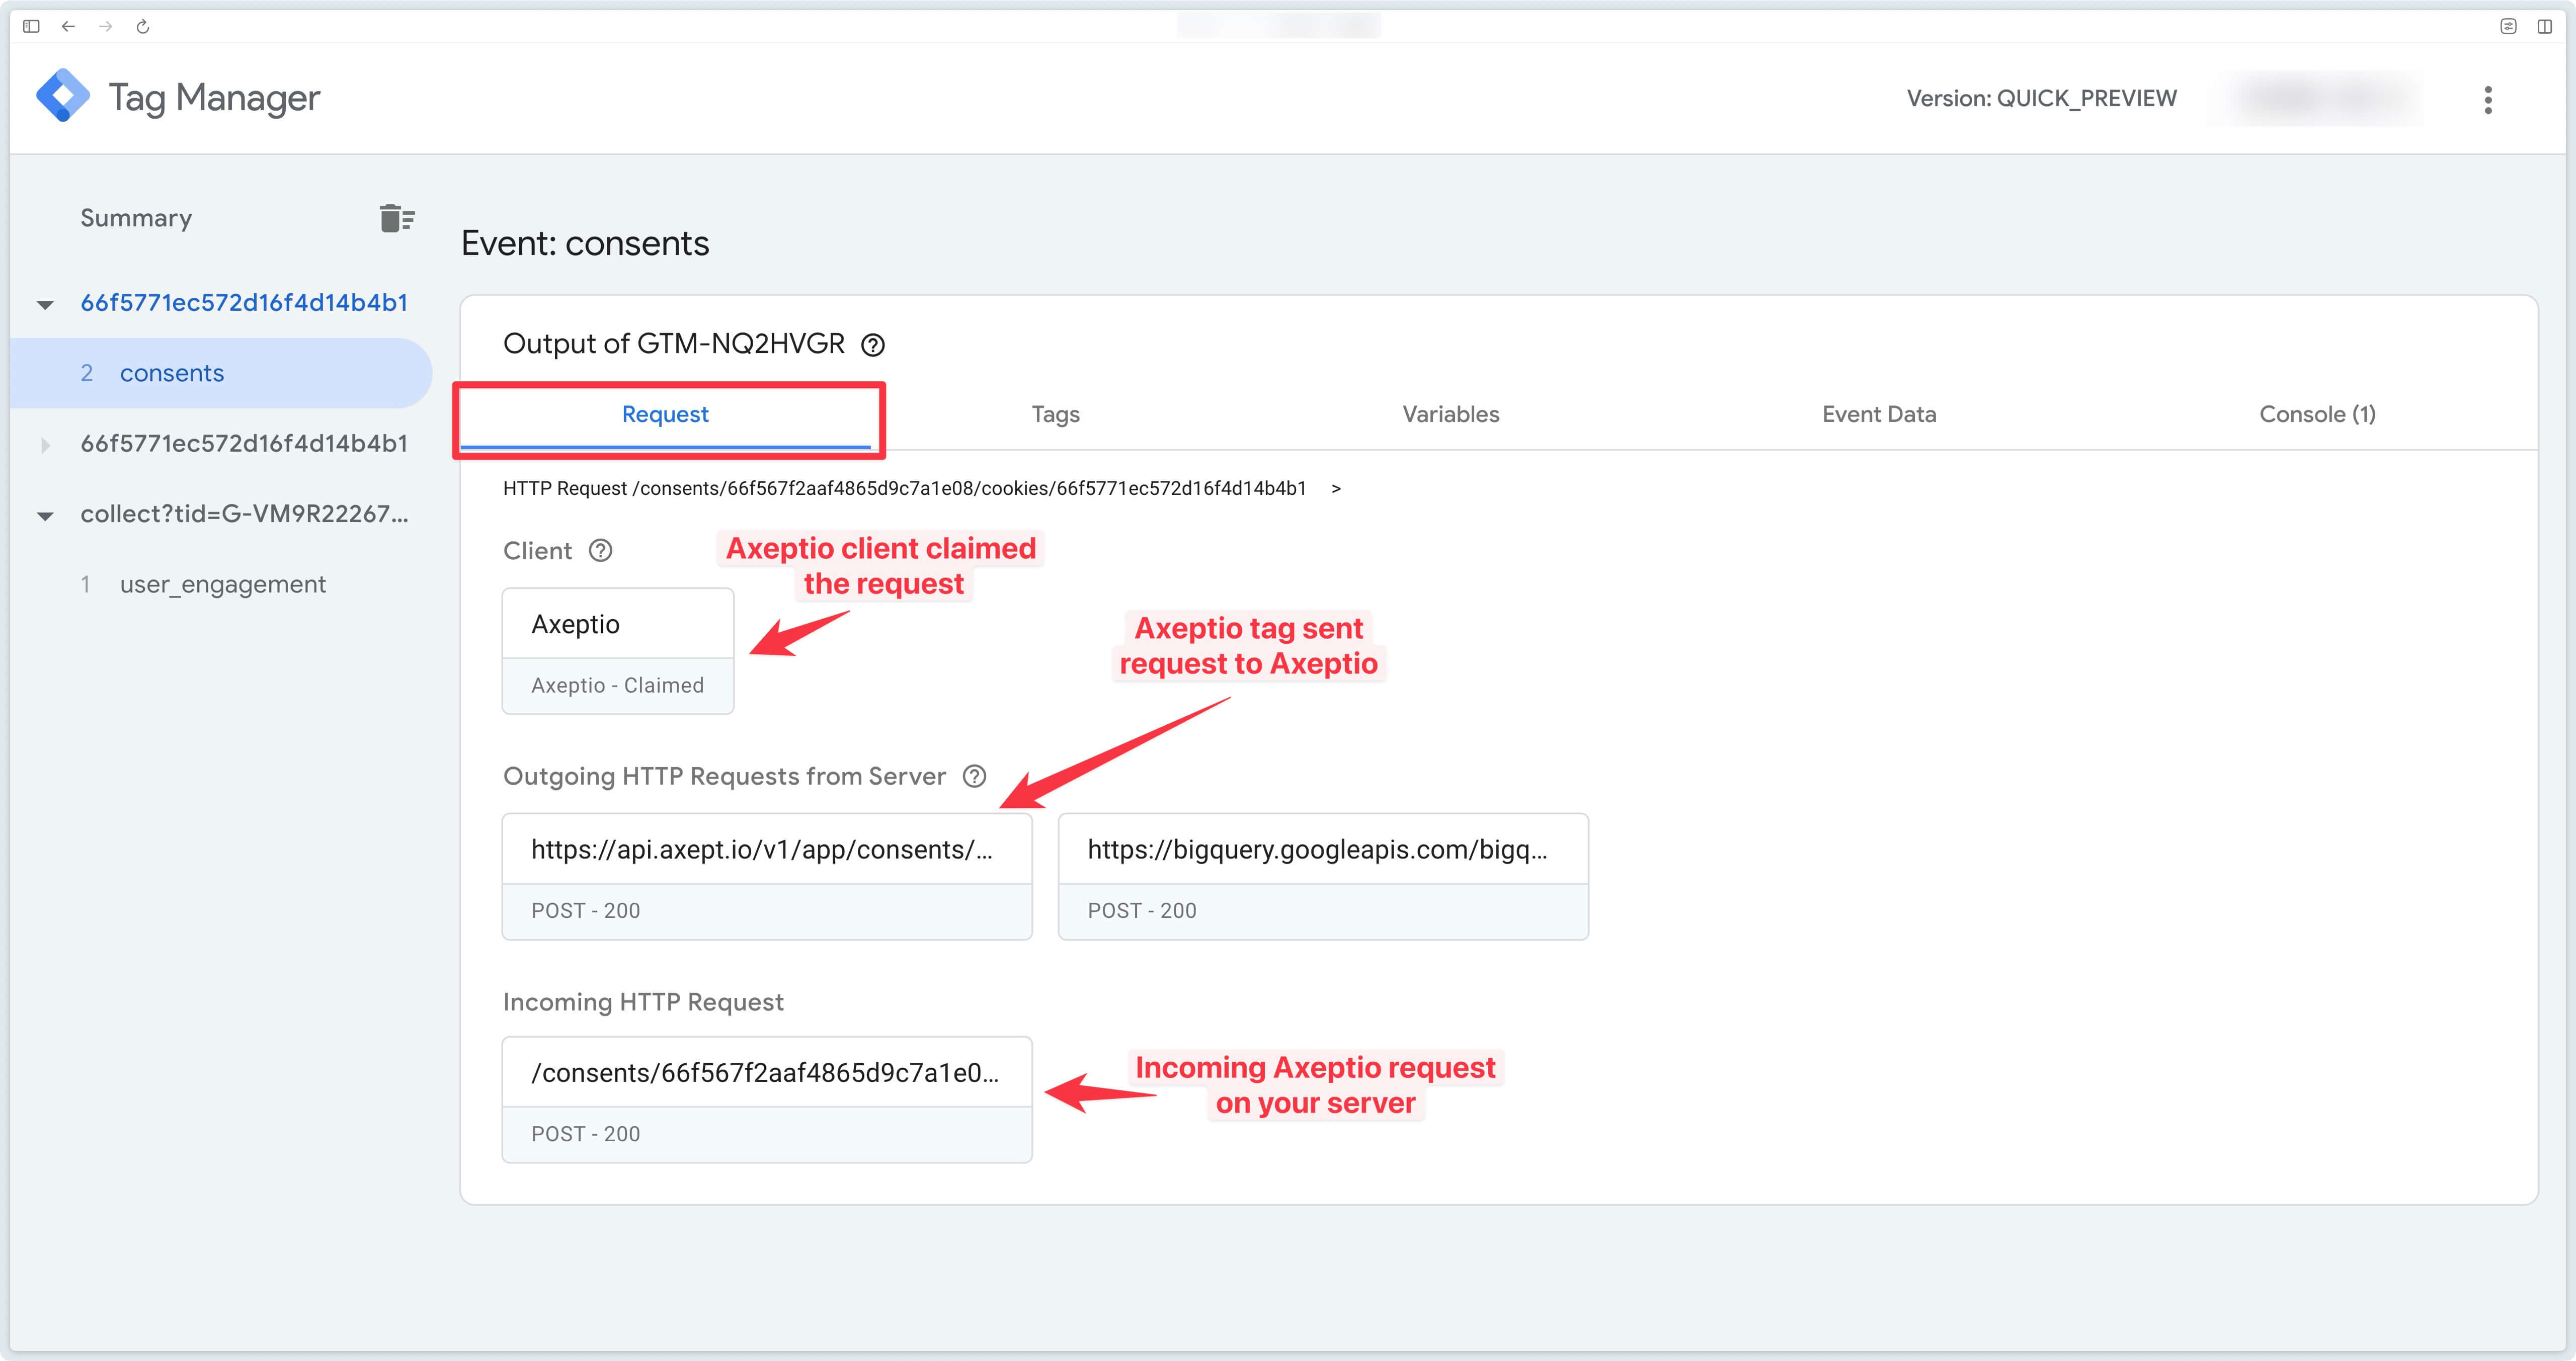
After 2 minutes, you can see your Axeptio consents requests arriving on your server.
To see these requests arrive on your server, you need to interact with the Axeptio banner.
Monitoring Addingwell
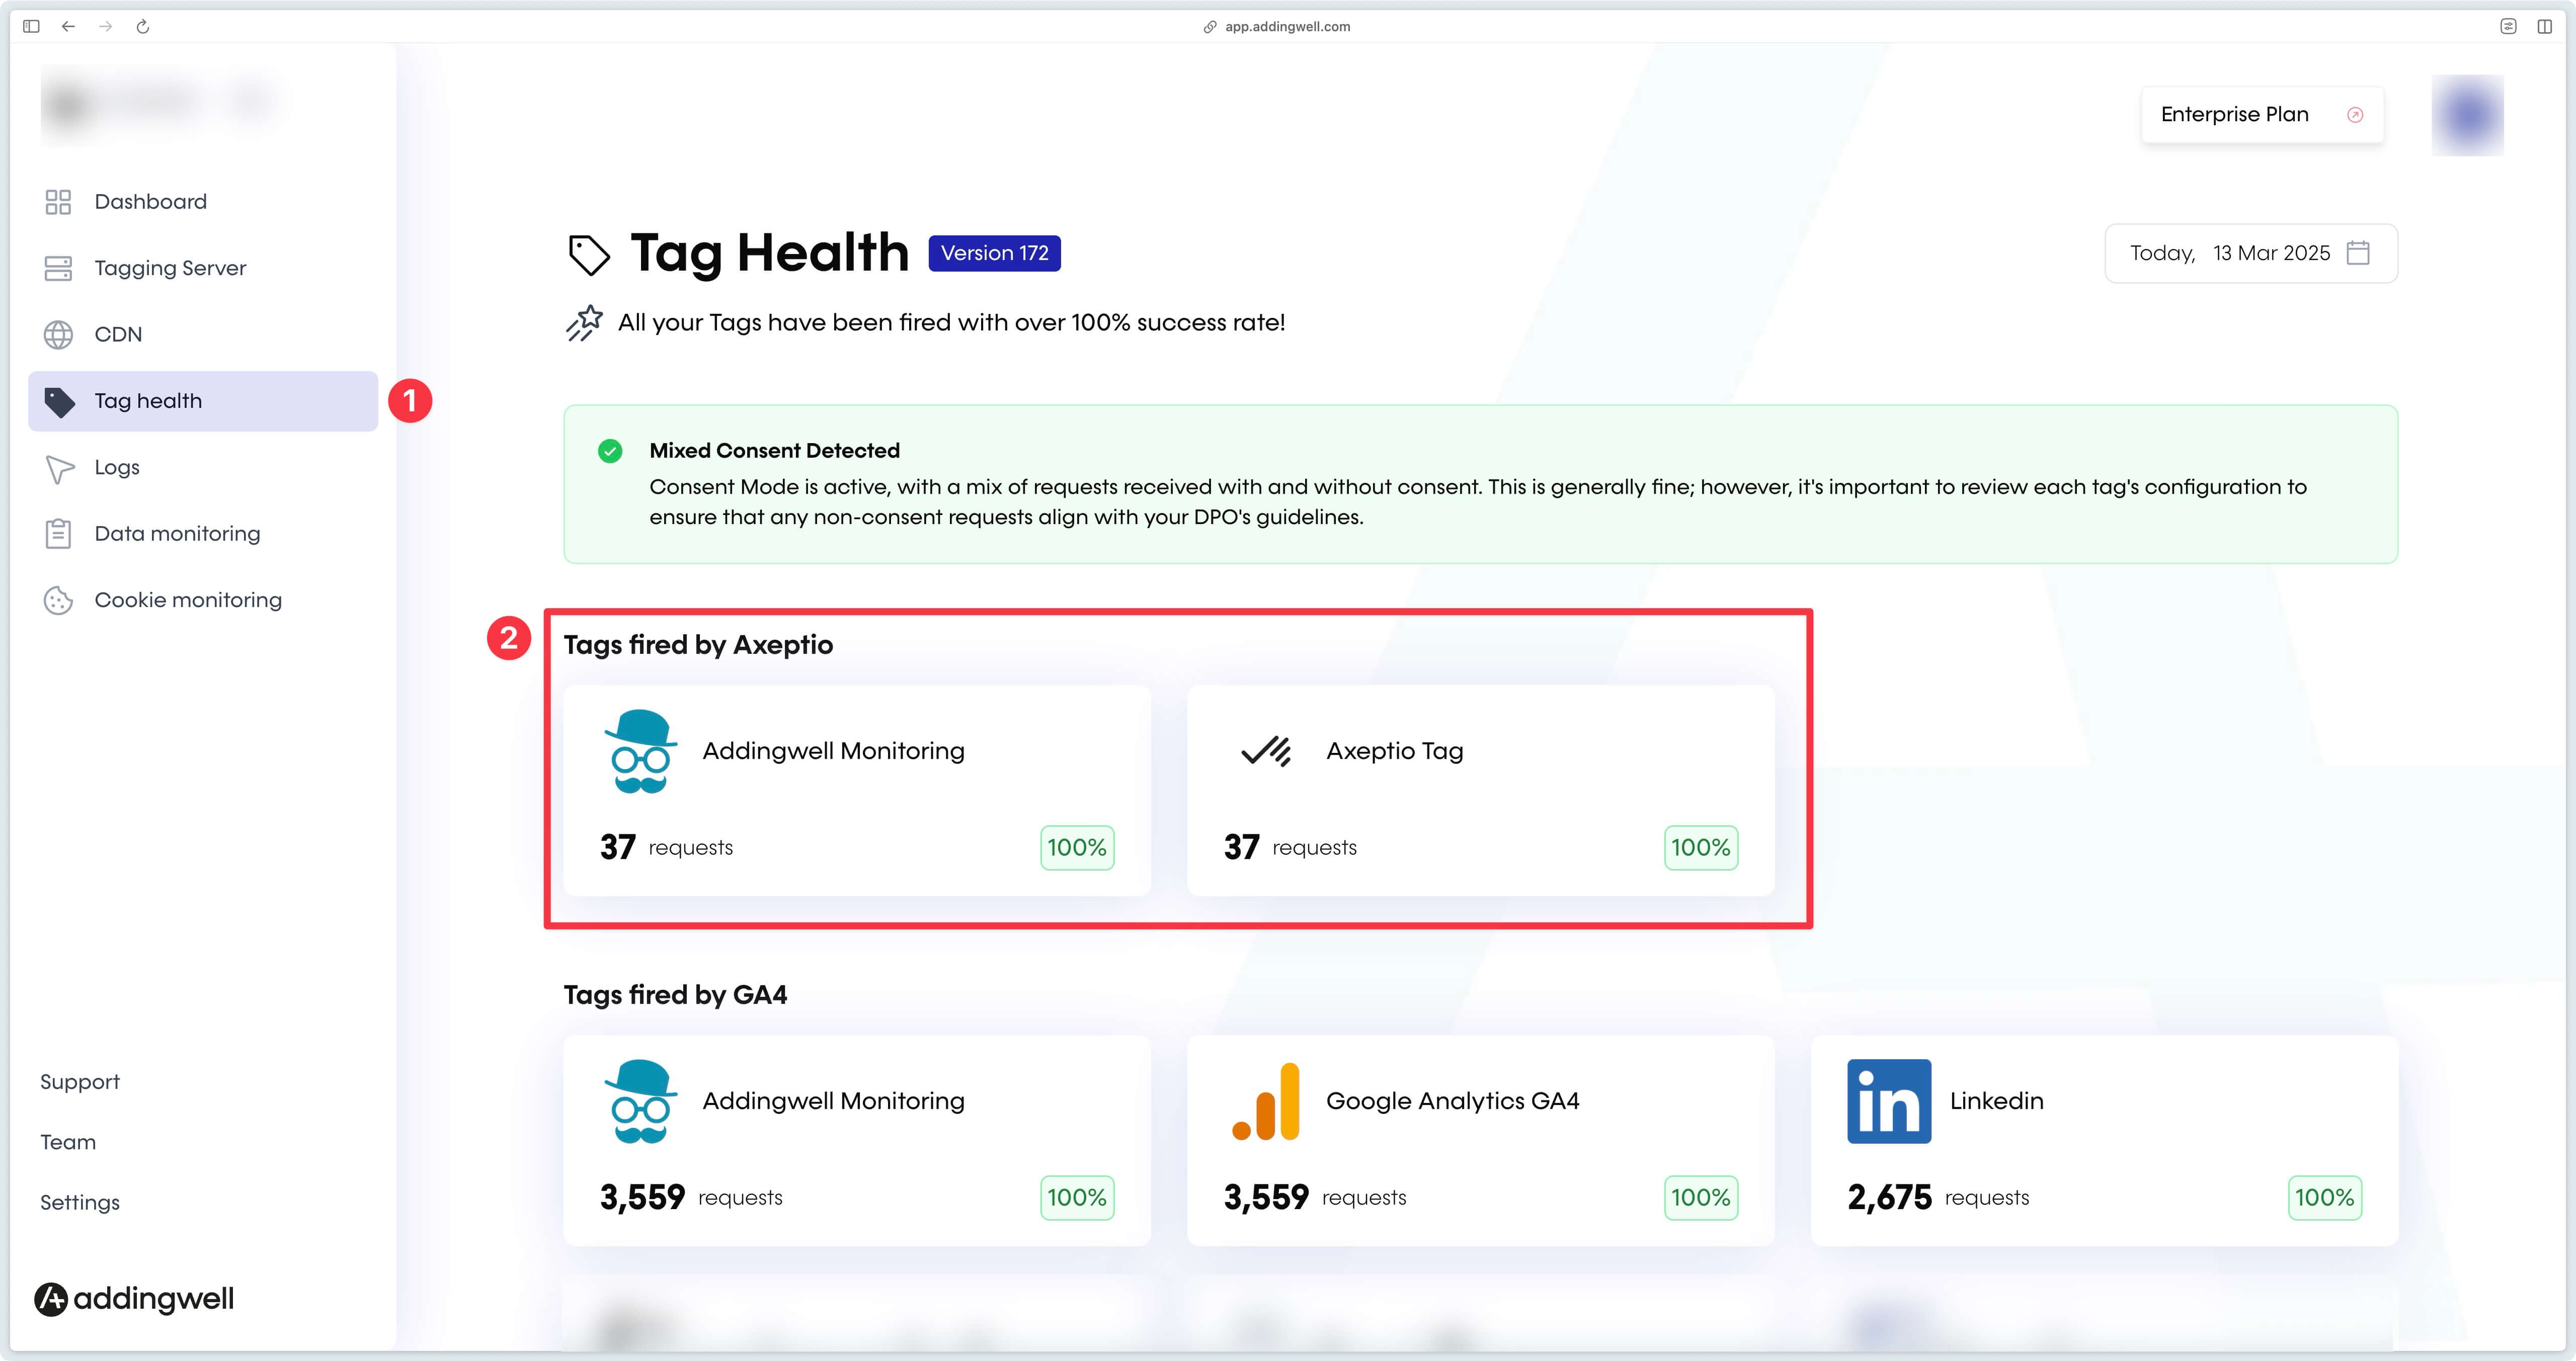
Tag Health
In your Addingwell container monitoring (Tag Health tab), you can see the tags triggered by the Axeptio client, and in particular the Axeptio tag.
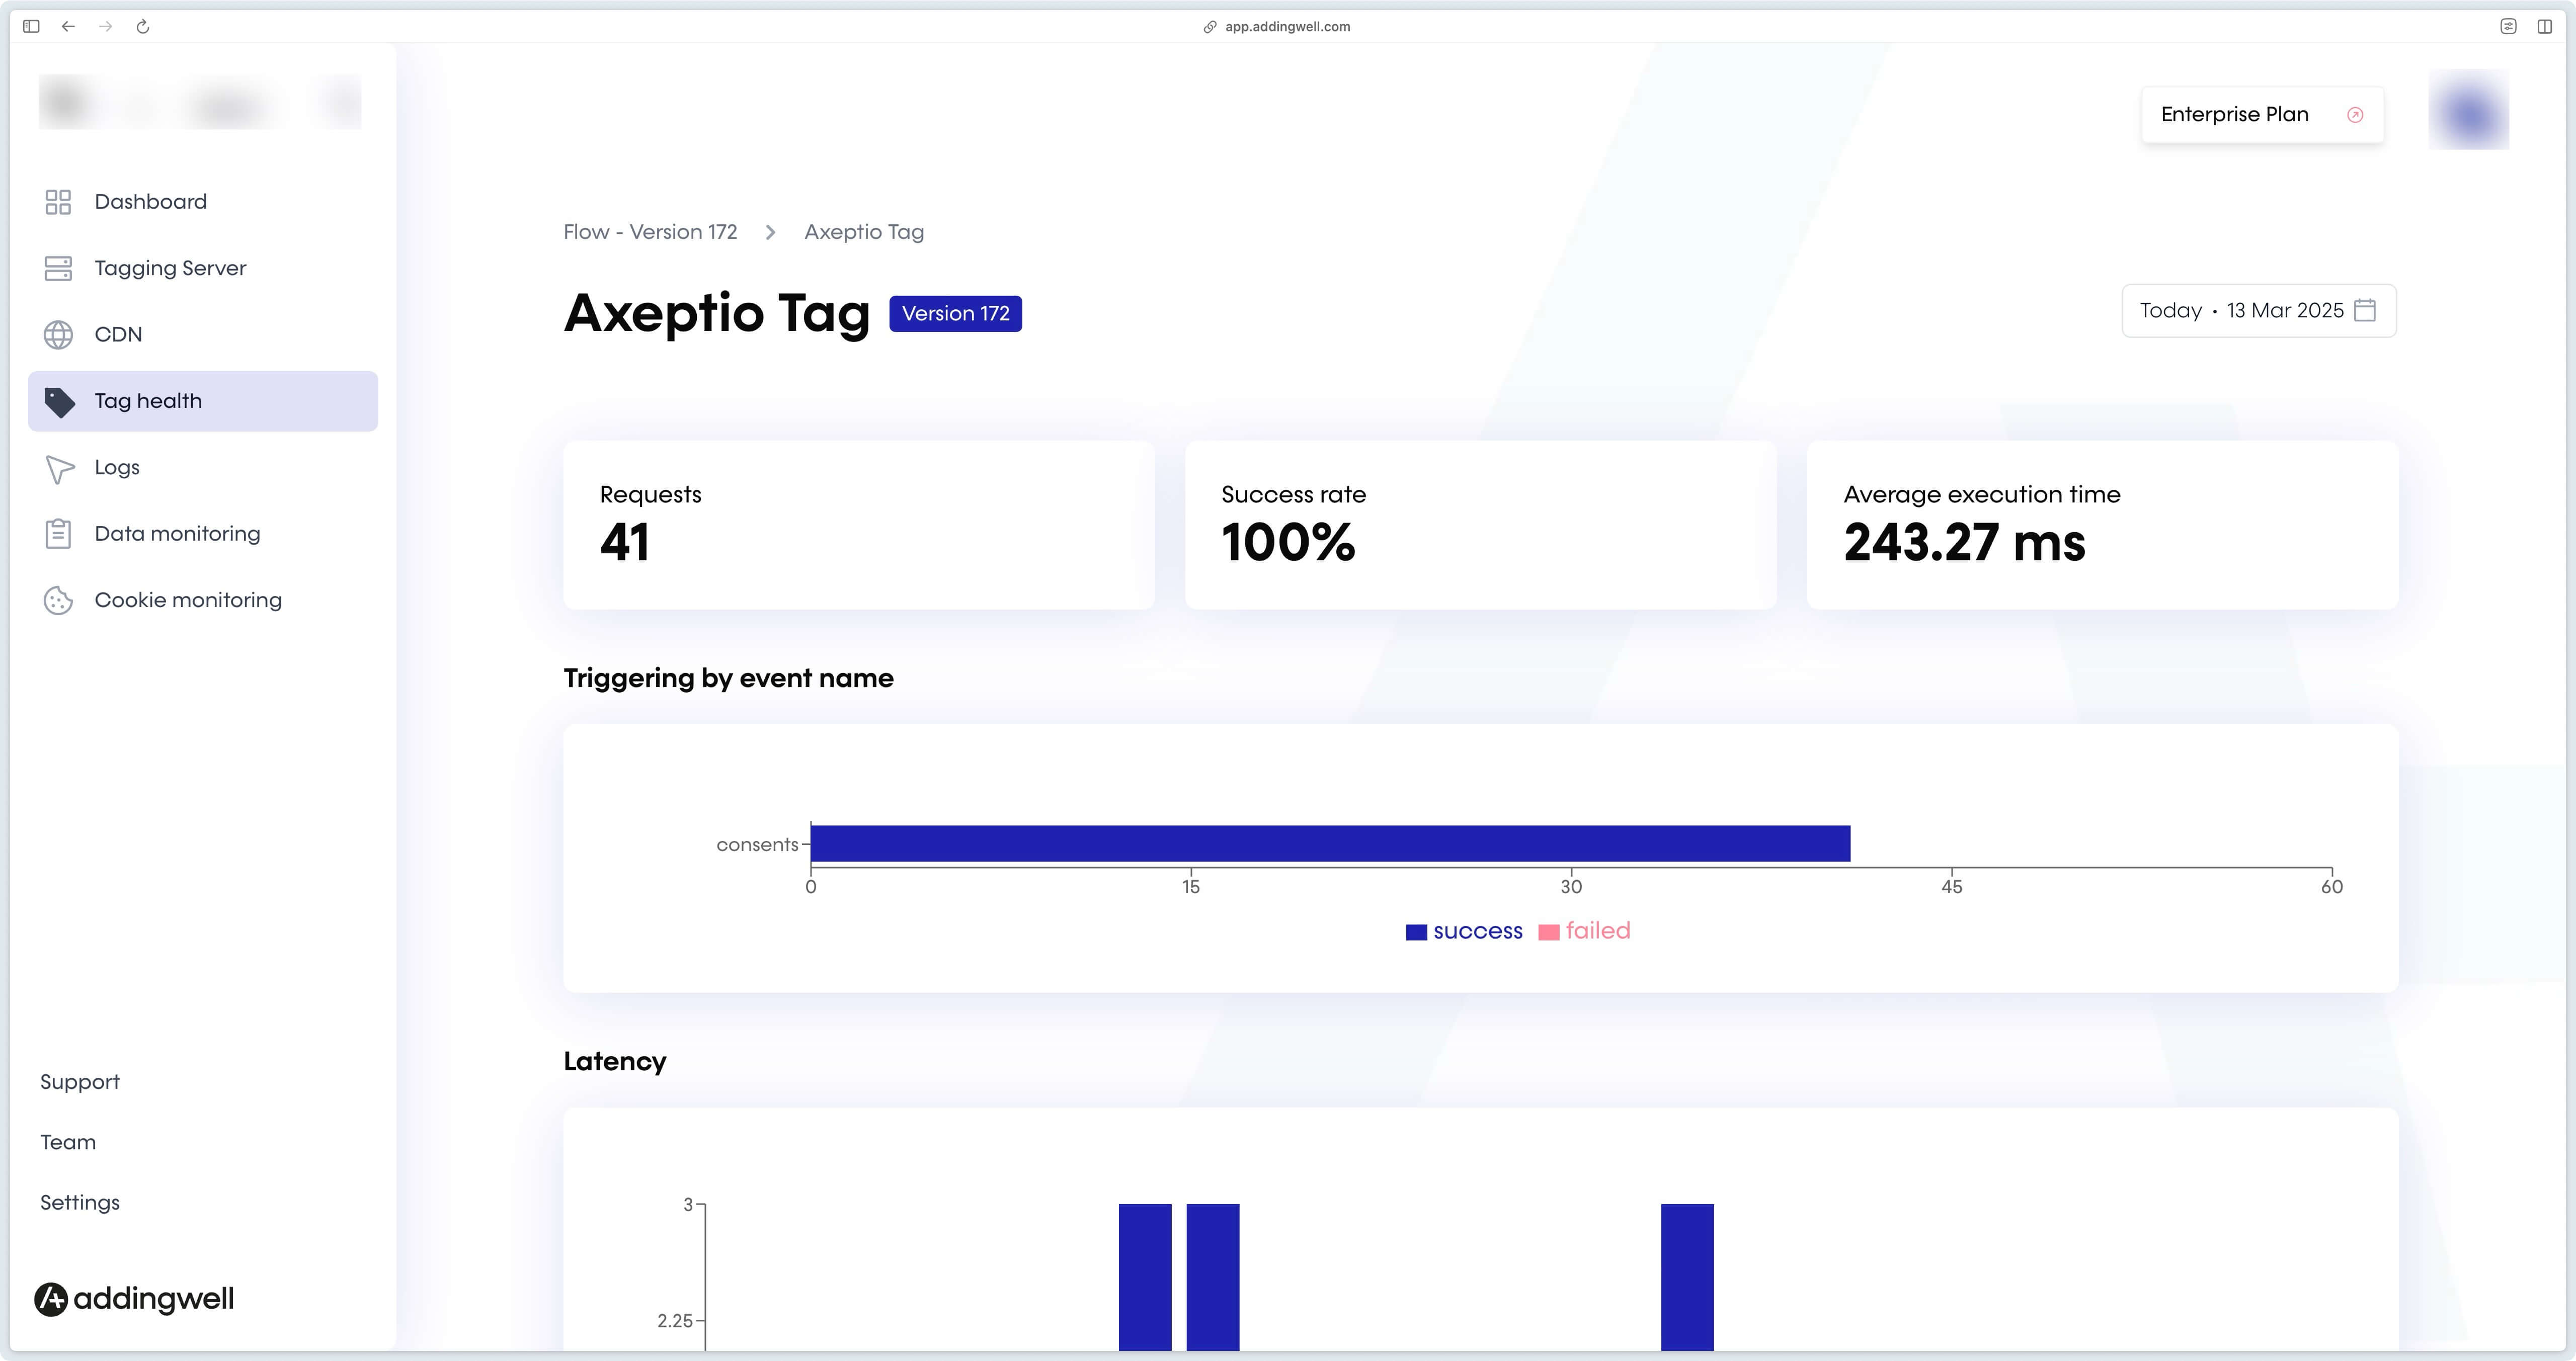
By clicking on the Axeptio tag, you can see on which events it has been triggered. This tag is only triggered on consents events.
Logs
In the Logs section of your Addingwell container, you can see the success rate of requests sent to Axeptio.
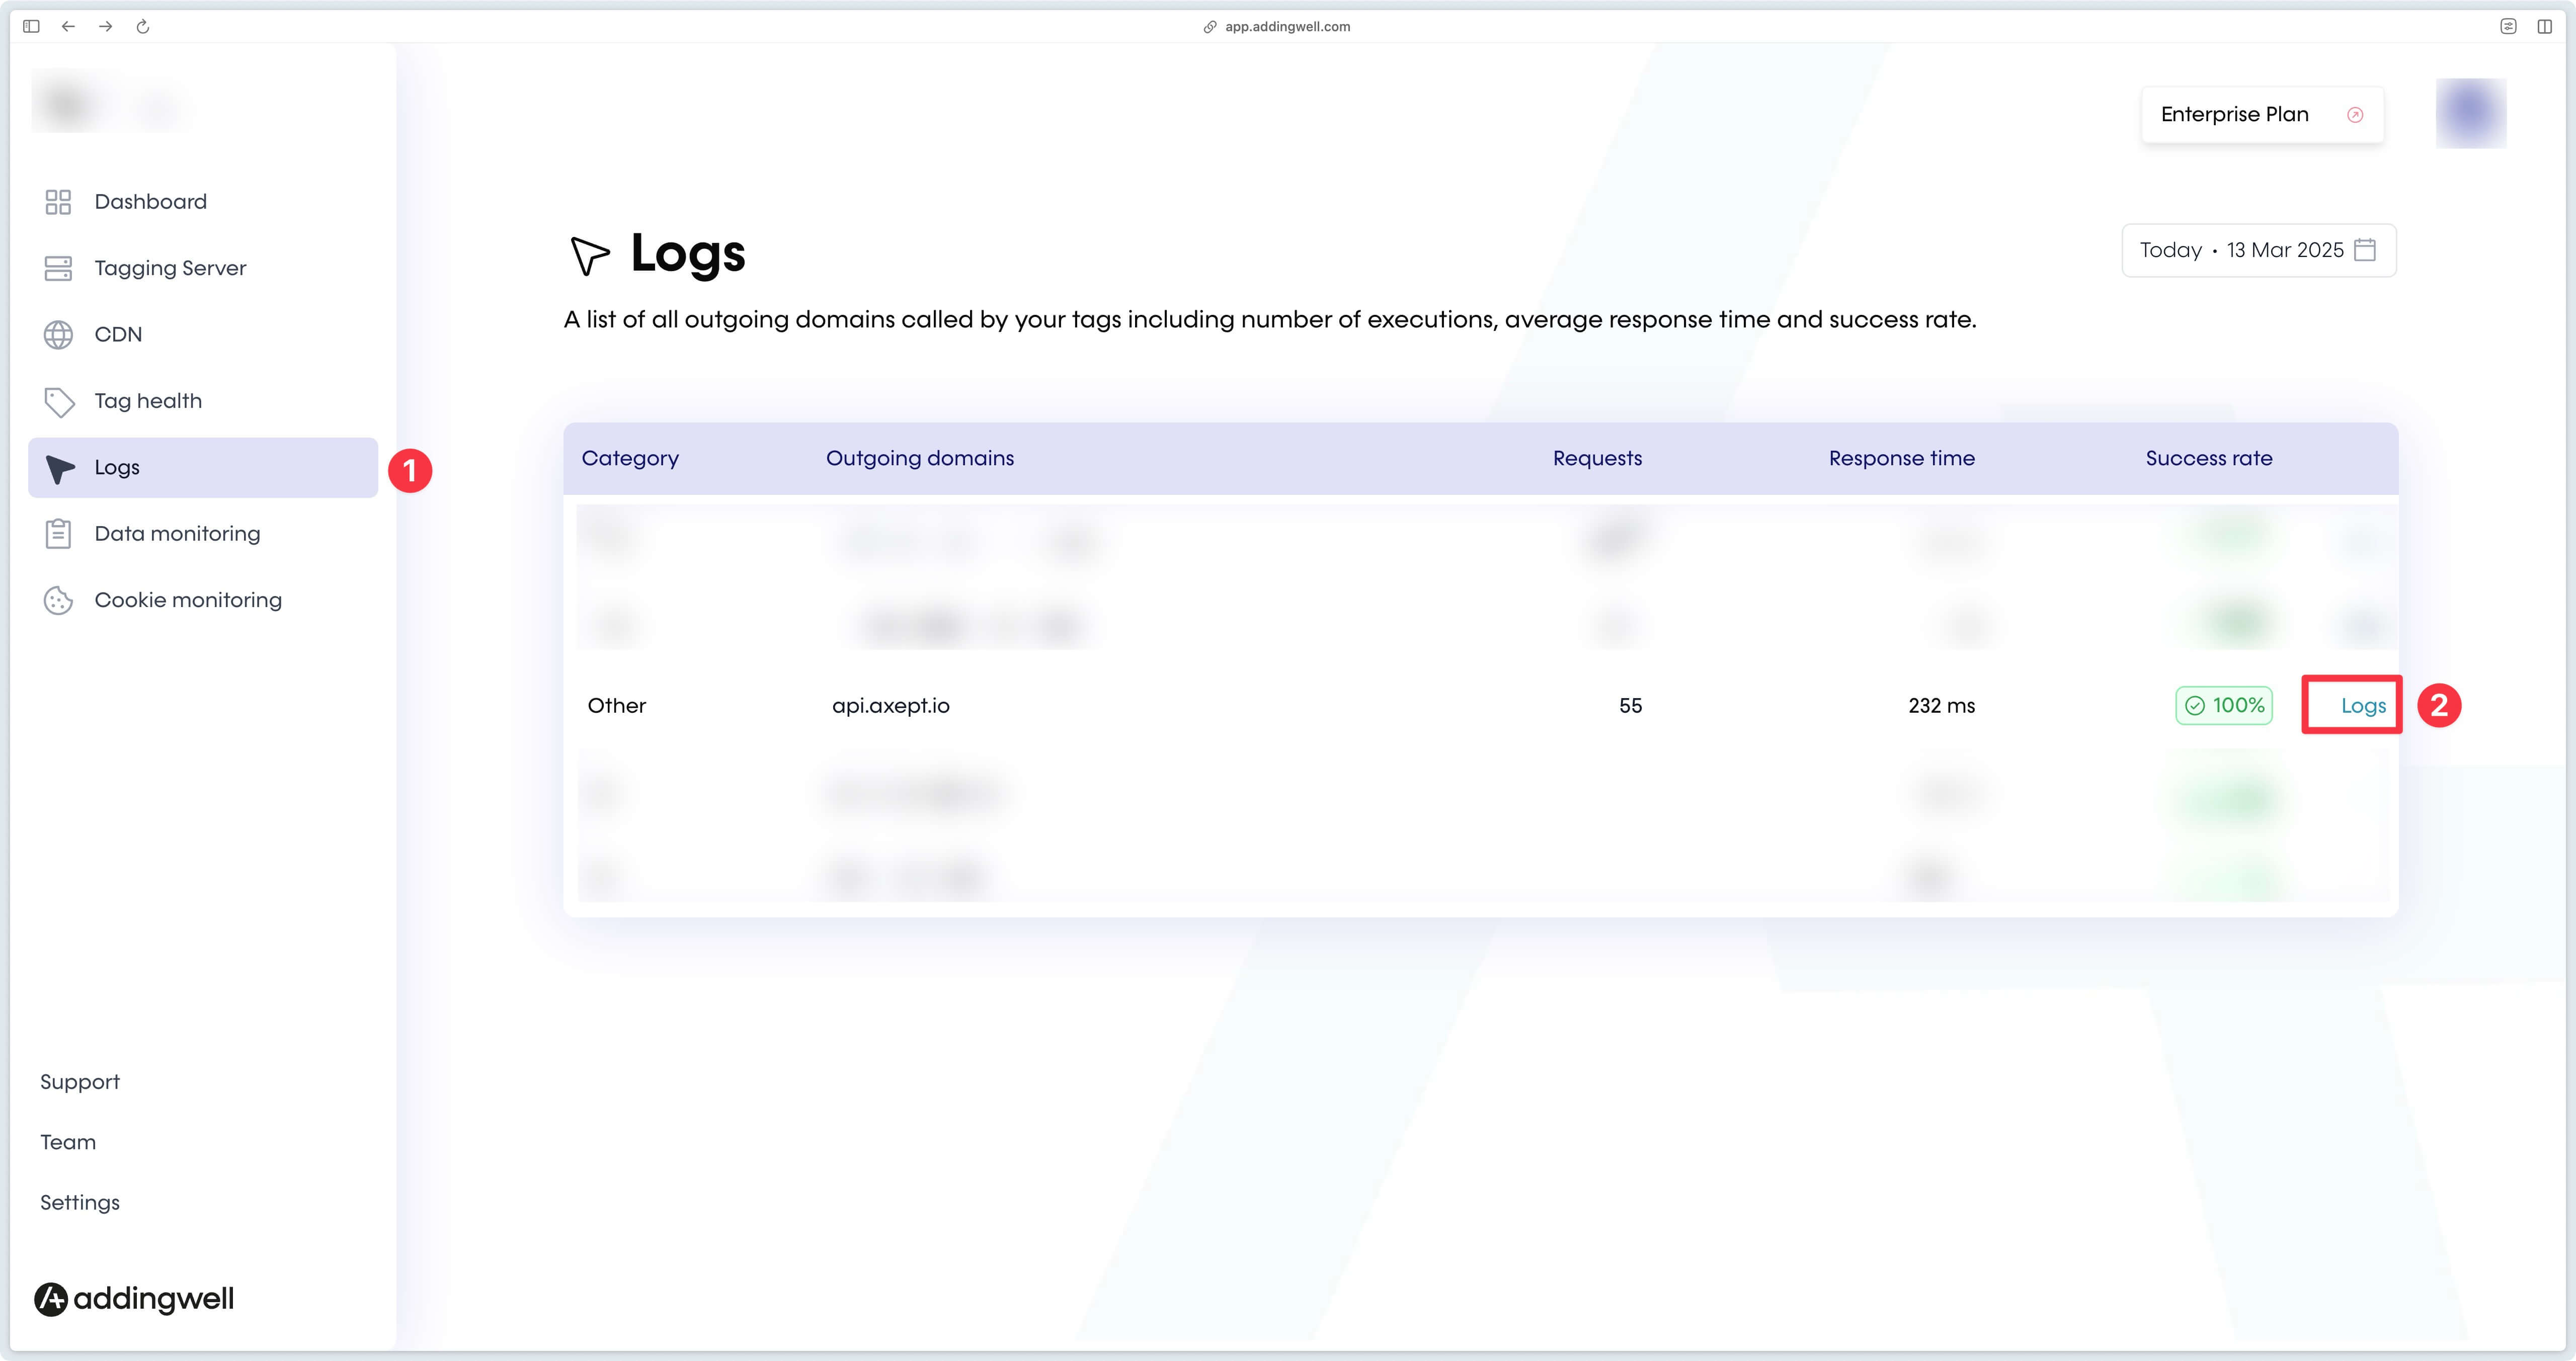
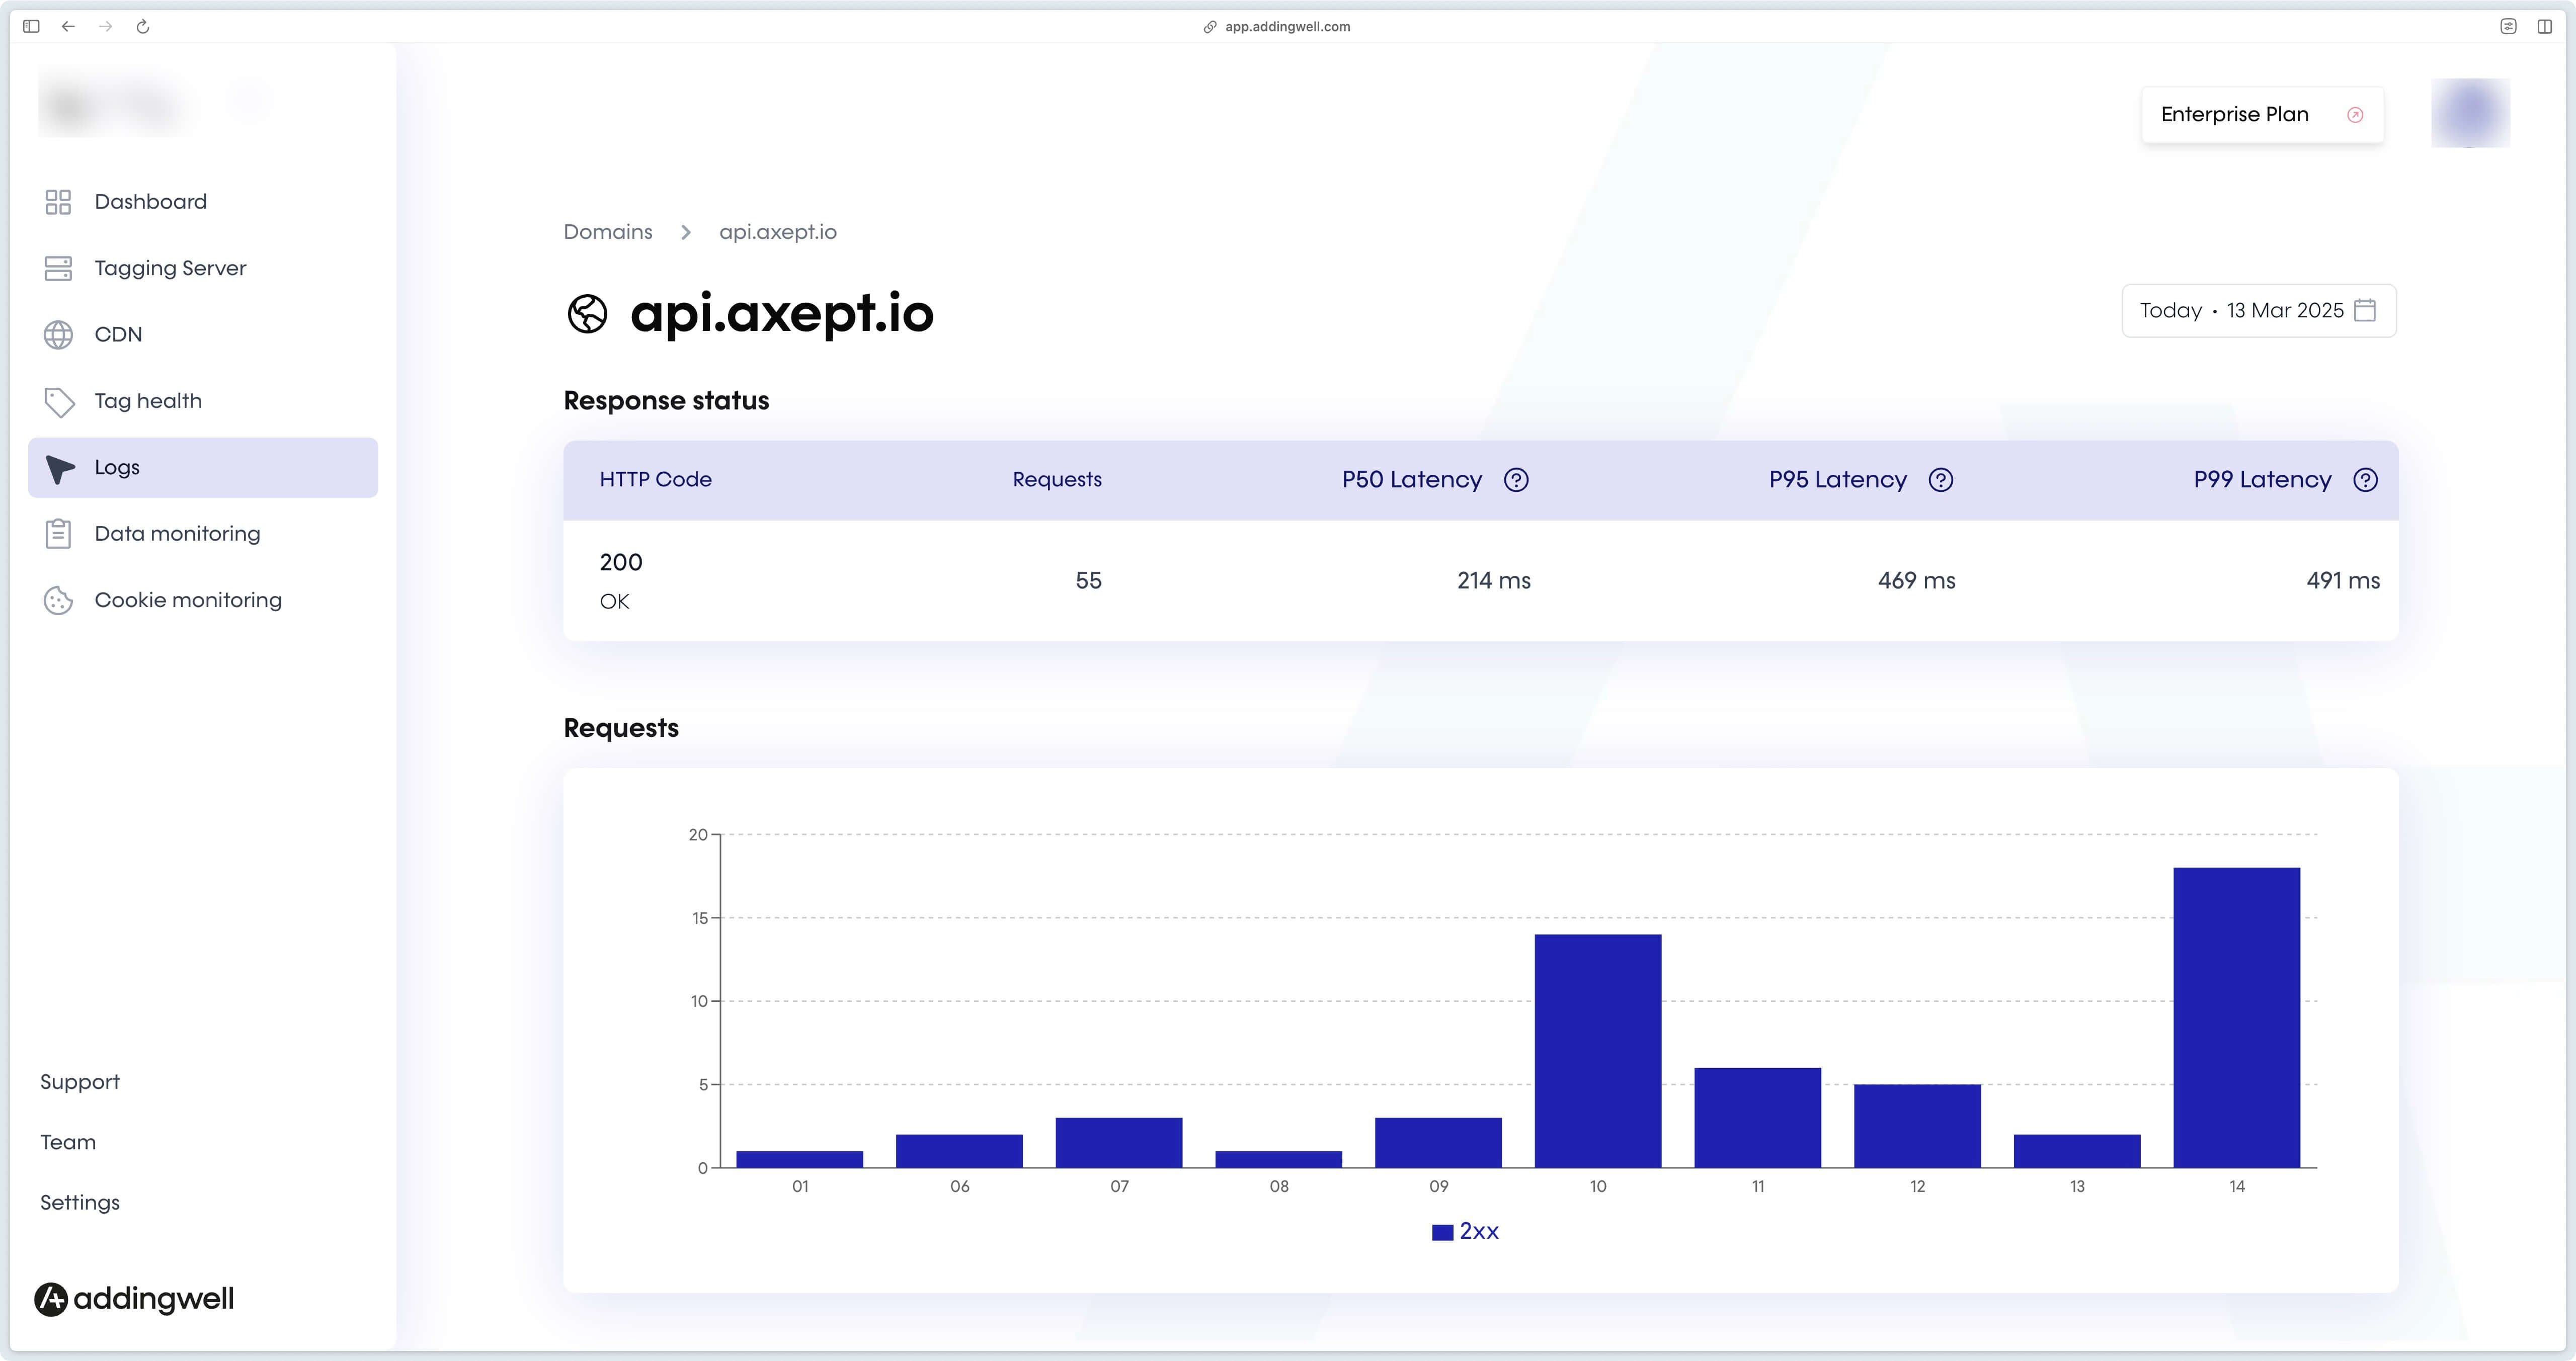
By clicking on the Logs link, you can access more information on Axeptio requests.
For more details on Addingwell monitoring, see our documentation on the subject.
Known errors and solutions
CORS requests errors
If you’re getting CORS errors, it’s most likely because you haven’t published your server container.
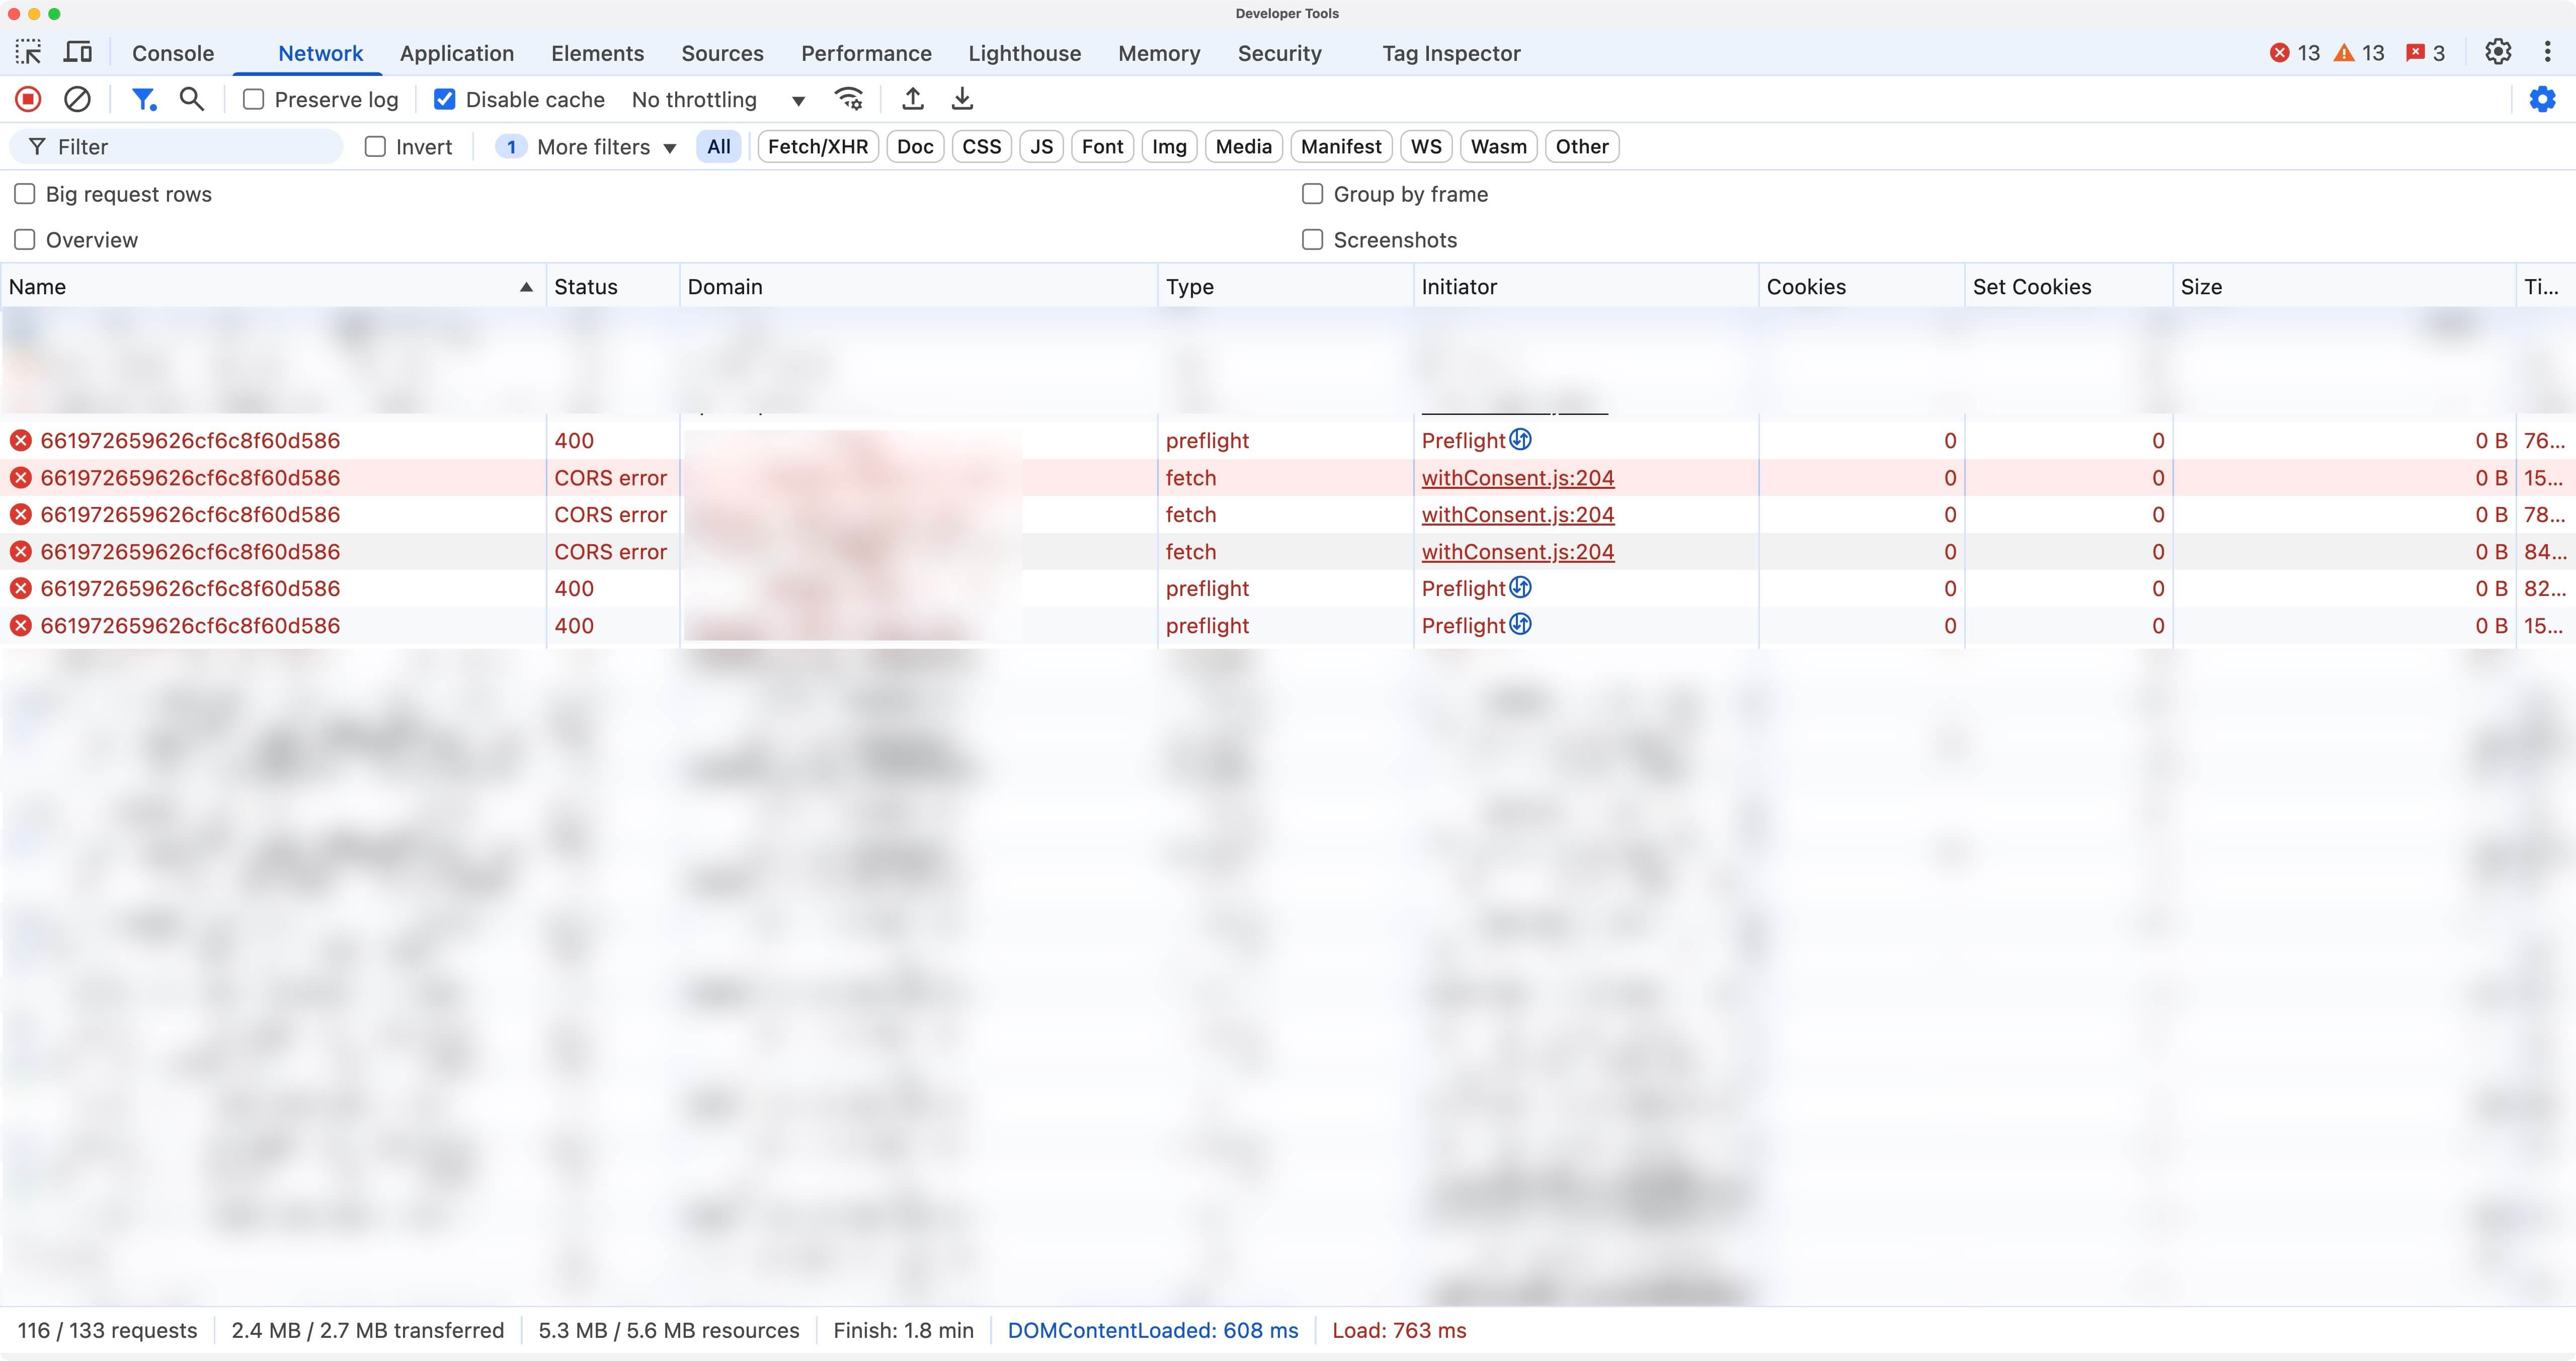
After publishing the server container you should no longer see this error.