Configure your server-side environment
Create your Addingwell Container
Register and create your account
Go to Addingwell and click on Start free trial. Follow the steps to create your account by providing the required information.
Once your account has been created, you will have to create your first Container.
In Addingwell, the Container is the place where you’ll manage your server.
Create your Container
Follow the on-screen instructions to name and configure your Container to suit your needs.
When creating your Container, you’ll need to choose a billing account. If you wish to attach this Container to an existing billing account, you’ll need to select it at this stage.
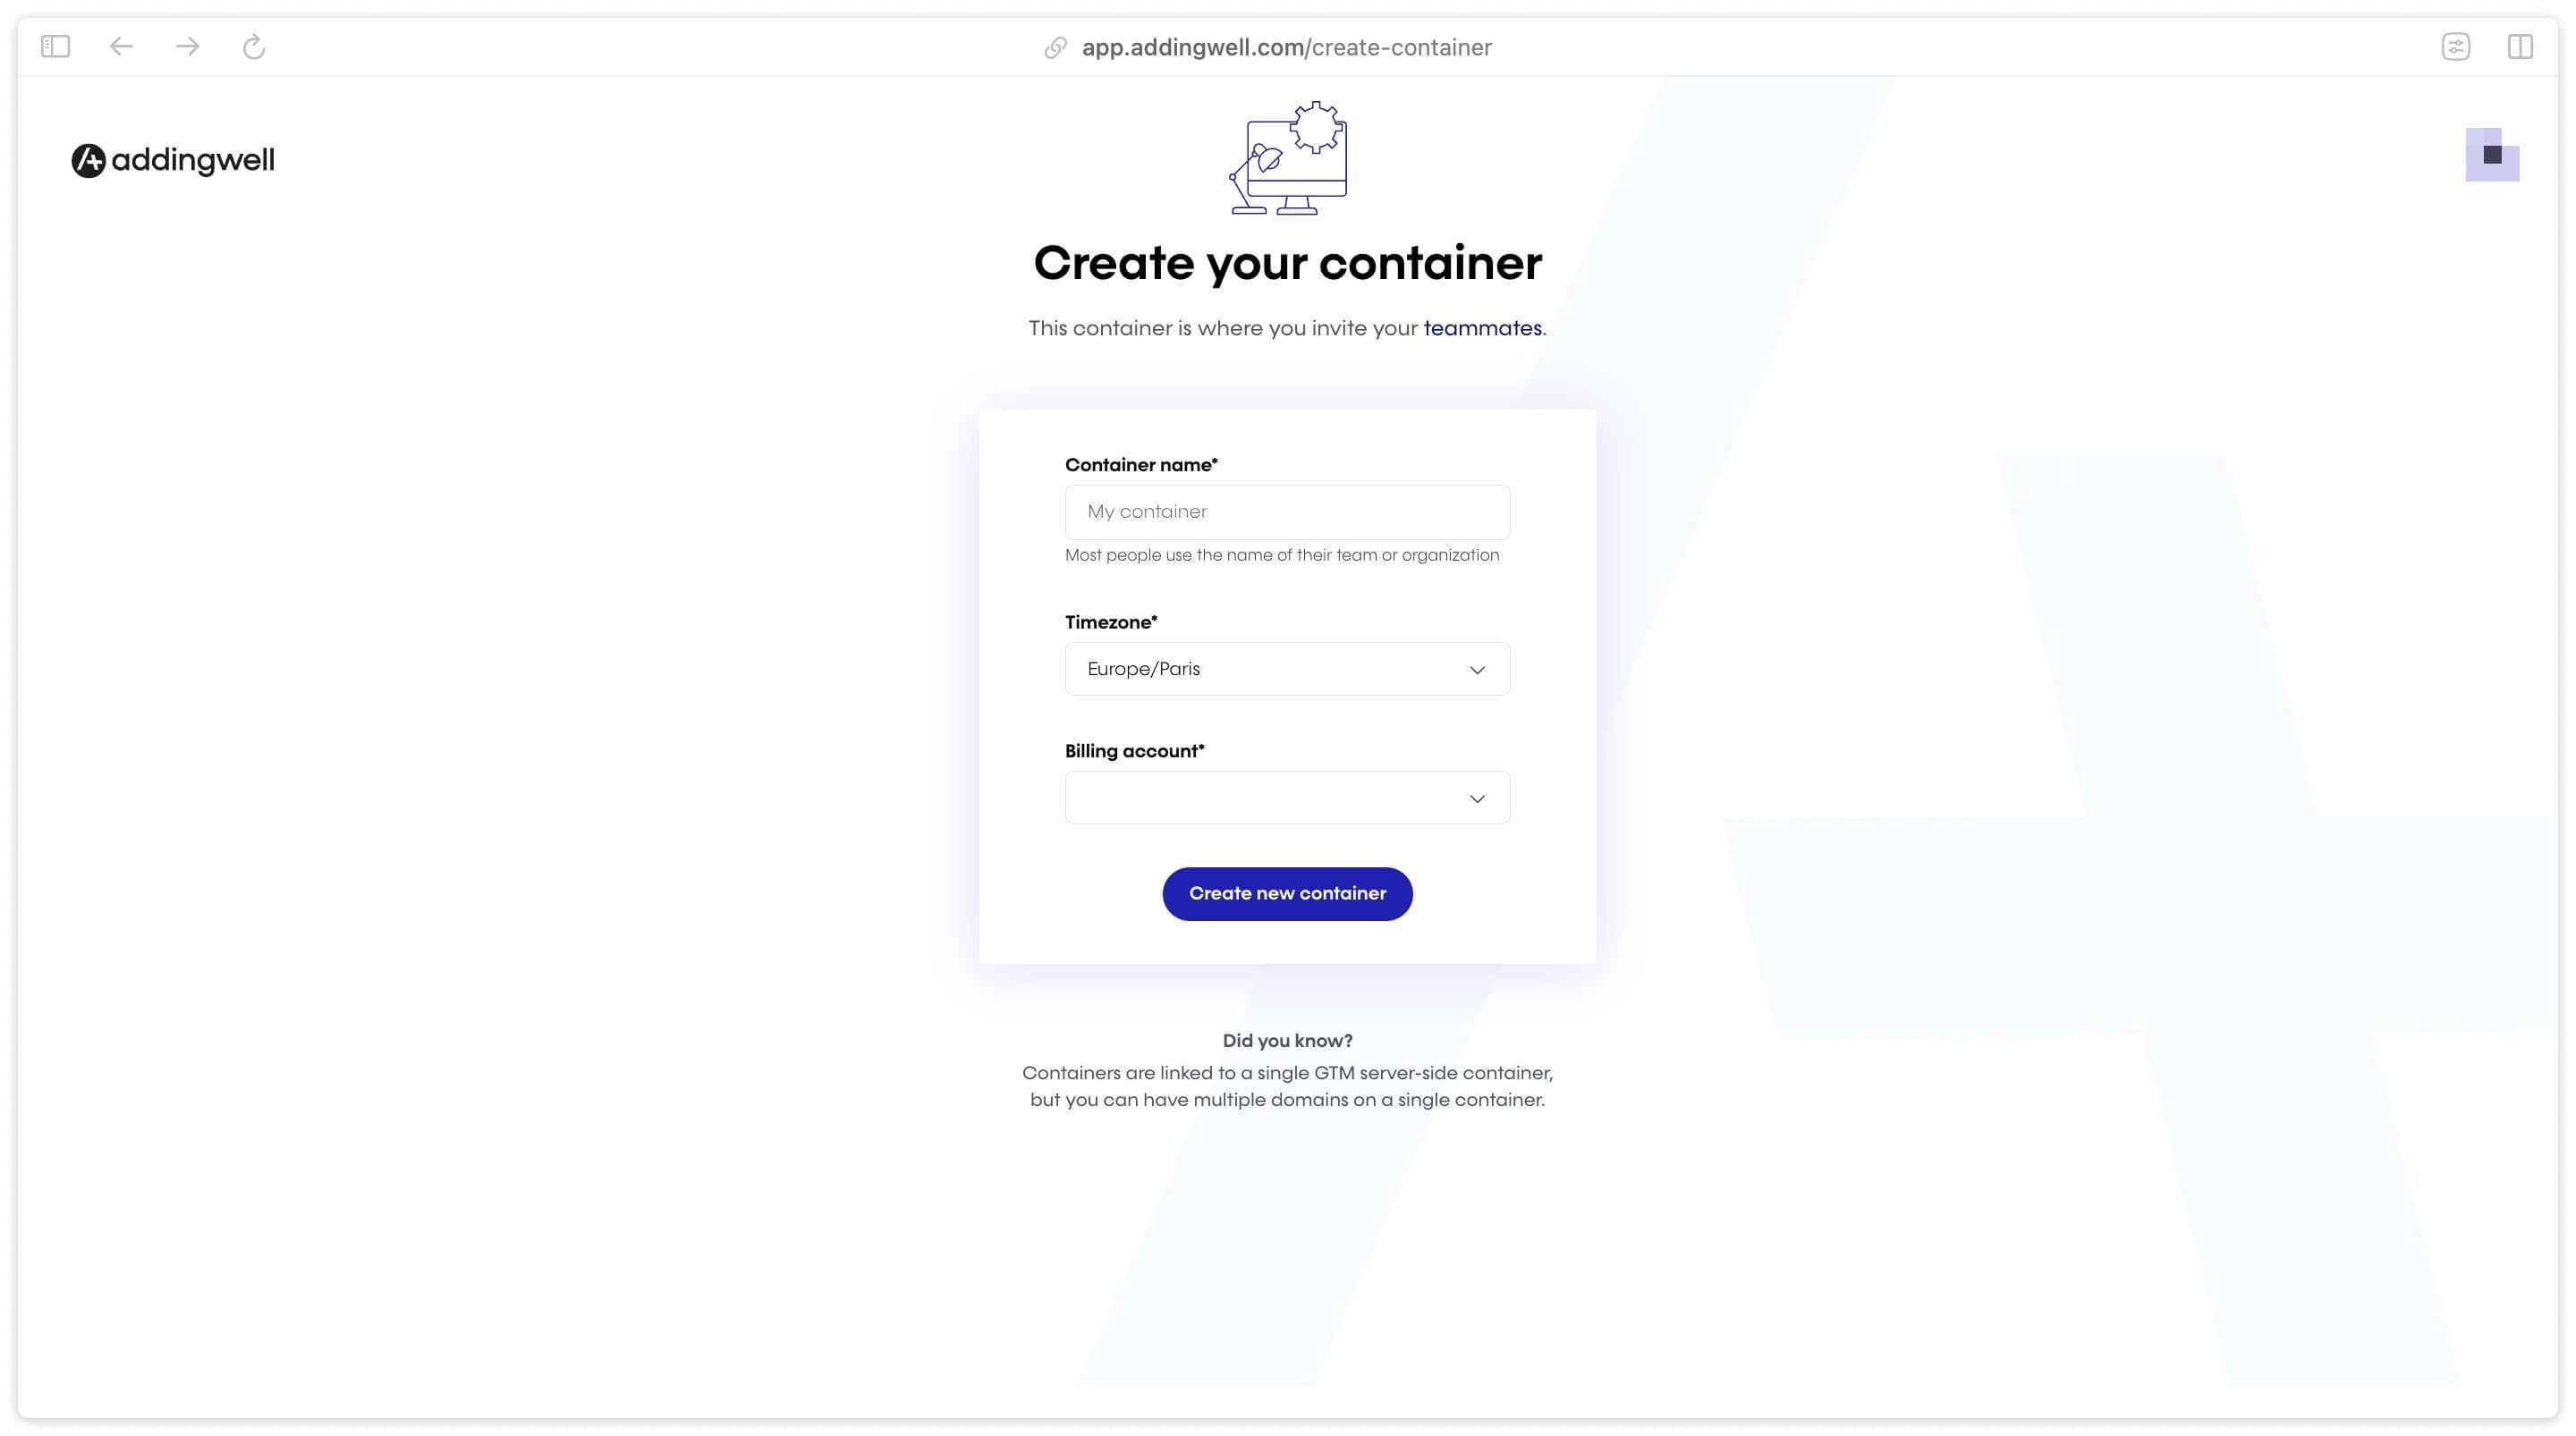
Confirm Container creation and proceed to the next step.
Server container configuration
Access to configuration interface
After having created your Container, you’ll have access to an interface where you’ll need to provide the configuration token for your GTM server container. This token will be used to connect the container created in Google Tag Manager with the Addingwell infrastructure.

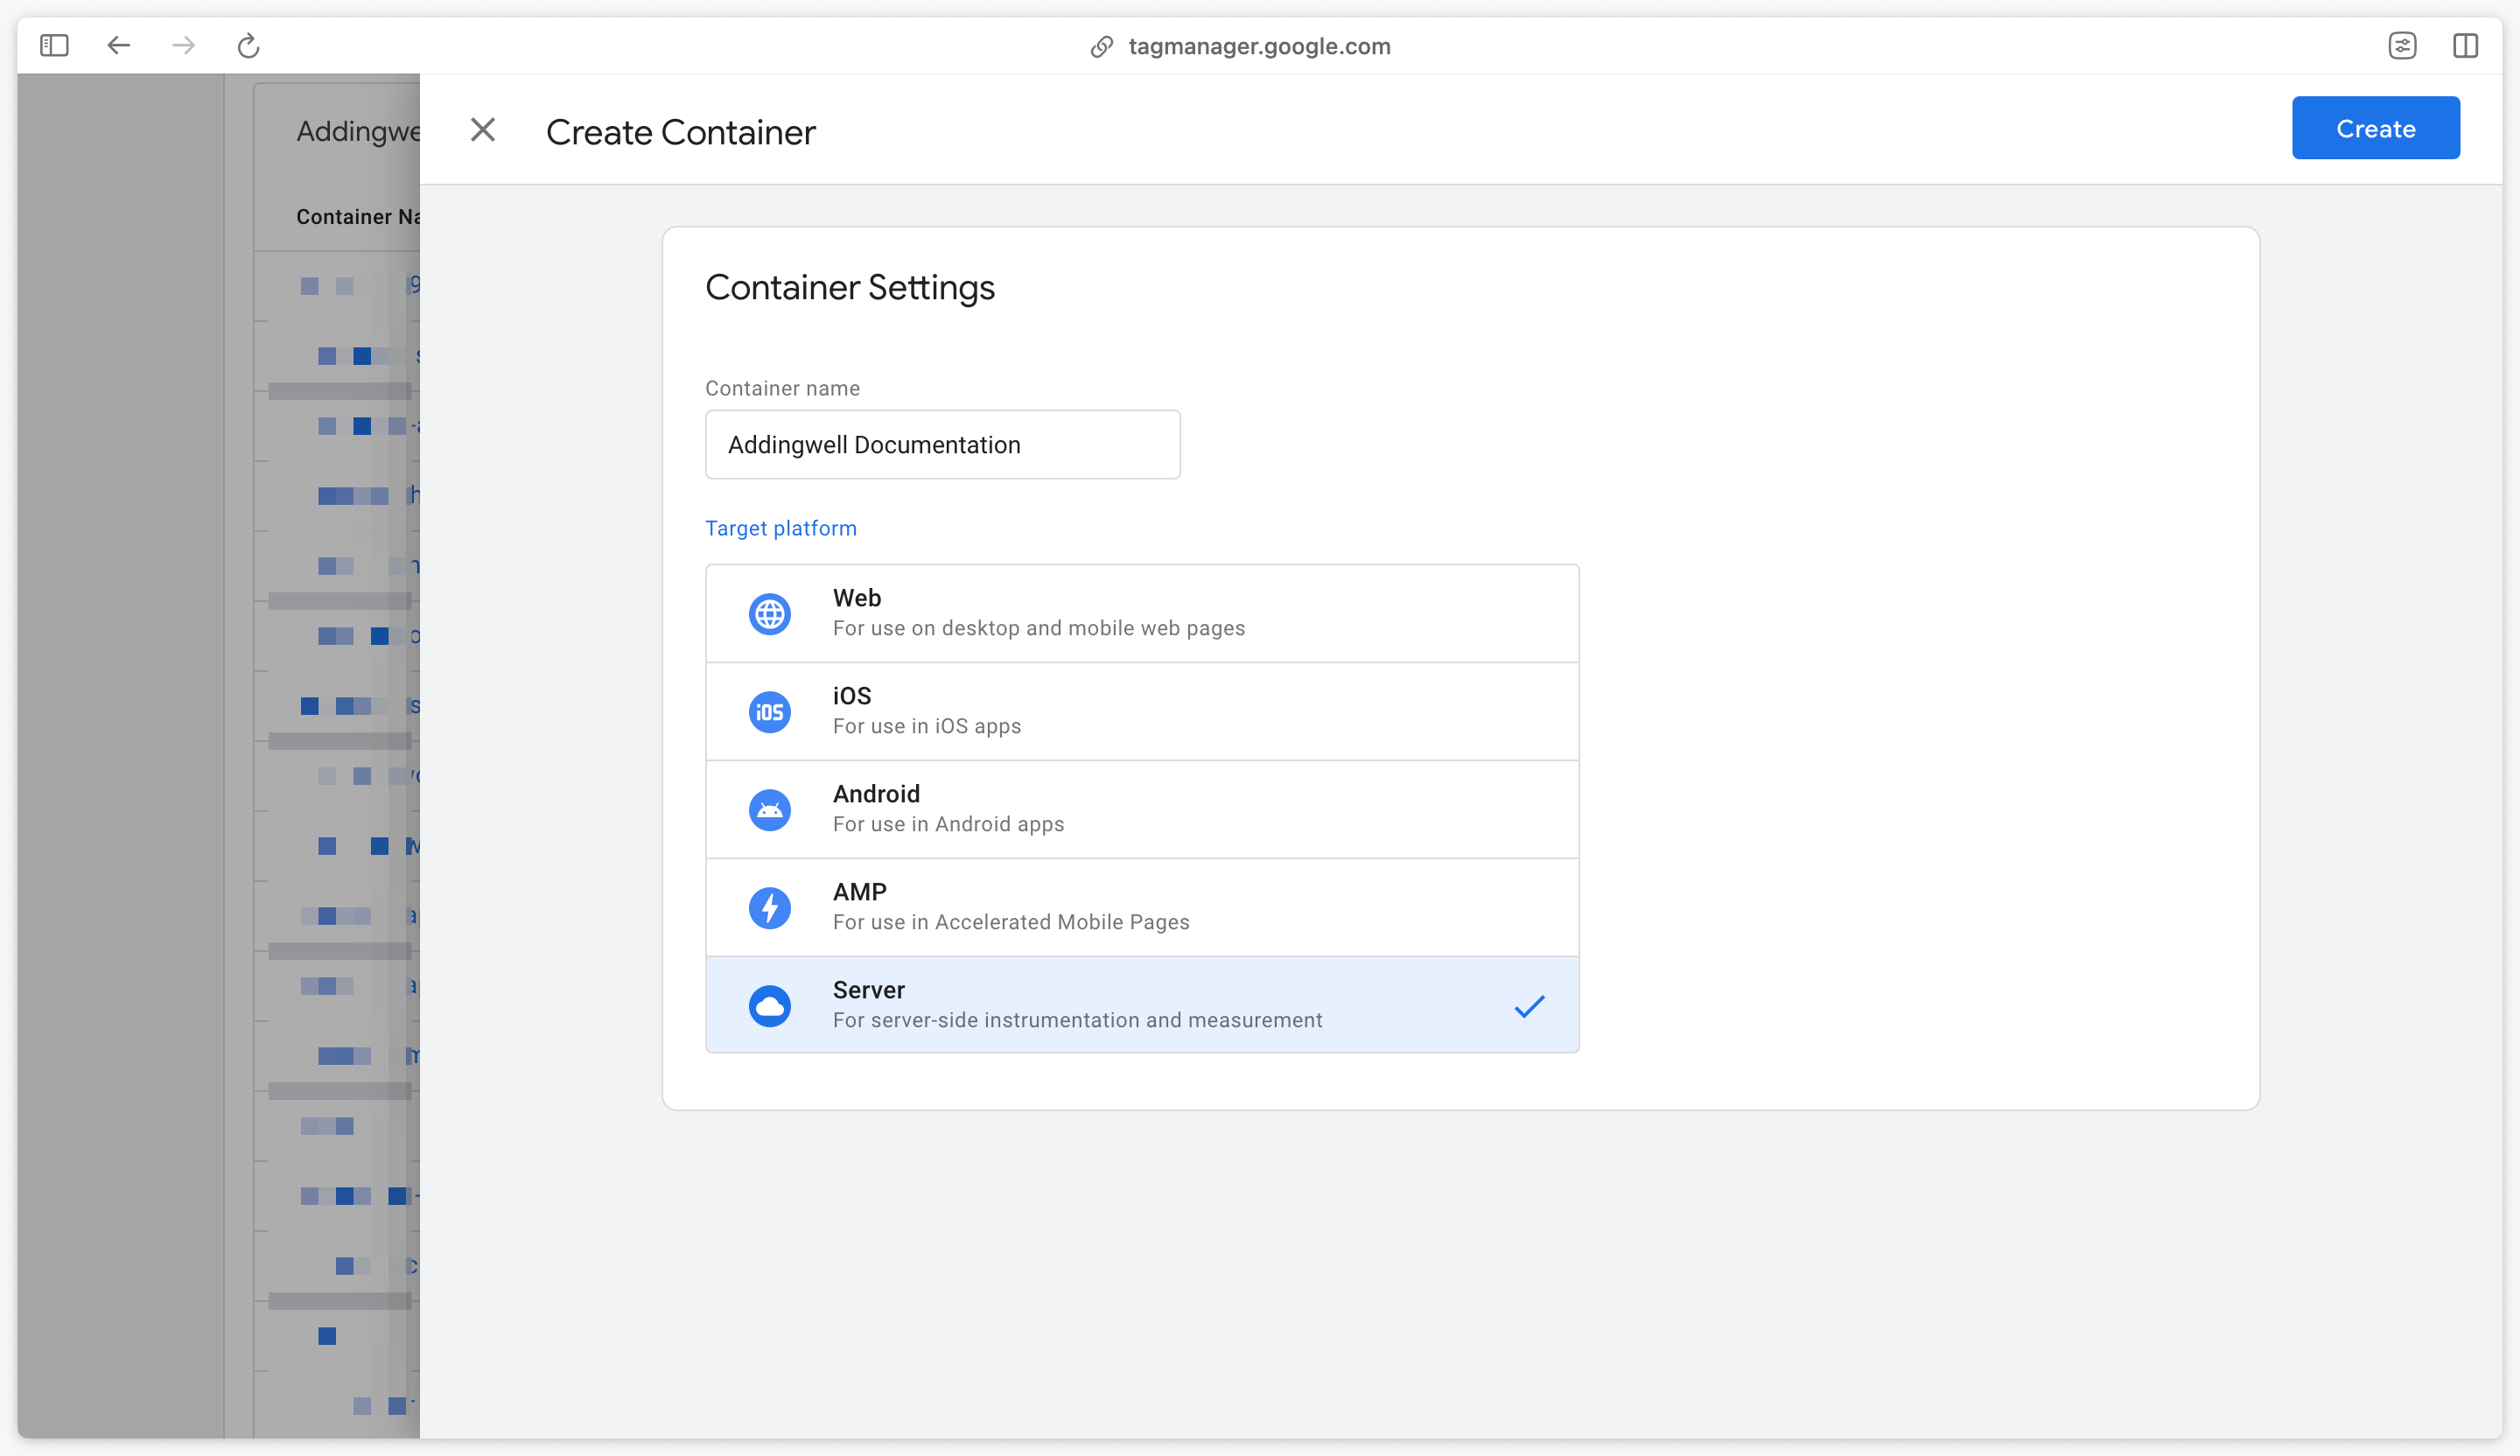
Create the server container
Go to Google Tag Manager , and log in or create an account if this is your first visit.
Click on Create Container and select the Server option for the container type.
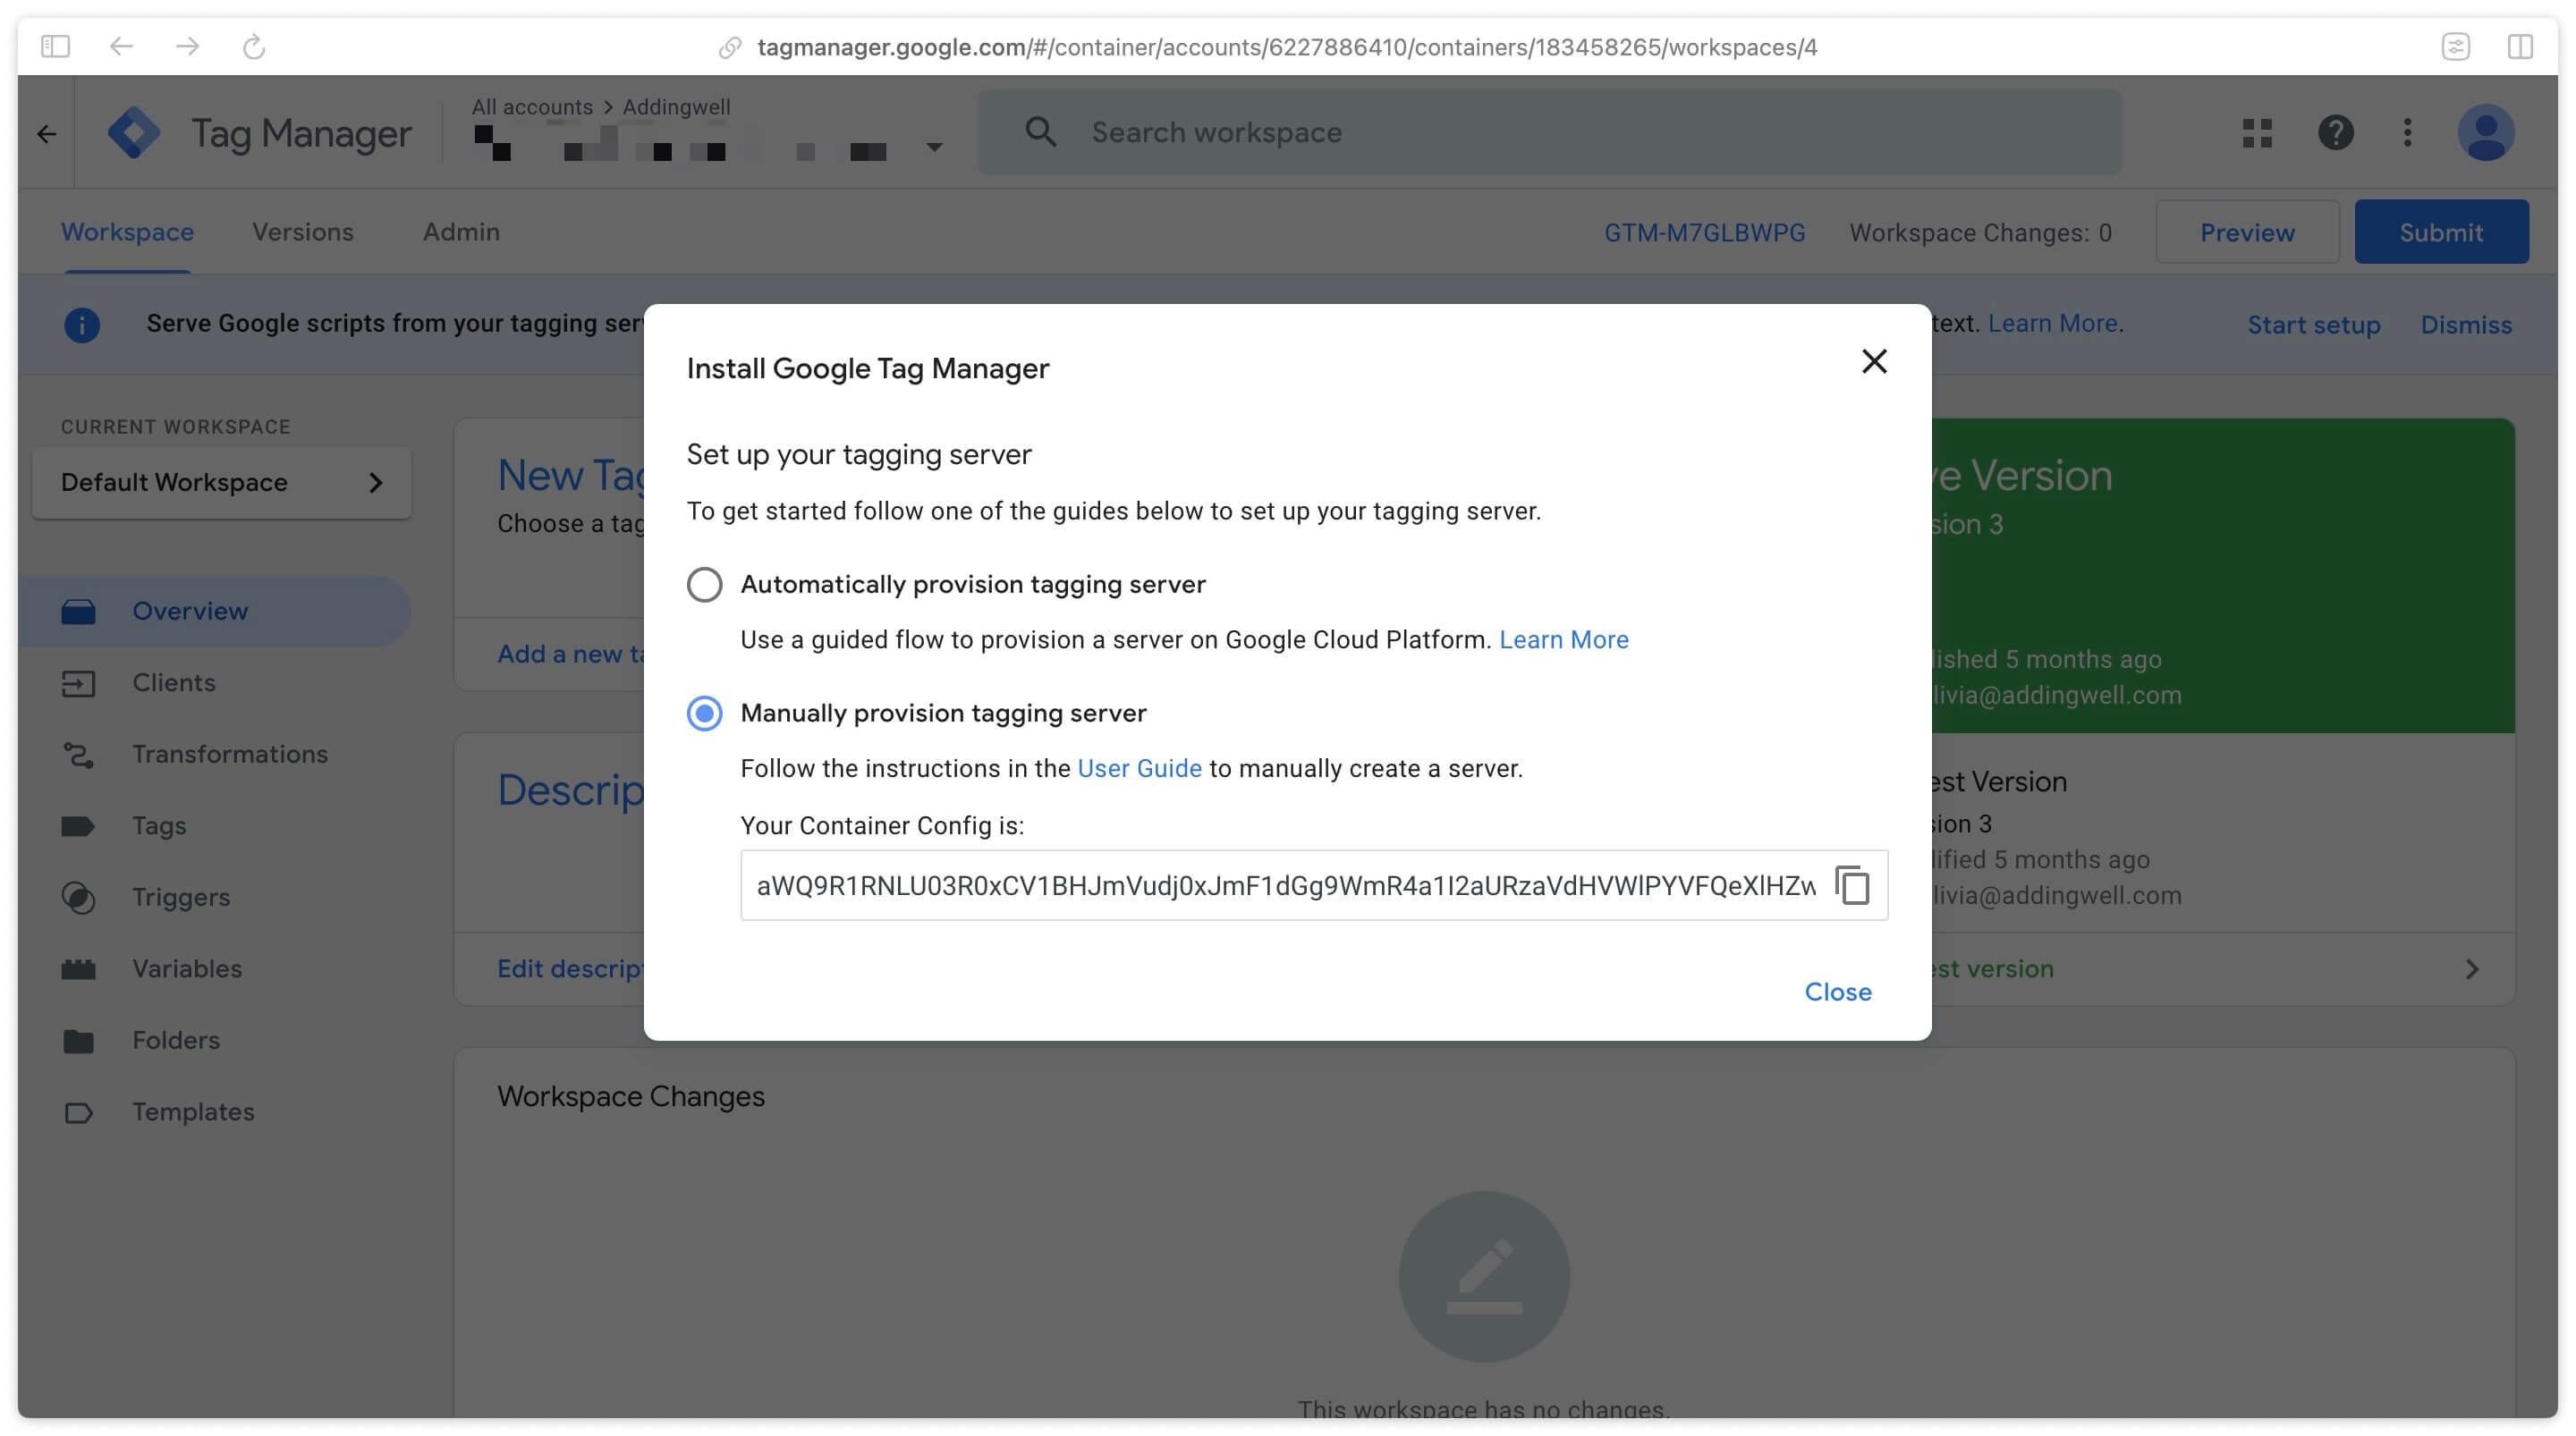
Manually provision tagging server
Google Tag Manager will ask you how you wish to provision your server. Choose the Manually provision tagging server option.
A configuration token will be displayed on the screen. Copy this token.
Addingwell configuration
Go back to your Addingwell interface and paste the token in the field provided.

Click Next to proceed to the next step.
Warning: it is not possible to link a server container already provisioned on Google Cloud.
You own multiple domains and you’re unsure which architecture to choose for your GTM Web, GTM Server, and Addingwell containers? Read our dedicated article to discover our recommendations on the topic!
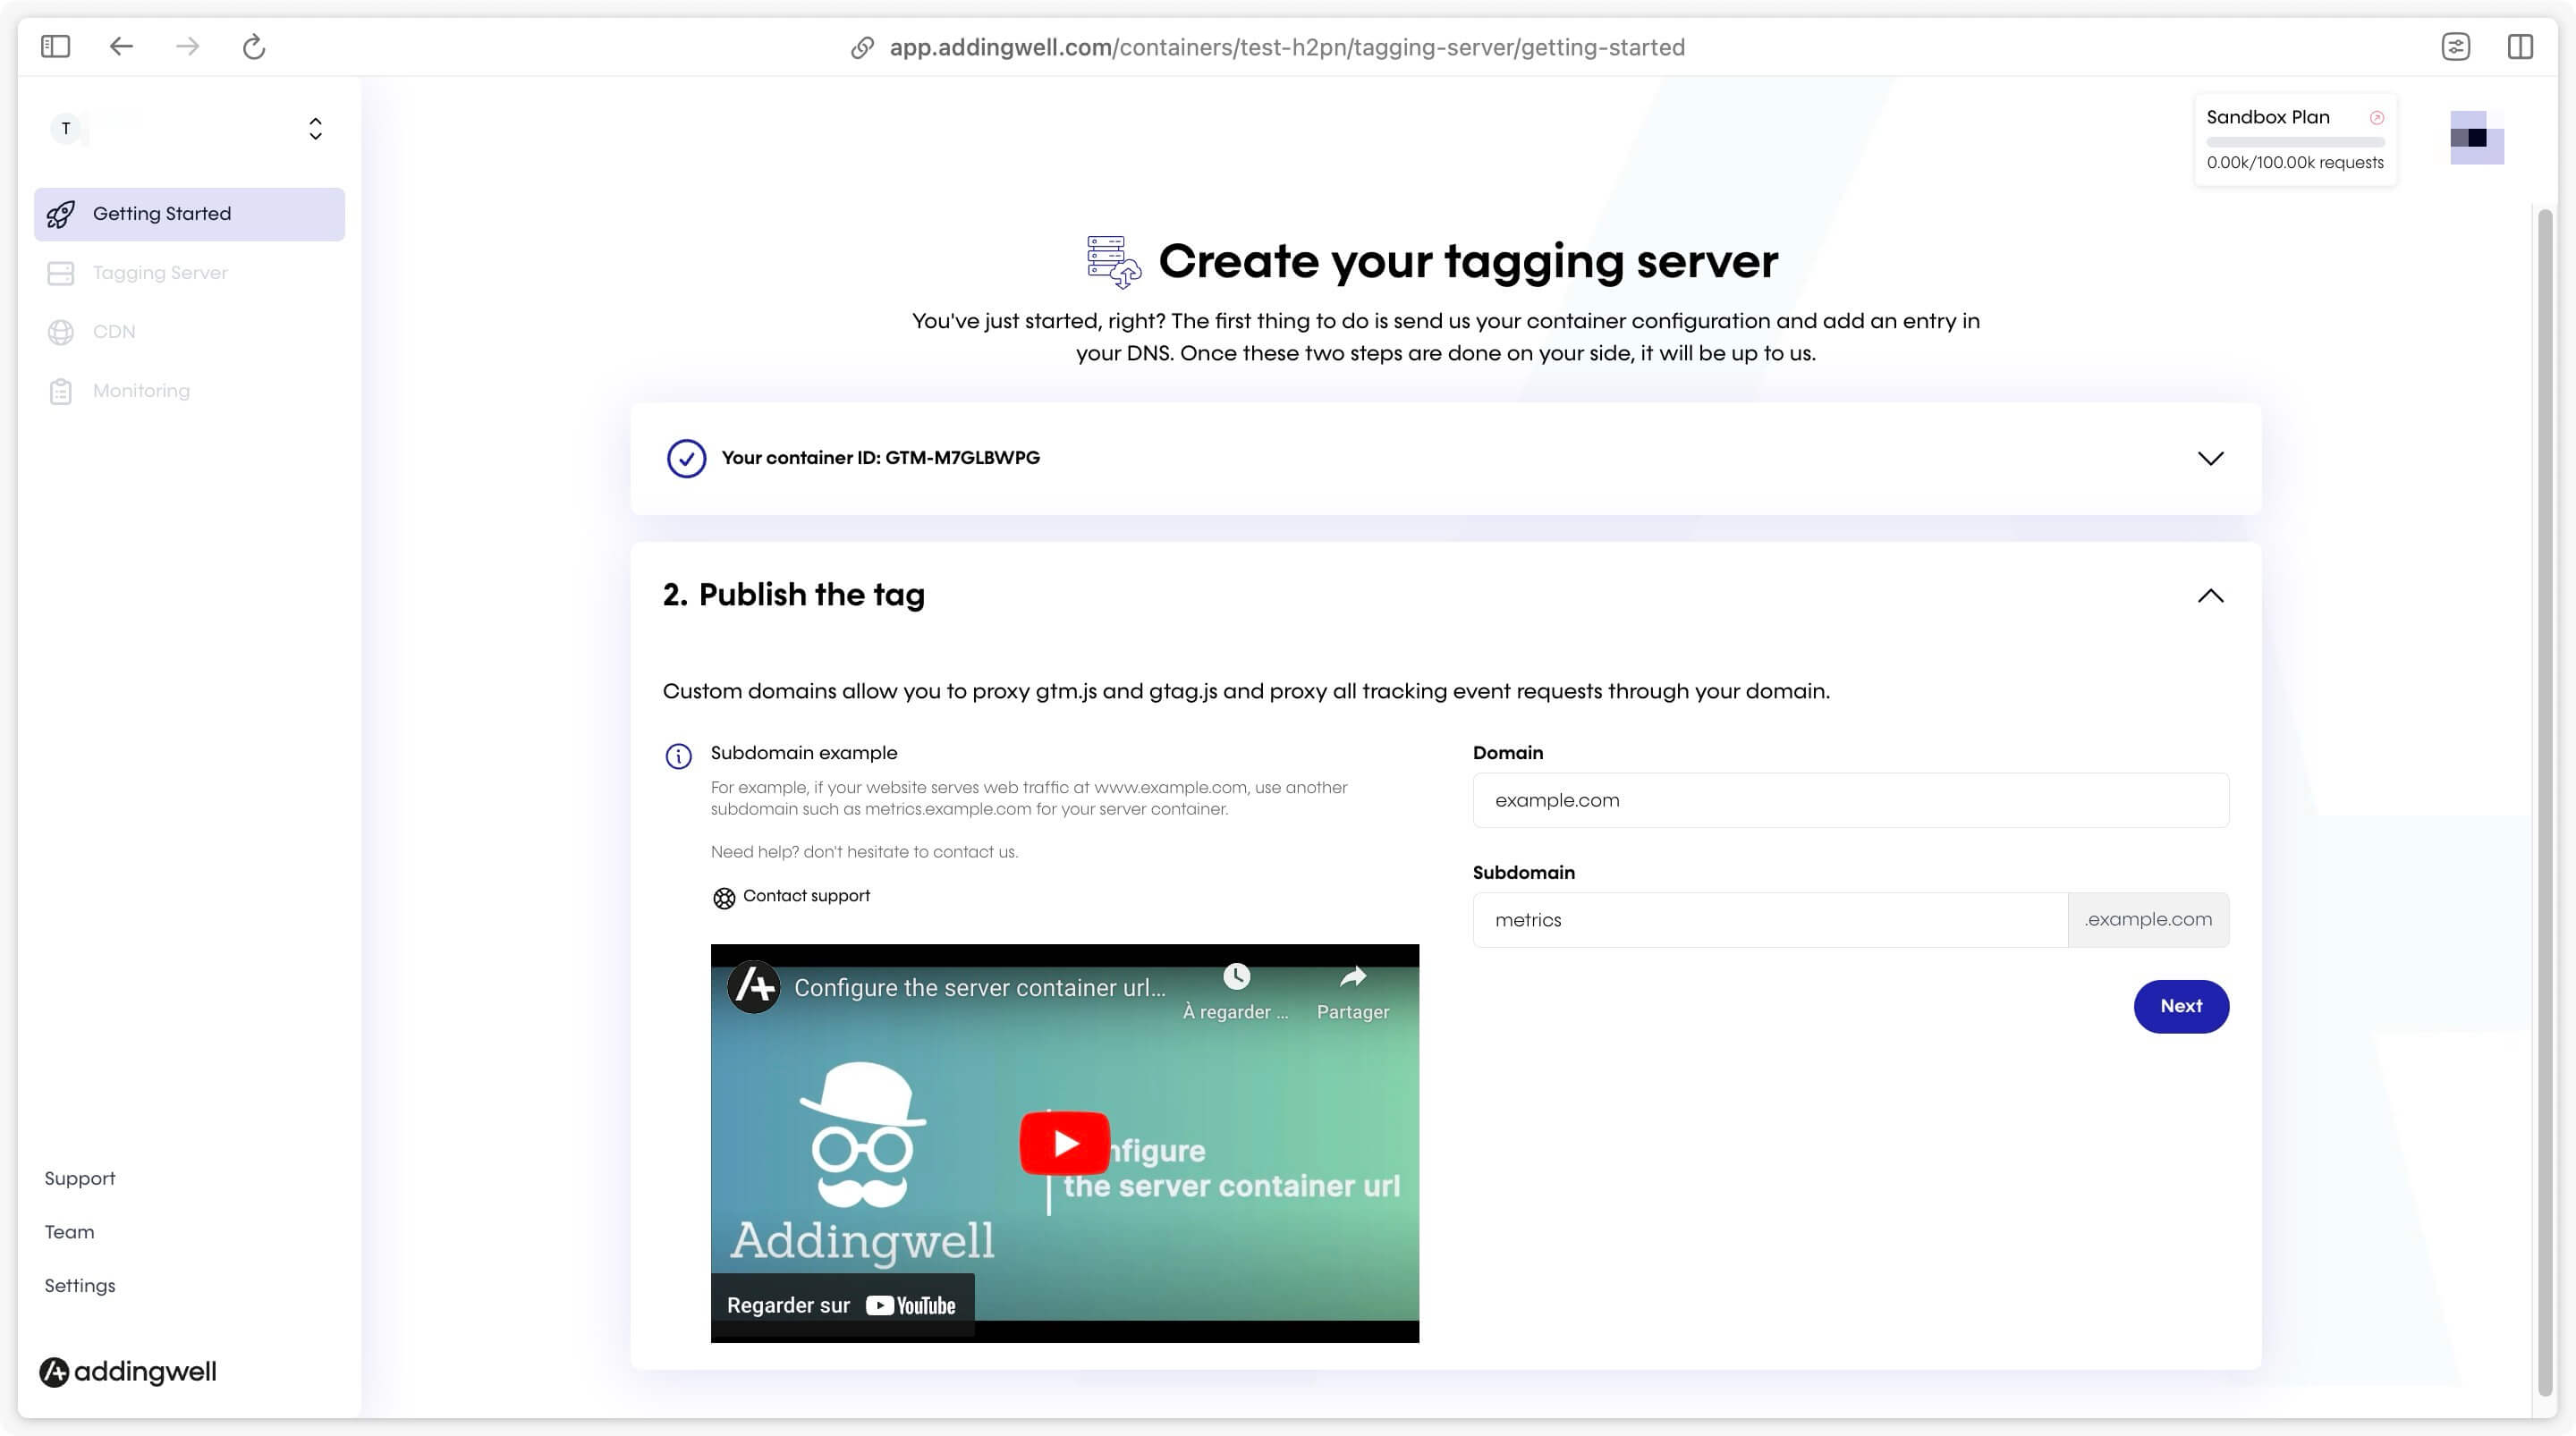
Create your tagging subdomain
Domain Name Configuration
Enter your custom domain name as well as the subdomain you will use for your tracking server.
This subdomain will be the address of your sGTM servers. It is essential to use a subdomain attached to your main domain in order to keep cookies first-party.
Avoid names associated with tracking or data collection, as they are frequently blocked by ad blockers (avoid e.g.: data, gtm, sgtm, analytics, tracking, collect, etc.).
Prefer a subdomain name specific to your brand or website, possibly combined with a non-descriptive prefix or an internal identifier to make it less identifiable by ad blockers.
For example, if your domain is example.com and you sell shoes online, you can use: shoes.example.com or even s7b3.example.com (an opaque prefix made of random characters).
These choices make the subdomain less detectable while still being clearly tied to your main domain.
If you have multiple browsing domains, several tracking subdomains will be required. You can add more at the end of the onboarding process.
Click Next.
Configure DNS records
You need to set up DNS records with your domain name provider. This step is crucial for a successful integration.
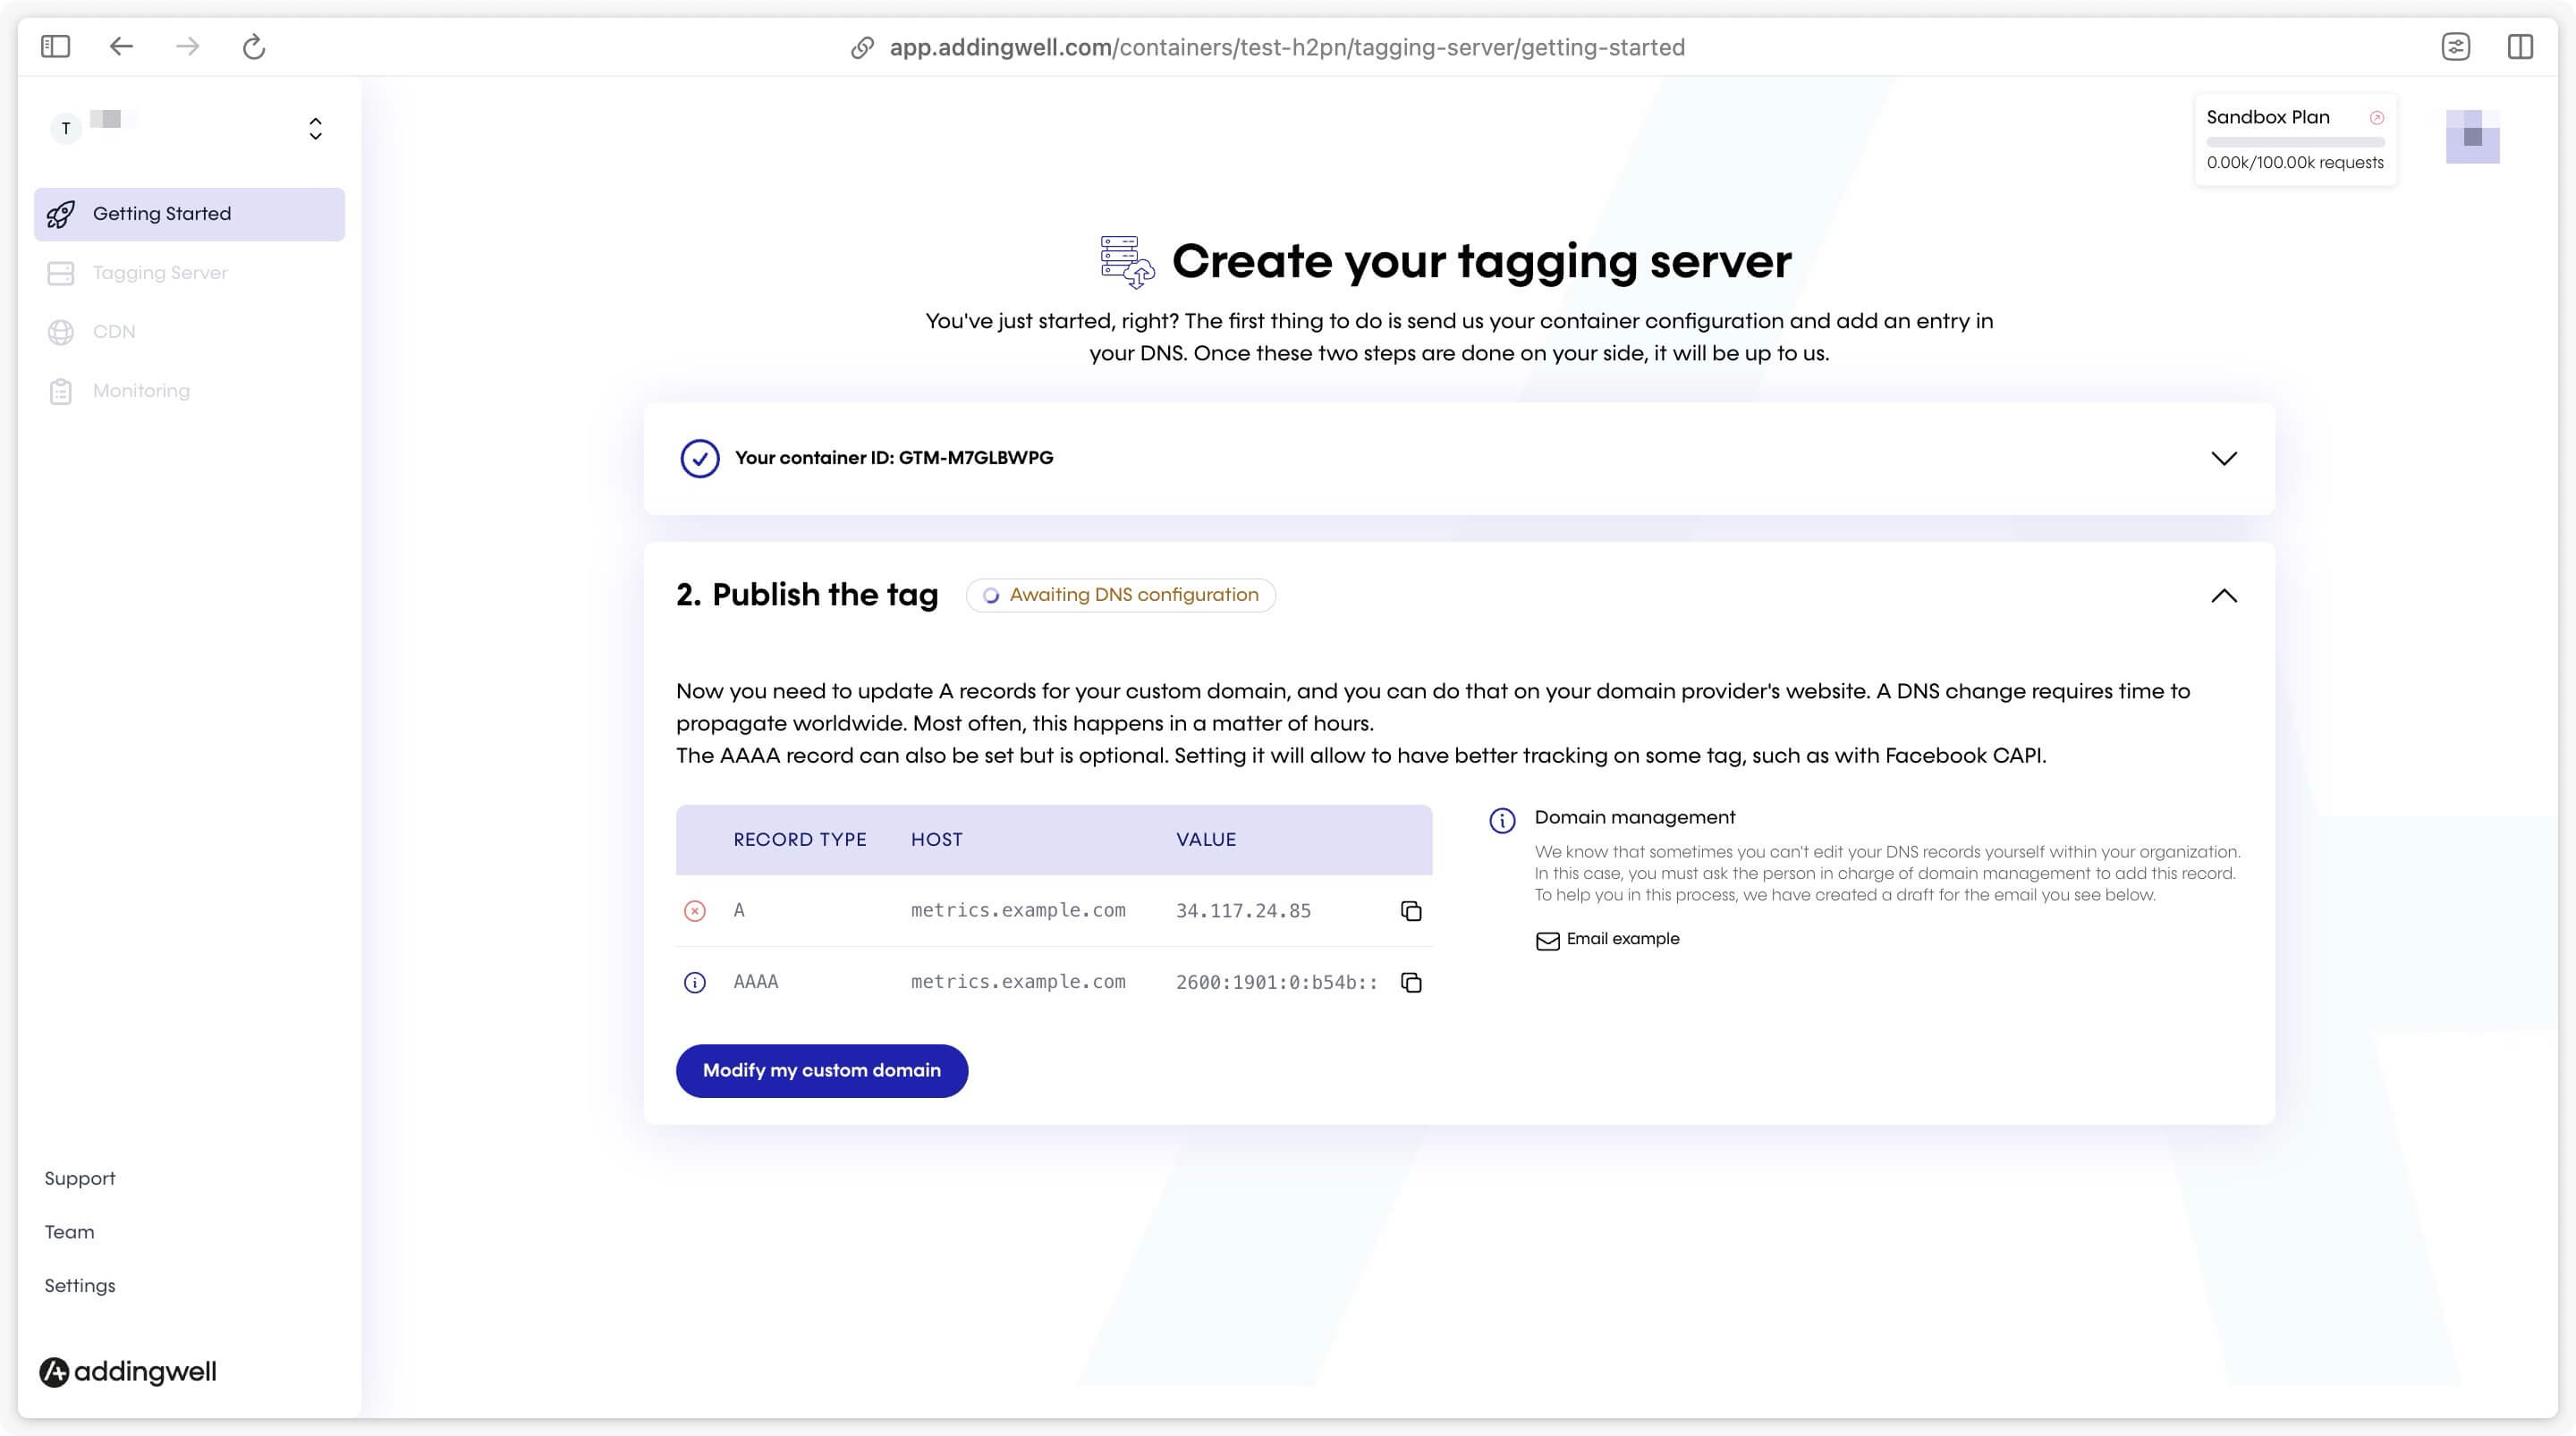
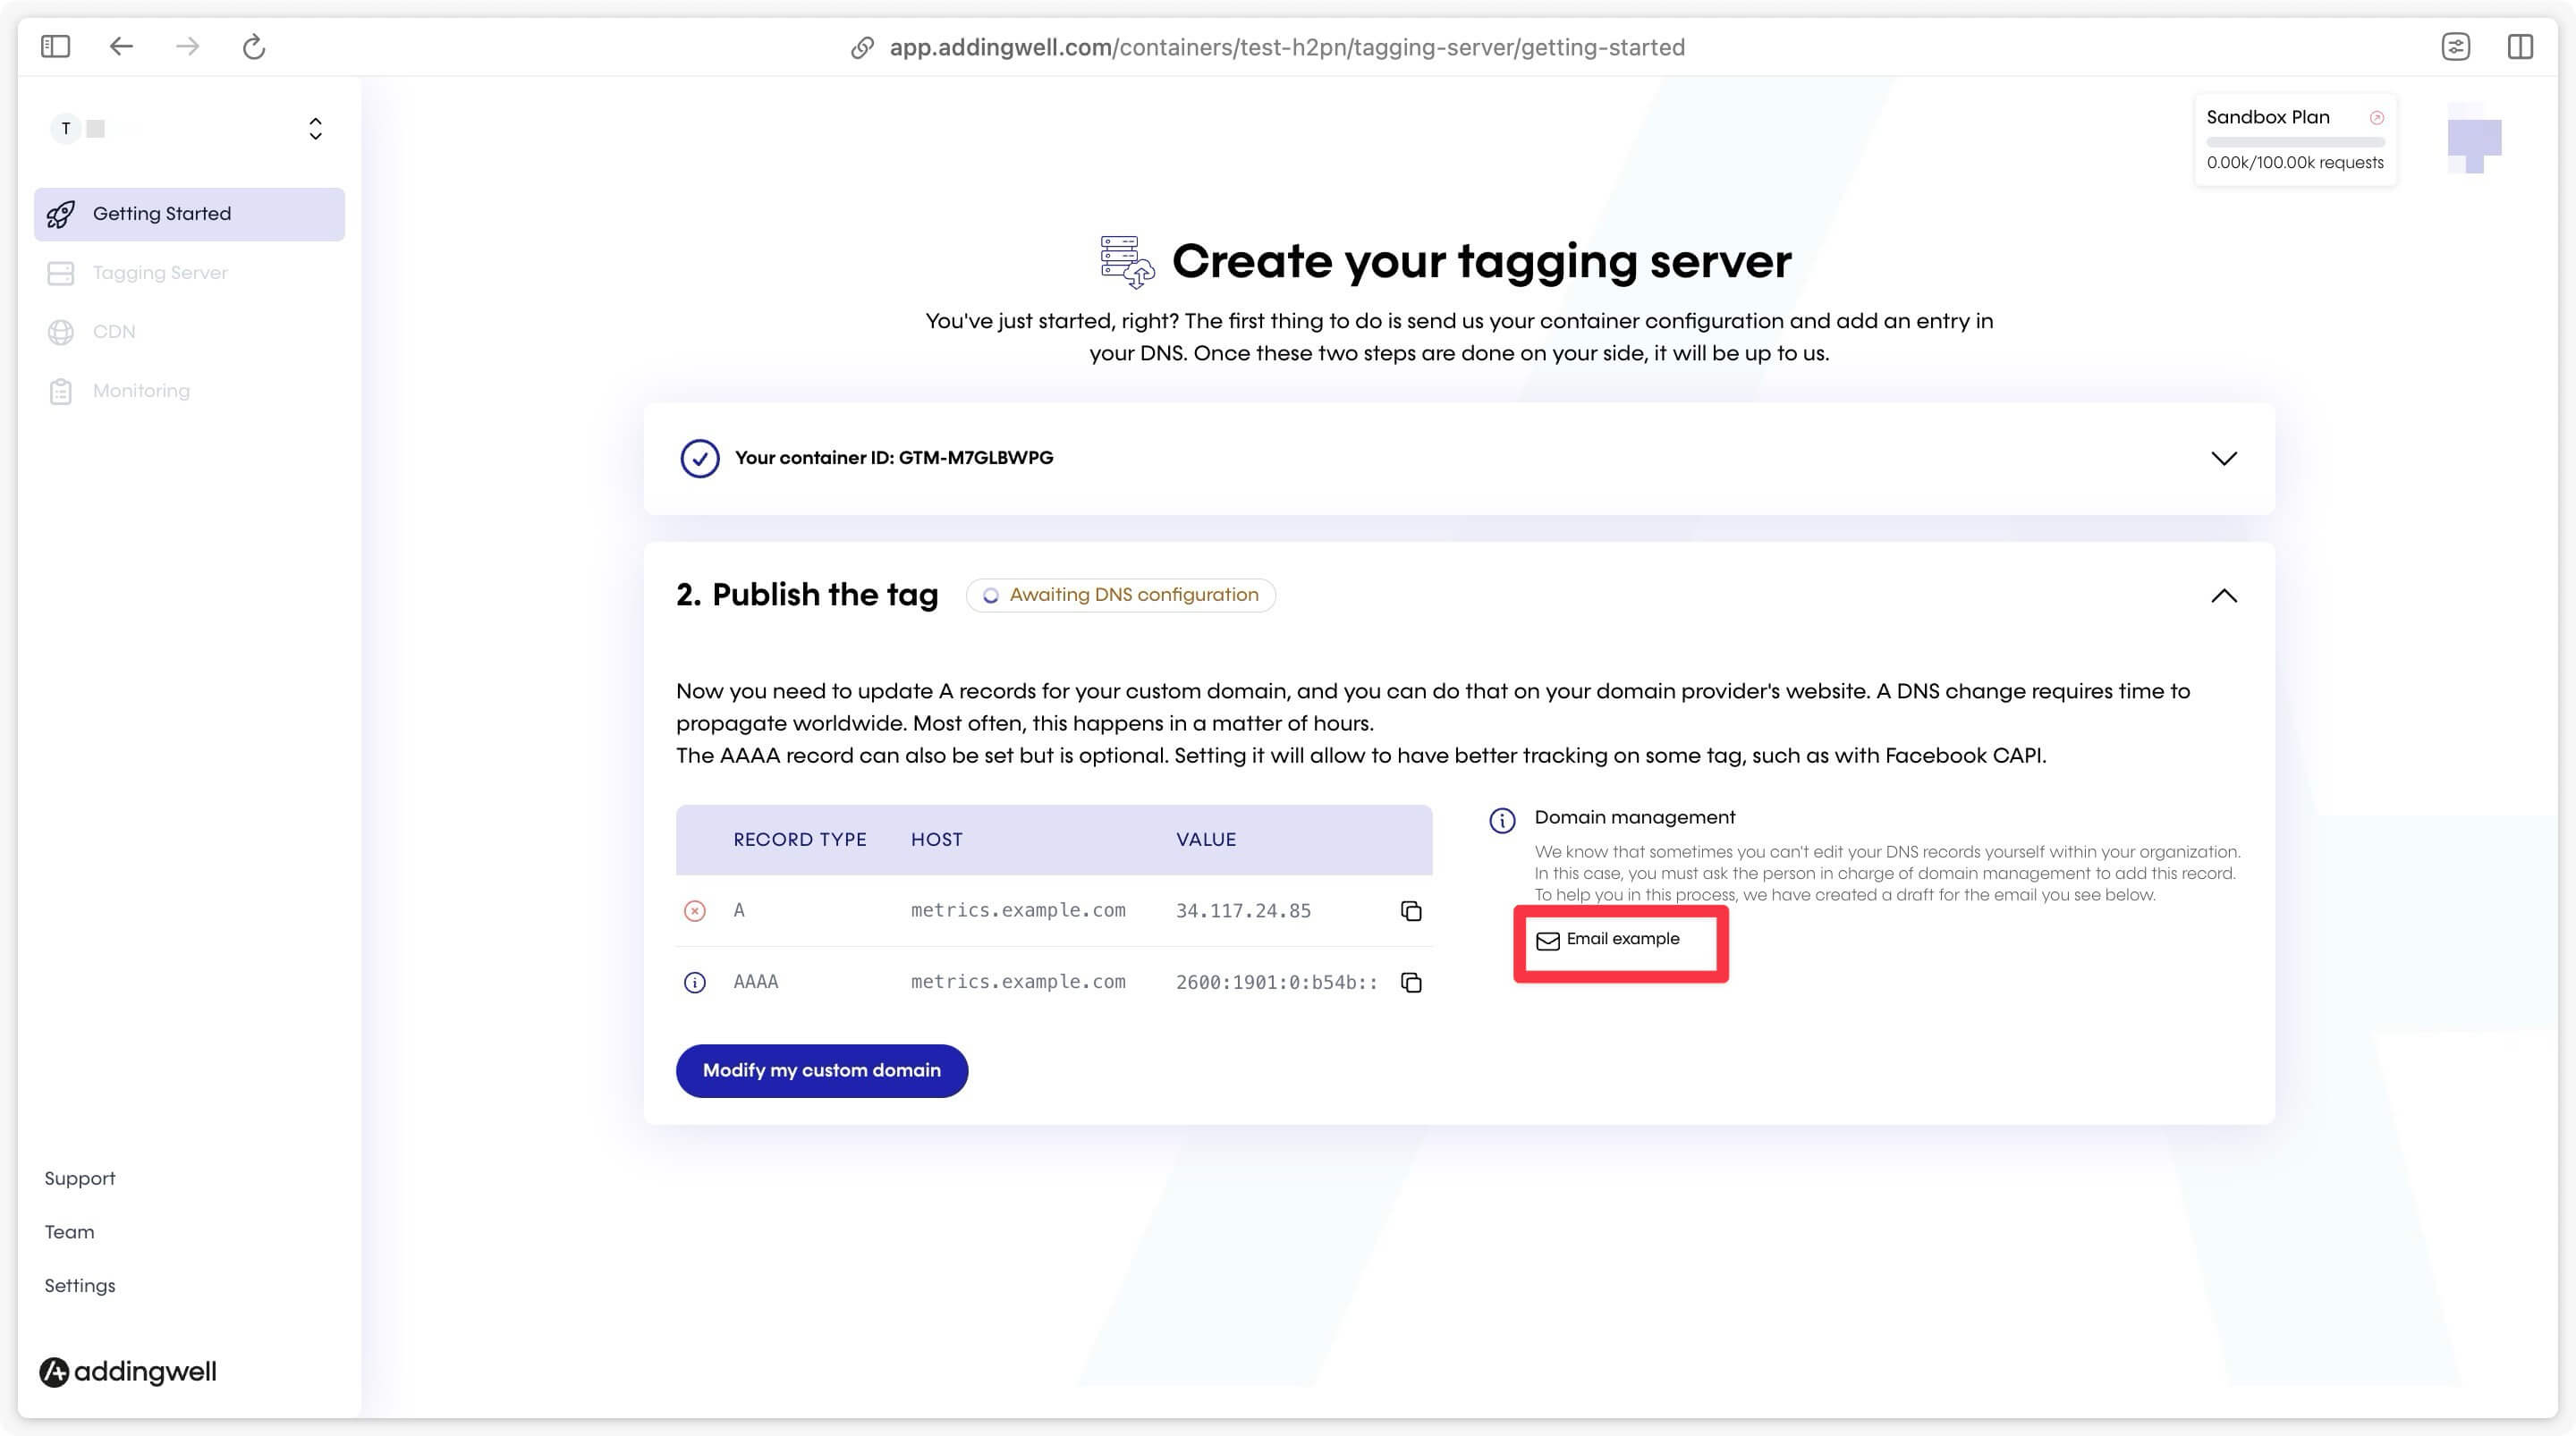
If you don’t know how to configure DNS records, contact your webmaster or domain provider. A webmaster-friendly email template is available, containing all the information you need to set up DNS records.
Waiting for DNS propagation
After setting up your DNS records, you may need to wait between 5 minutes and 1 hour for changes to be propagated and taken into account on our side.
During this time, Addingwell will be waiting for DNS configuration.
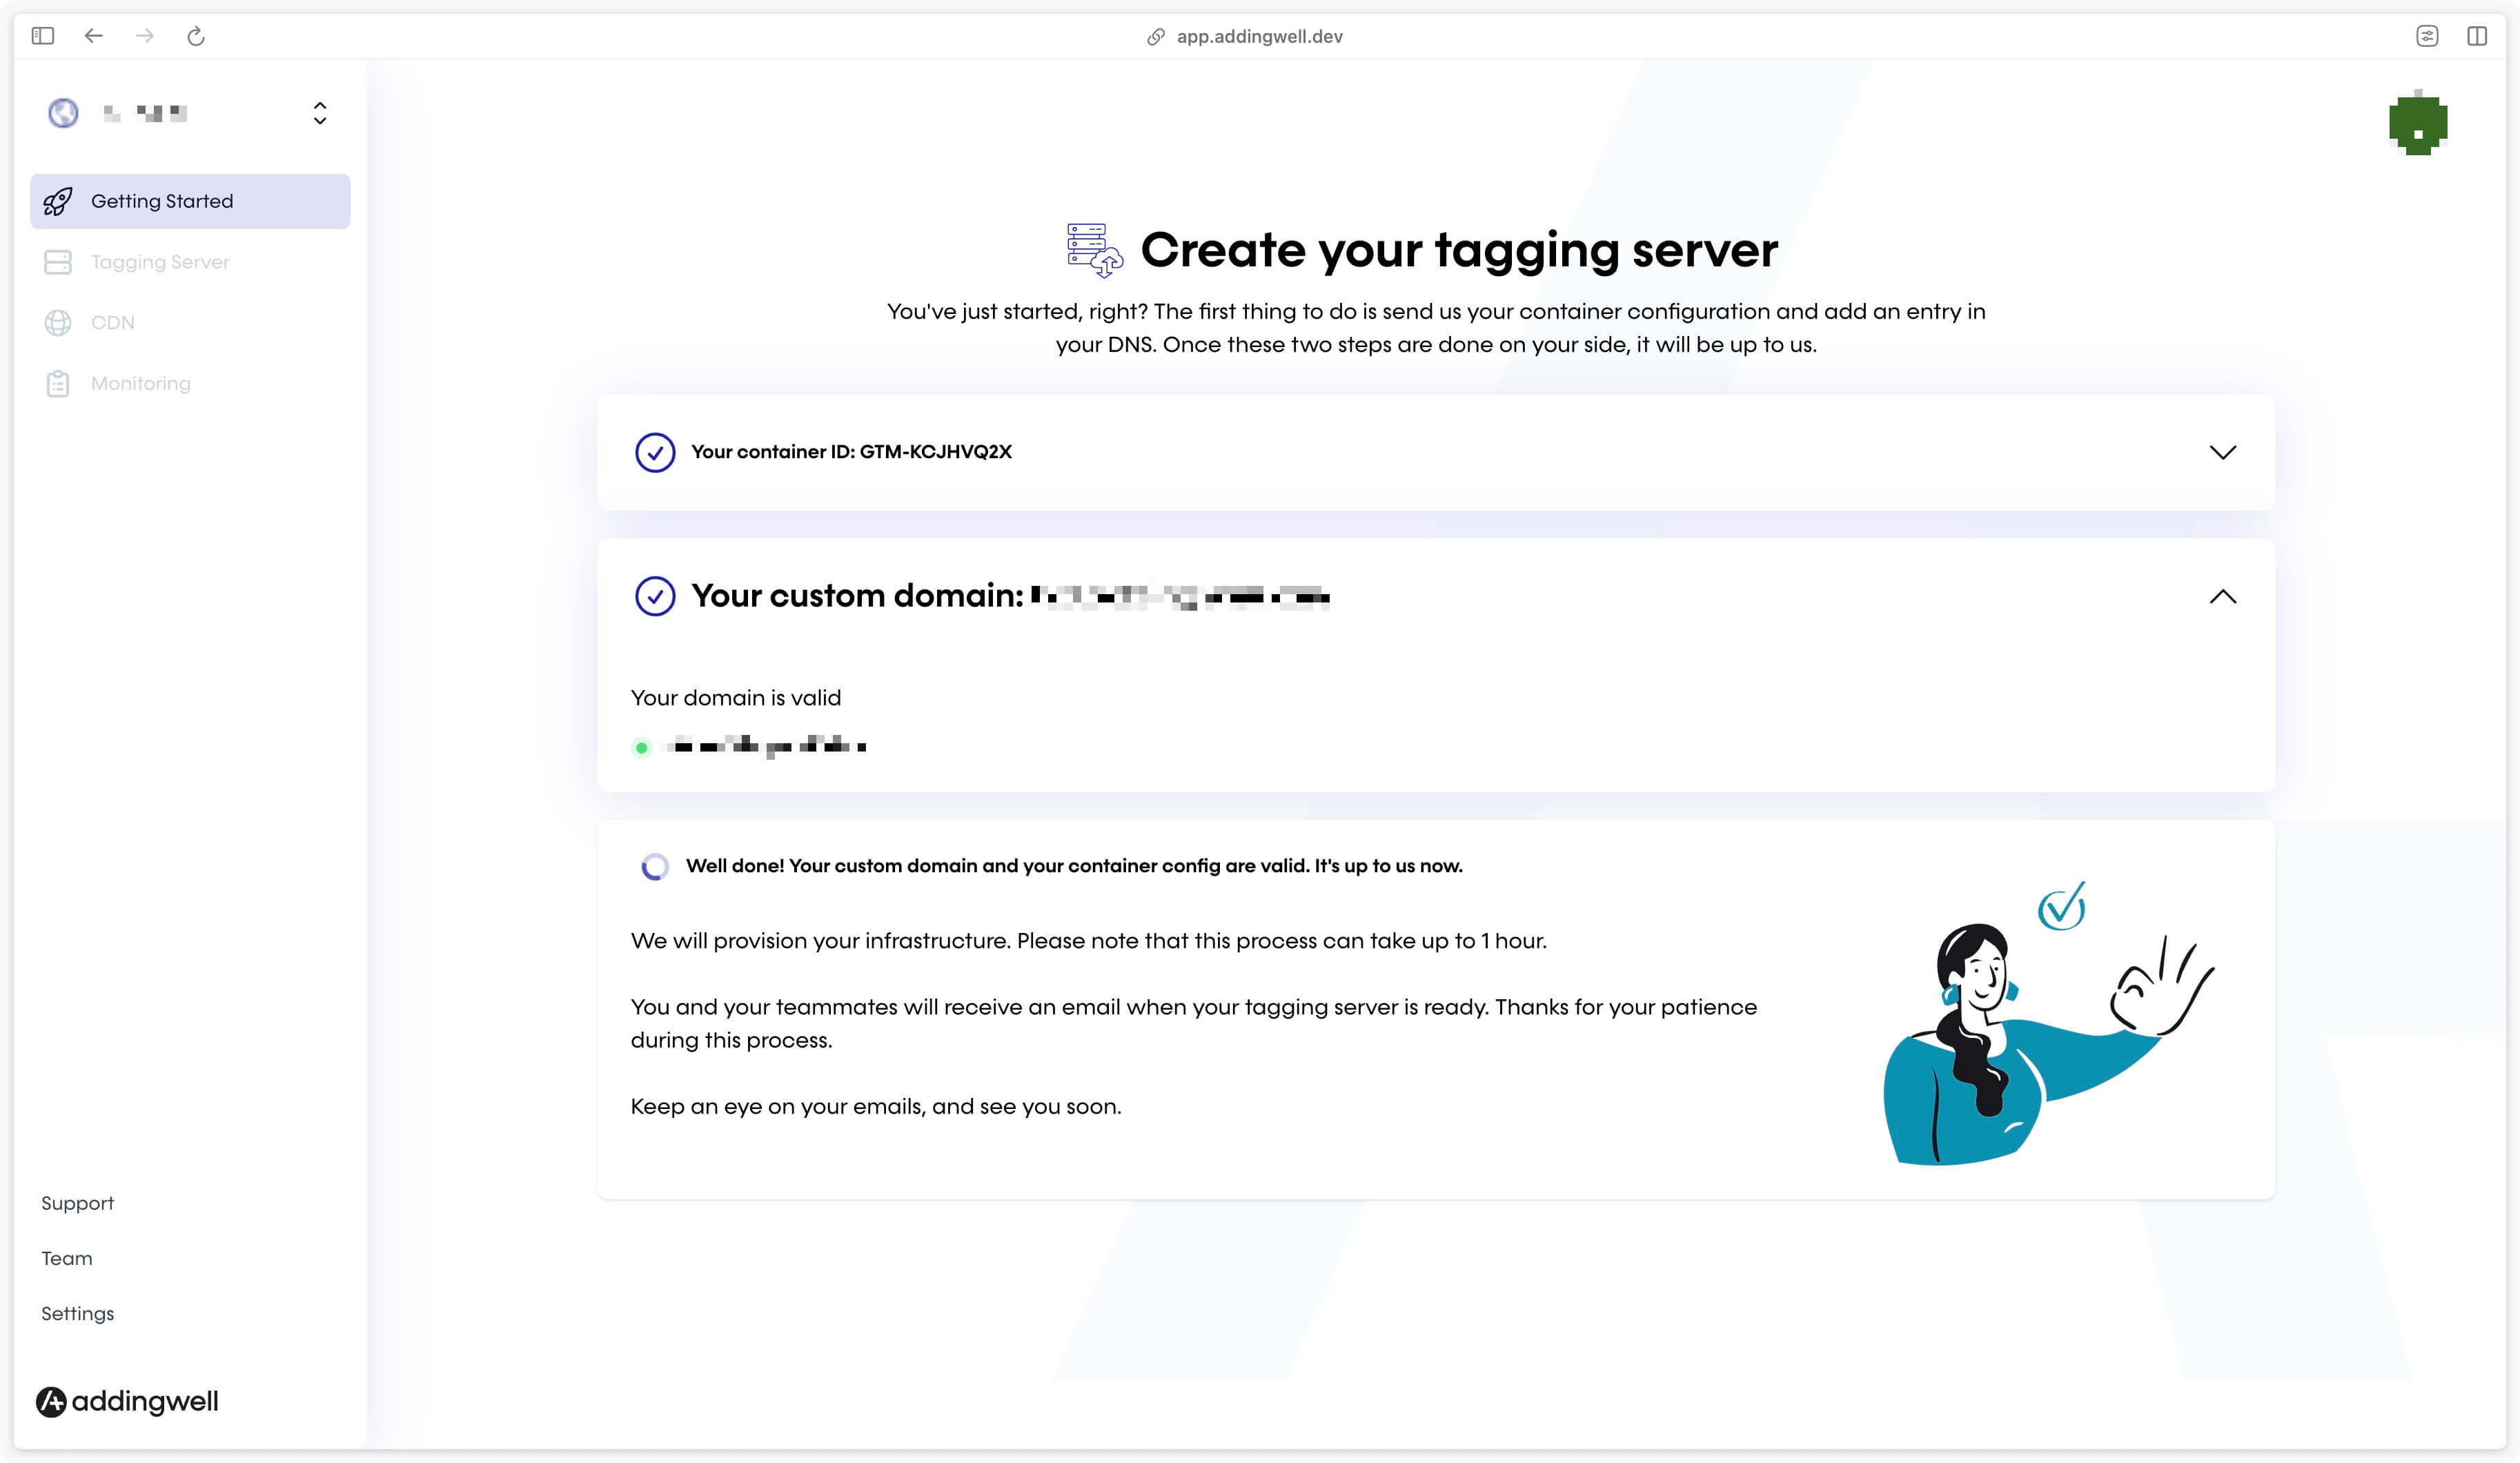
Finalizing the configuration
Once DNS records have been propagated, Addingwell will automatically provision your server. You will receive an email informing you that your server is ready. Part of the Addingwell interface will unlock, indicating that configuration is complete and you can start using the server.

Next step
Tu sum up, you’ve created your Addingwell Container, configured your GTM server container, and set up your tagging subdomain. These steps are essential to ensure correct and seamless integration.
Now that your server is configured, you’re ready to move on to the next step: configure your server container.