Twitter Conversion API with GTM Server-Side
Understanding the Twitter Conversion API and its benefits
What is the Twitter Conversion API?
The Twitter Conversion API (also known as the Twitter Ads API or, more recently, the X Ads API) lets you send conversion data directly from your server to Twitter (or X). With Twitter, you can send data via the pixel or the conversion API. If you’re reading this page, it’s likely that you’re now using only the pixel to track your conversions.
Using the pixel allows you to send third-party cookies (in other words, very precise information to Twitter about the person visiting your website), but you are subject to the restrictions present in most browsers (Ad-Blockers and cookie lifetime limits).
As a reminder, third-party cookies are now deprecated on most browsers, and this will be the case for Google Chrome in 2025. It’s therefore important not to rely solely on pixel requests and therefore to implement X Ads API.
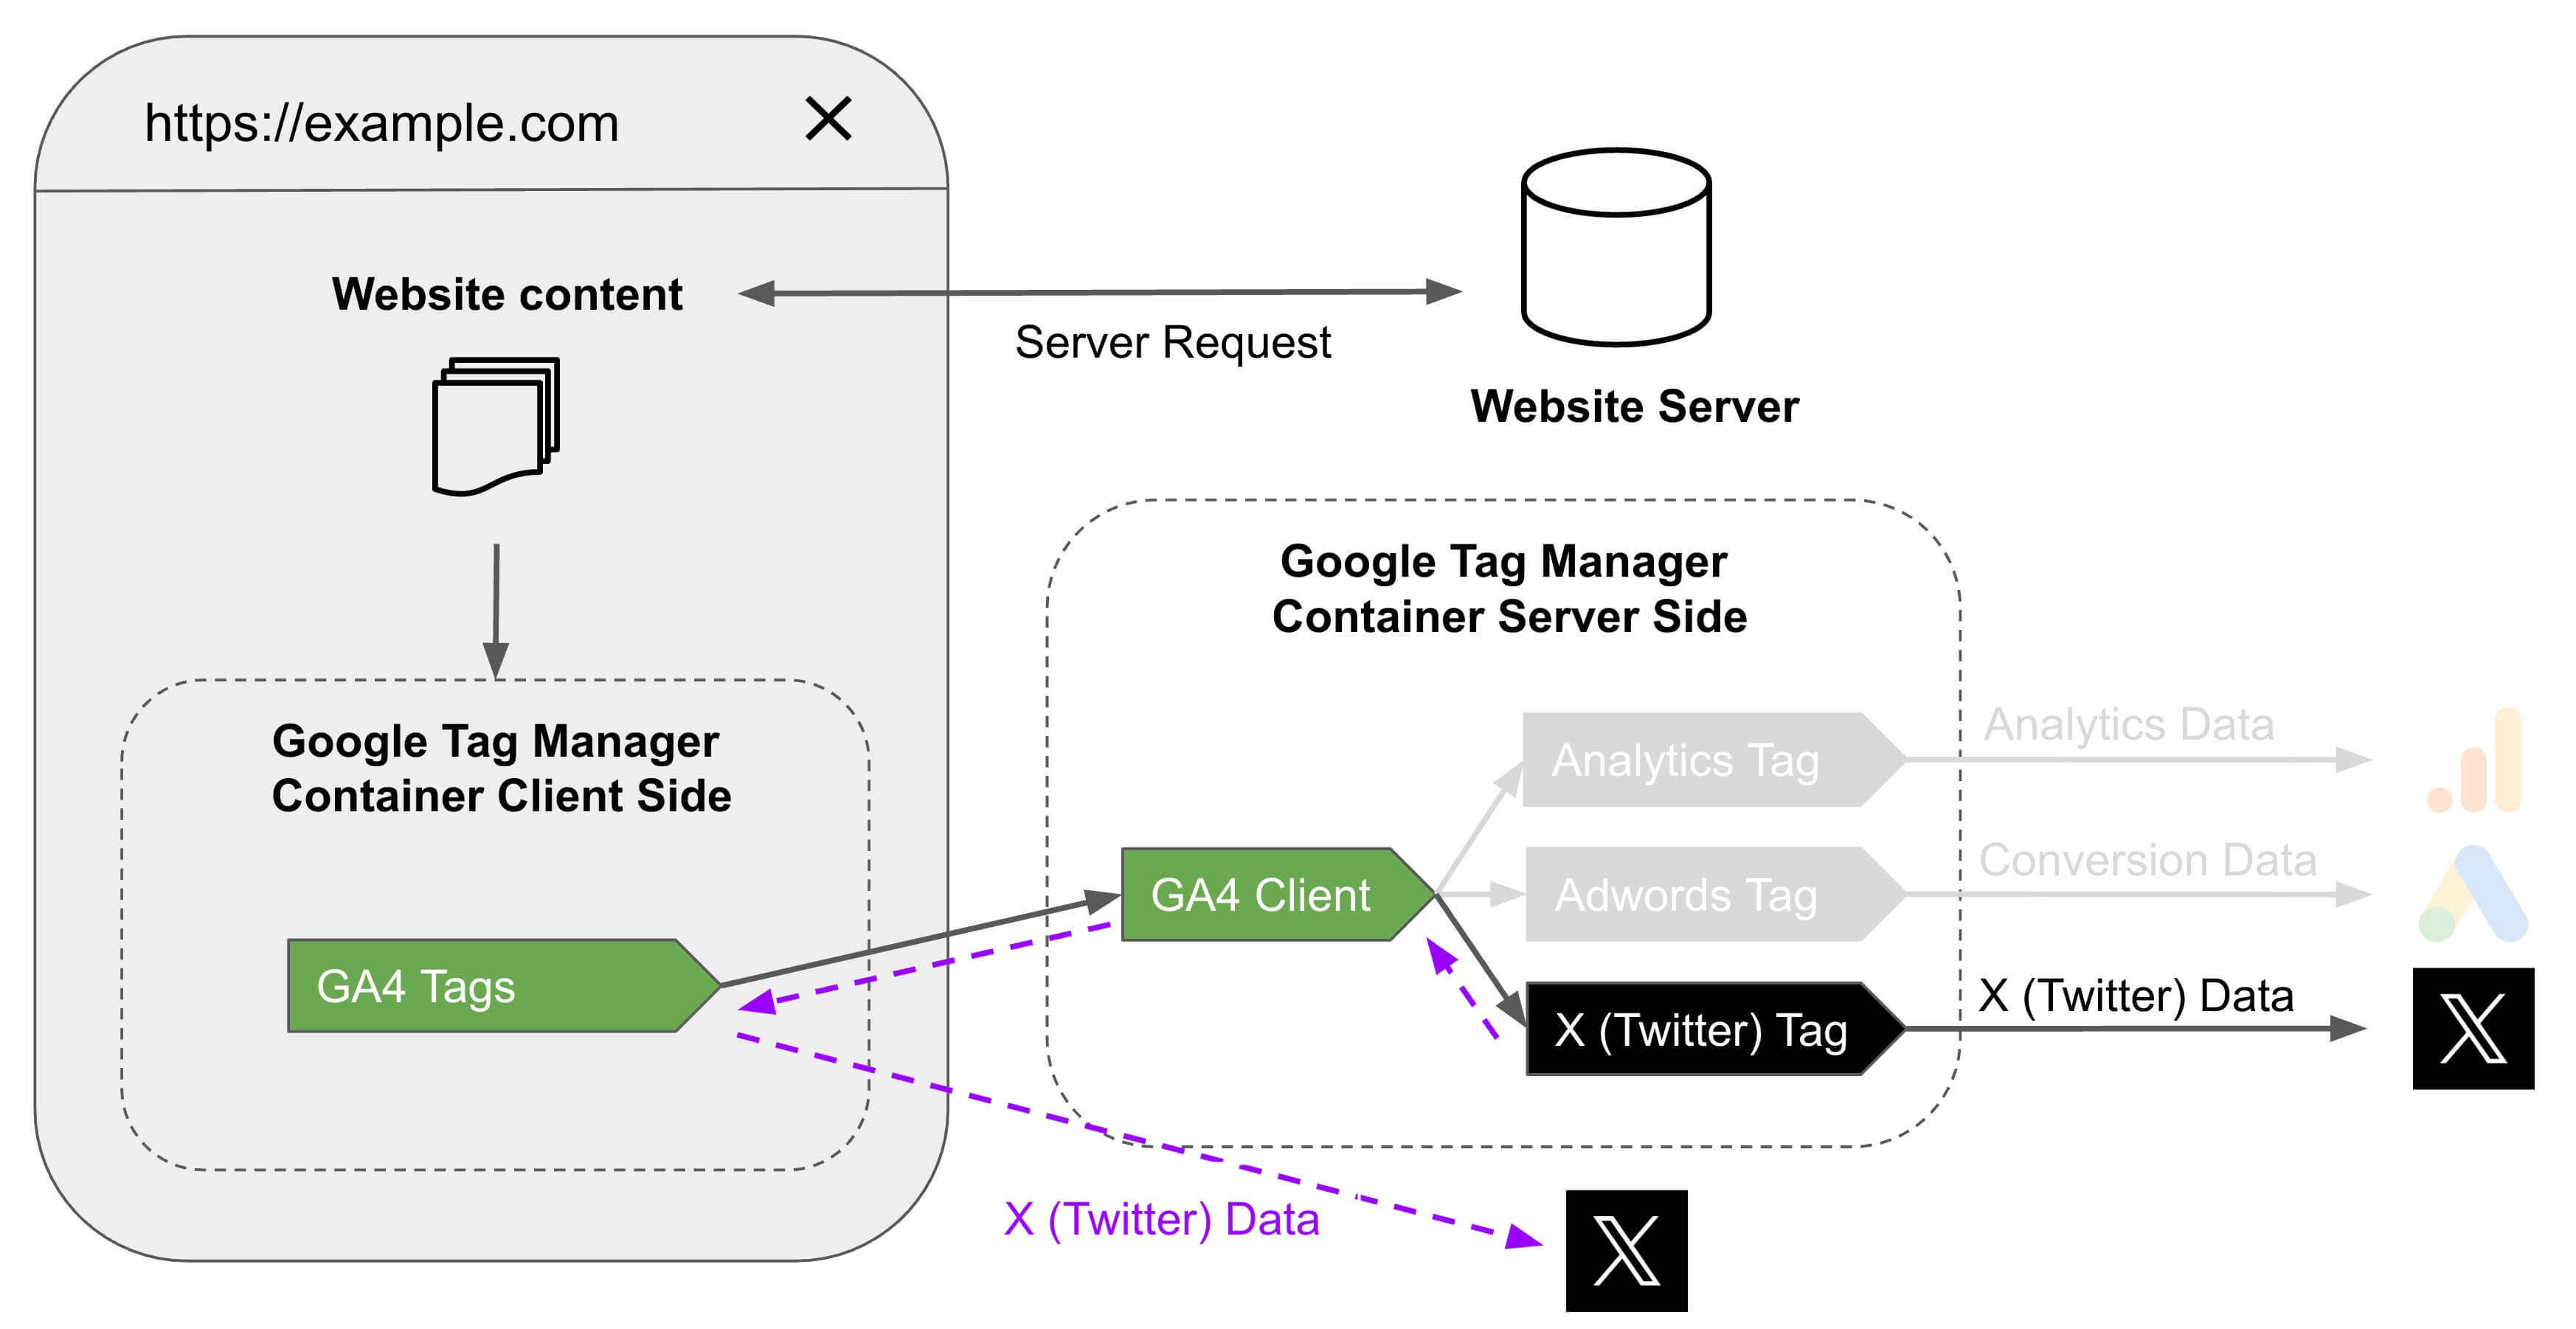
Going through the conversion API requires server-side tracking that not only bypasses ad-blockers but also extends the lifetime of cookies.
Why use GTM Server side to connect Twitter CAPI?
Google Tag Manager Server-Side lets you take advantage of our tag X Ads API, which enables you to connect to the Twitter Conversion API with an easy-to-use interface and, above all, without having to write any code.
Prerequisites for the Twitter Conversion API tag with sGTM
To set up our tag correctly, you’ll need to obtain some information upstream. We’ll explain how in this section.
X Developer Portal
Create your account with free access to X Developer Portal .
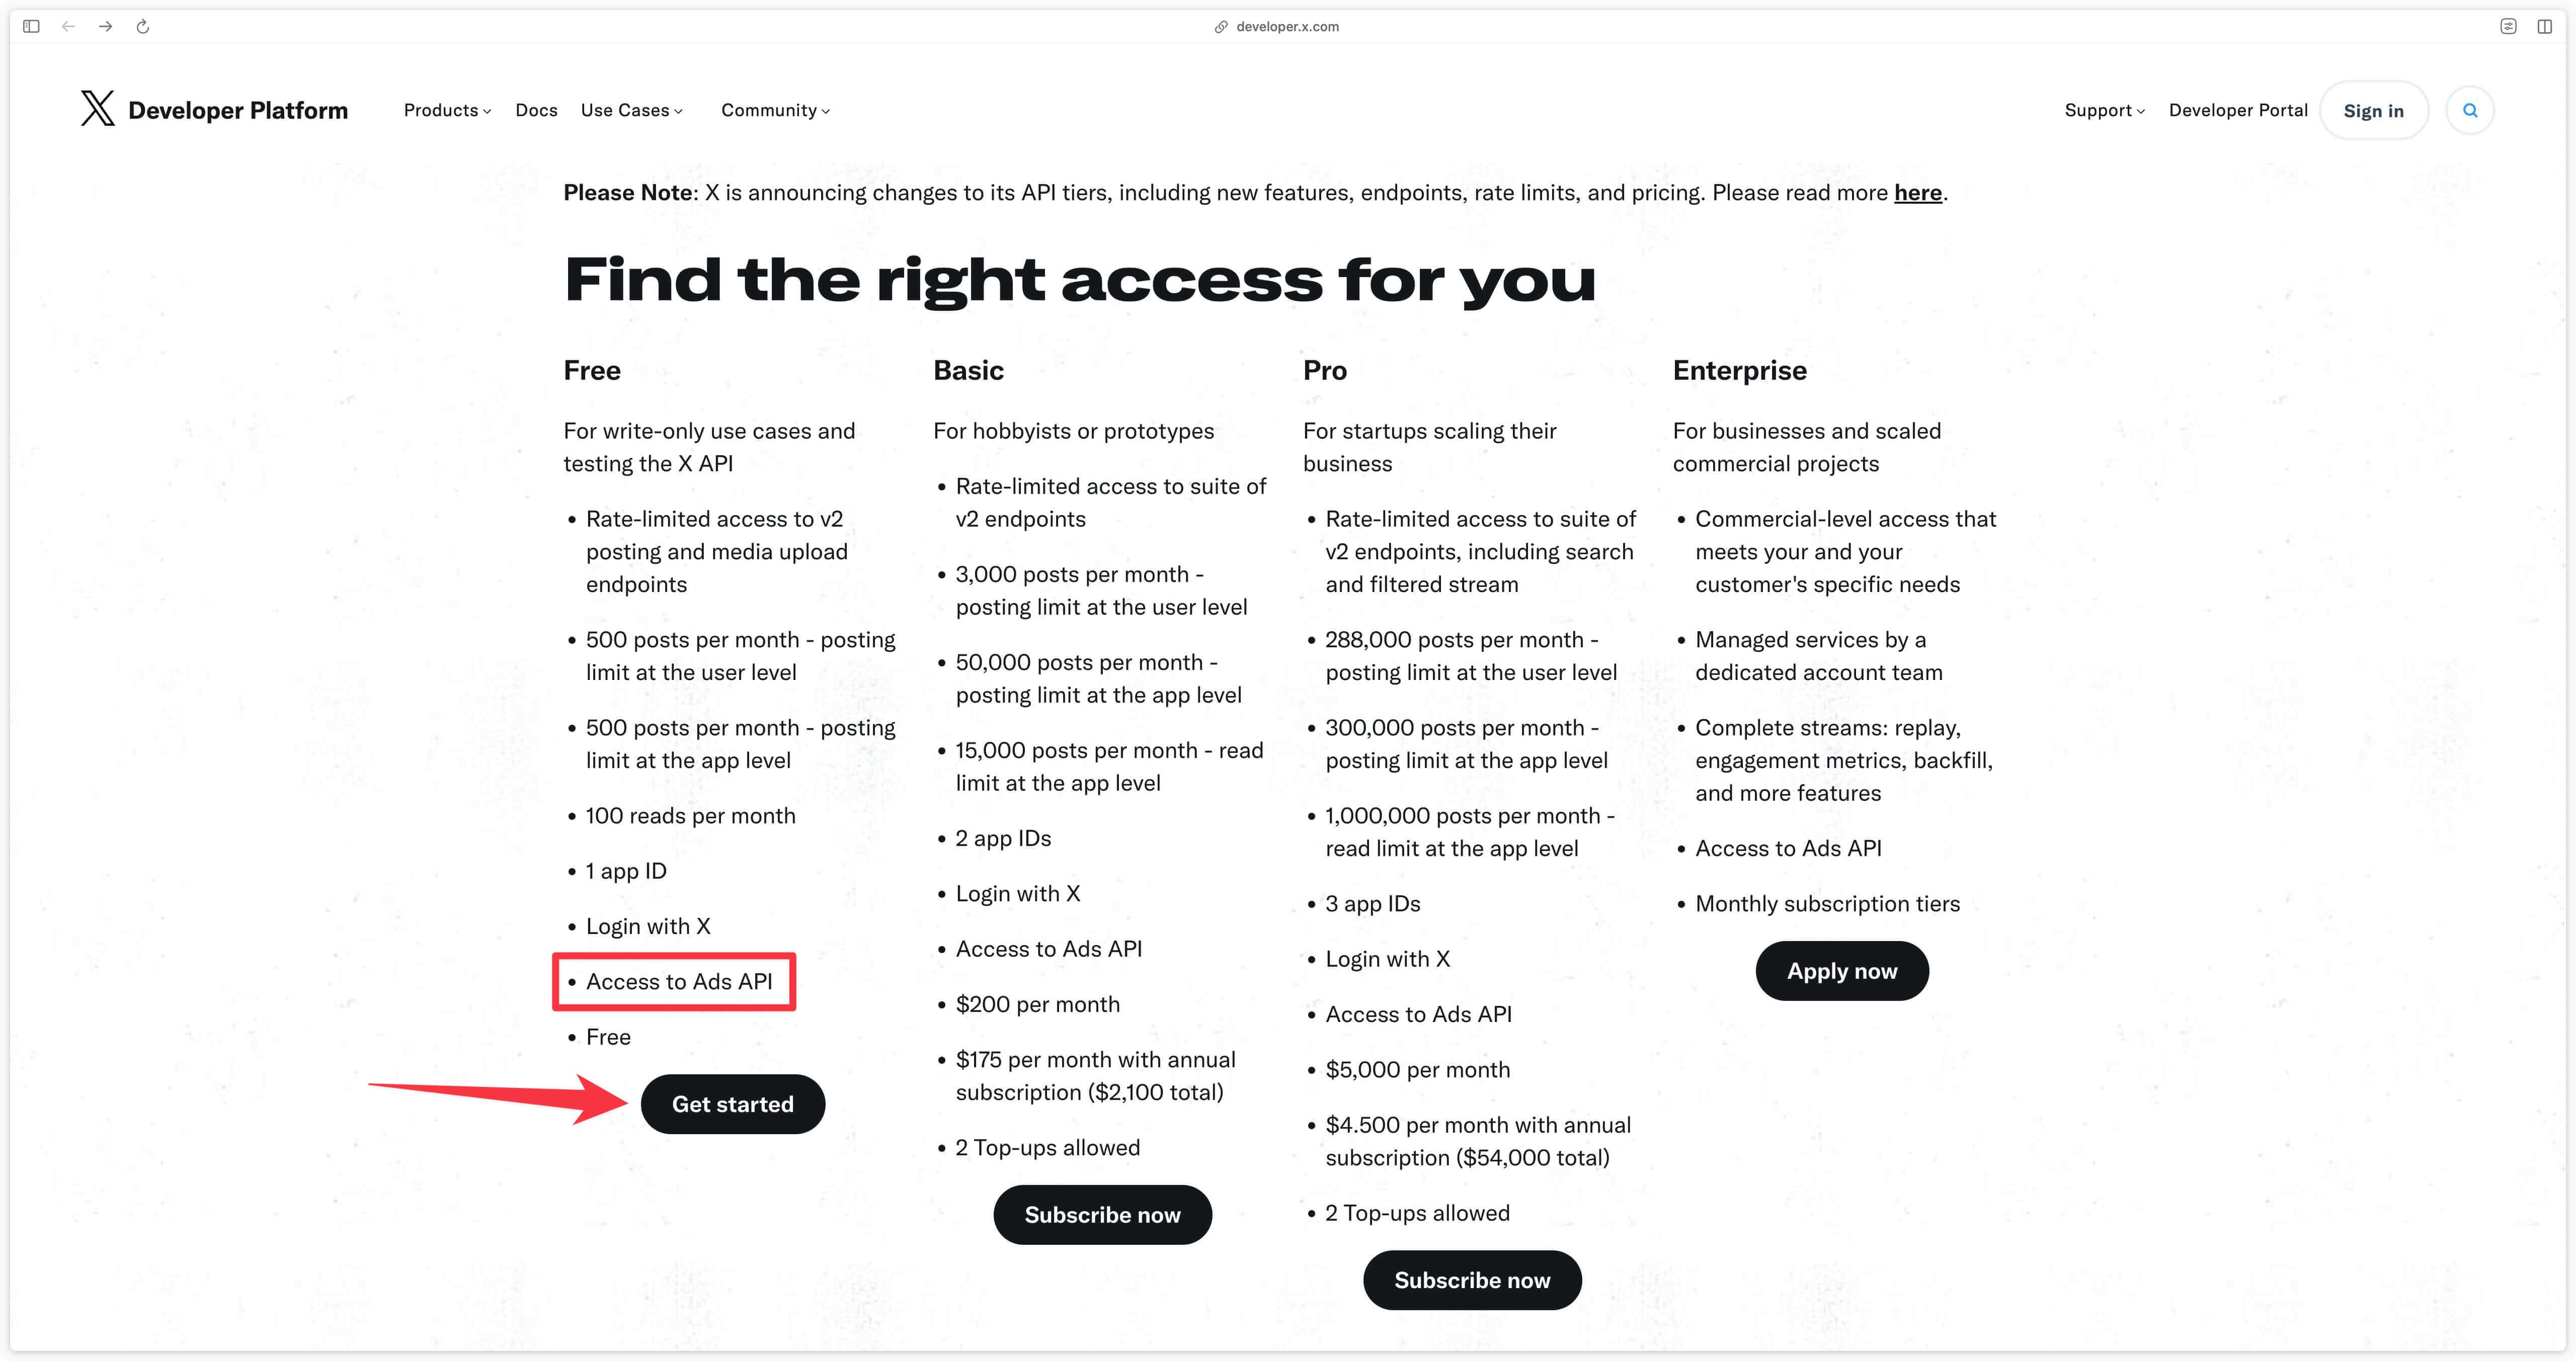
You’ll then need to register or log in to your X account.
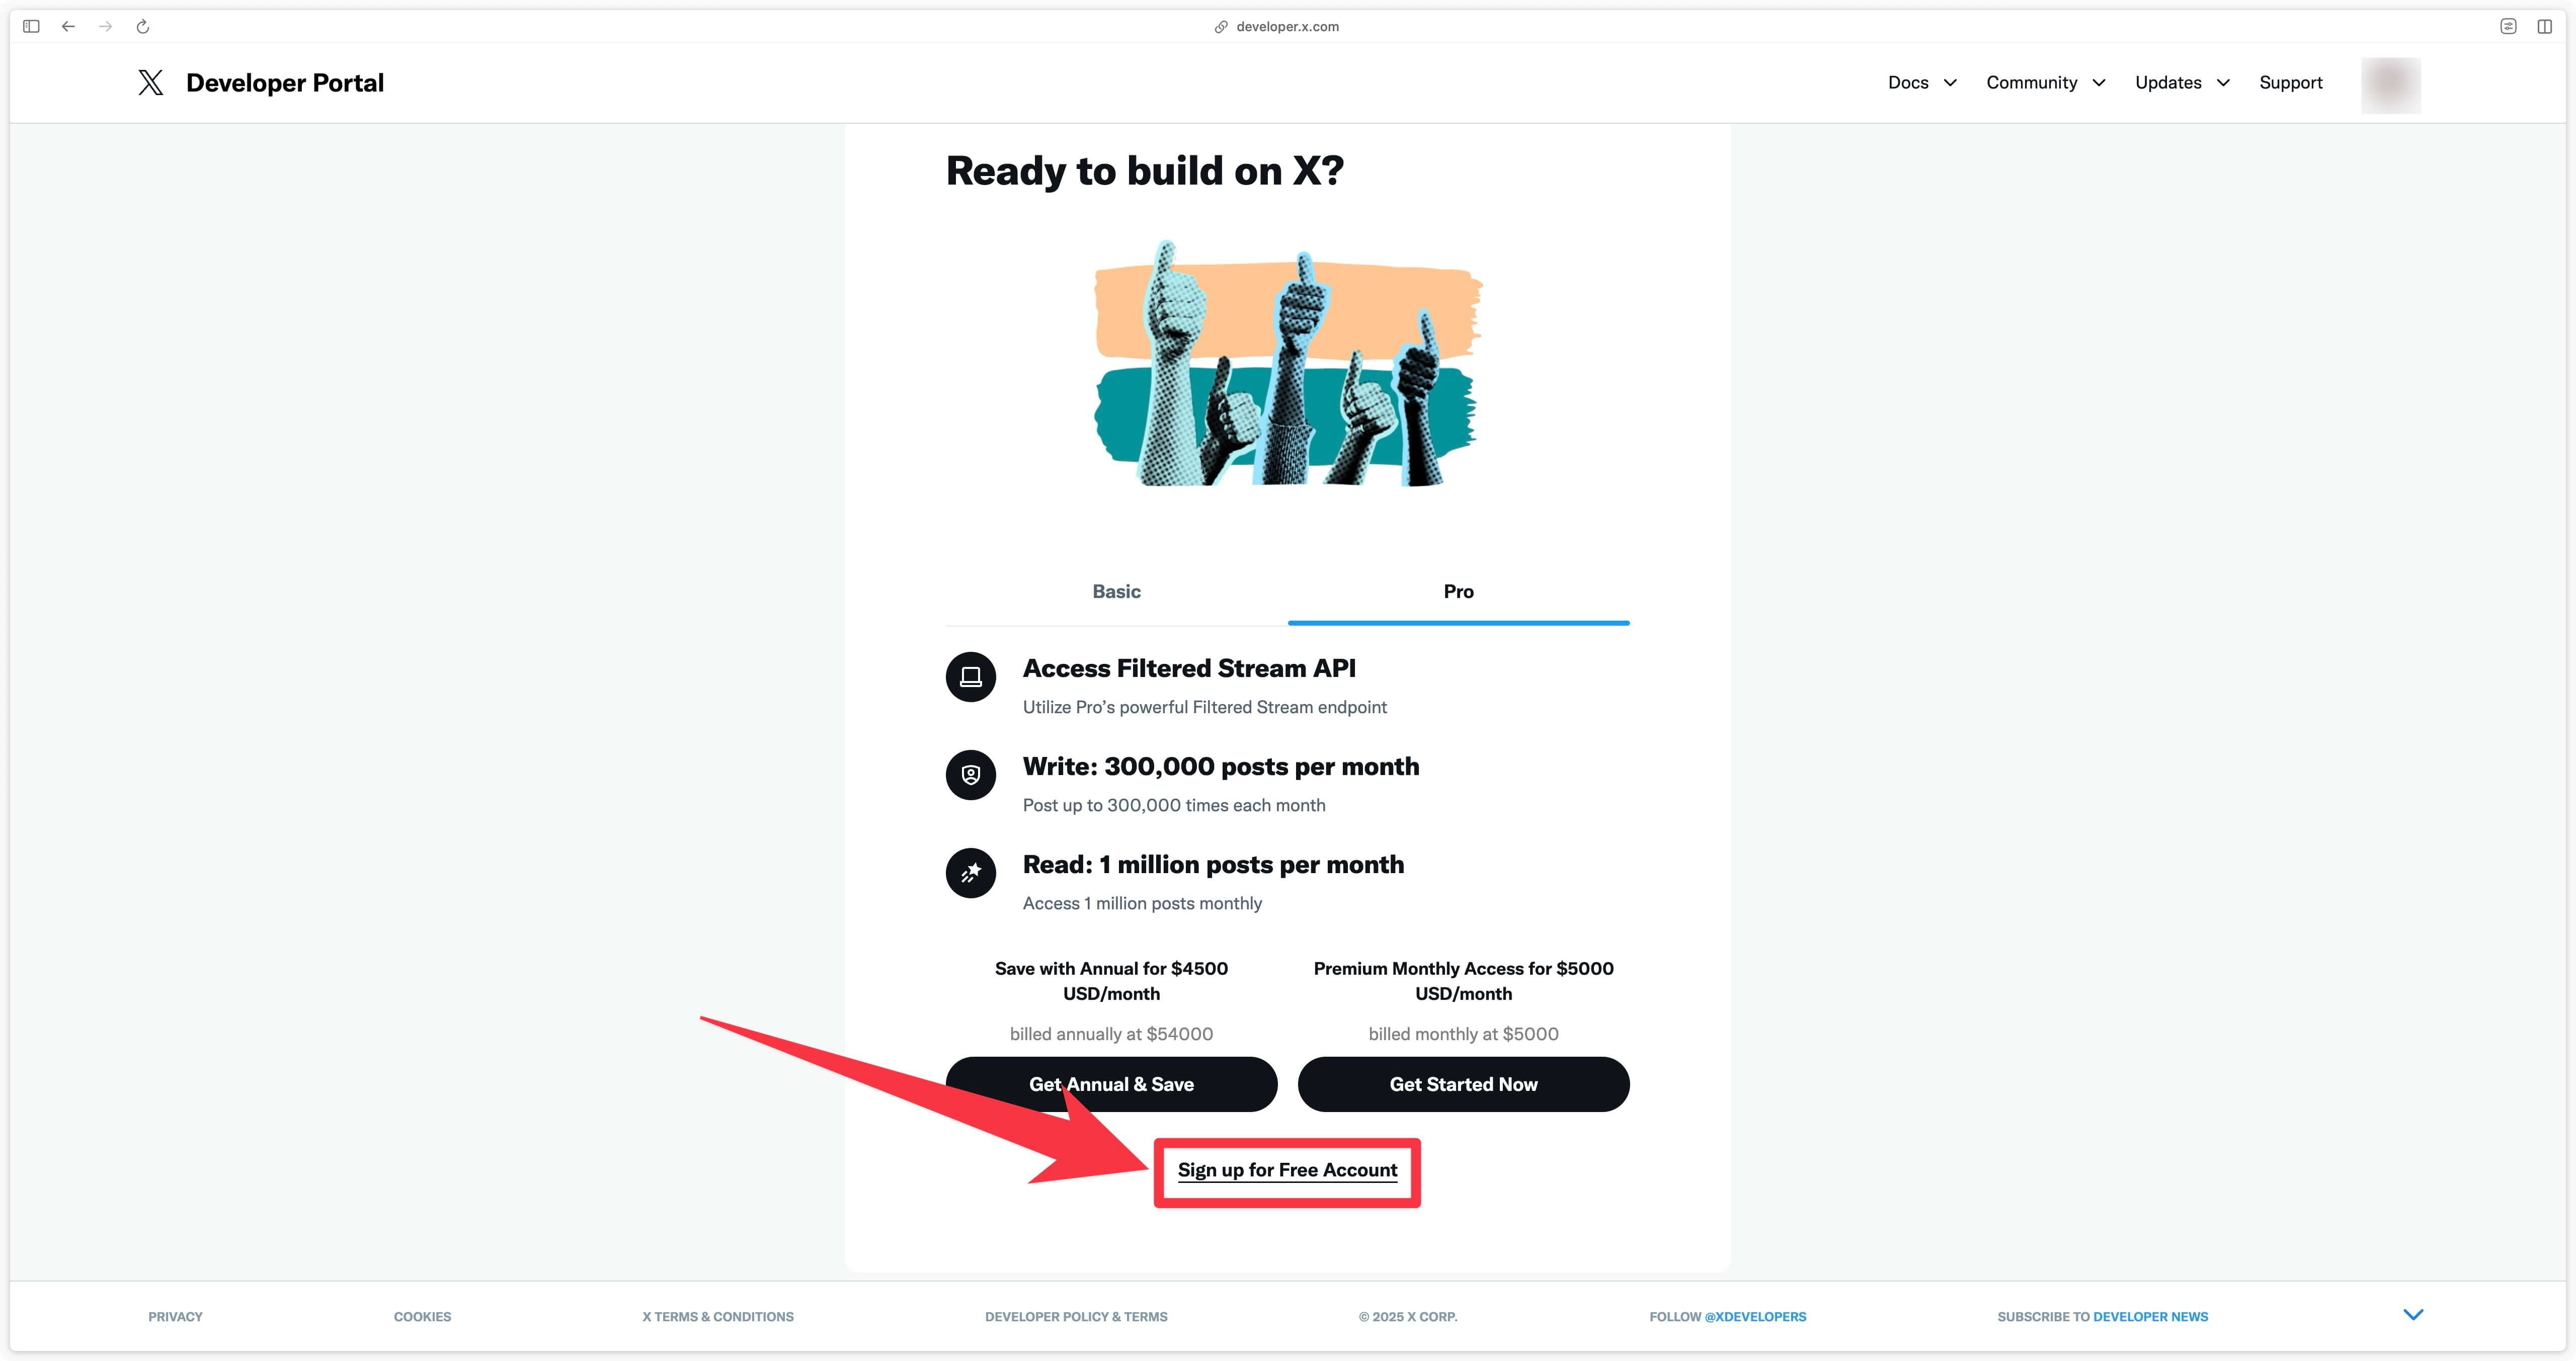
Then click on the Sign up for free account link at the bottom of the page.
On the next page, you must explain (minimum 250 characters) why you wish to access the X Developer Portal.
Here’s a sample text you can use:
To accurately track conversions and optimize ad performance on X (formerly Twitter), I need to use the X Ads API with Google Tag Manager Server-Side (GTM SS). Unlike traditional browser-based tracking, which can be blocked by ad blockers or restricted.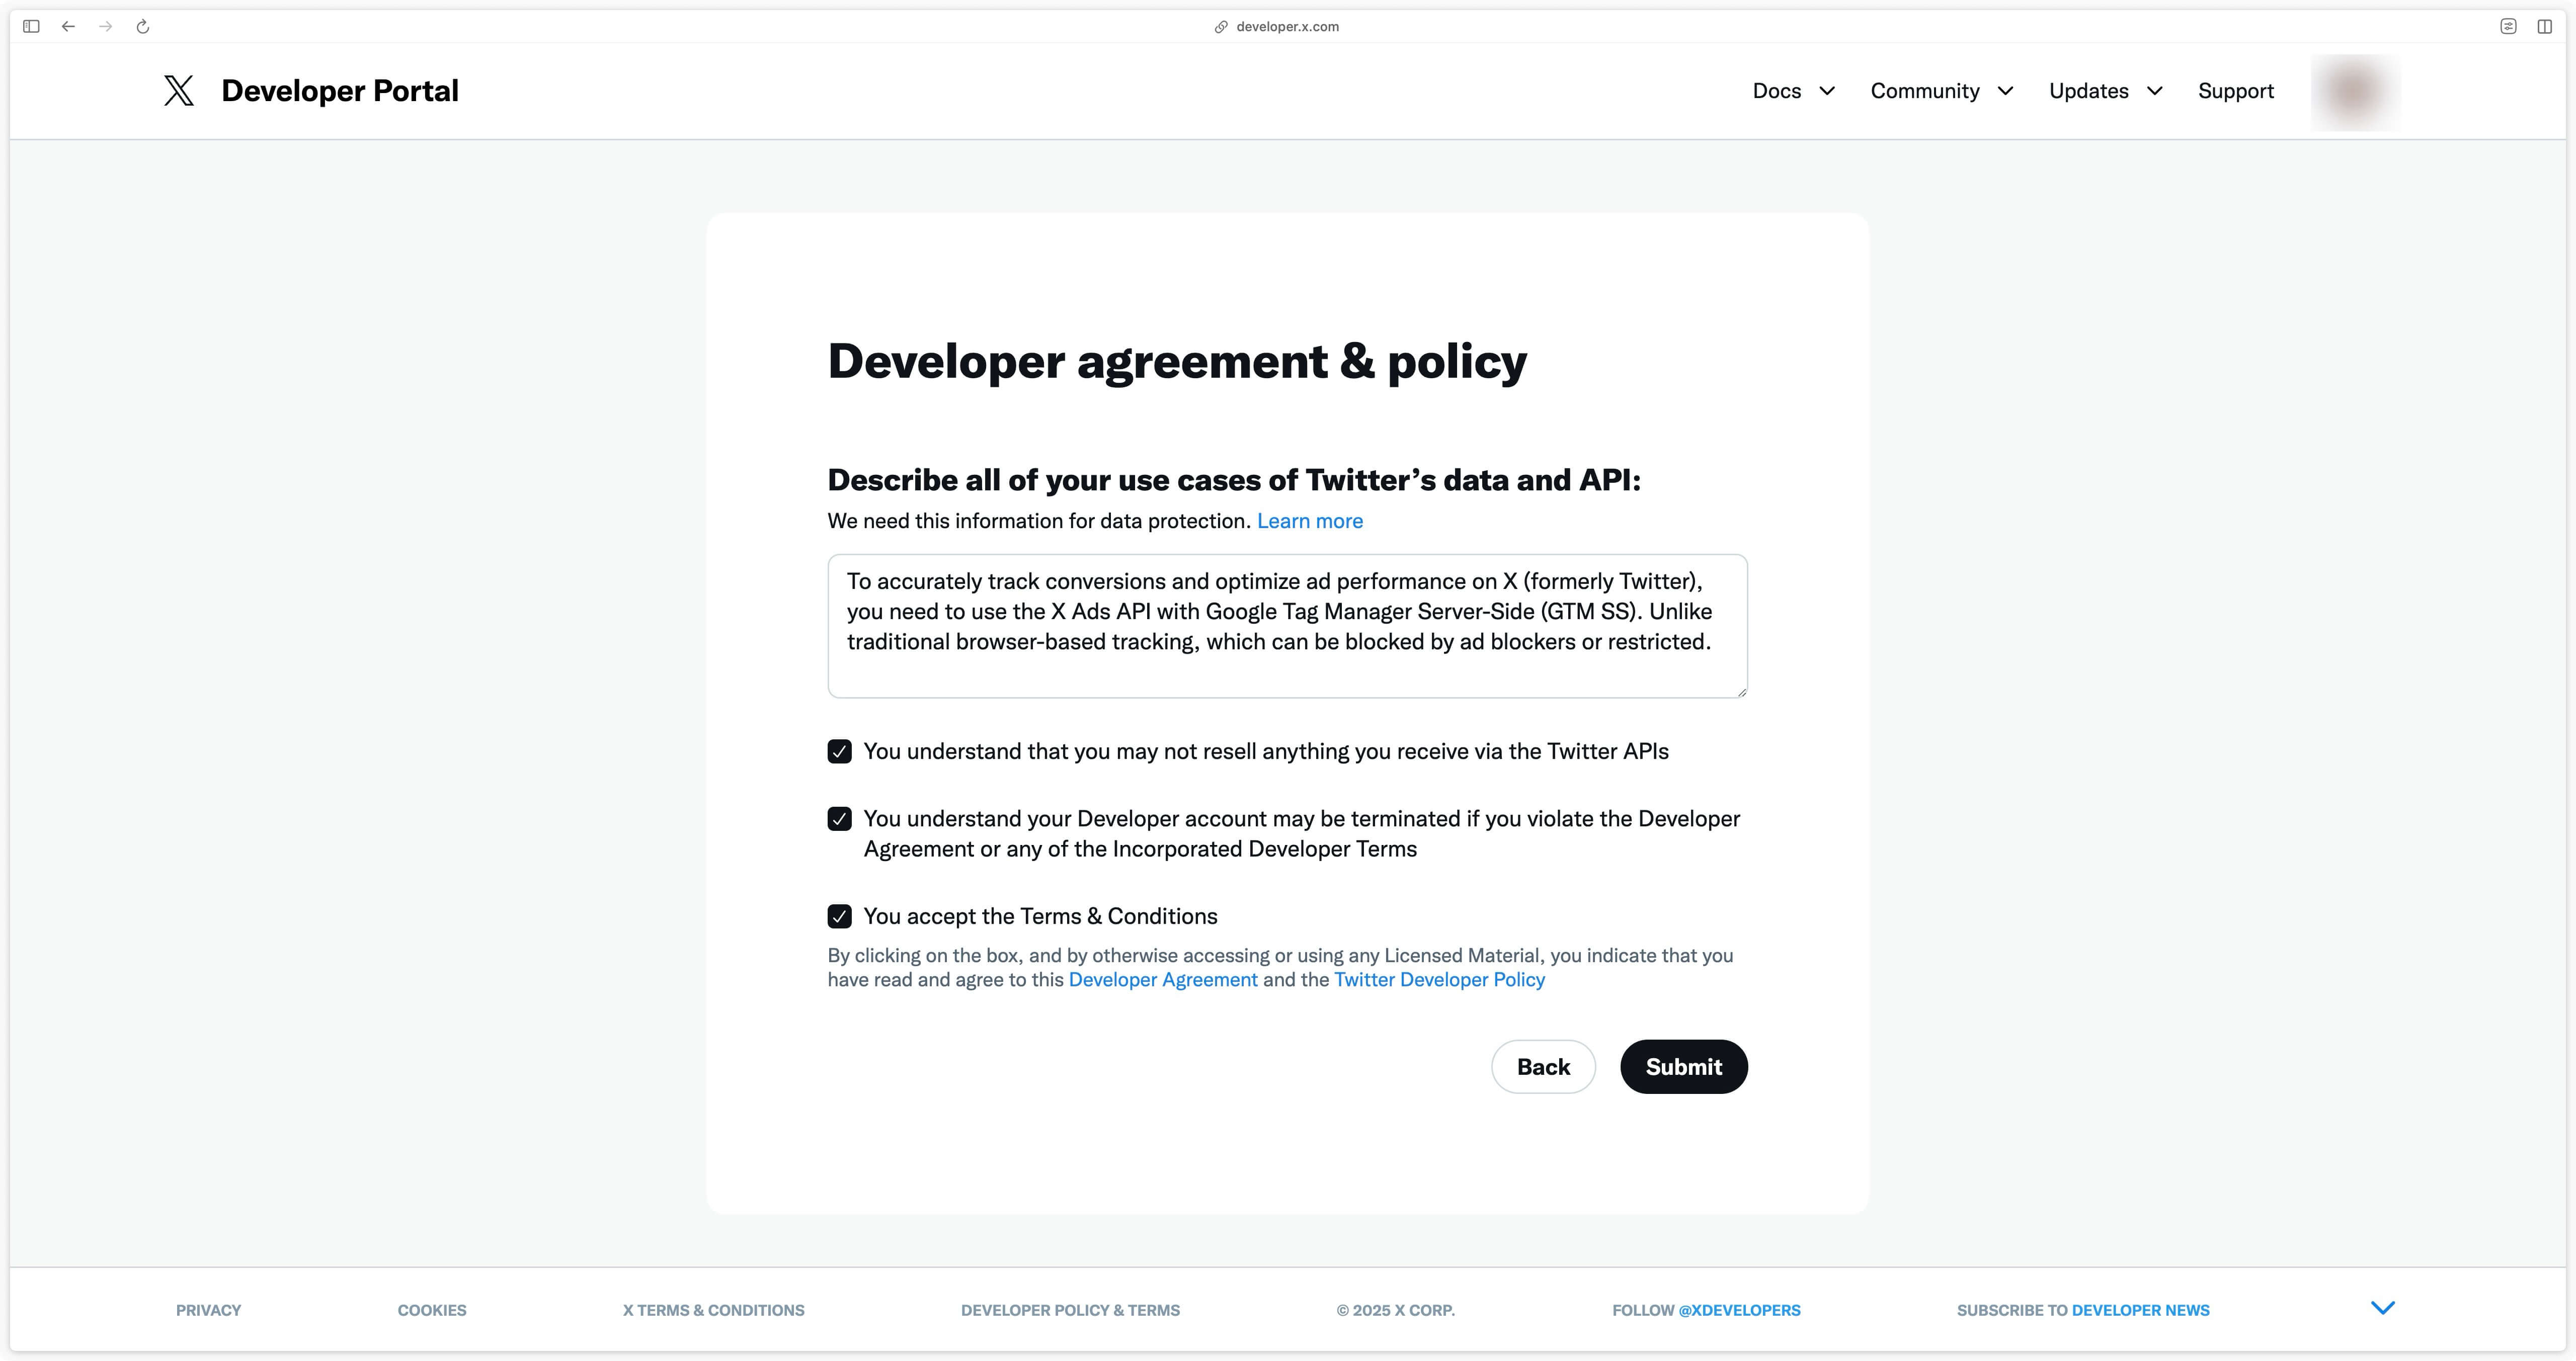
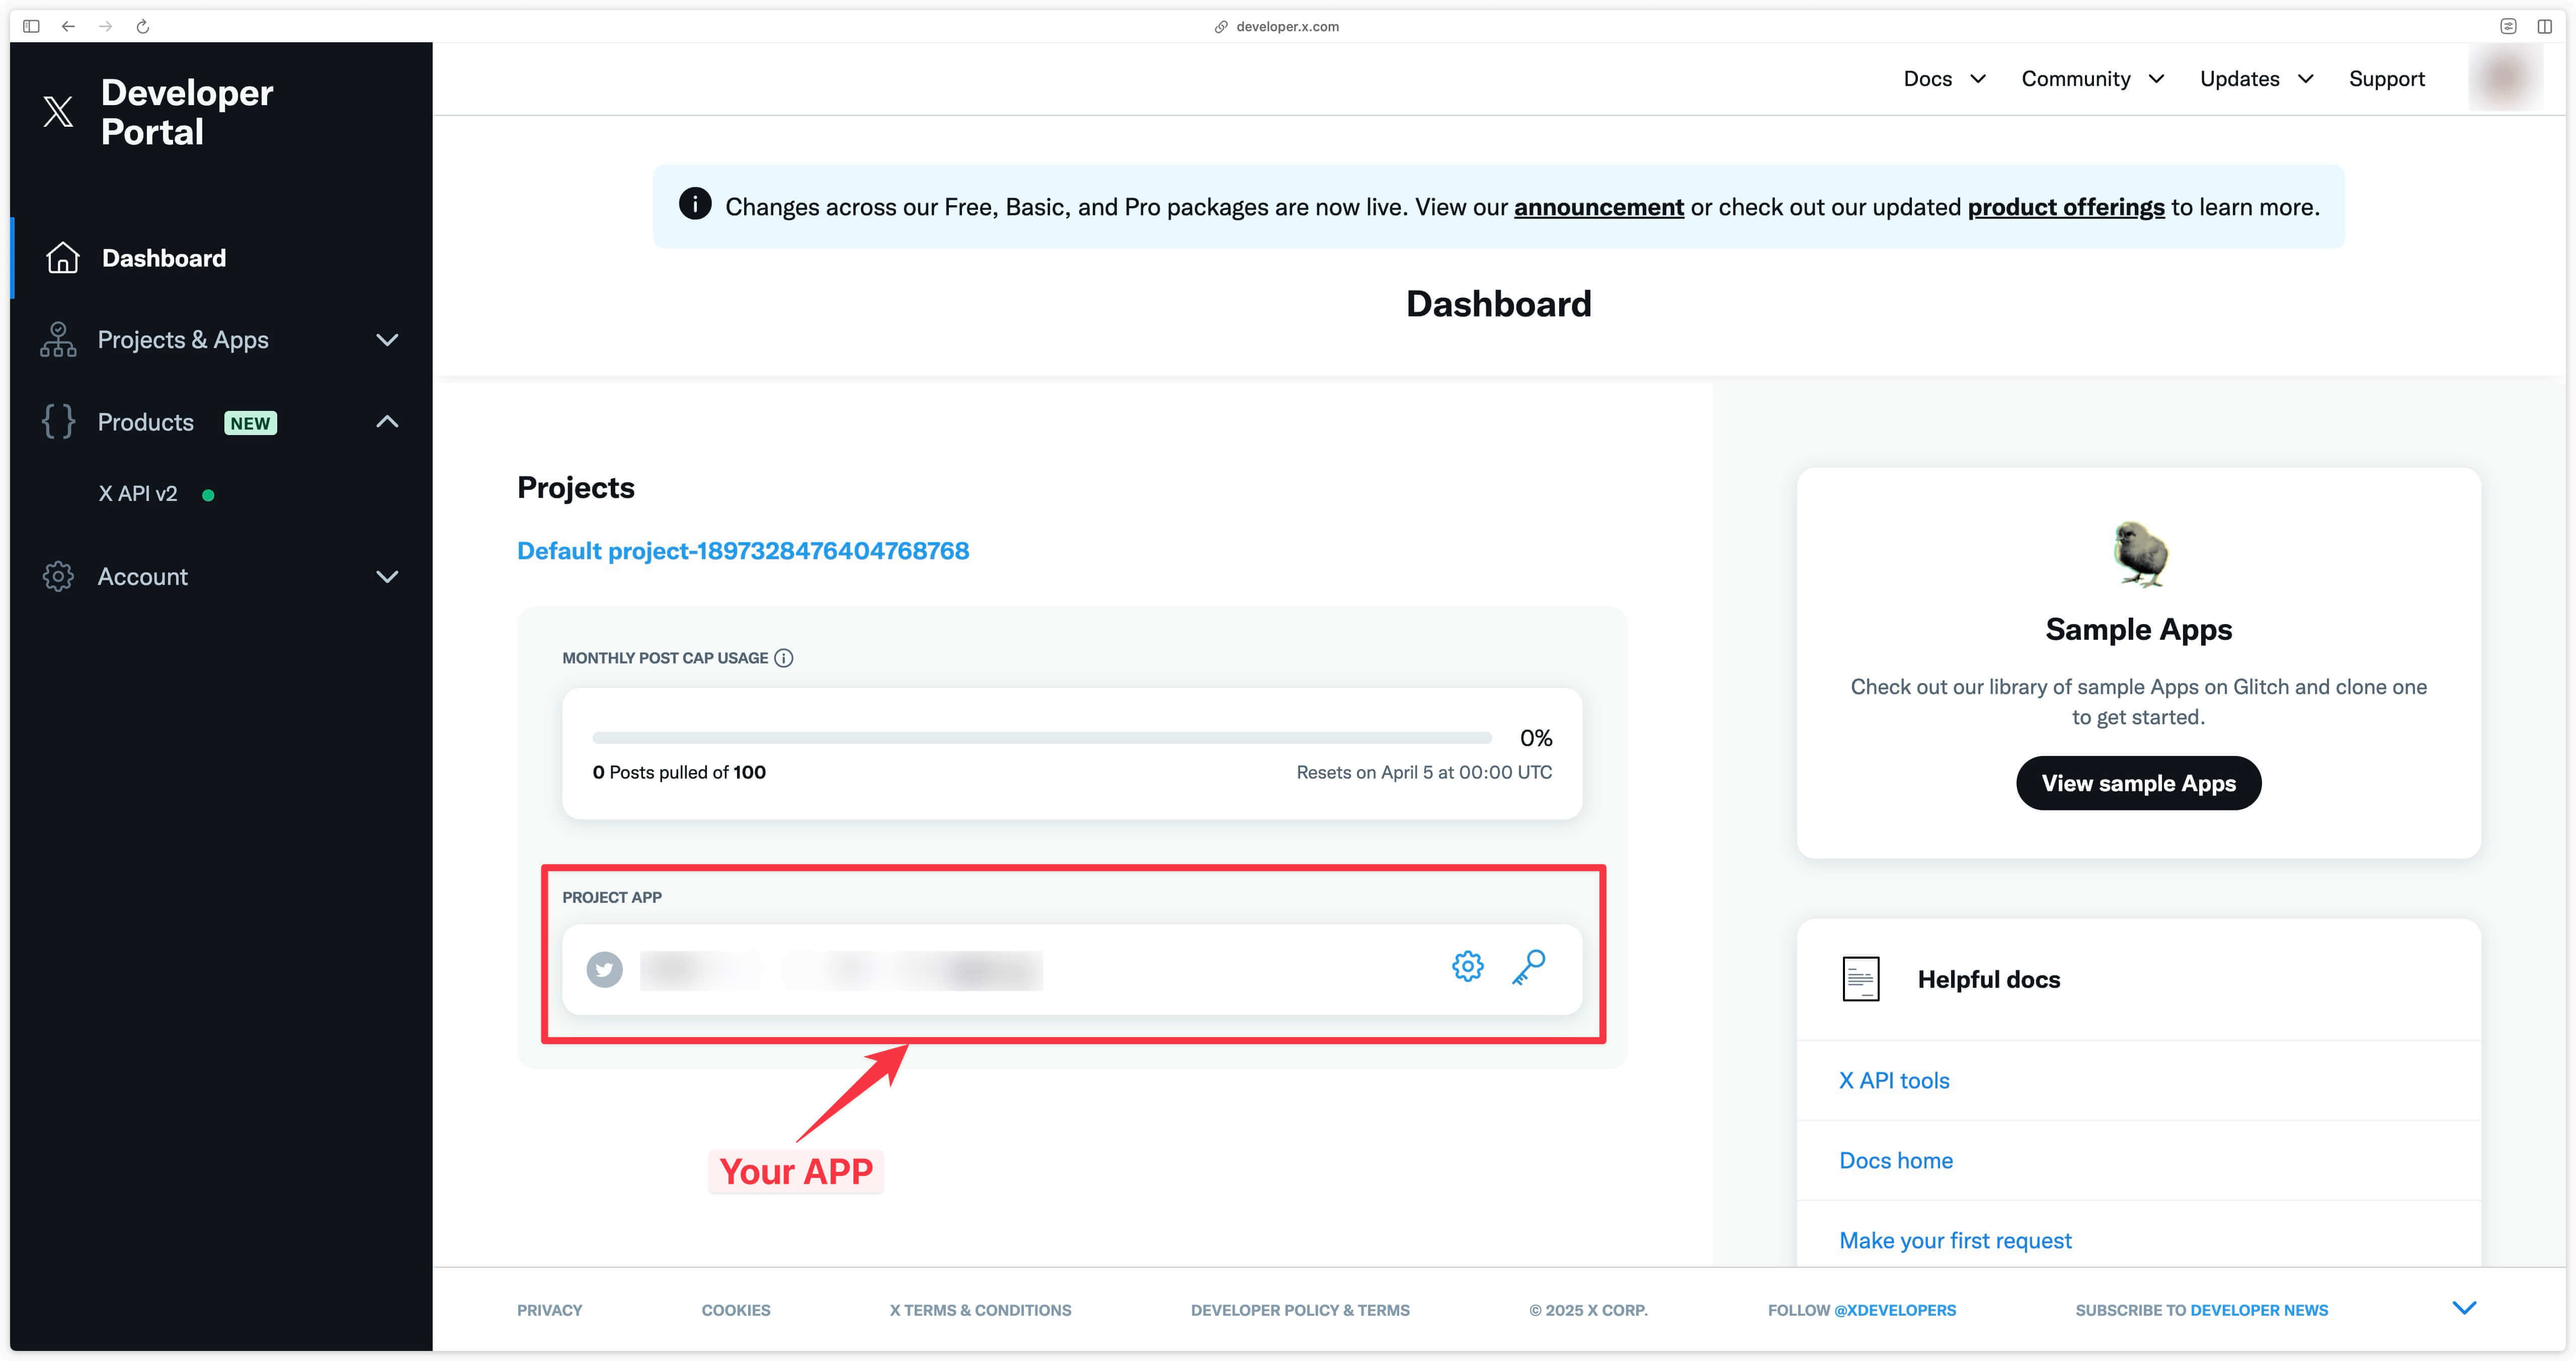
You will then be taken to the Developer Portal dashboard.
At this point, your application is created, but it doesn’t have access to the conversion API.
Request access to the conversion API
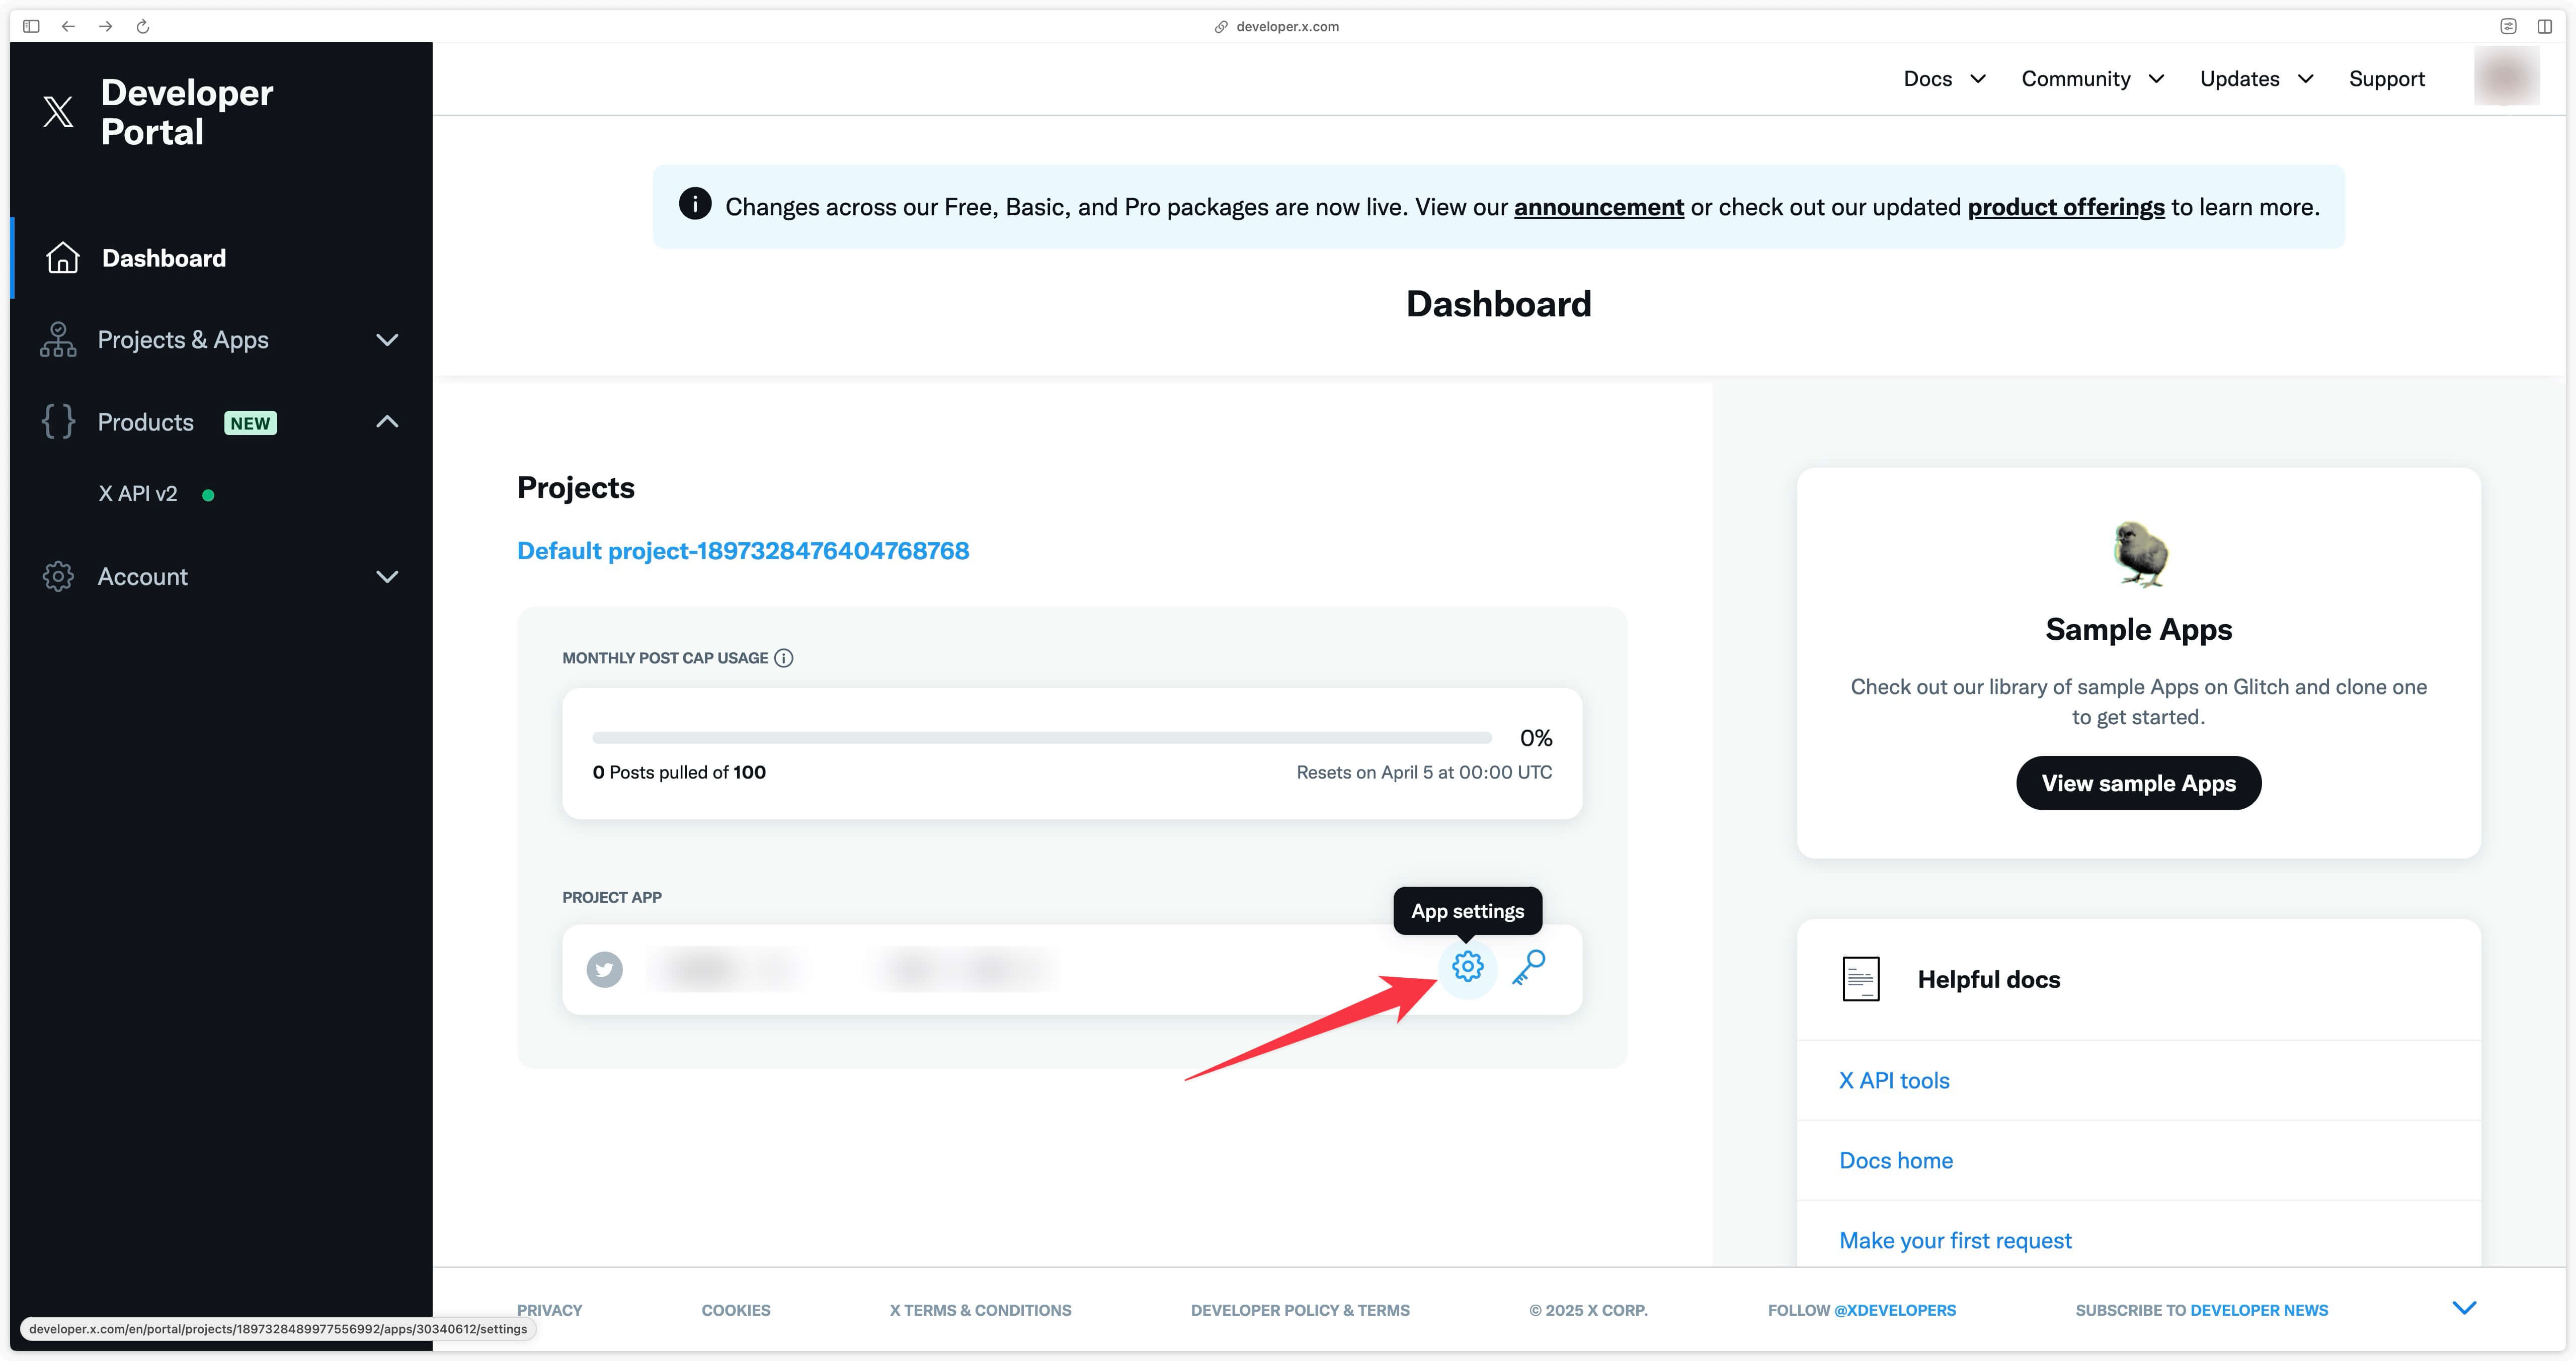
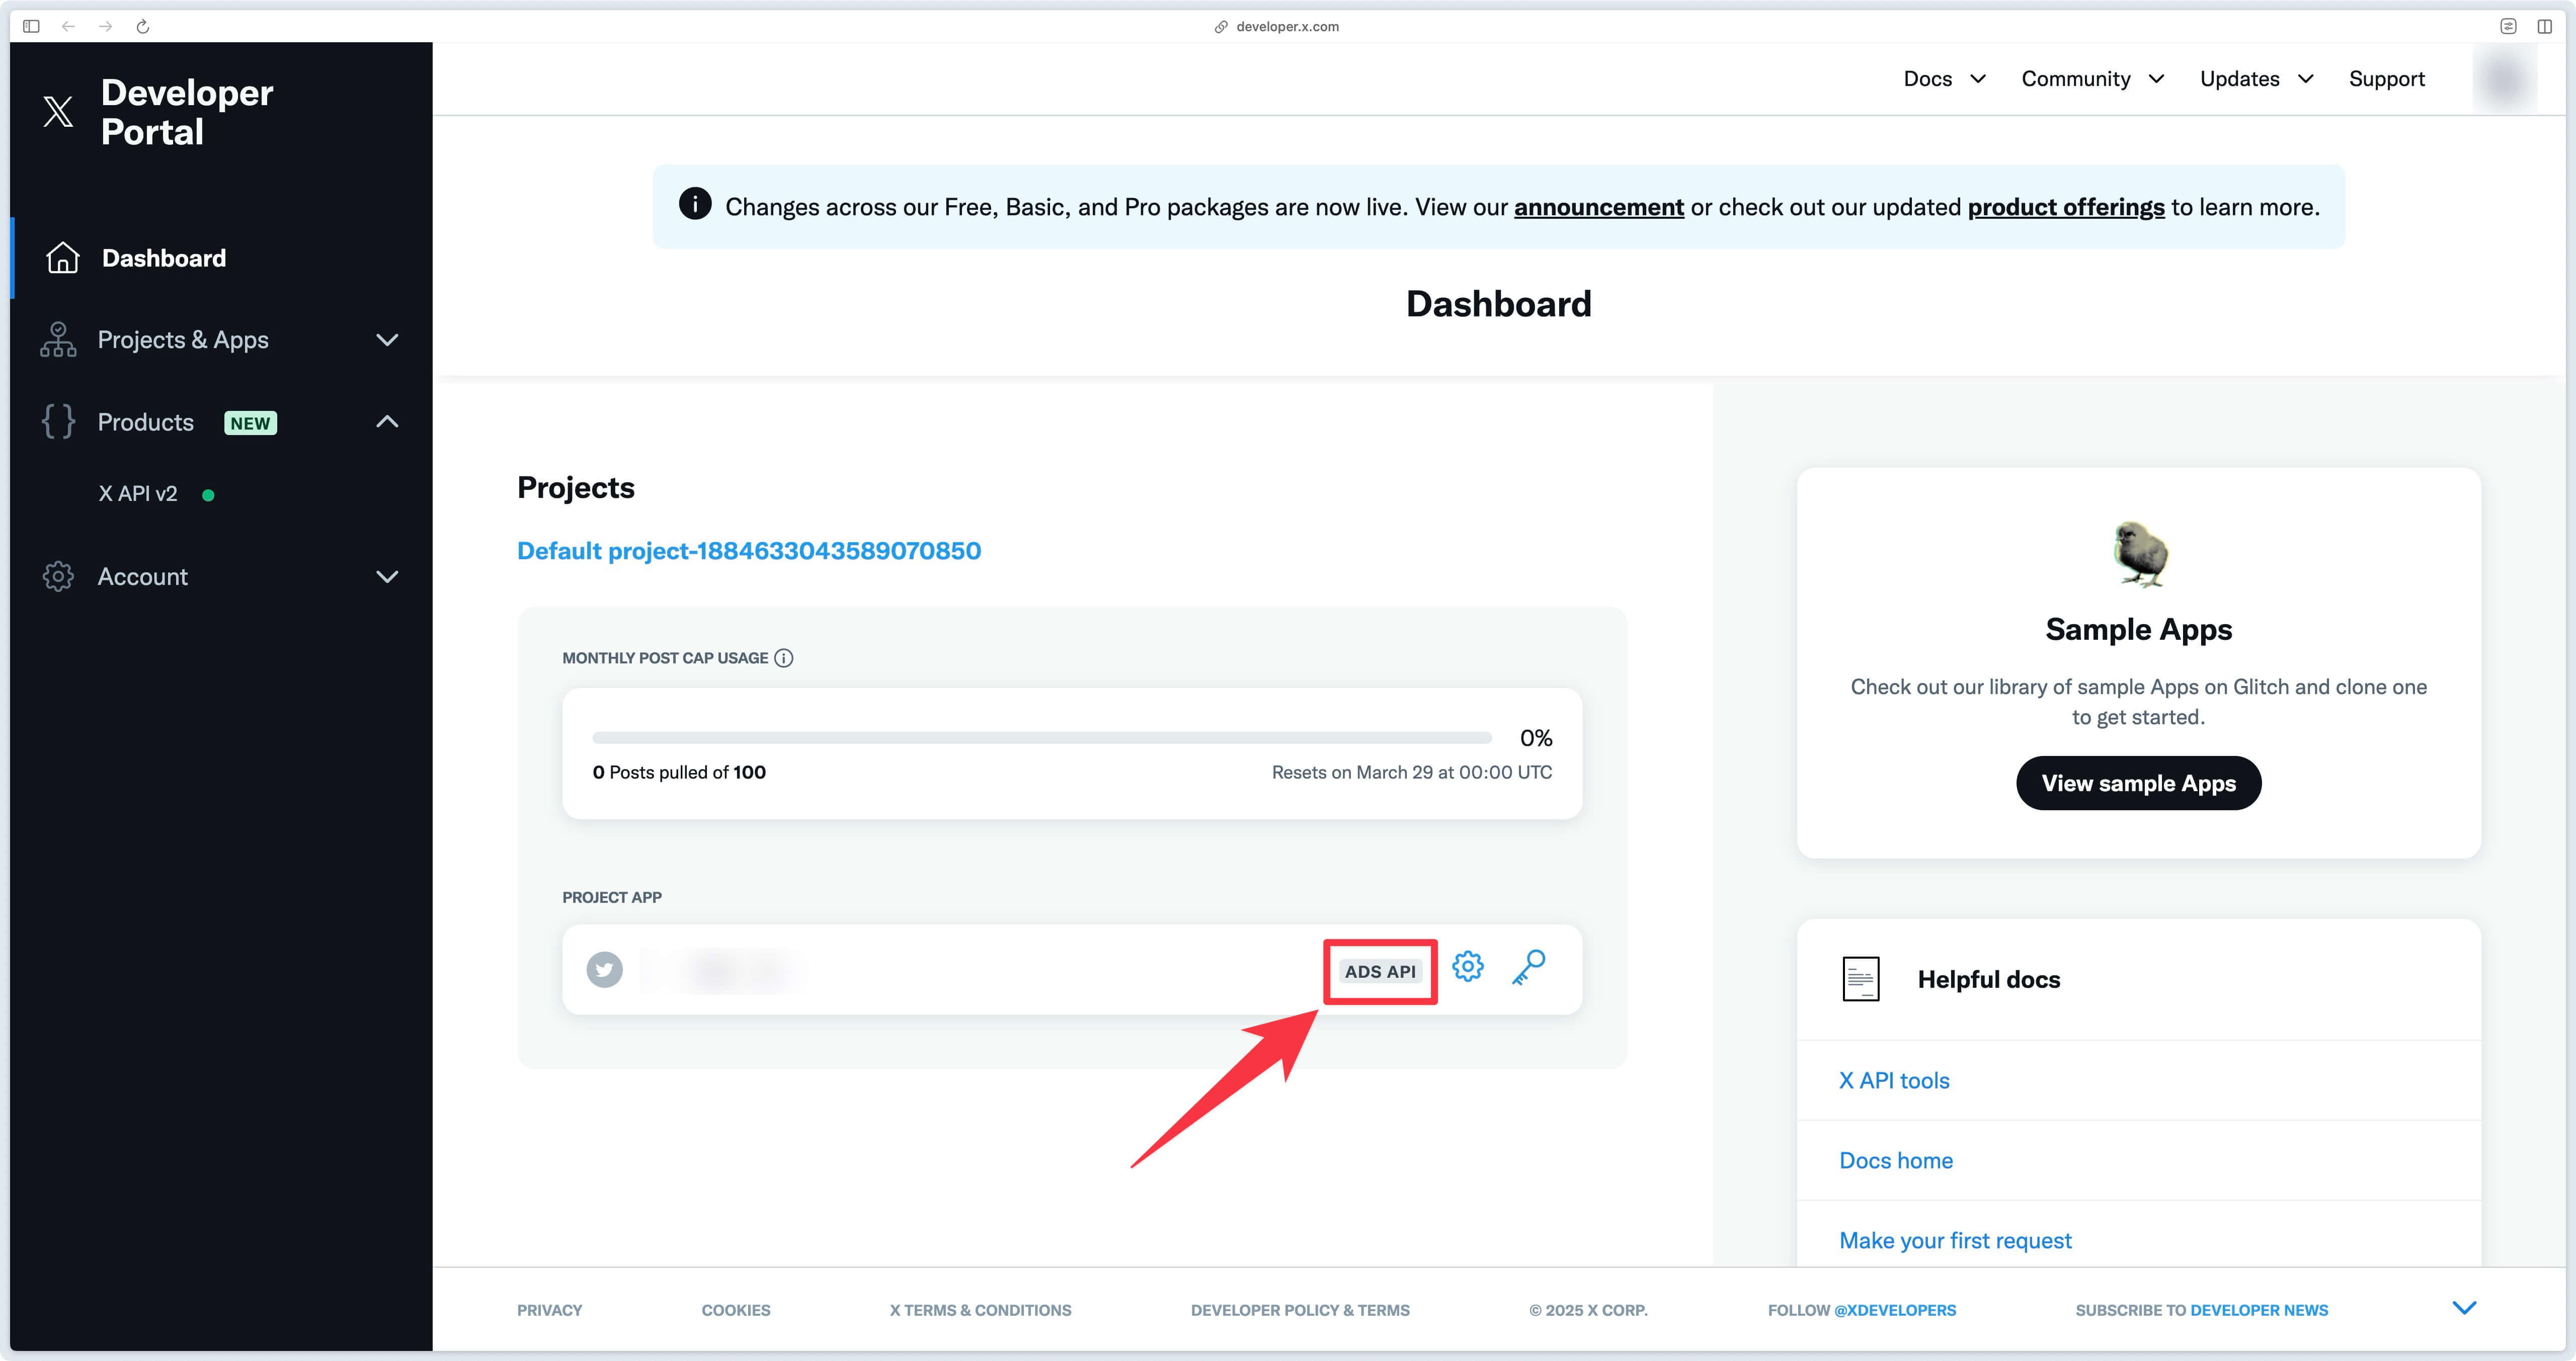
To request access to the conversion API, you first need to retrieve your application ID. To do this, go to App settings.
Copy the APP ID that appears.
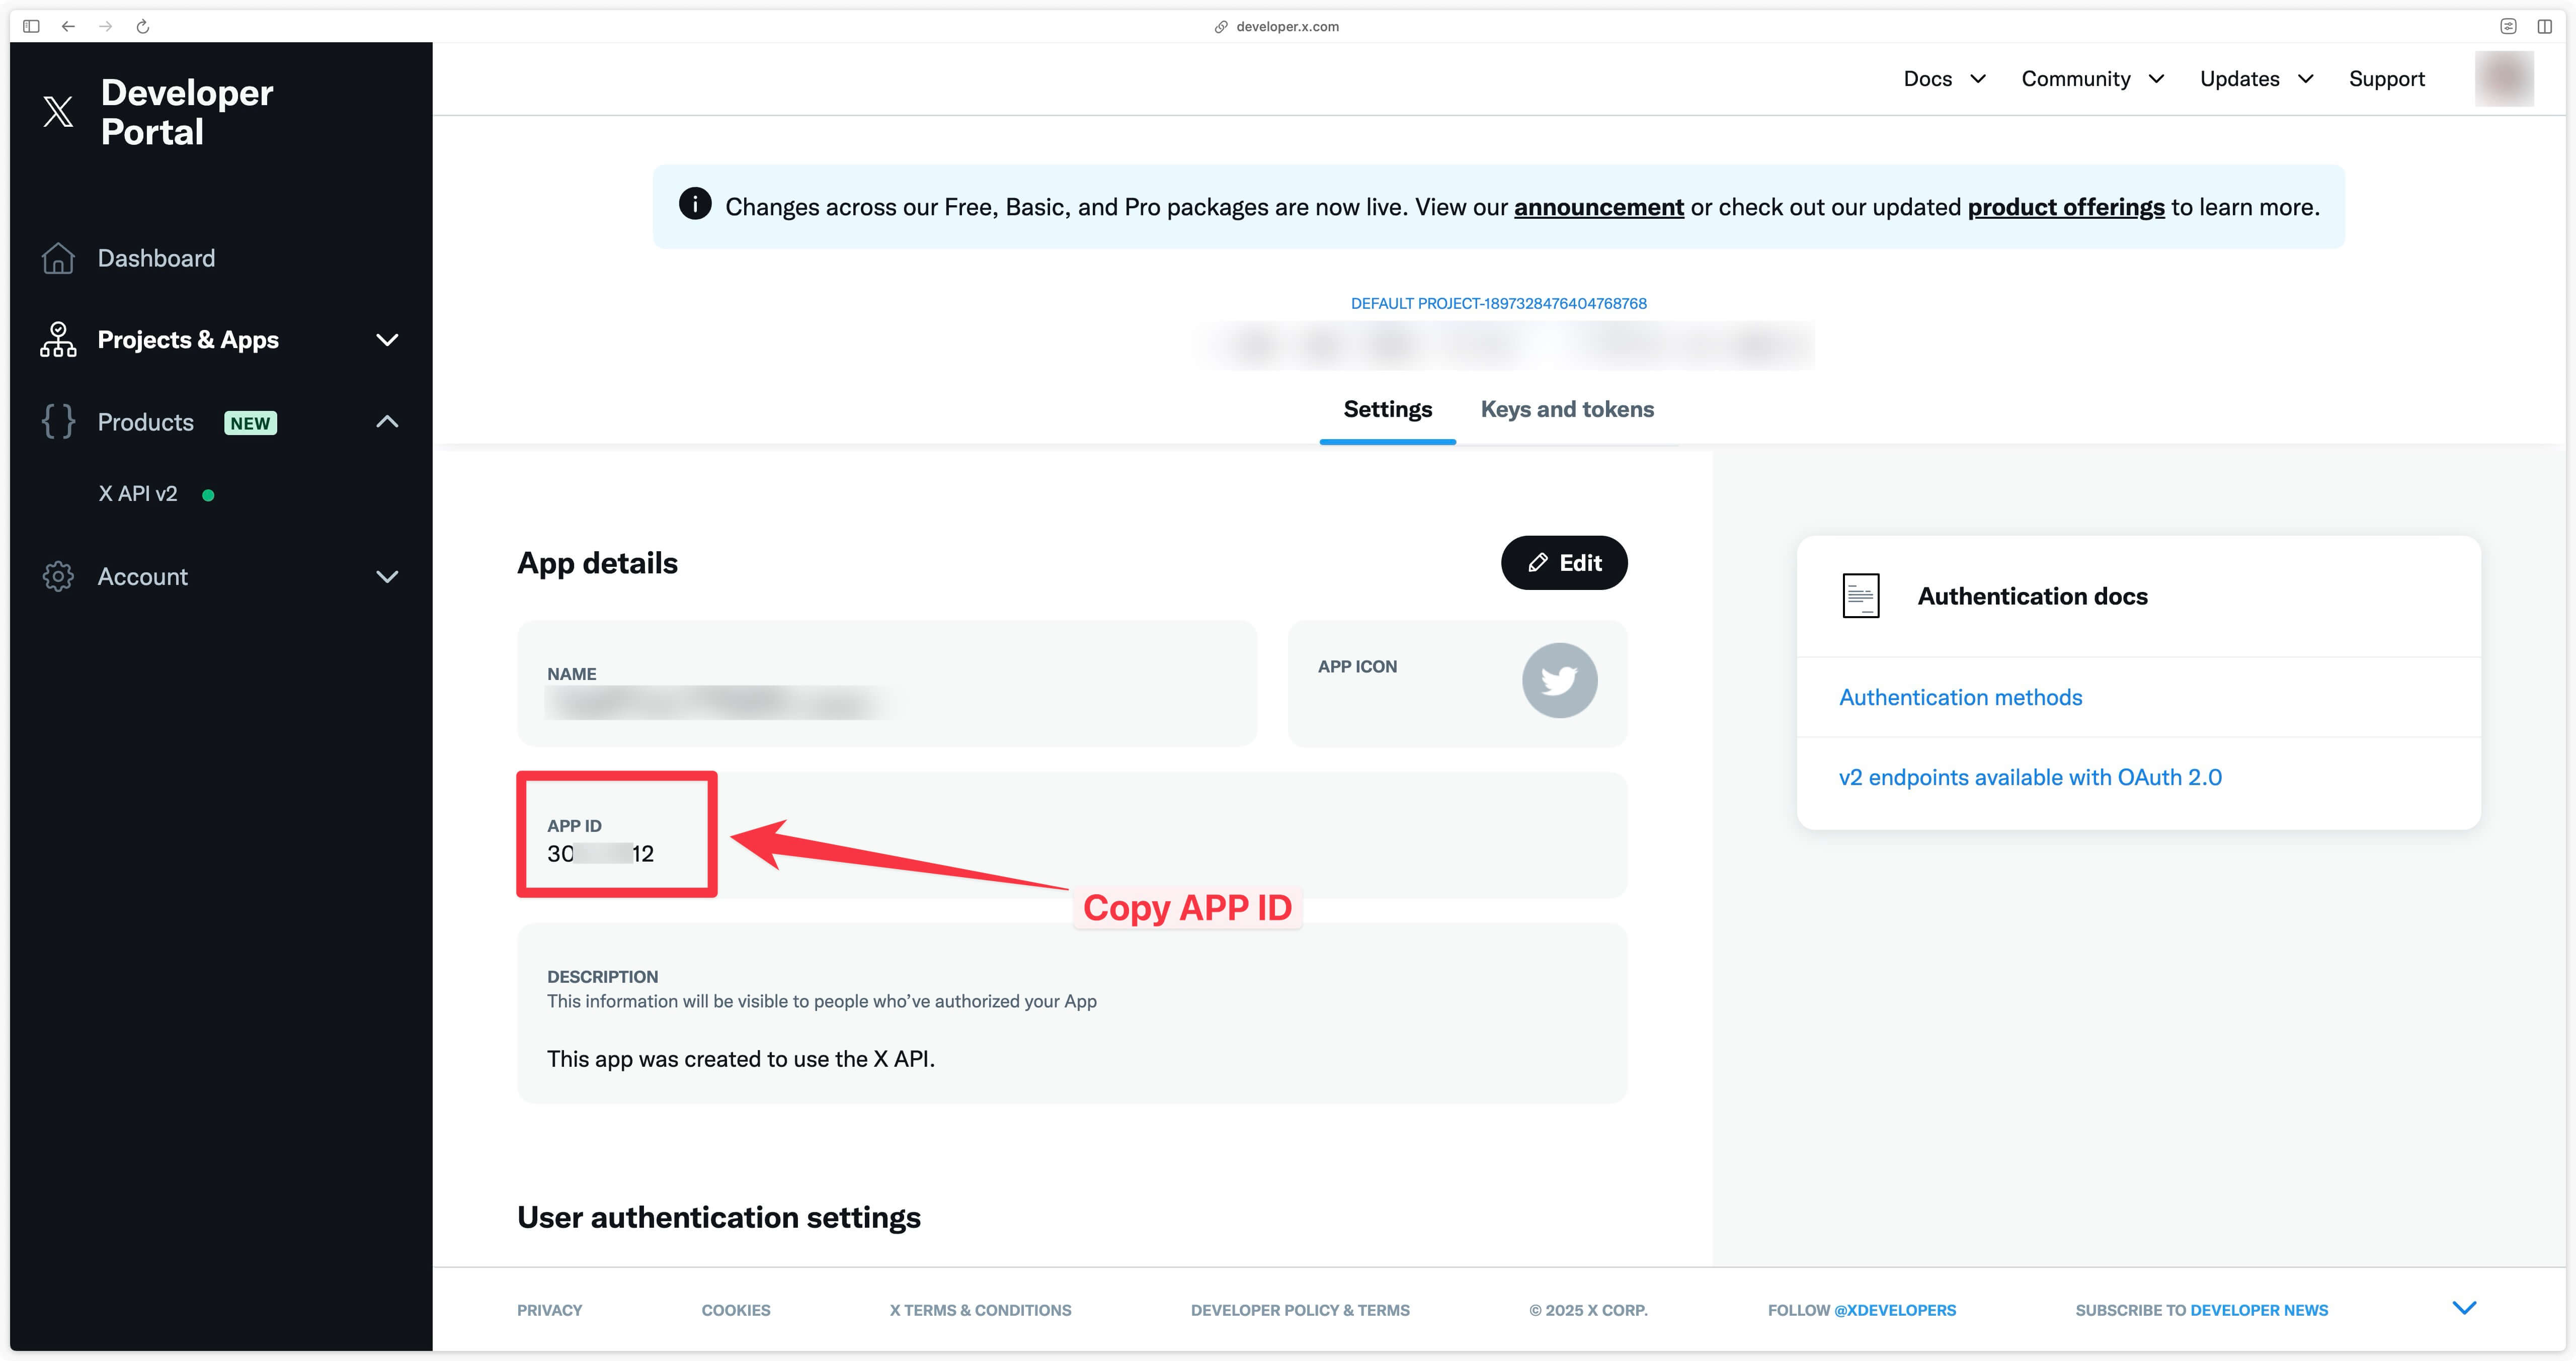
Then request access to the conversion API (X Ads API) via this form .
Fill in your details, then when you get to page 4, paste the app ID and also the text you used previously for the Developer Portal.
To accurately track conversions and optimize ad performance on X (formerly Twitter), I need to use the X Ads API with Google Tag Manager Server-Side (GTM SS). Unlike traditional browser-based tracking, which can be blocked by ad blockers or restricted.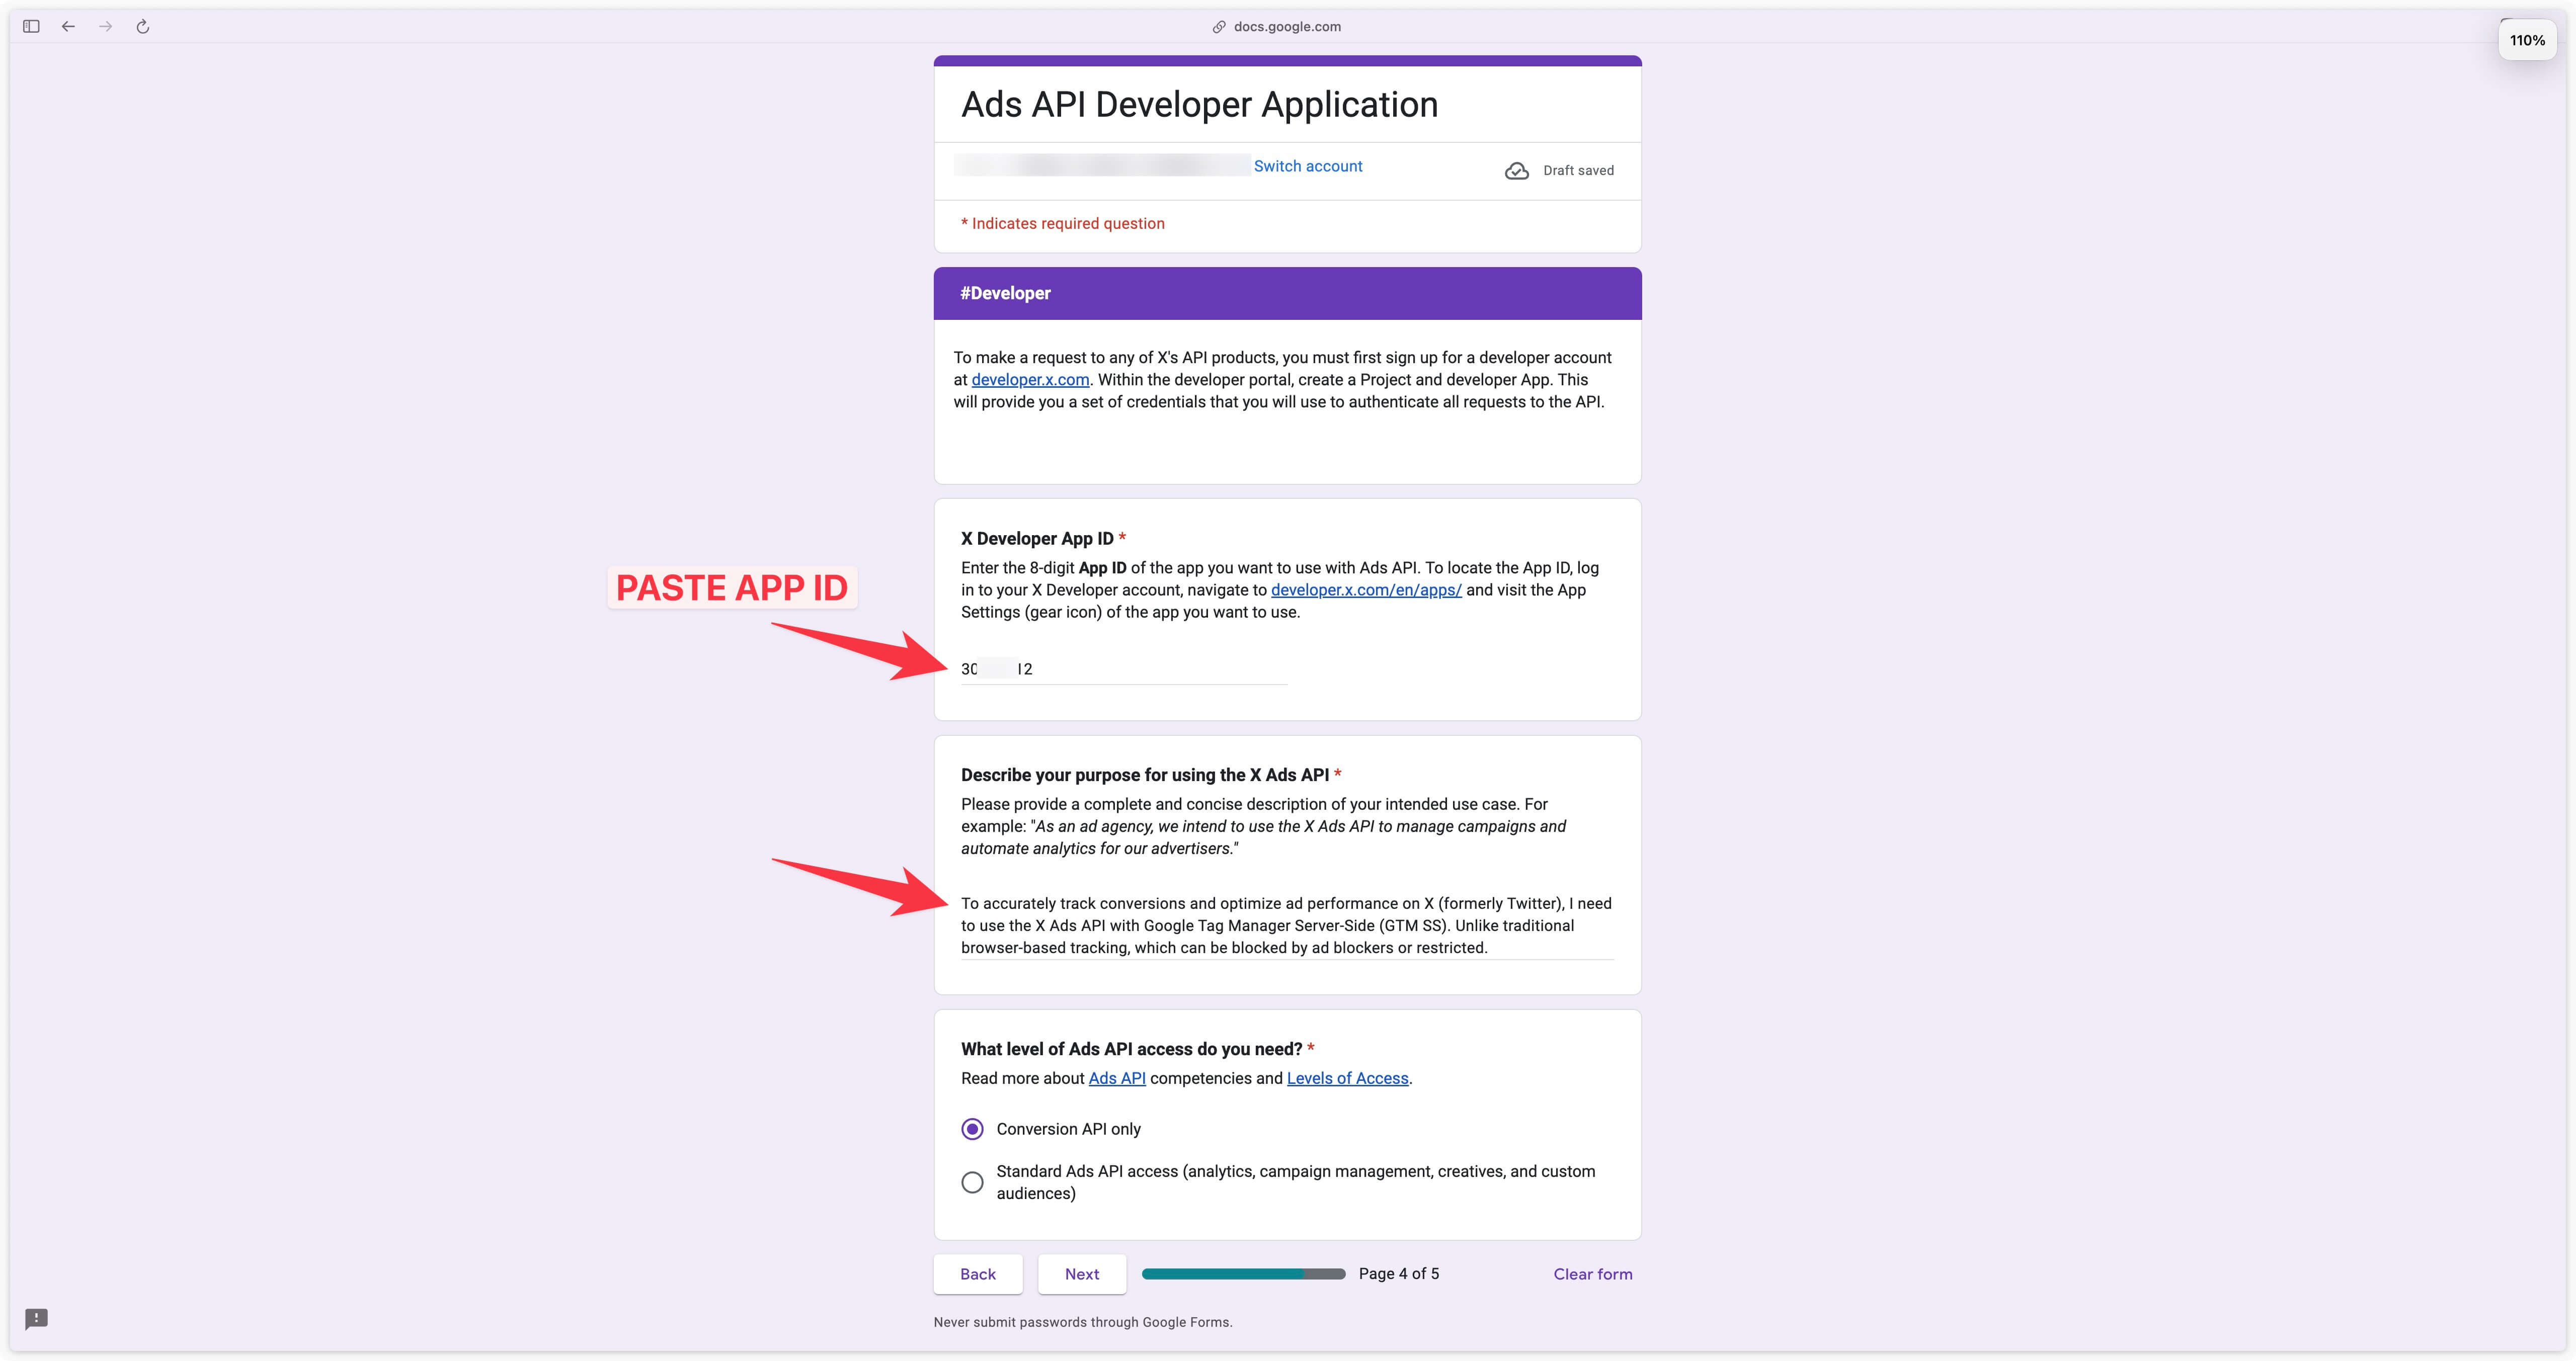
You can then submit the form.
You’ll know you’ve gained access when ADS API is written to your application (see screenshot below).
Generate access tokens
To send requests to the conversion API, we’ll need the following tokens:
- consumerKey
- consumerSecret
- oauthToken
- oauthTokenSecret
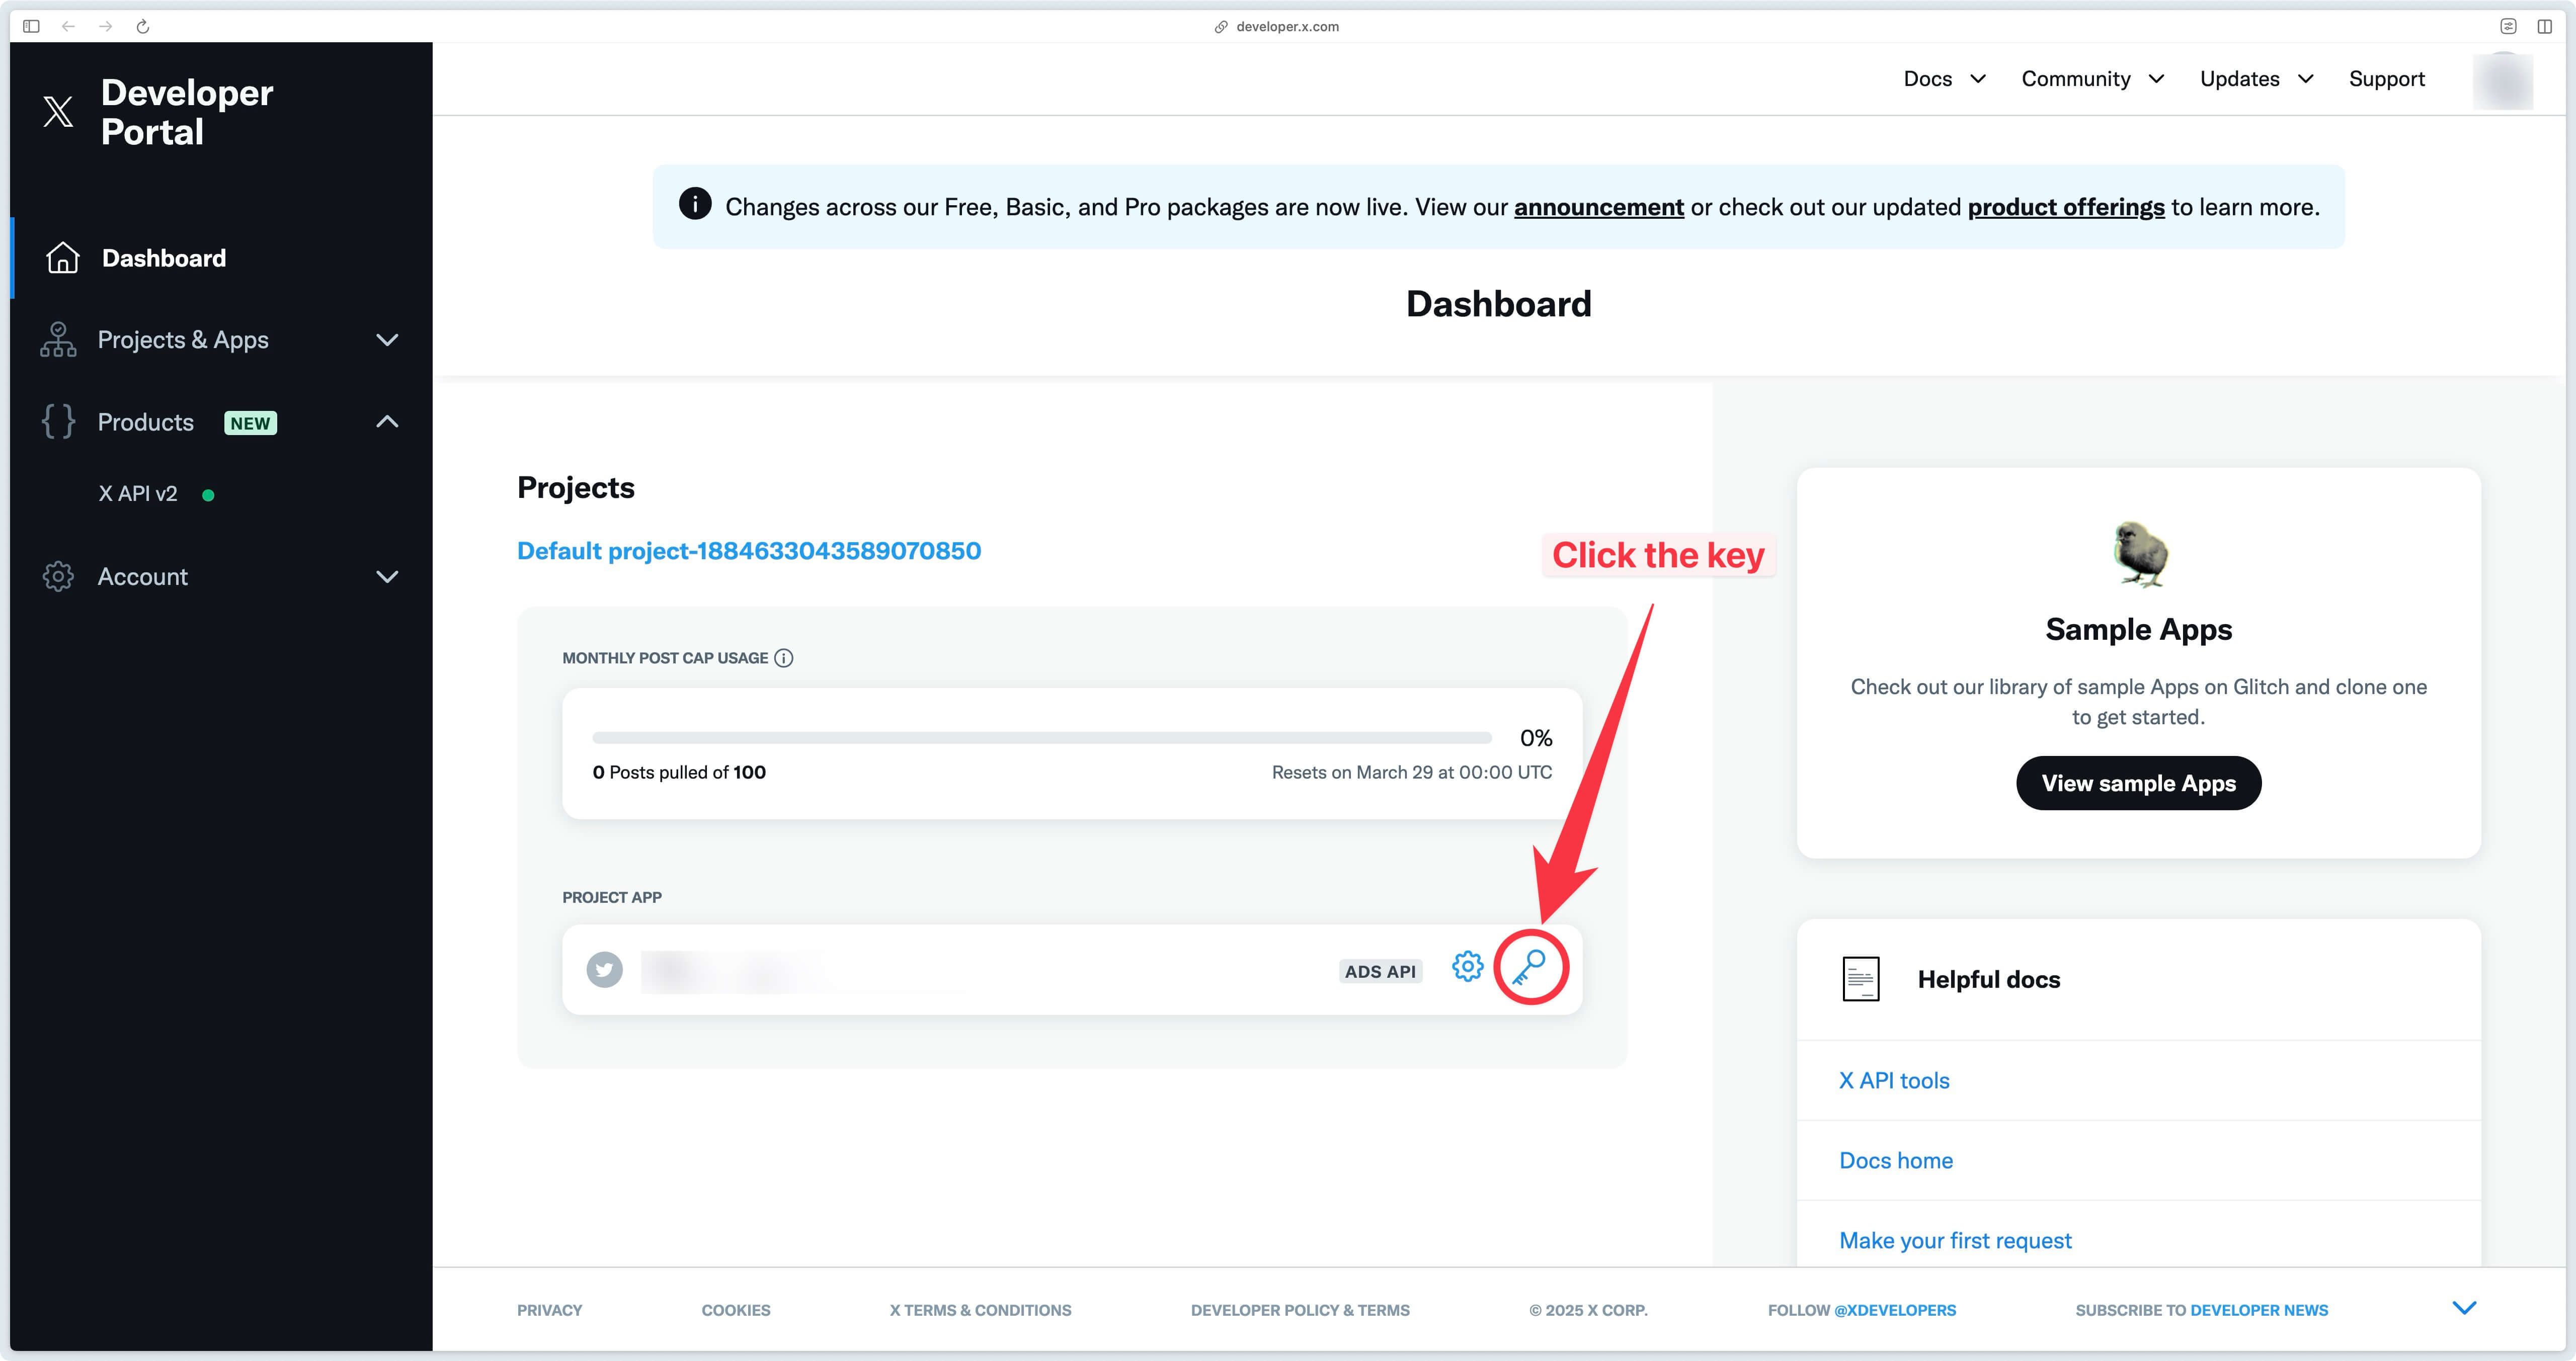
To do this, go to the X Developer Portal dashboard and click on the key next to your APP.
Then click on the Regenerate button in the red-framed sections below.
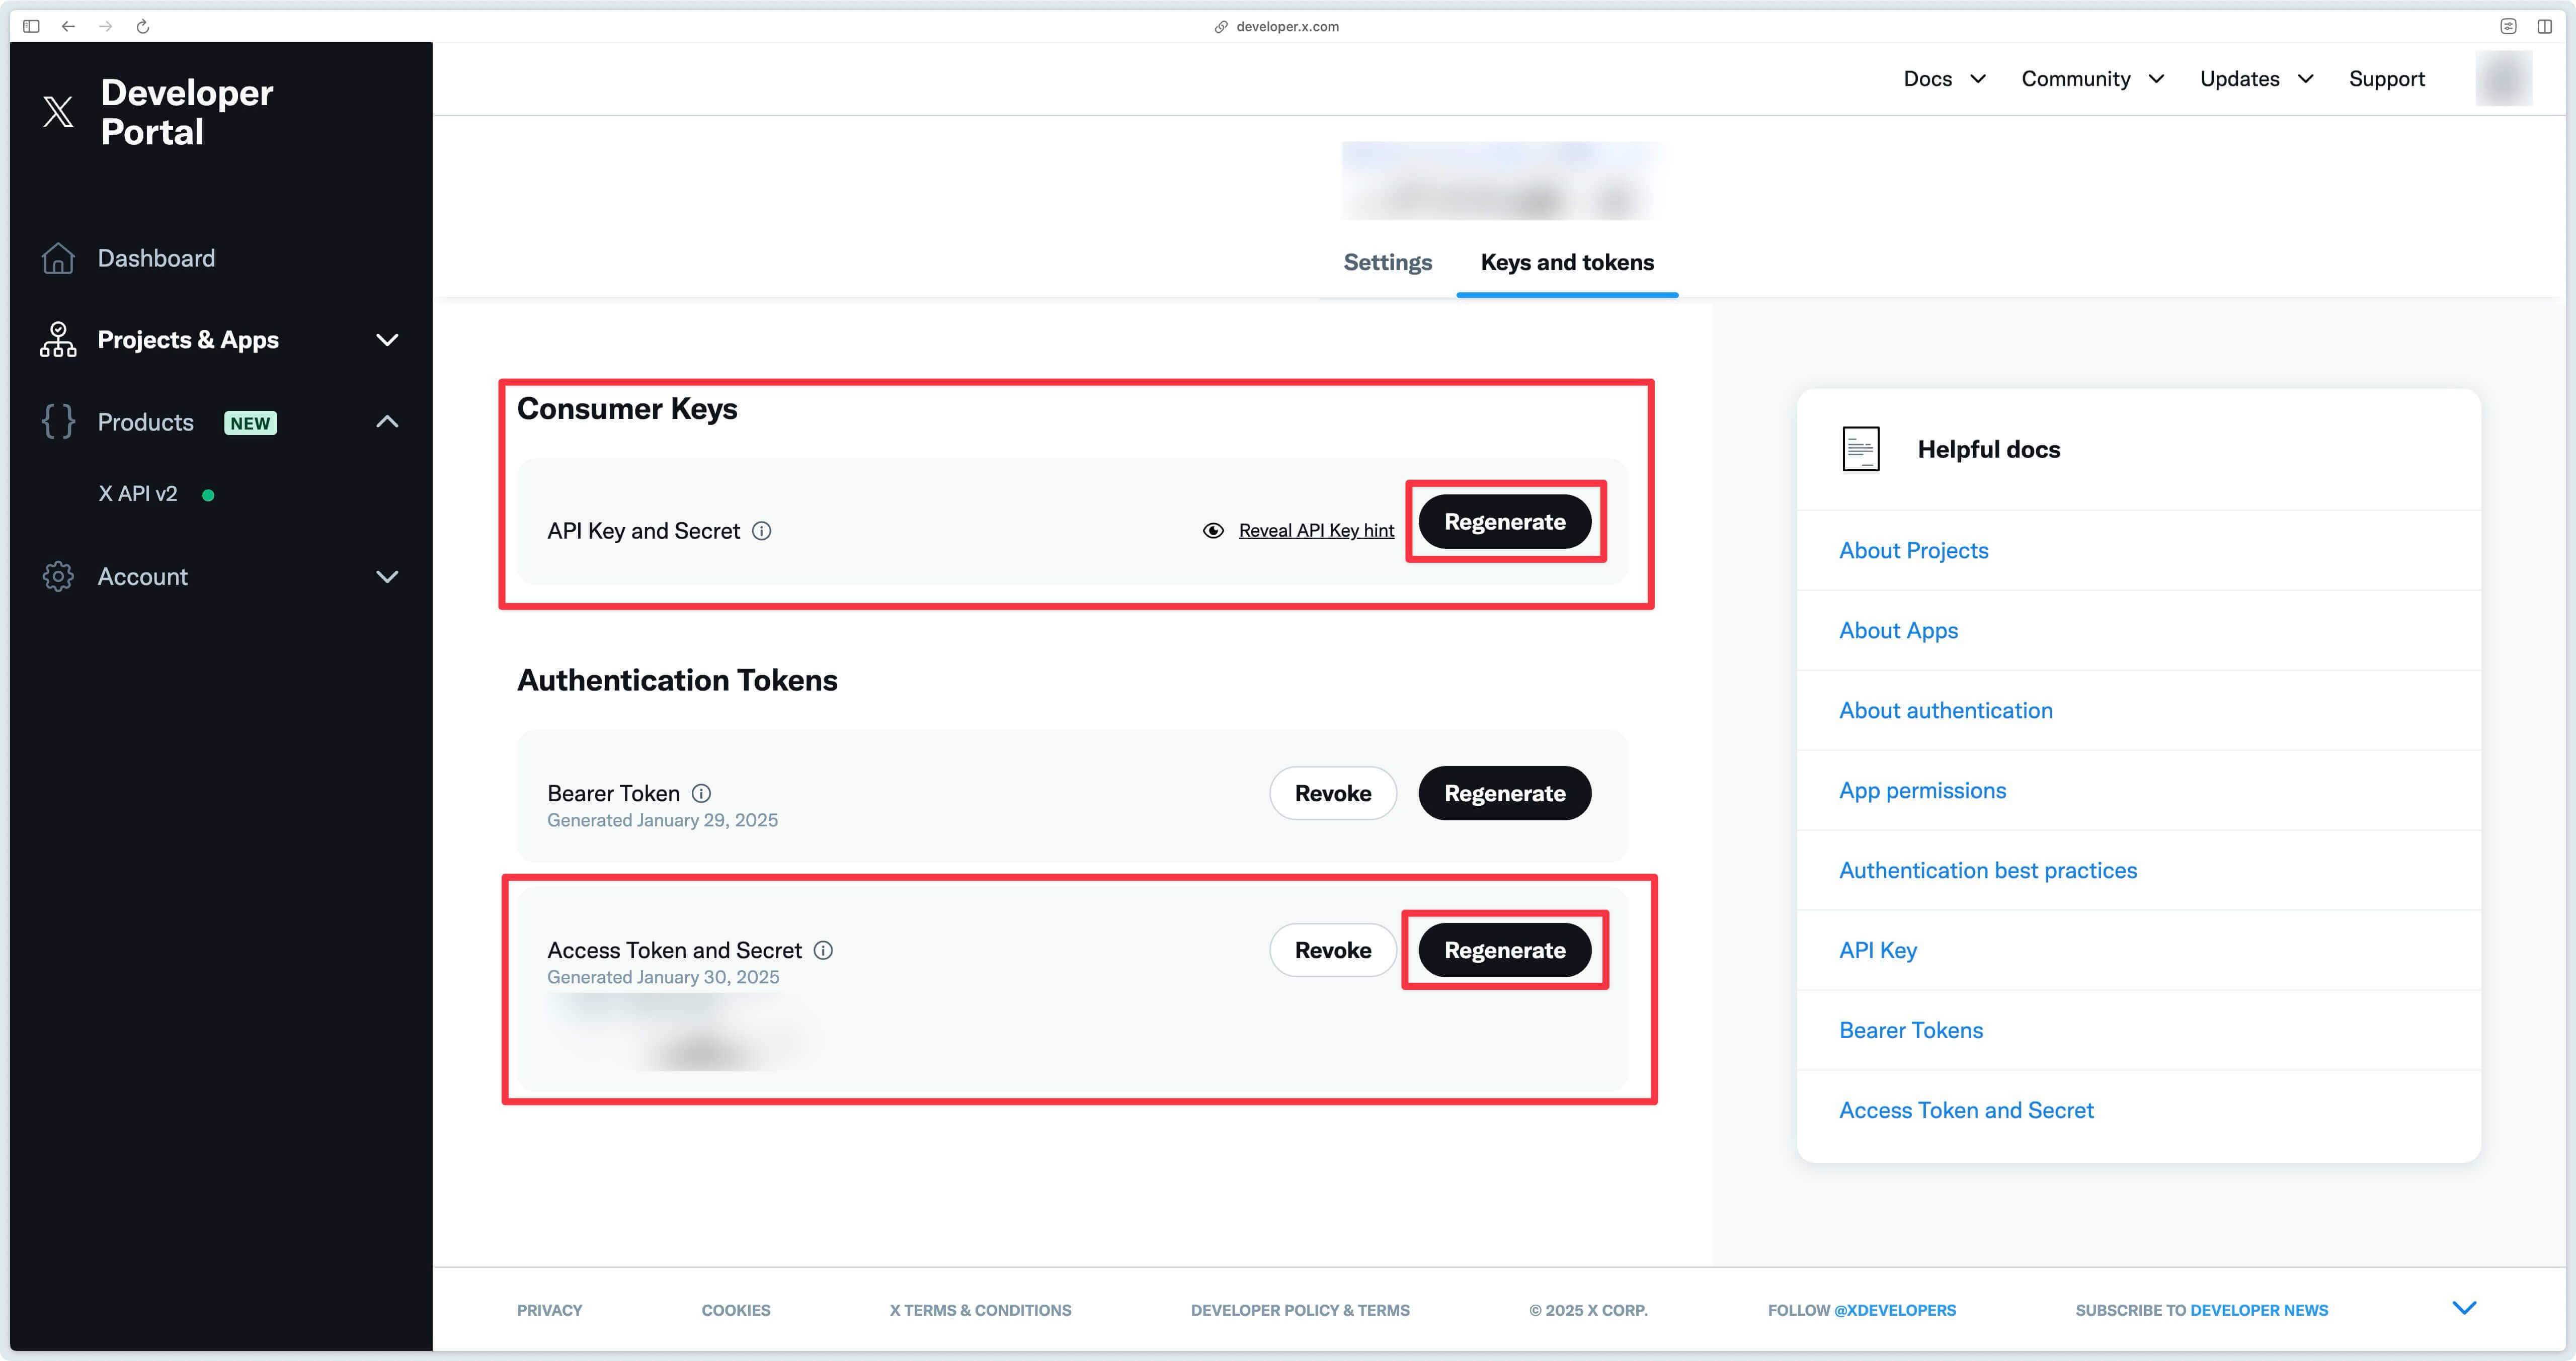
A pop-up window then appears with the tokens we need.
| consumerKey and consumerSecret | oauthToken and oauthTokenSecret |
|---|---|
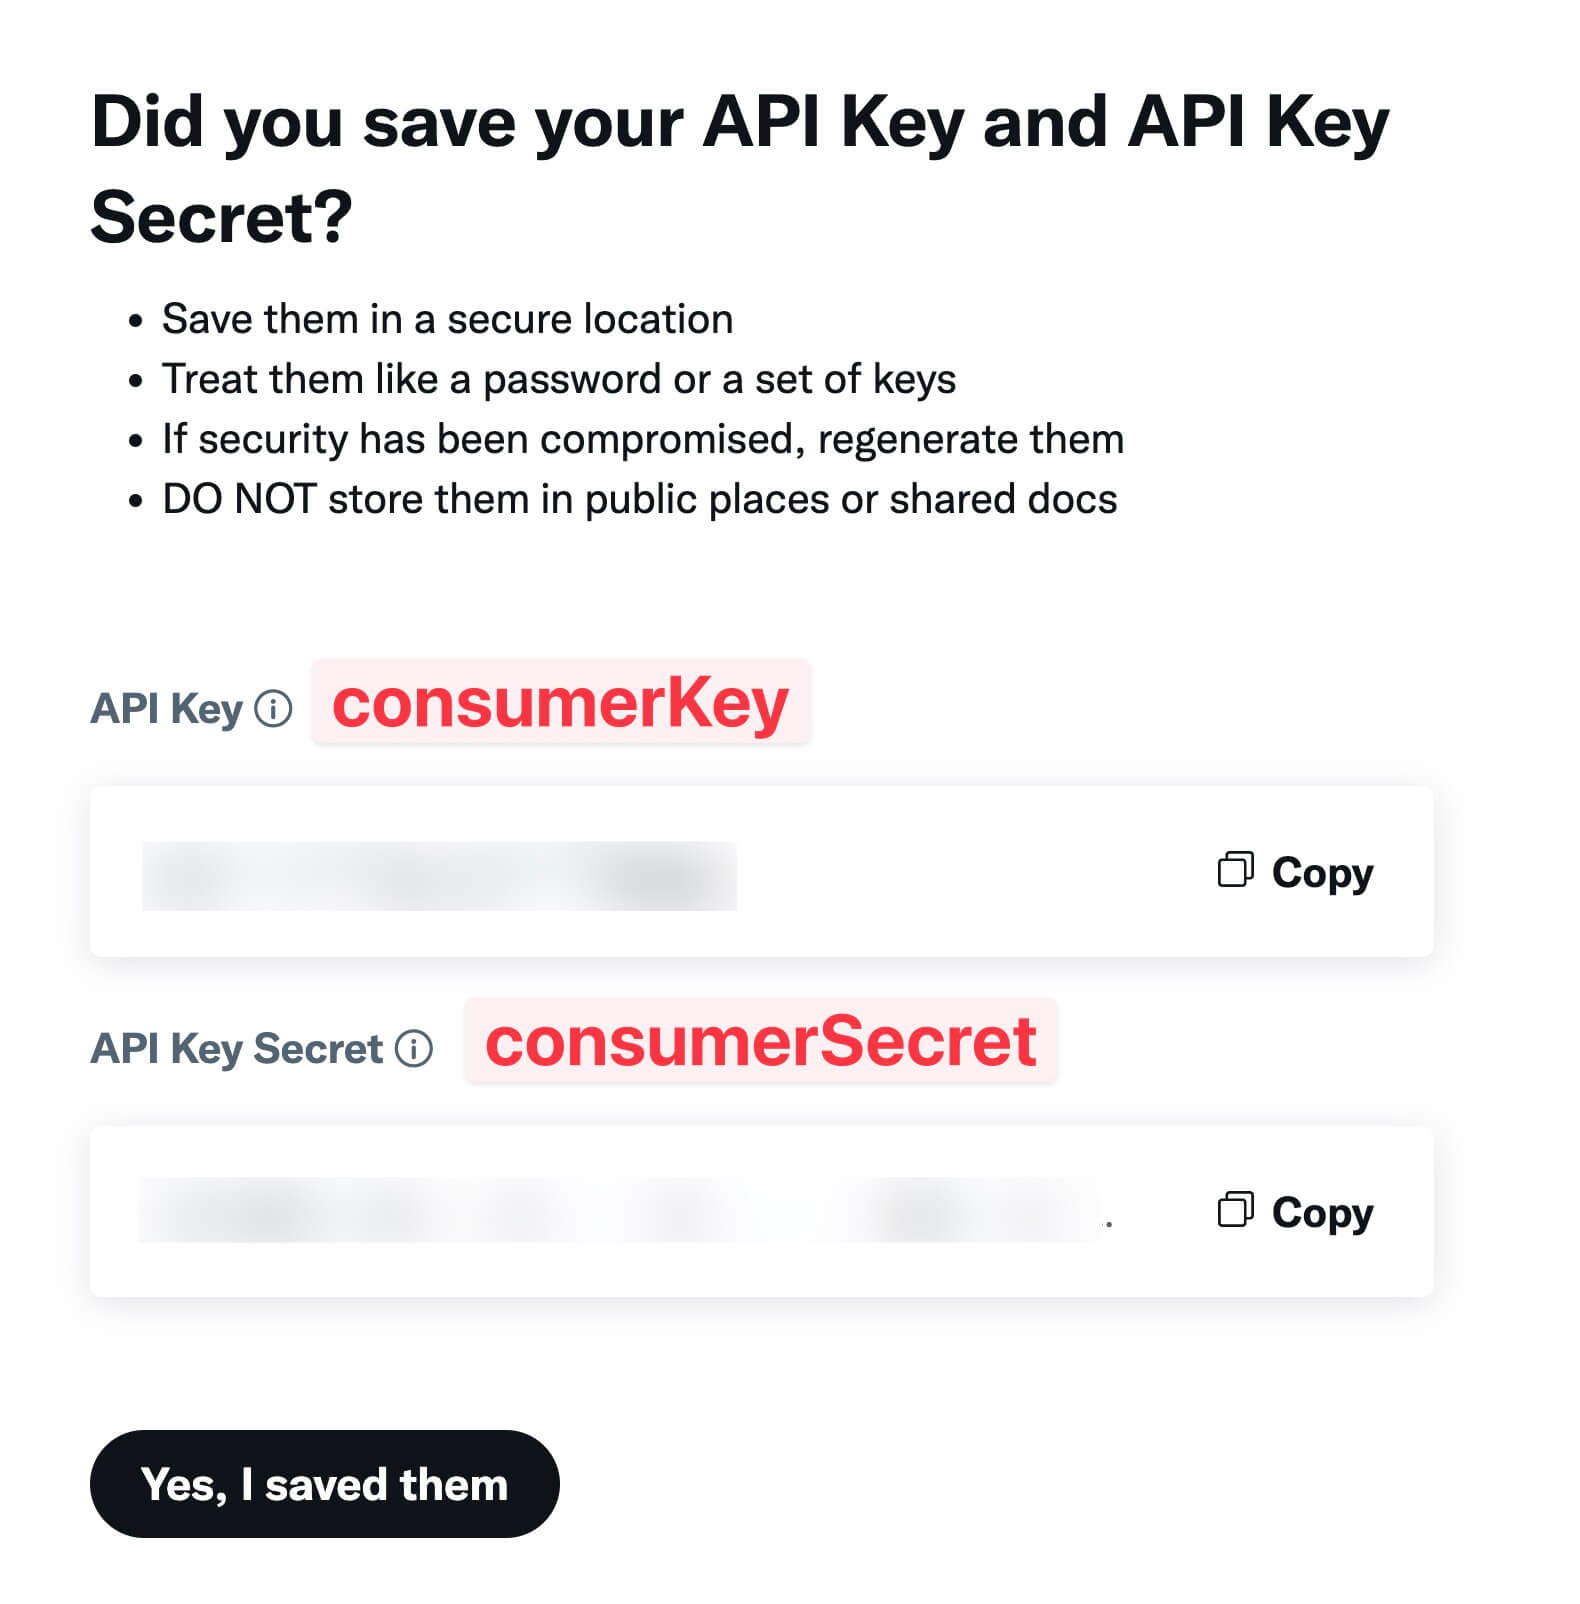 | 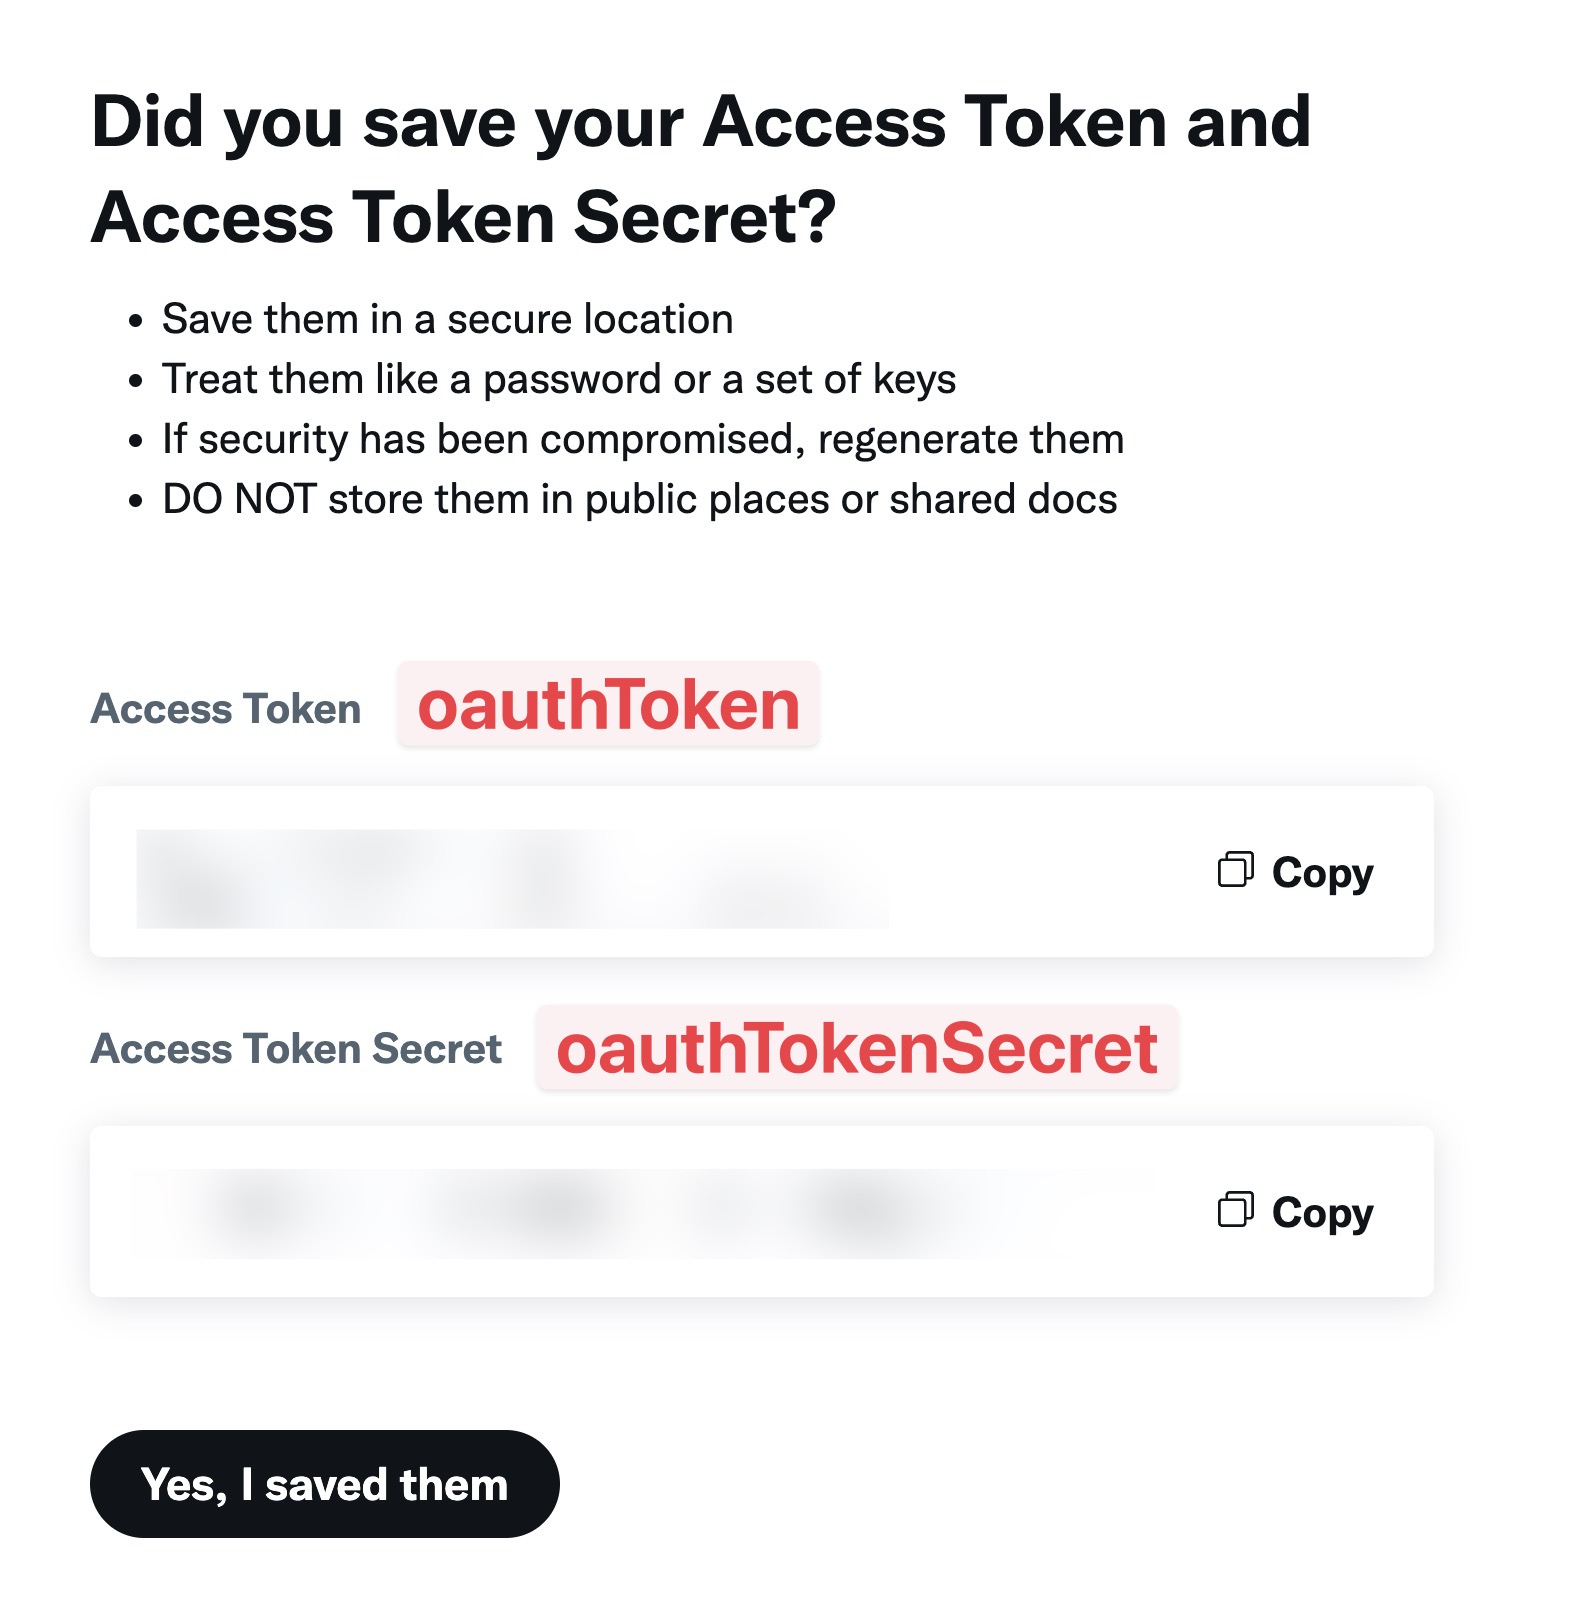 |
Event ID and Pixel ID
Go to the X Business Manager , in the menu click on Tools then Events manager.
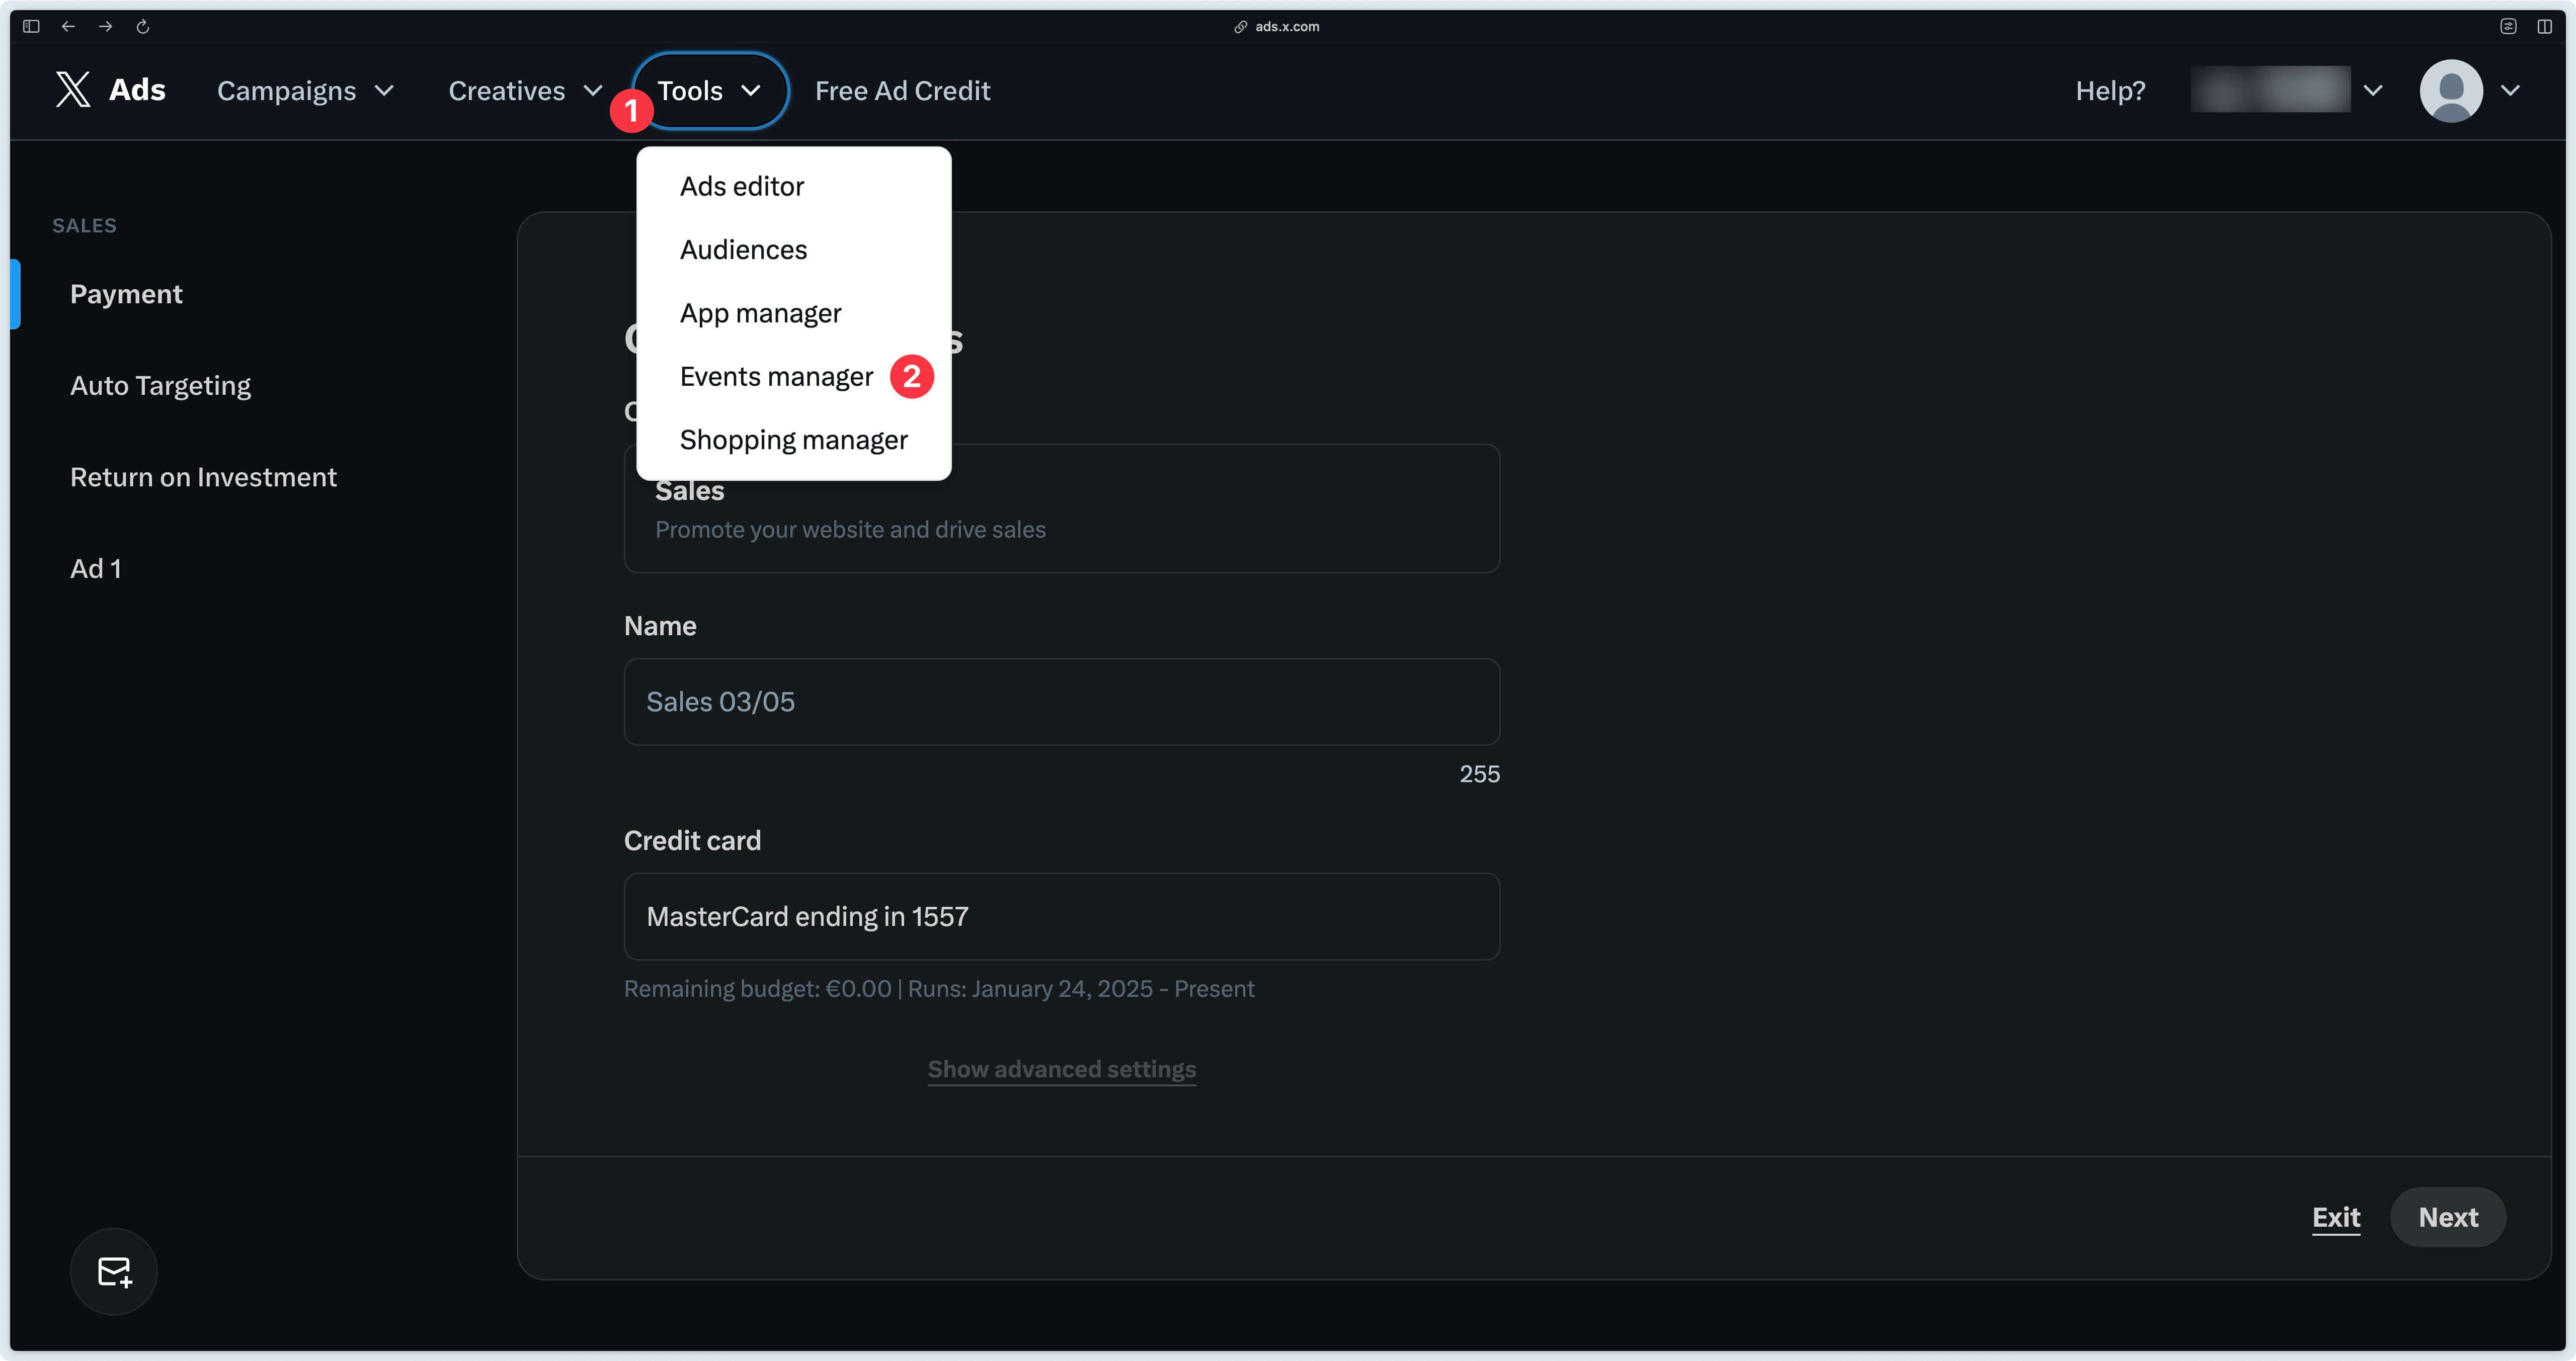
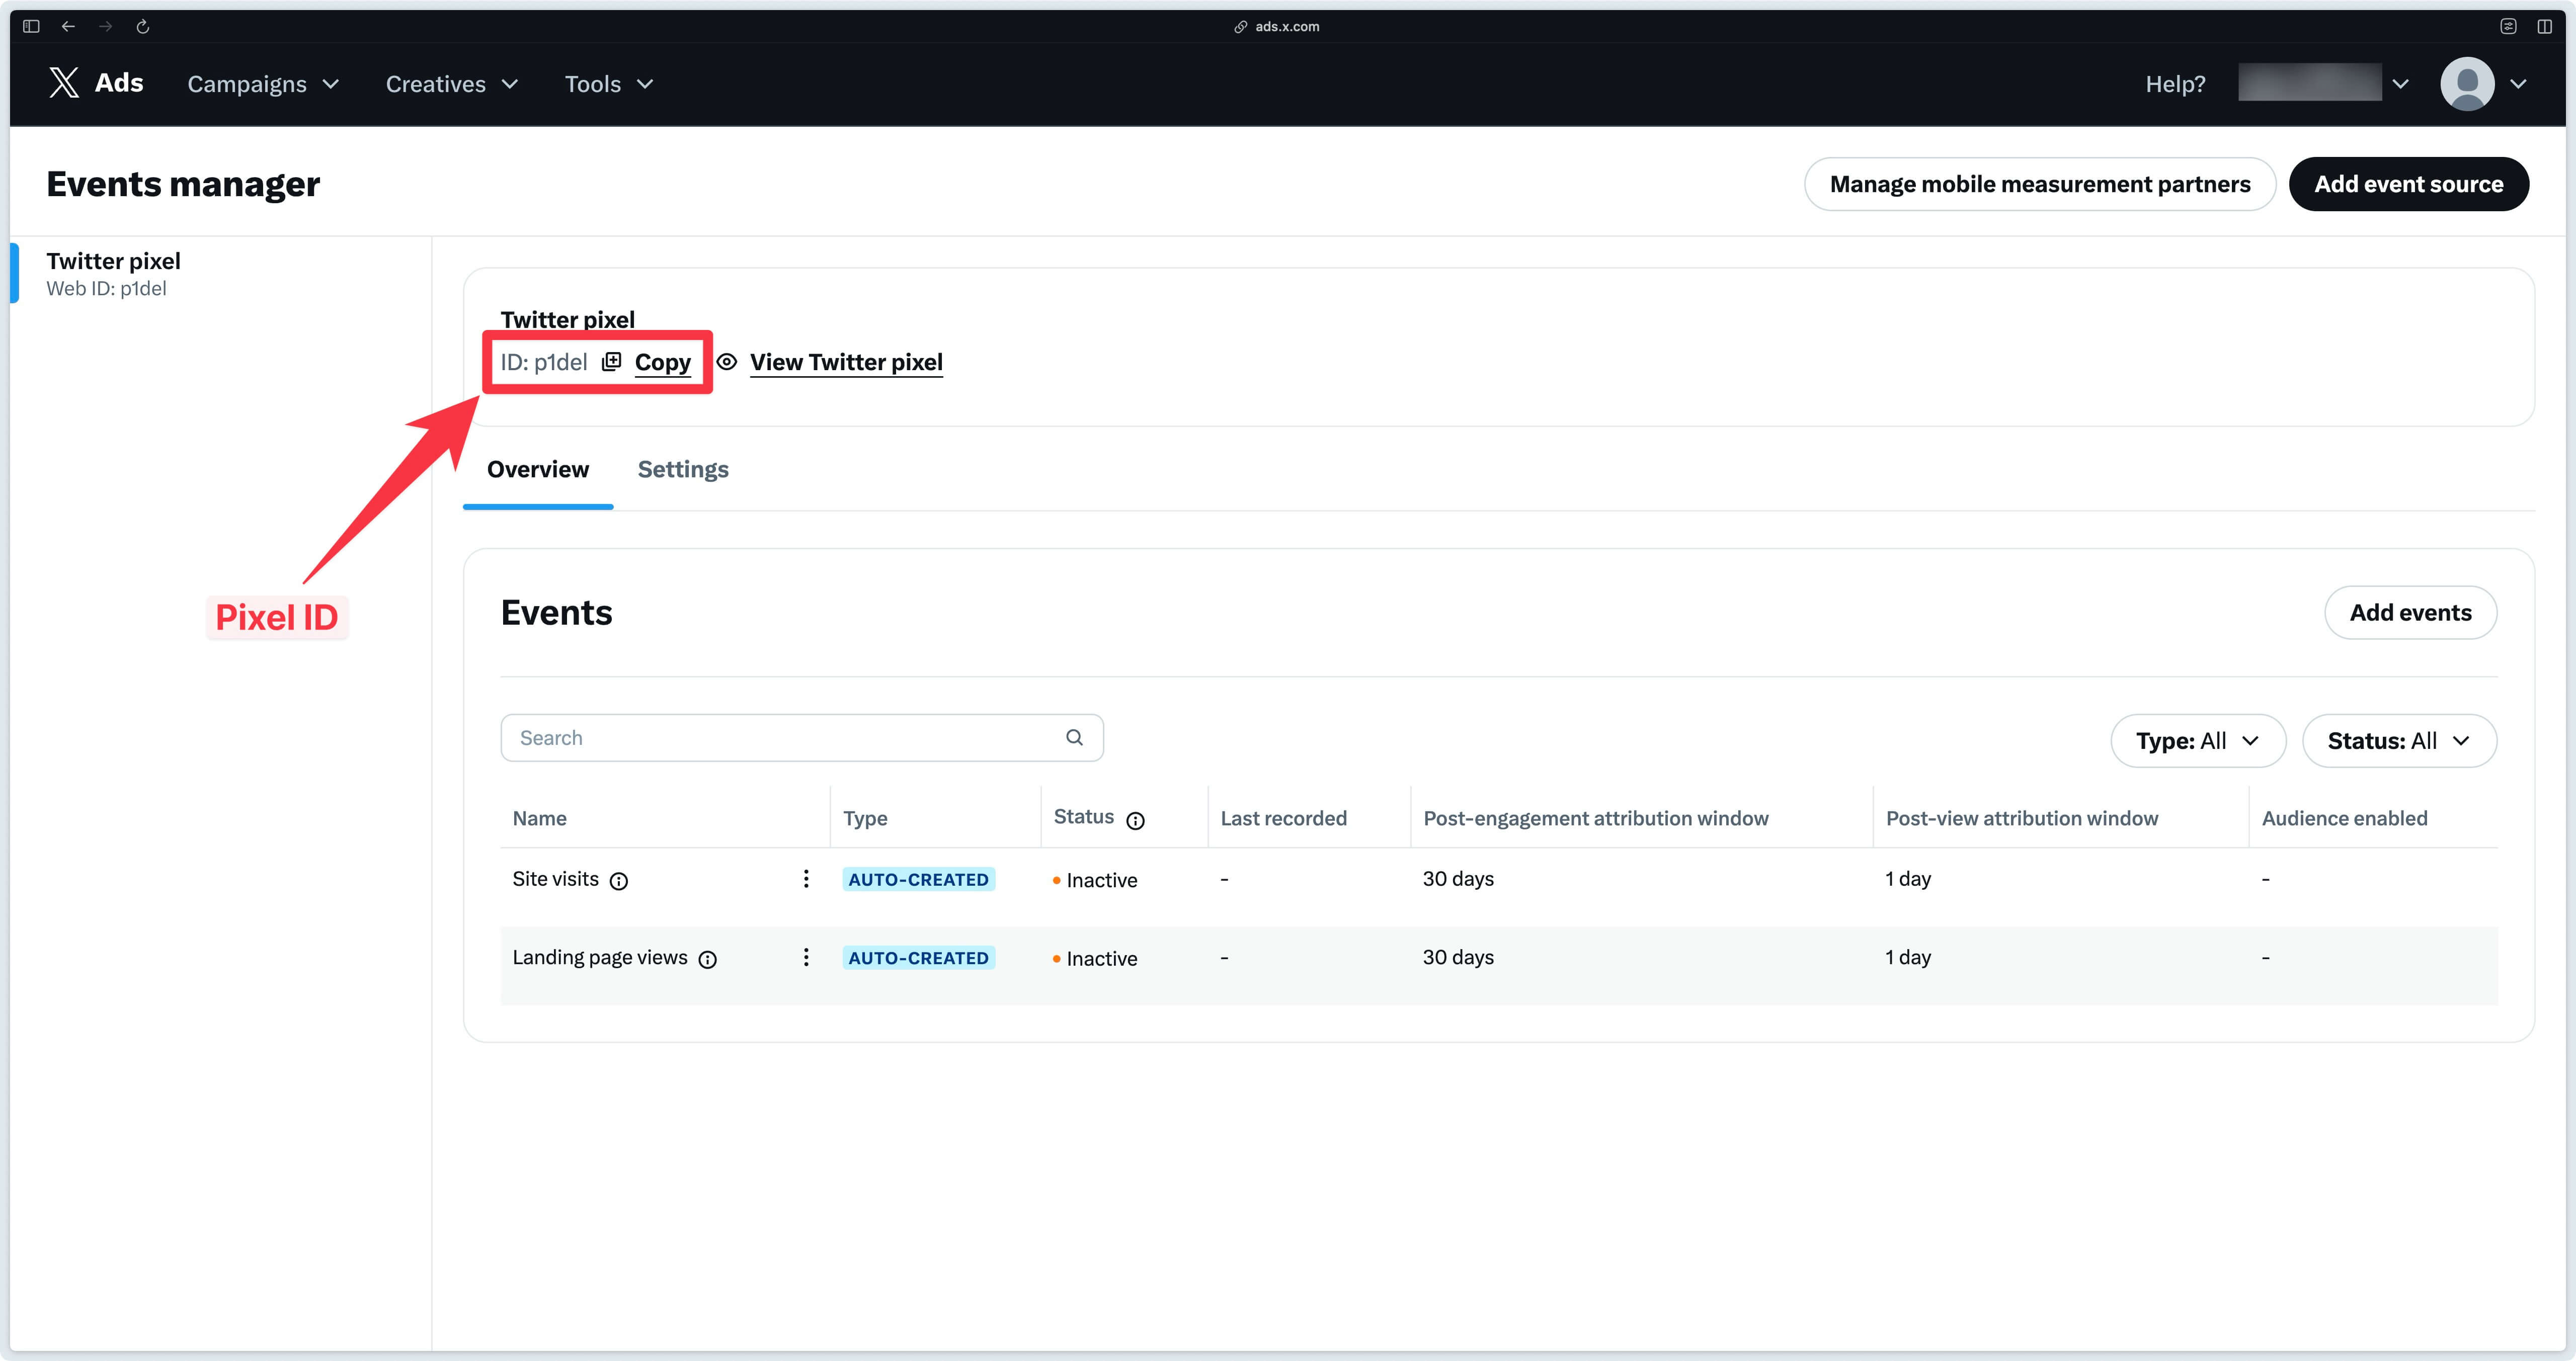
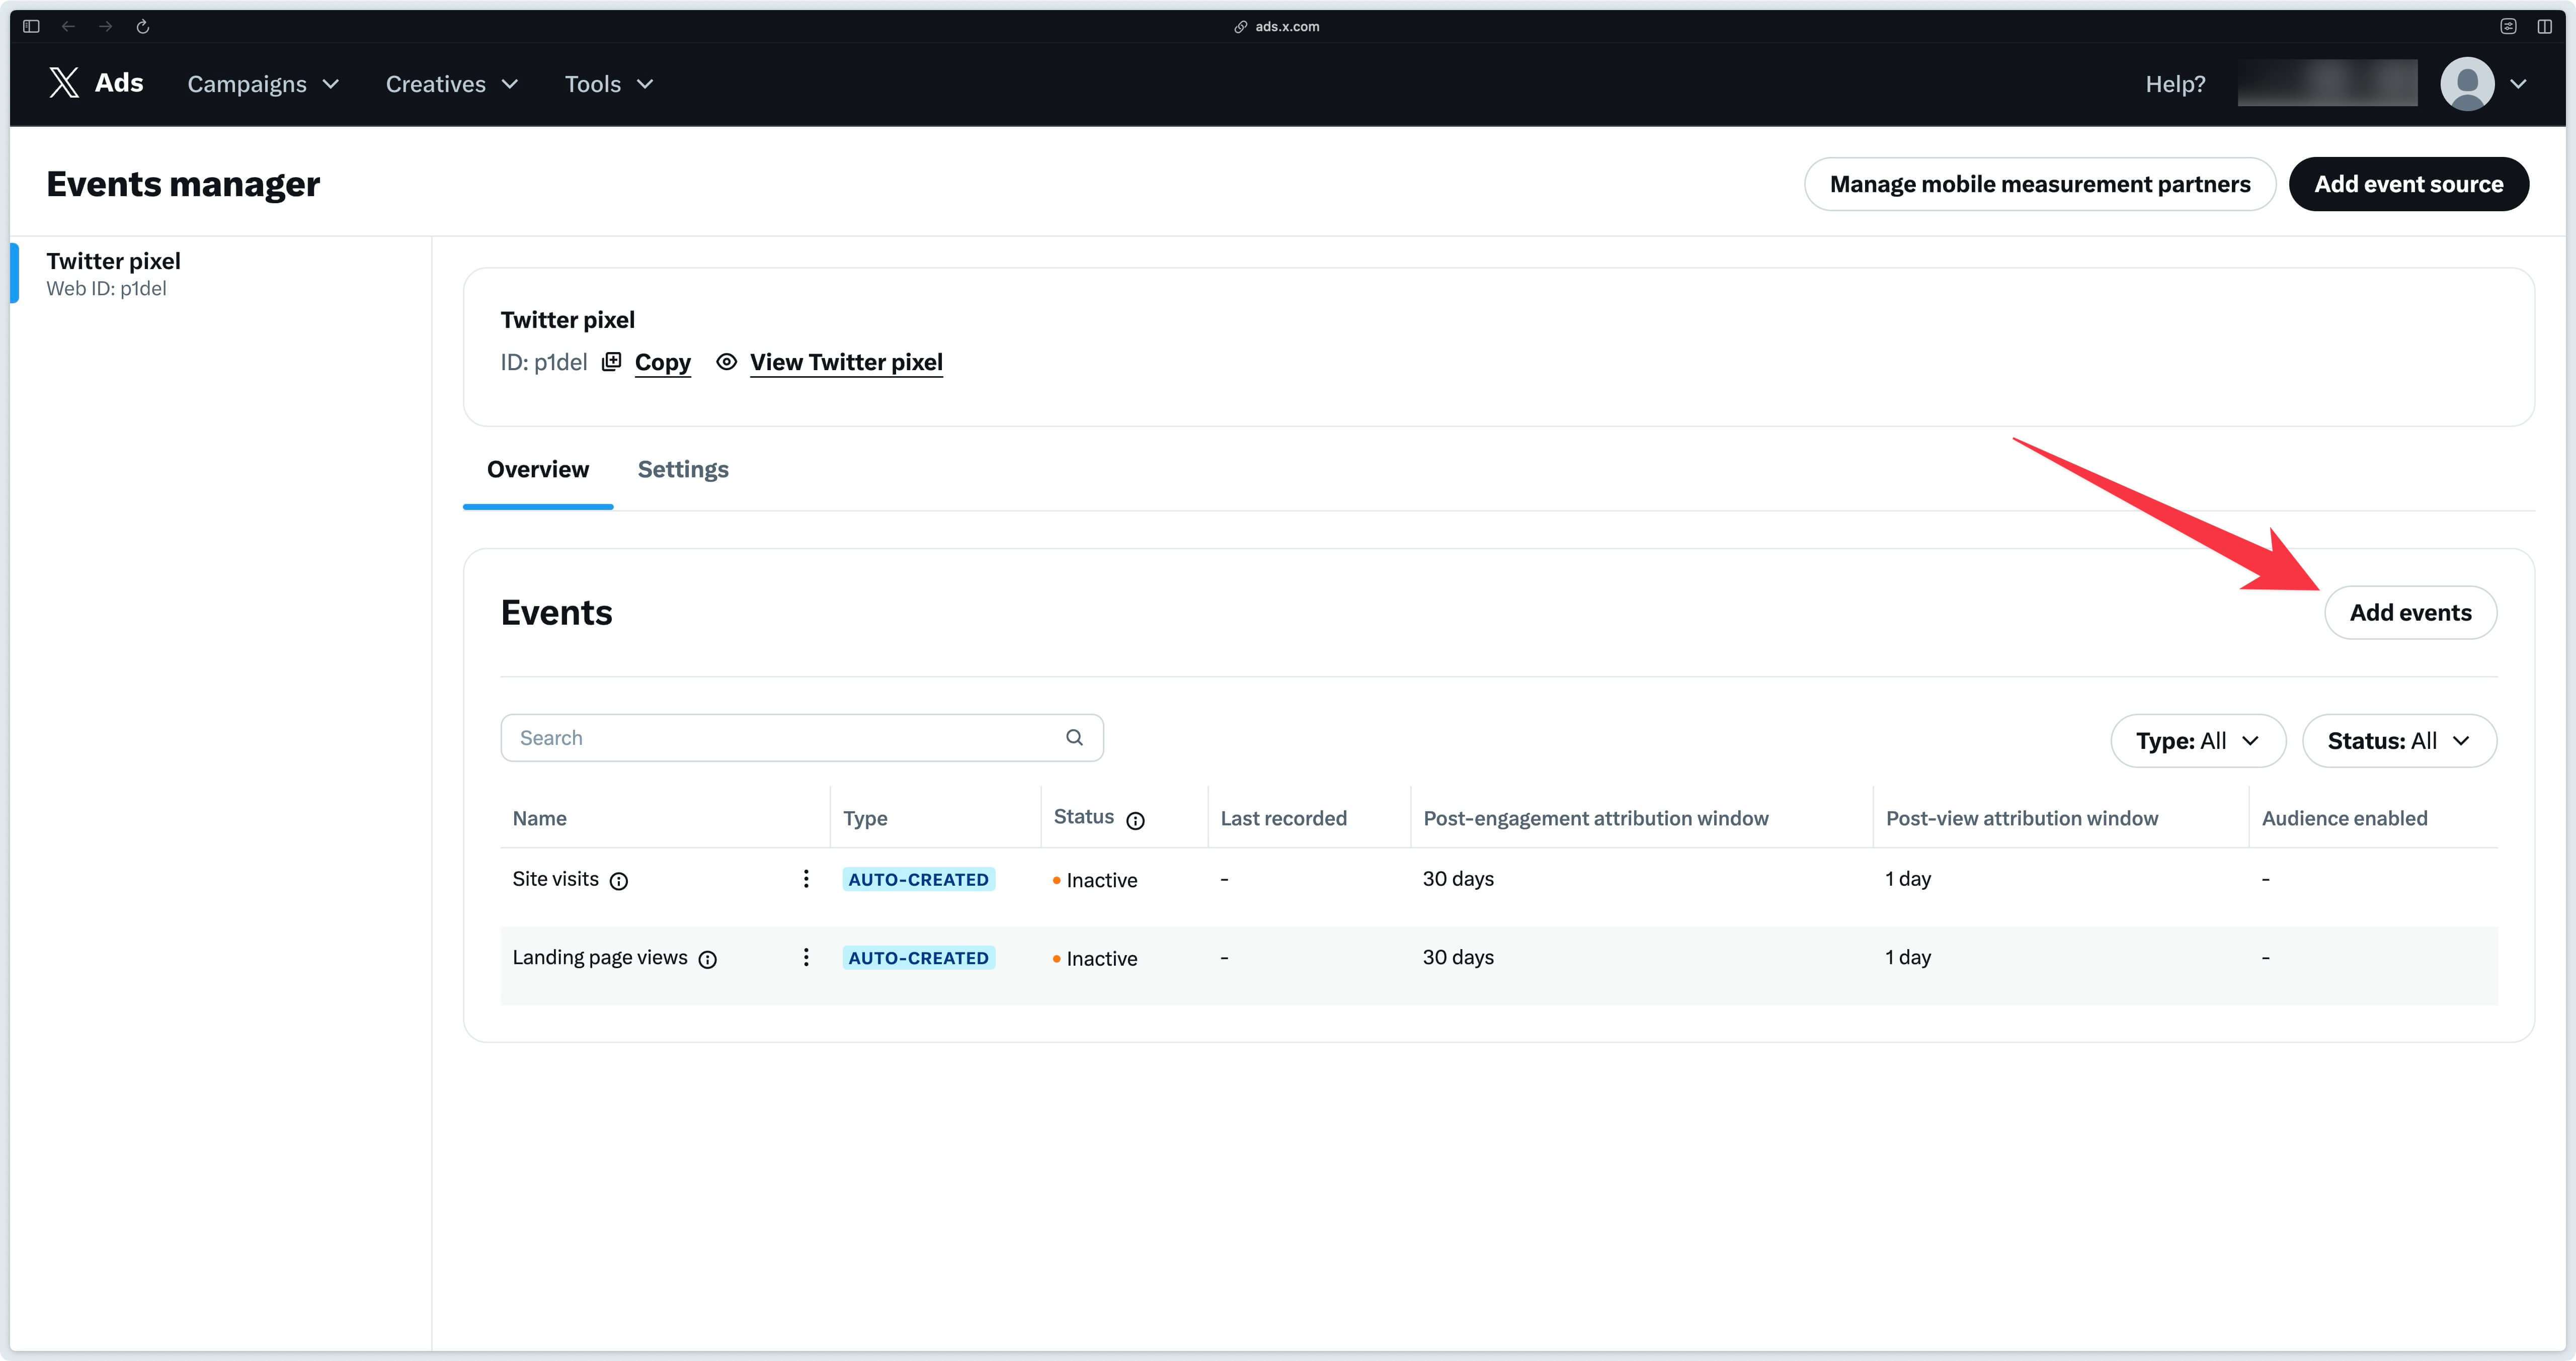
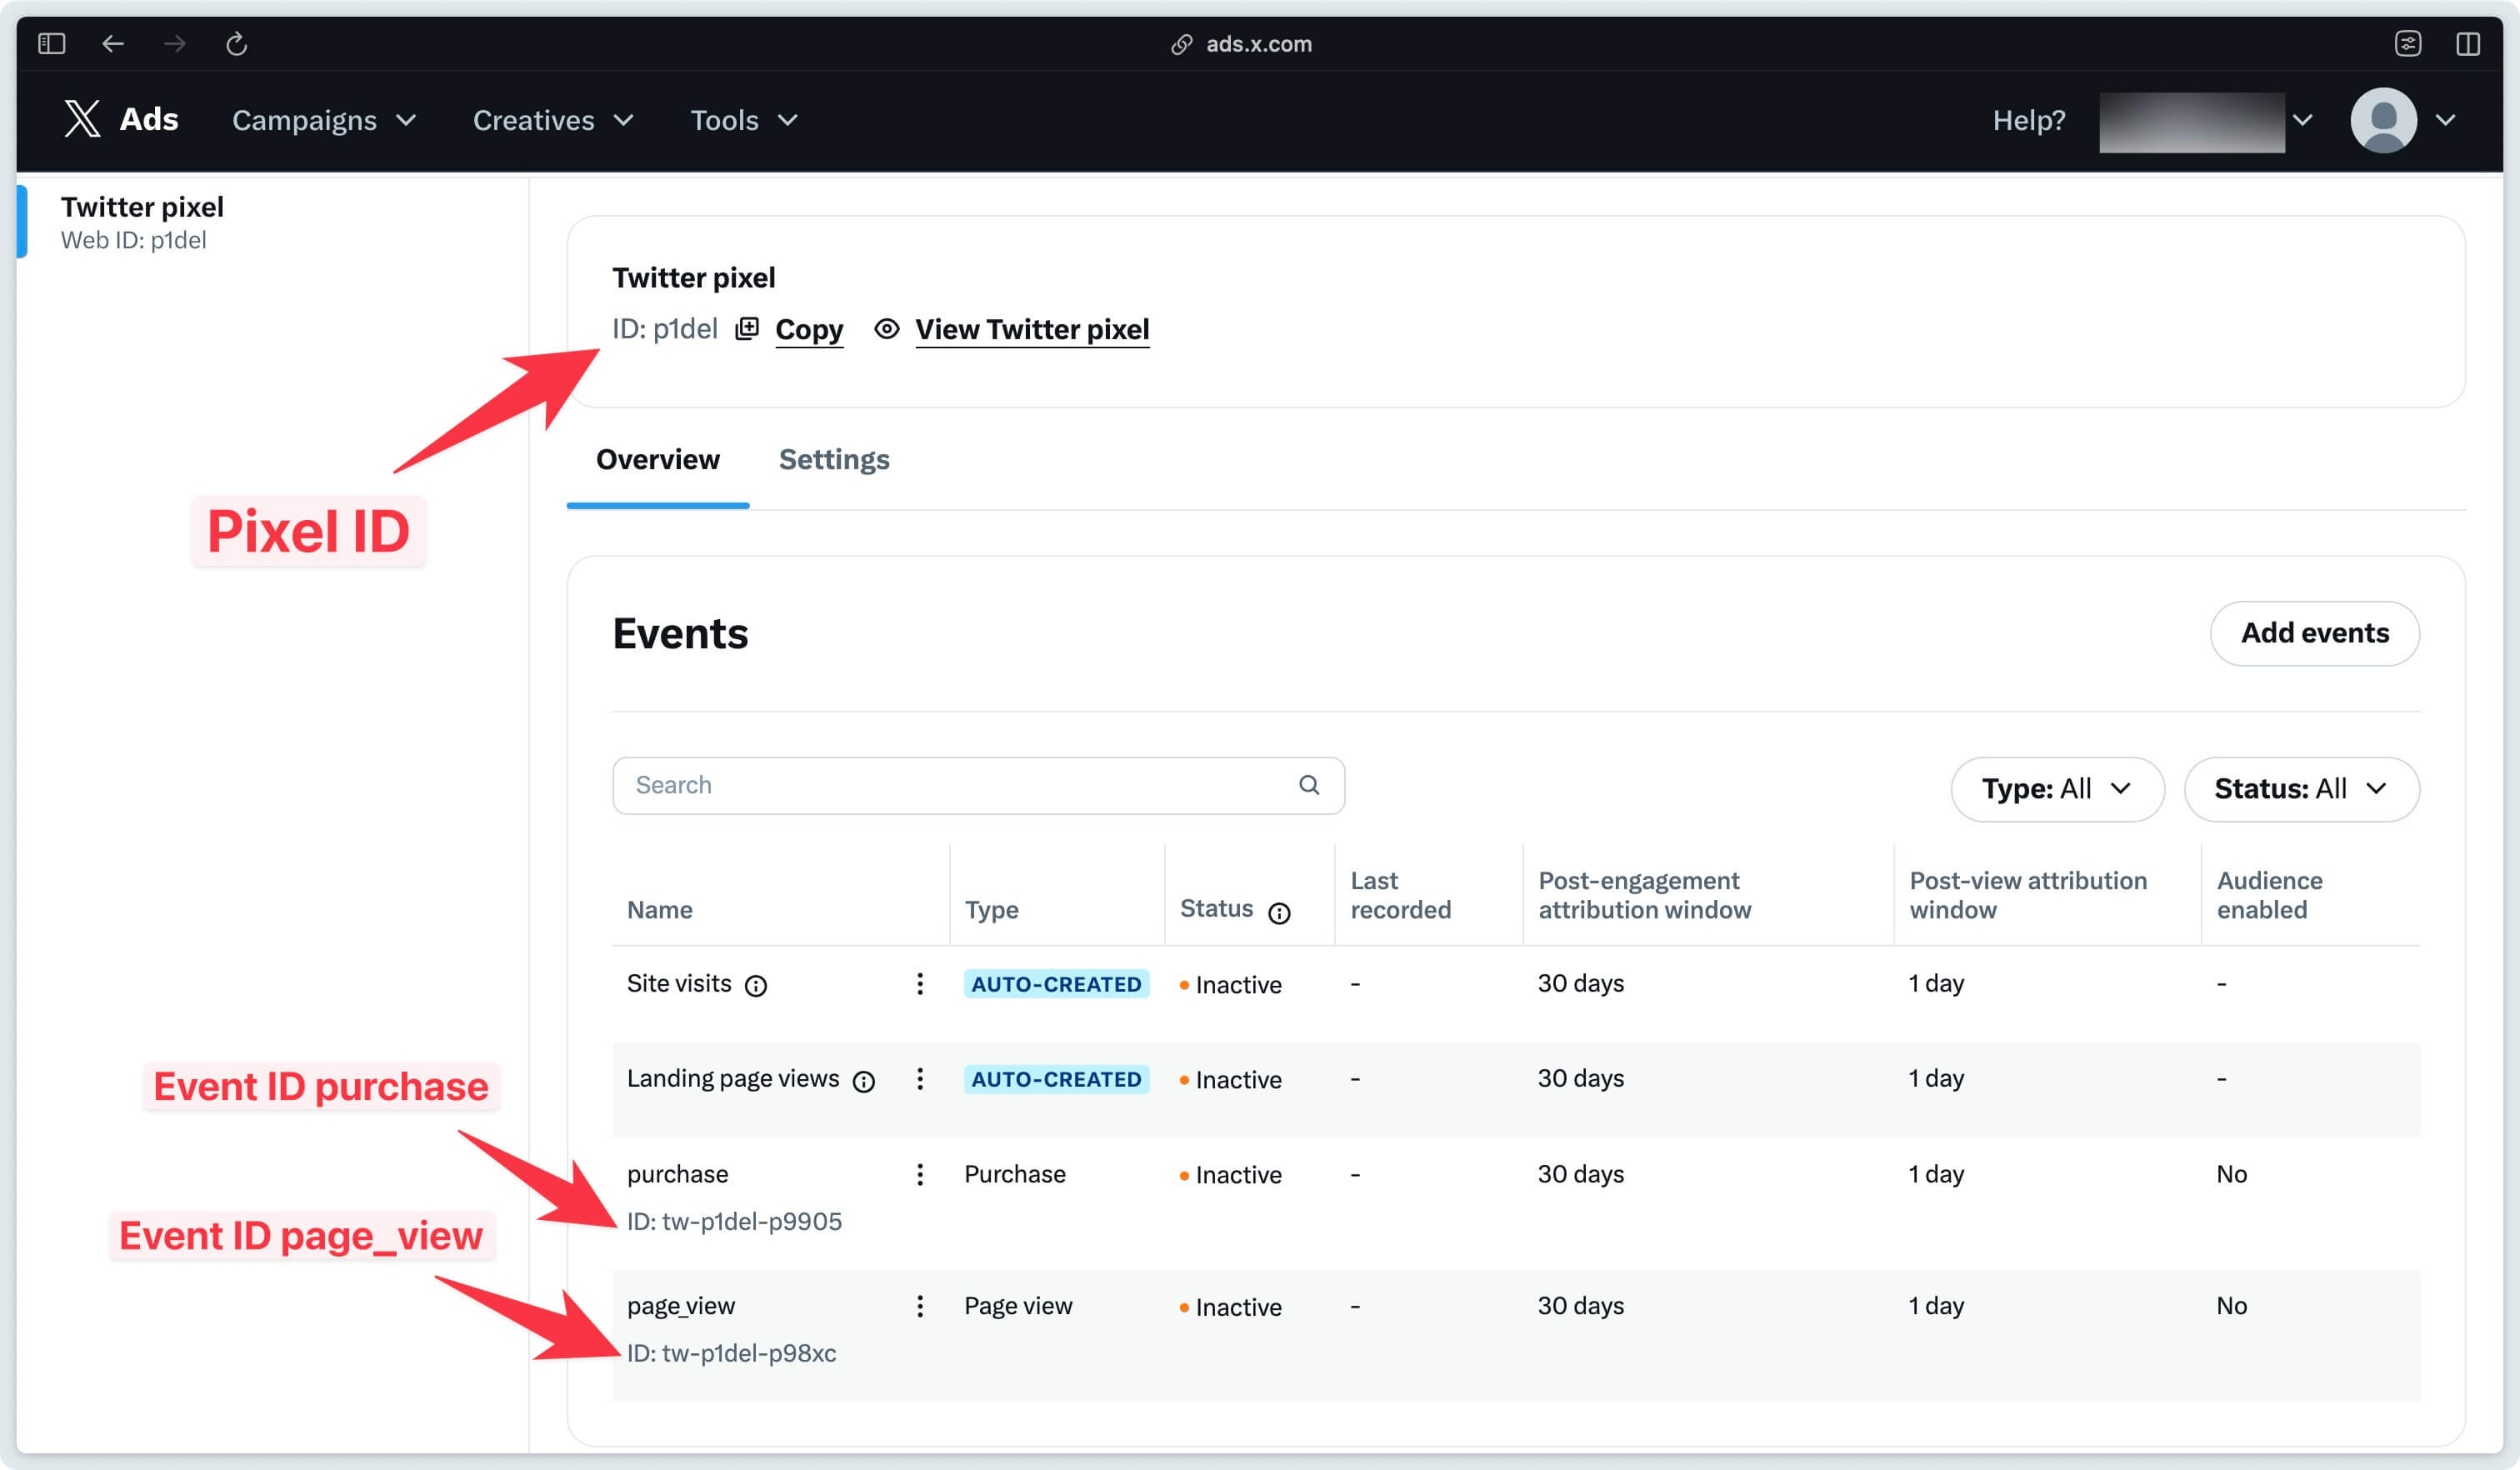
You then arrive at the next interface where you can already get your Pixel ID.
We’re now going to create 2 events as examples:
- Page View
- Purchase
To create a new event, click on Add Events.
Page View
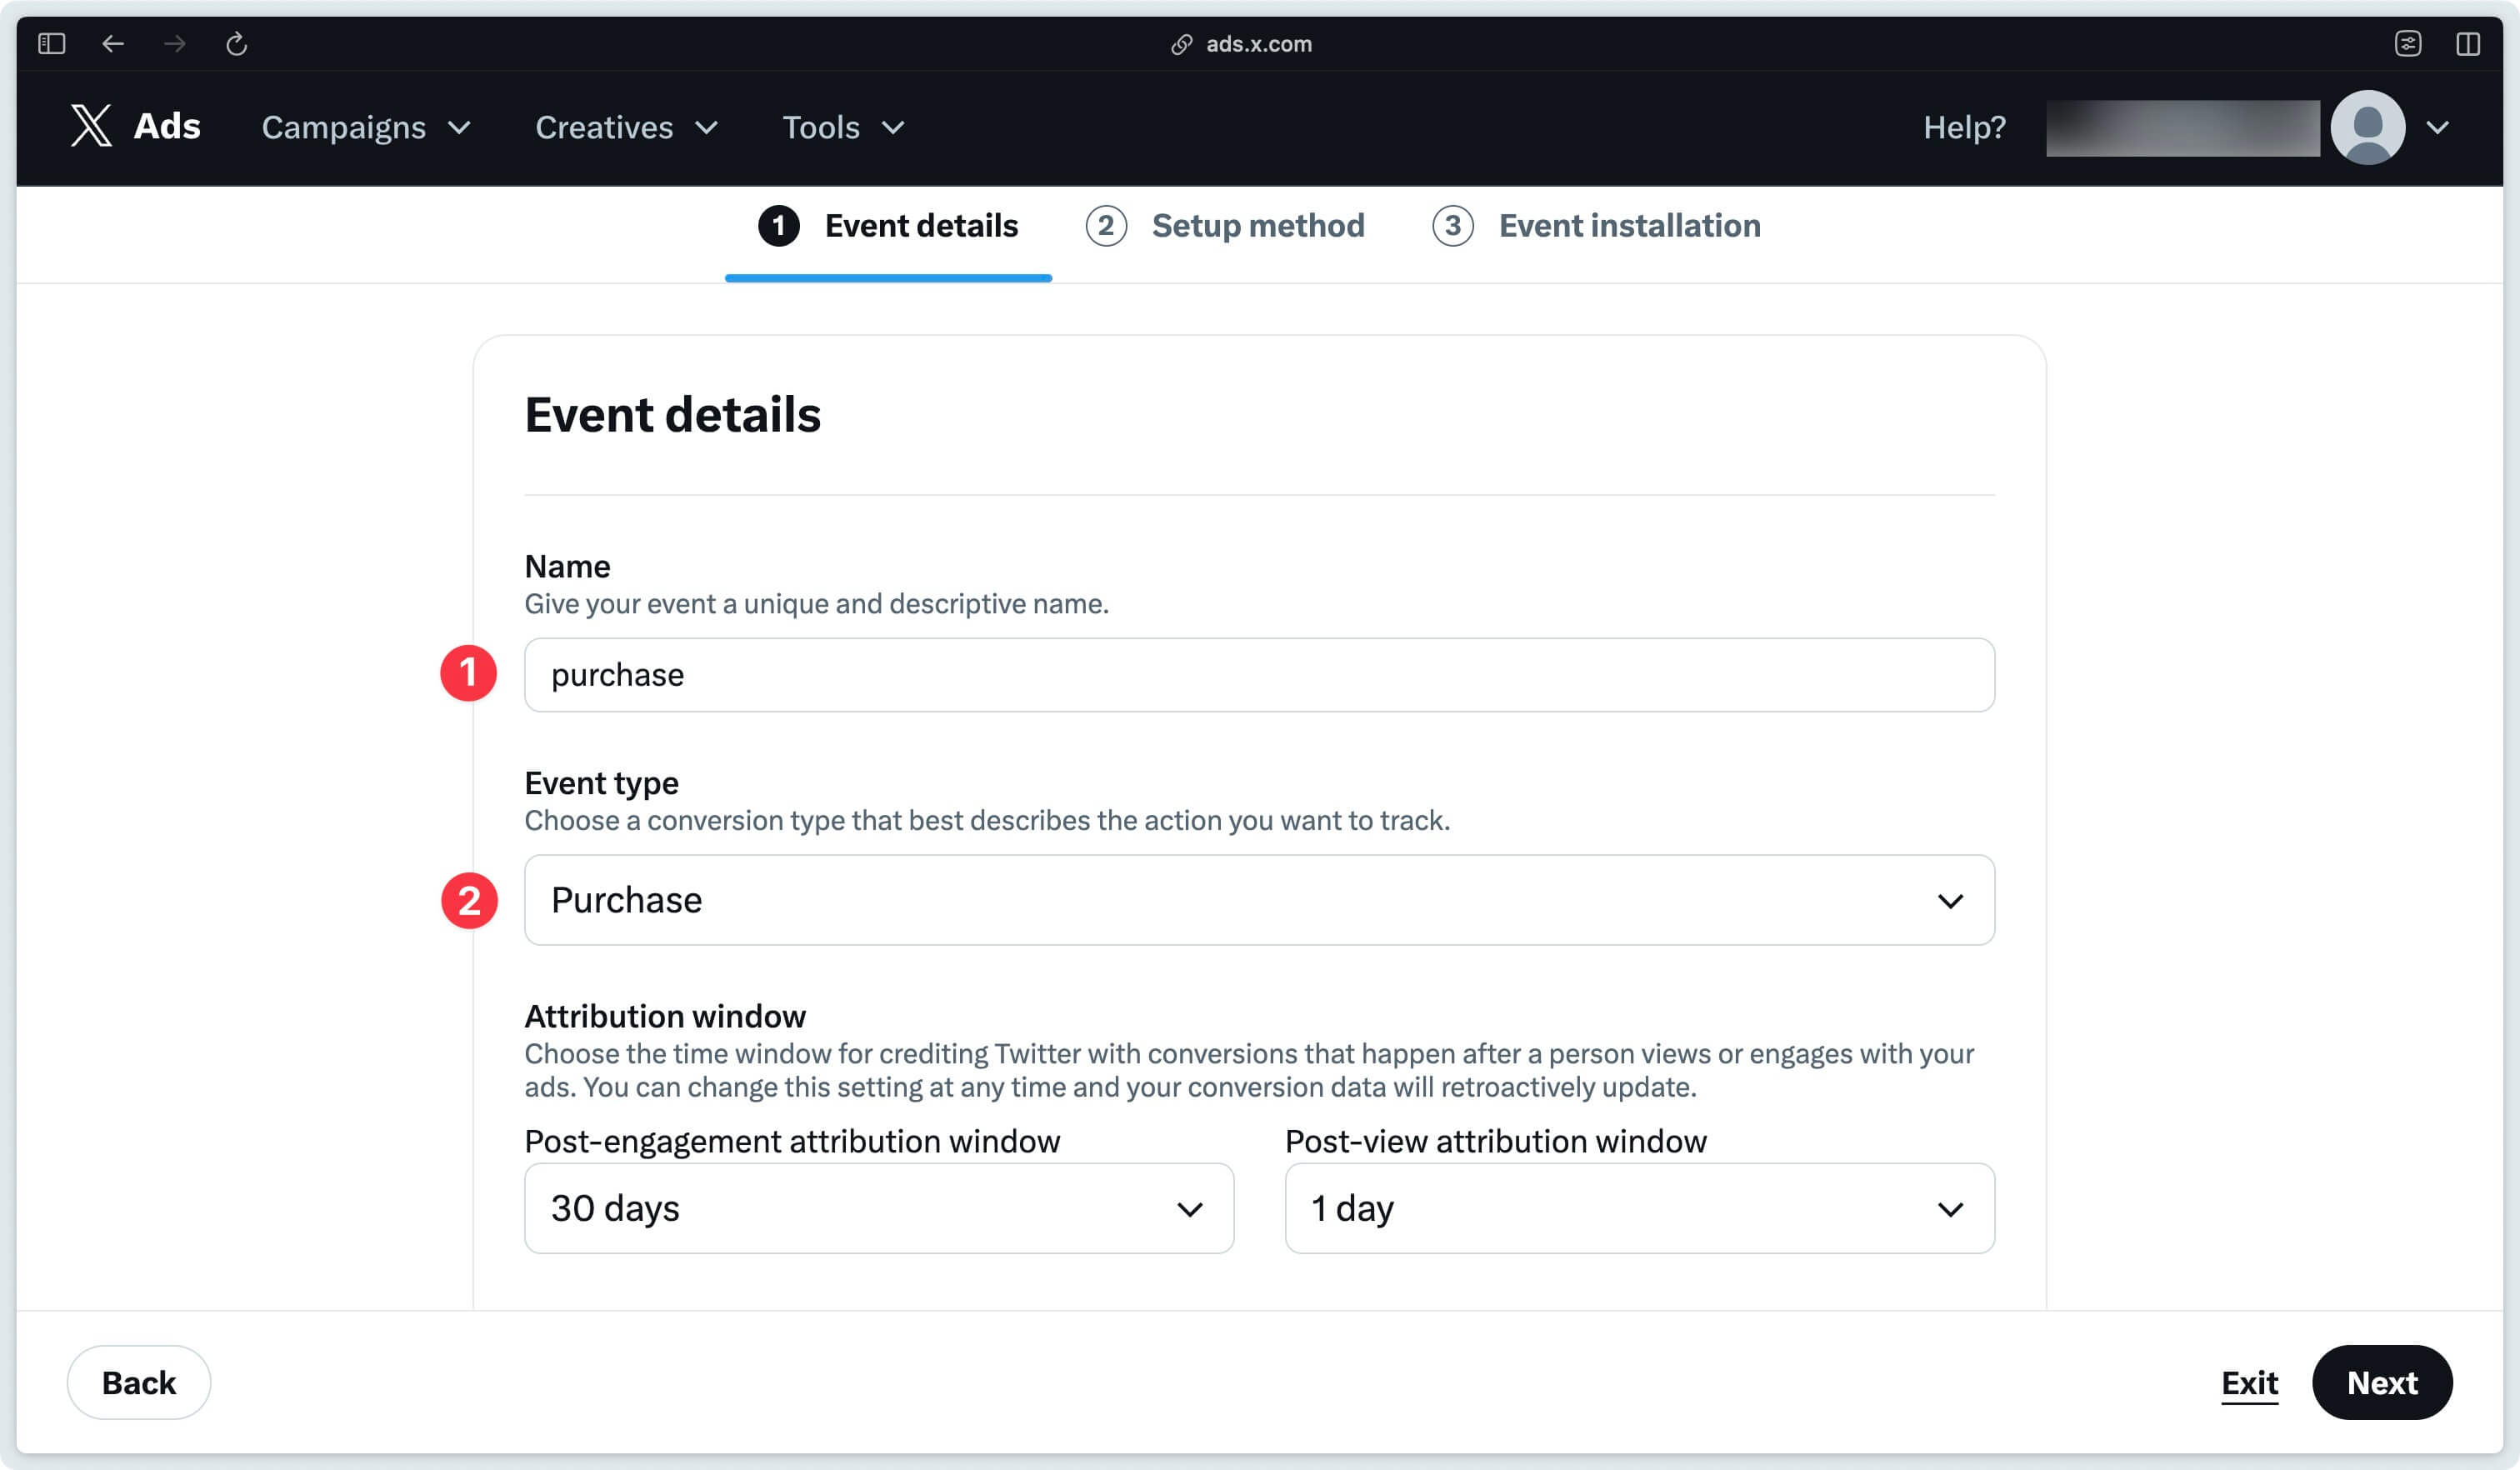
To create a Page View event, select Page view as Event Type and click Next.
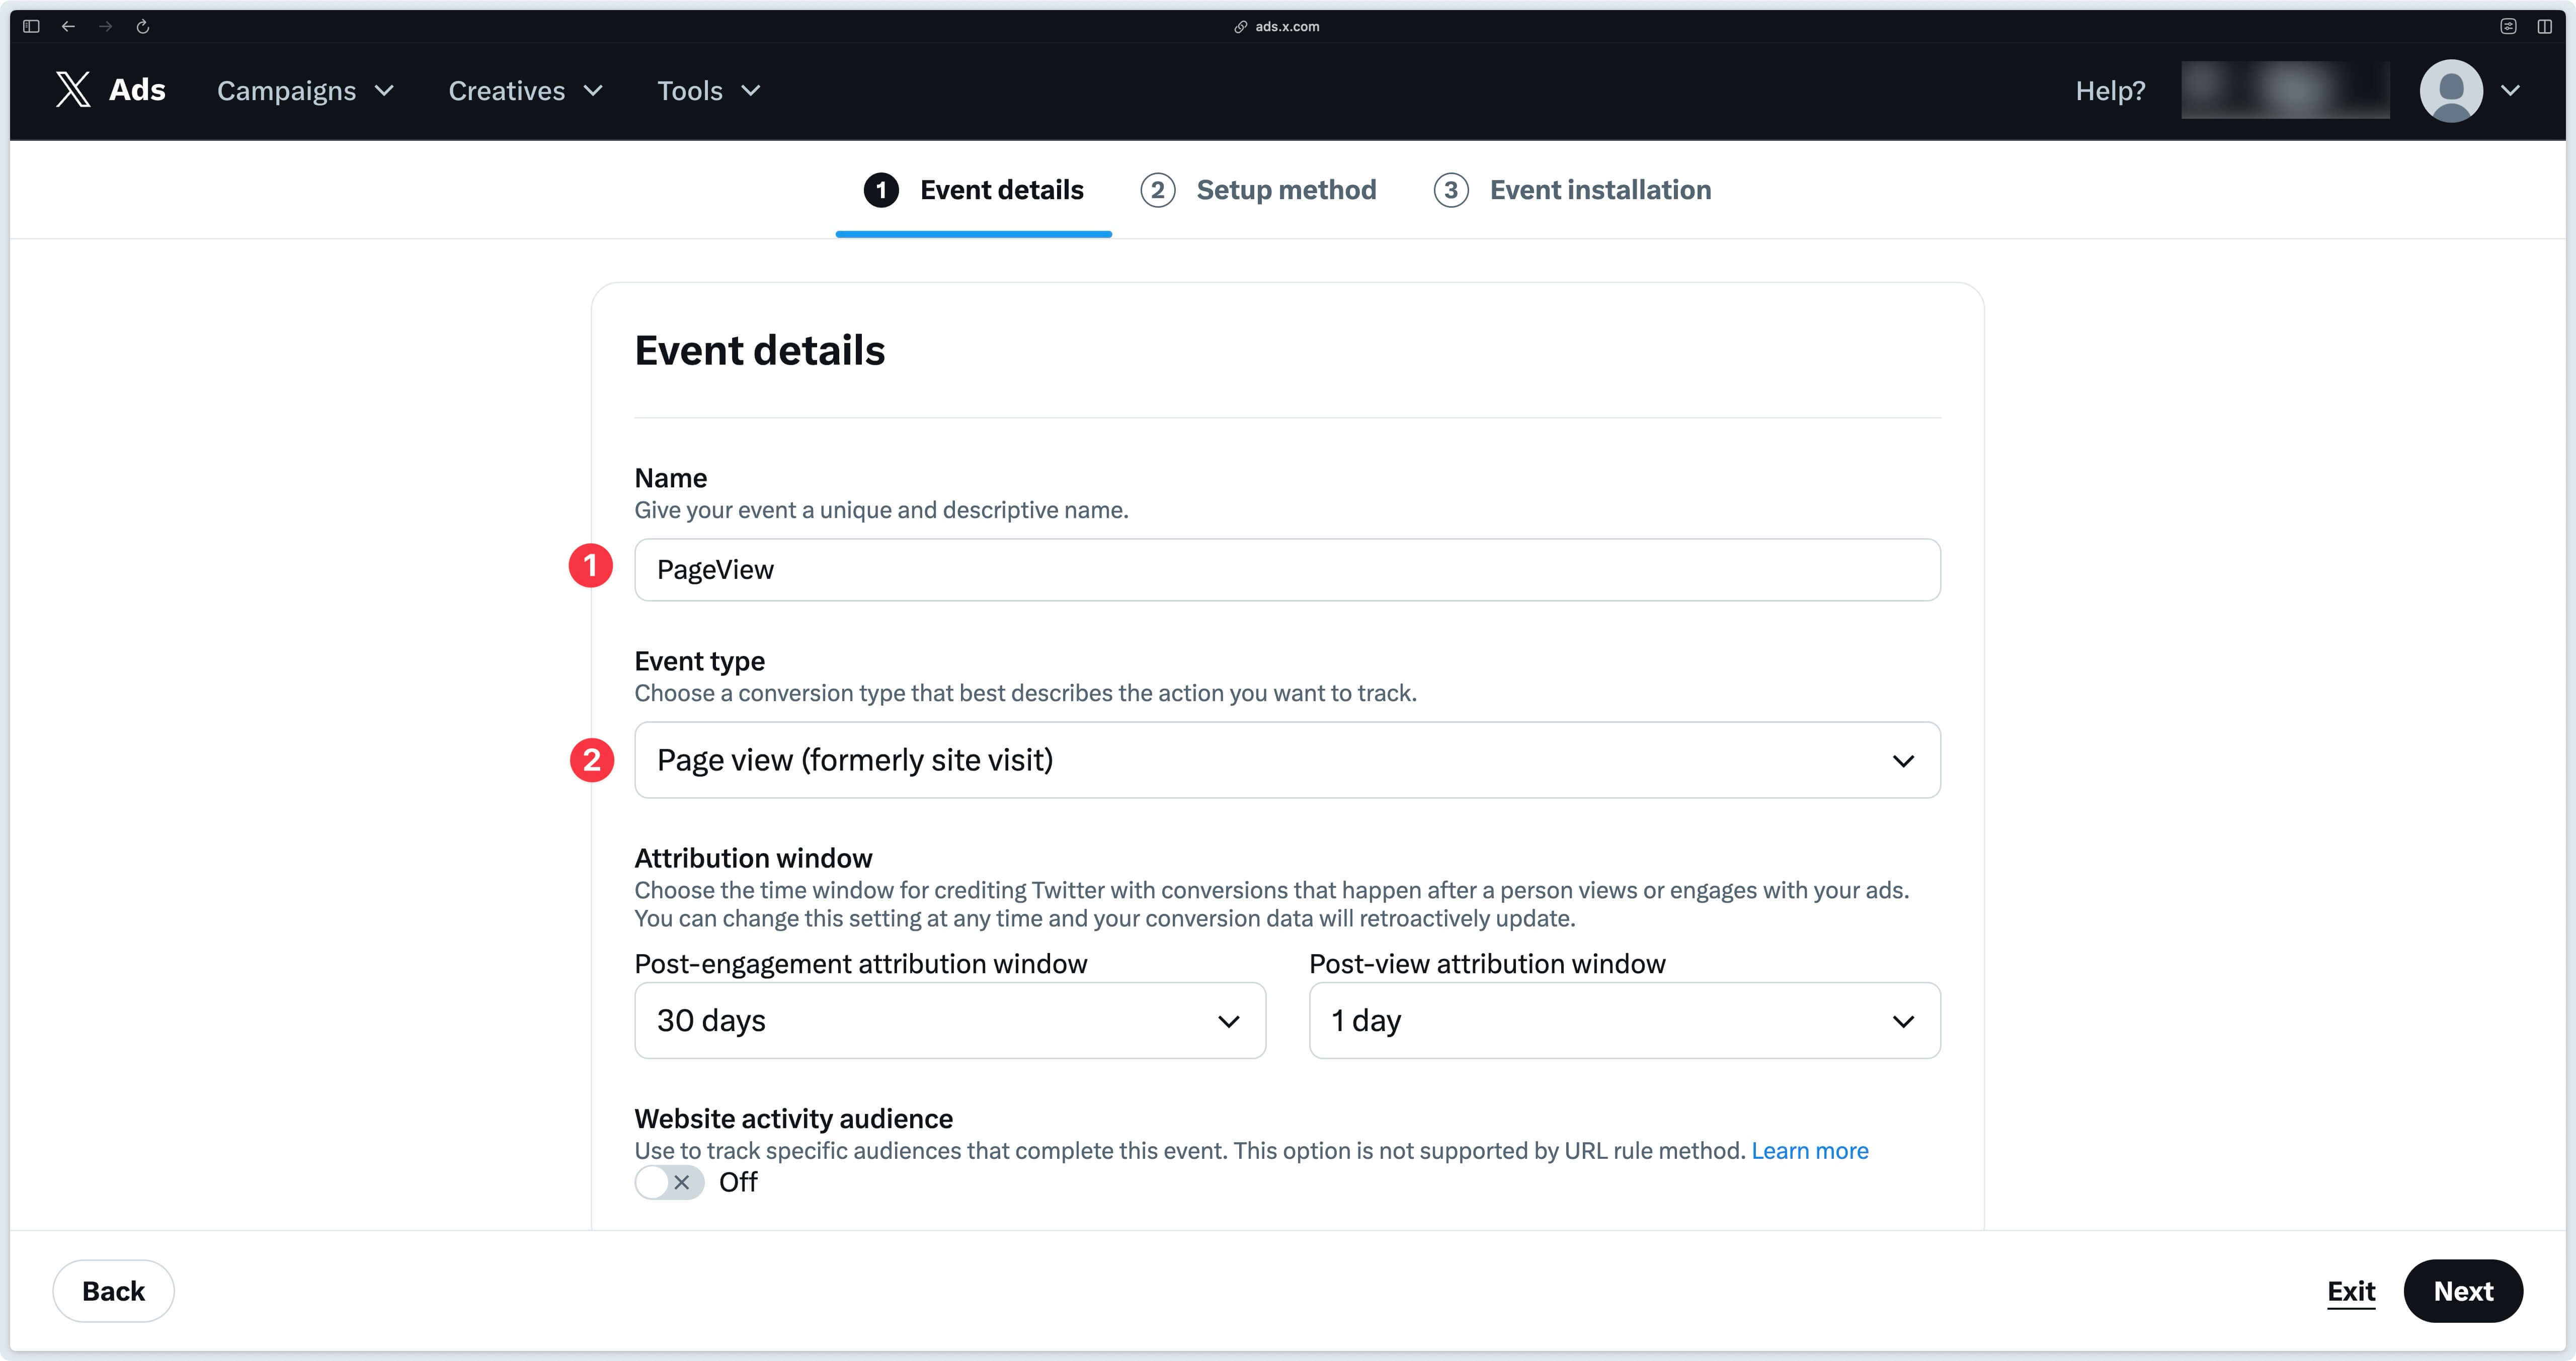
If you get an error at this point, change the name you’ve given to your event.
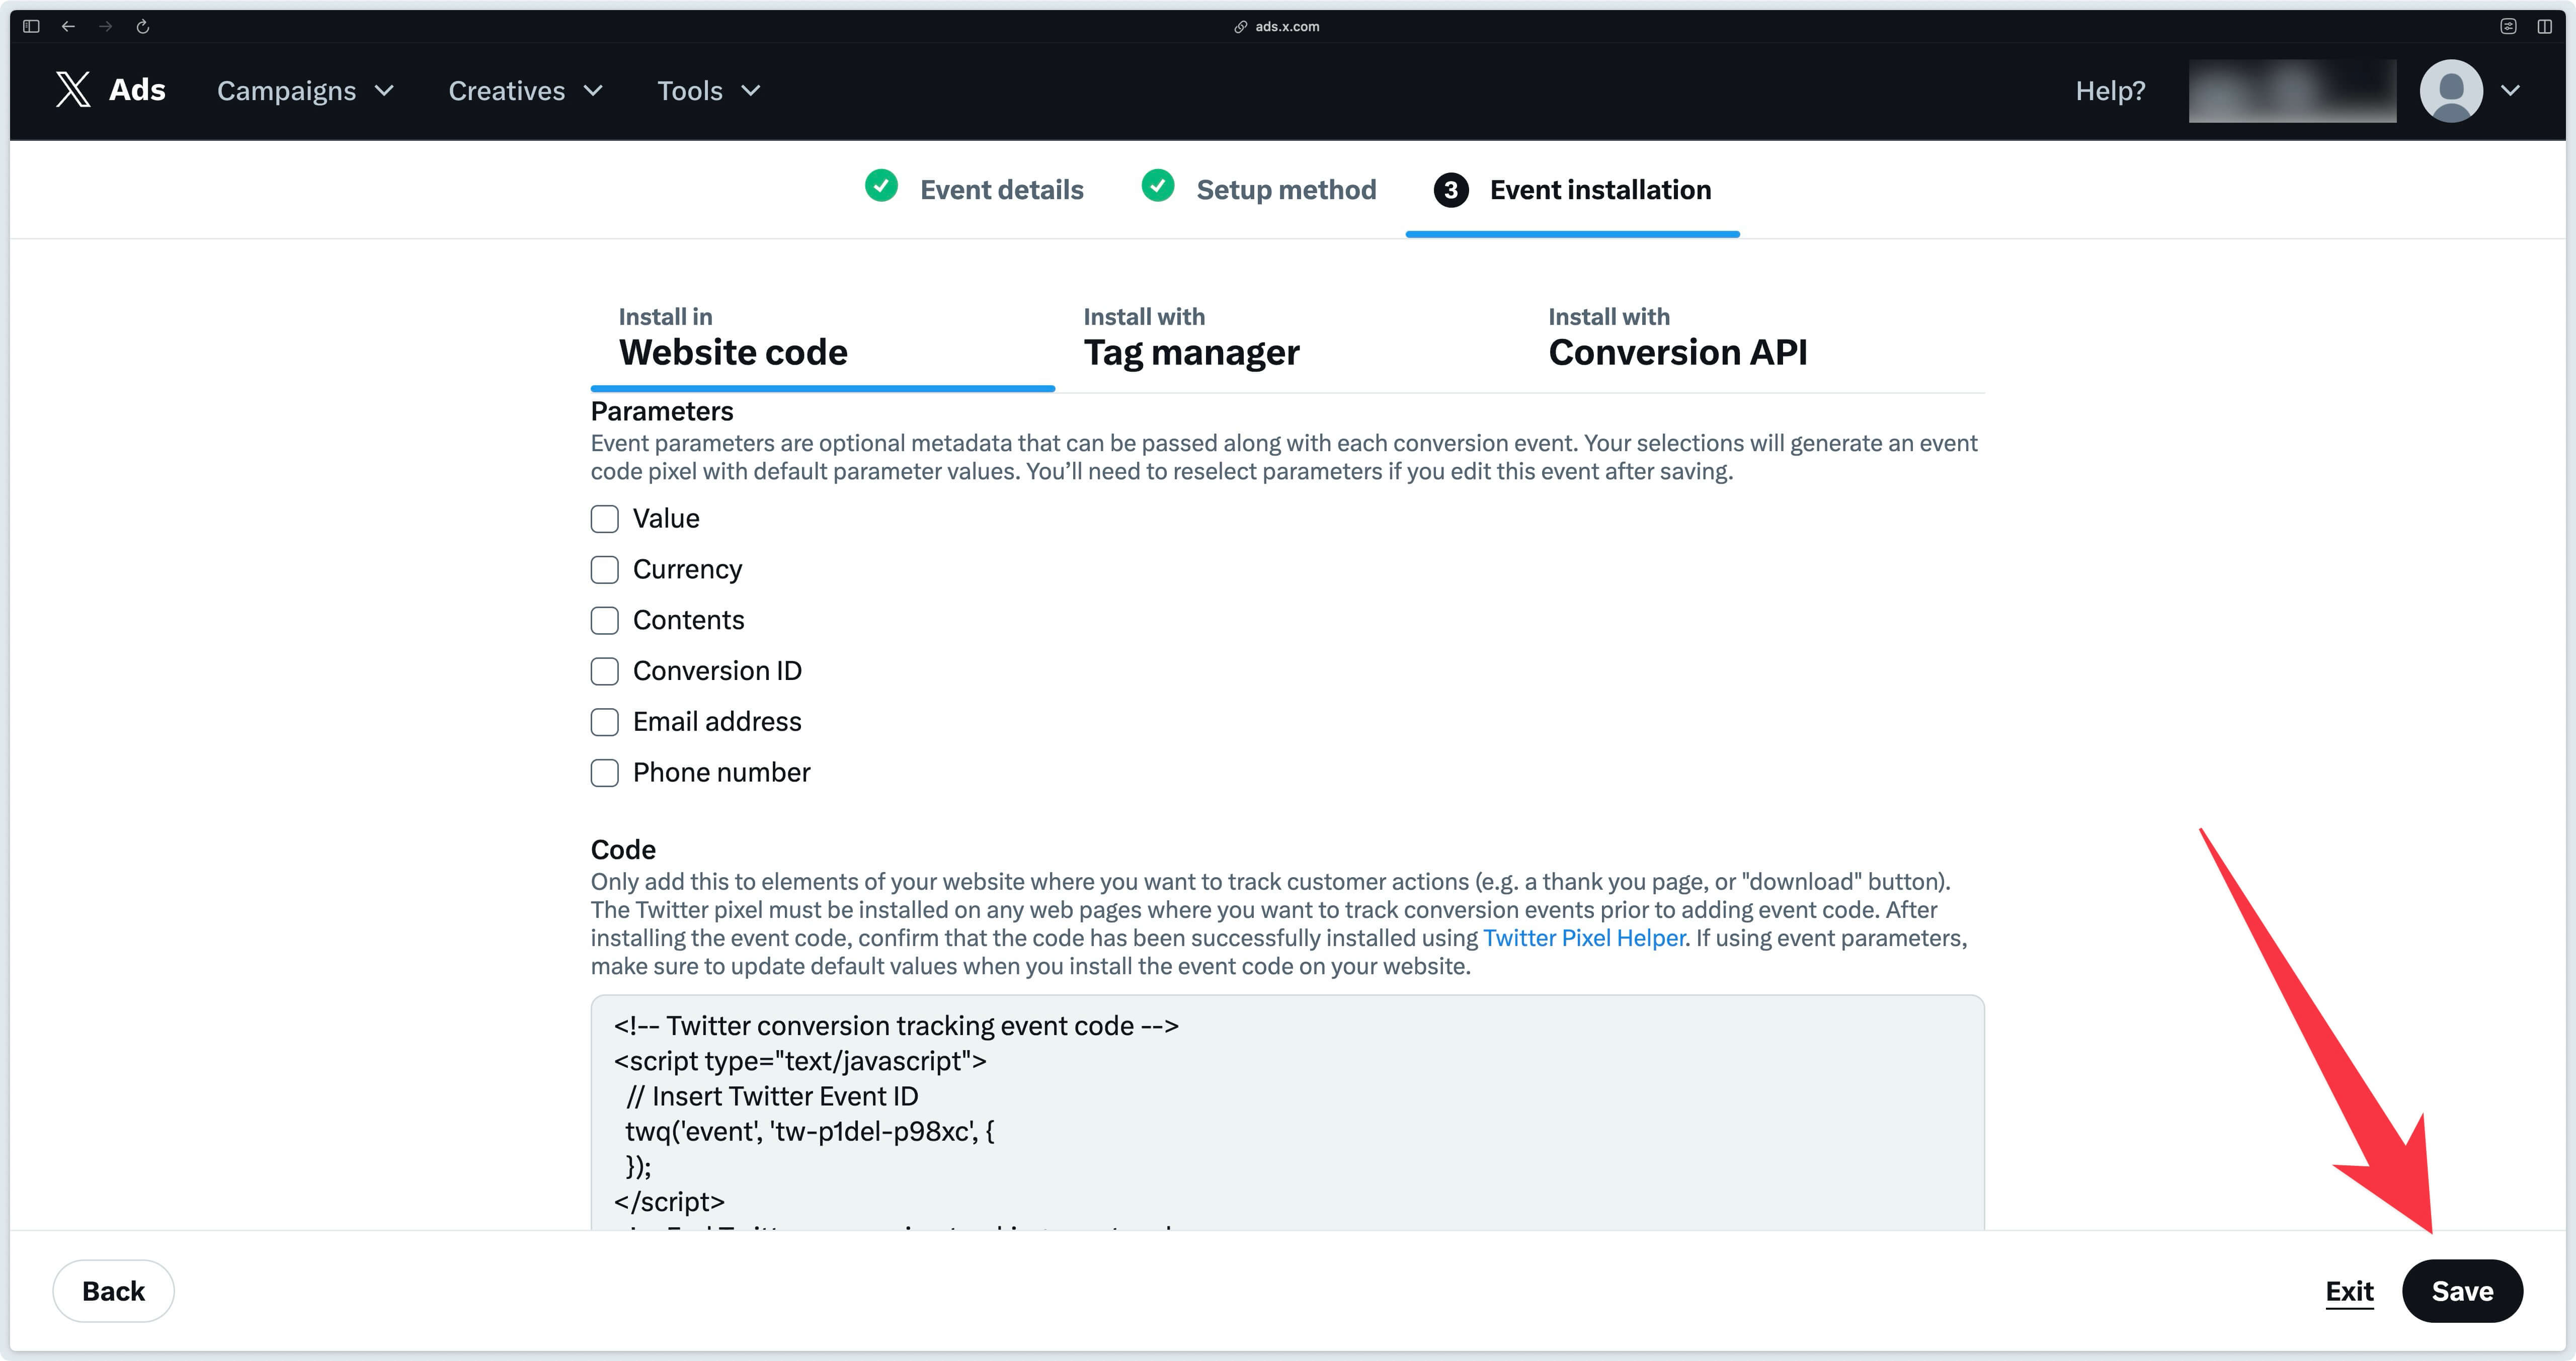
Then select Define event with code.
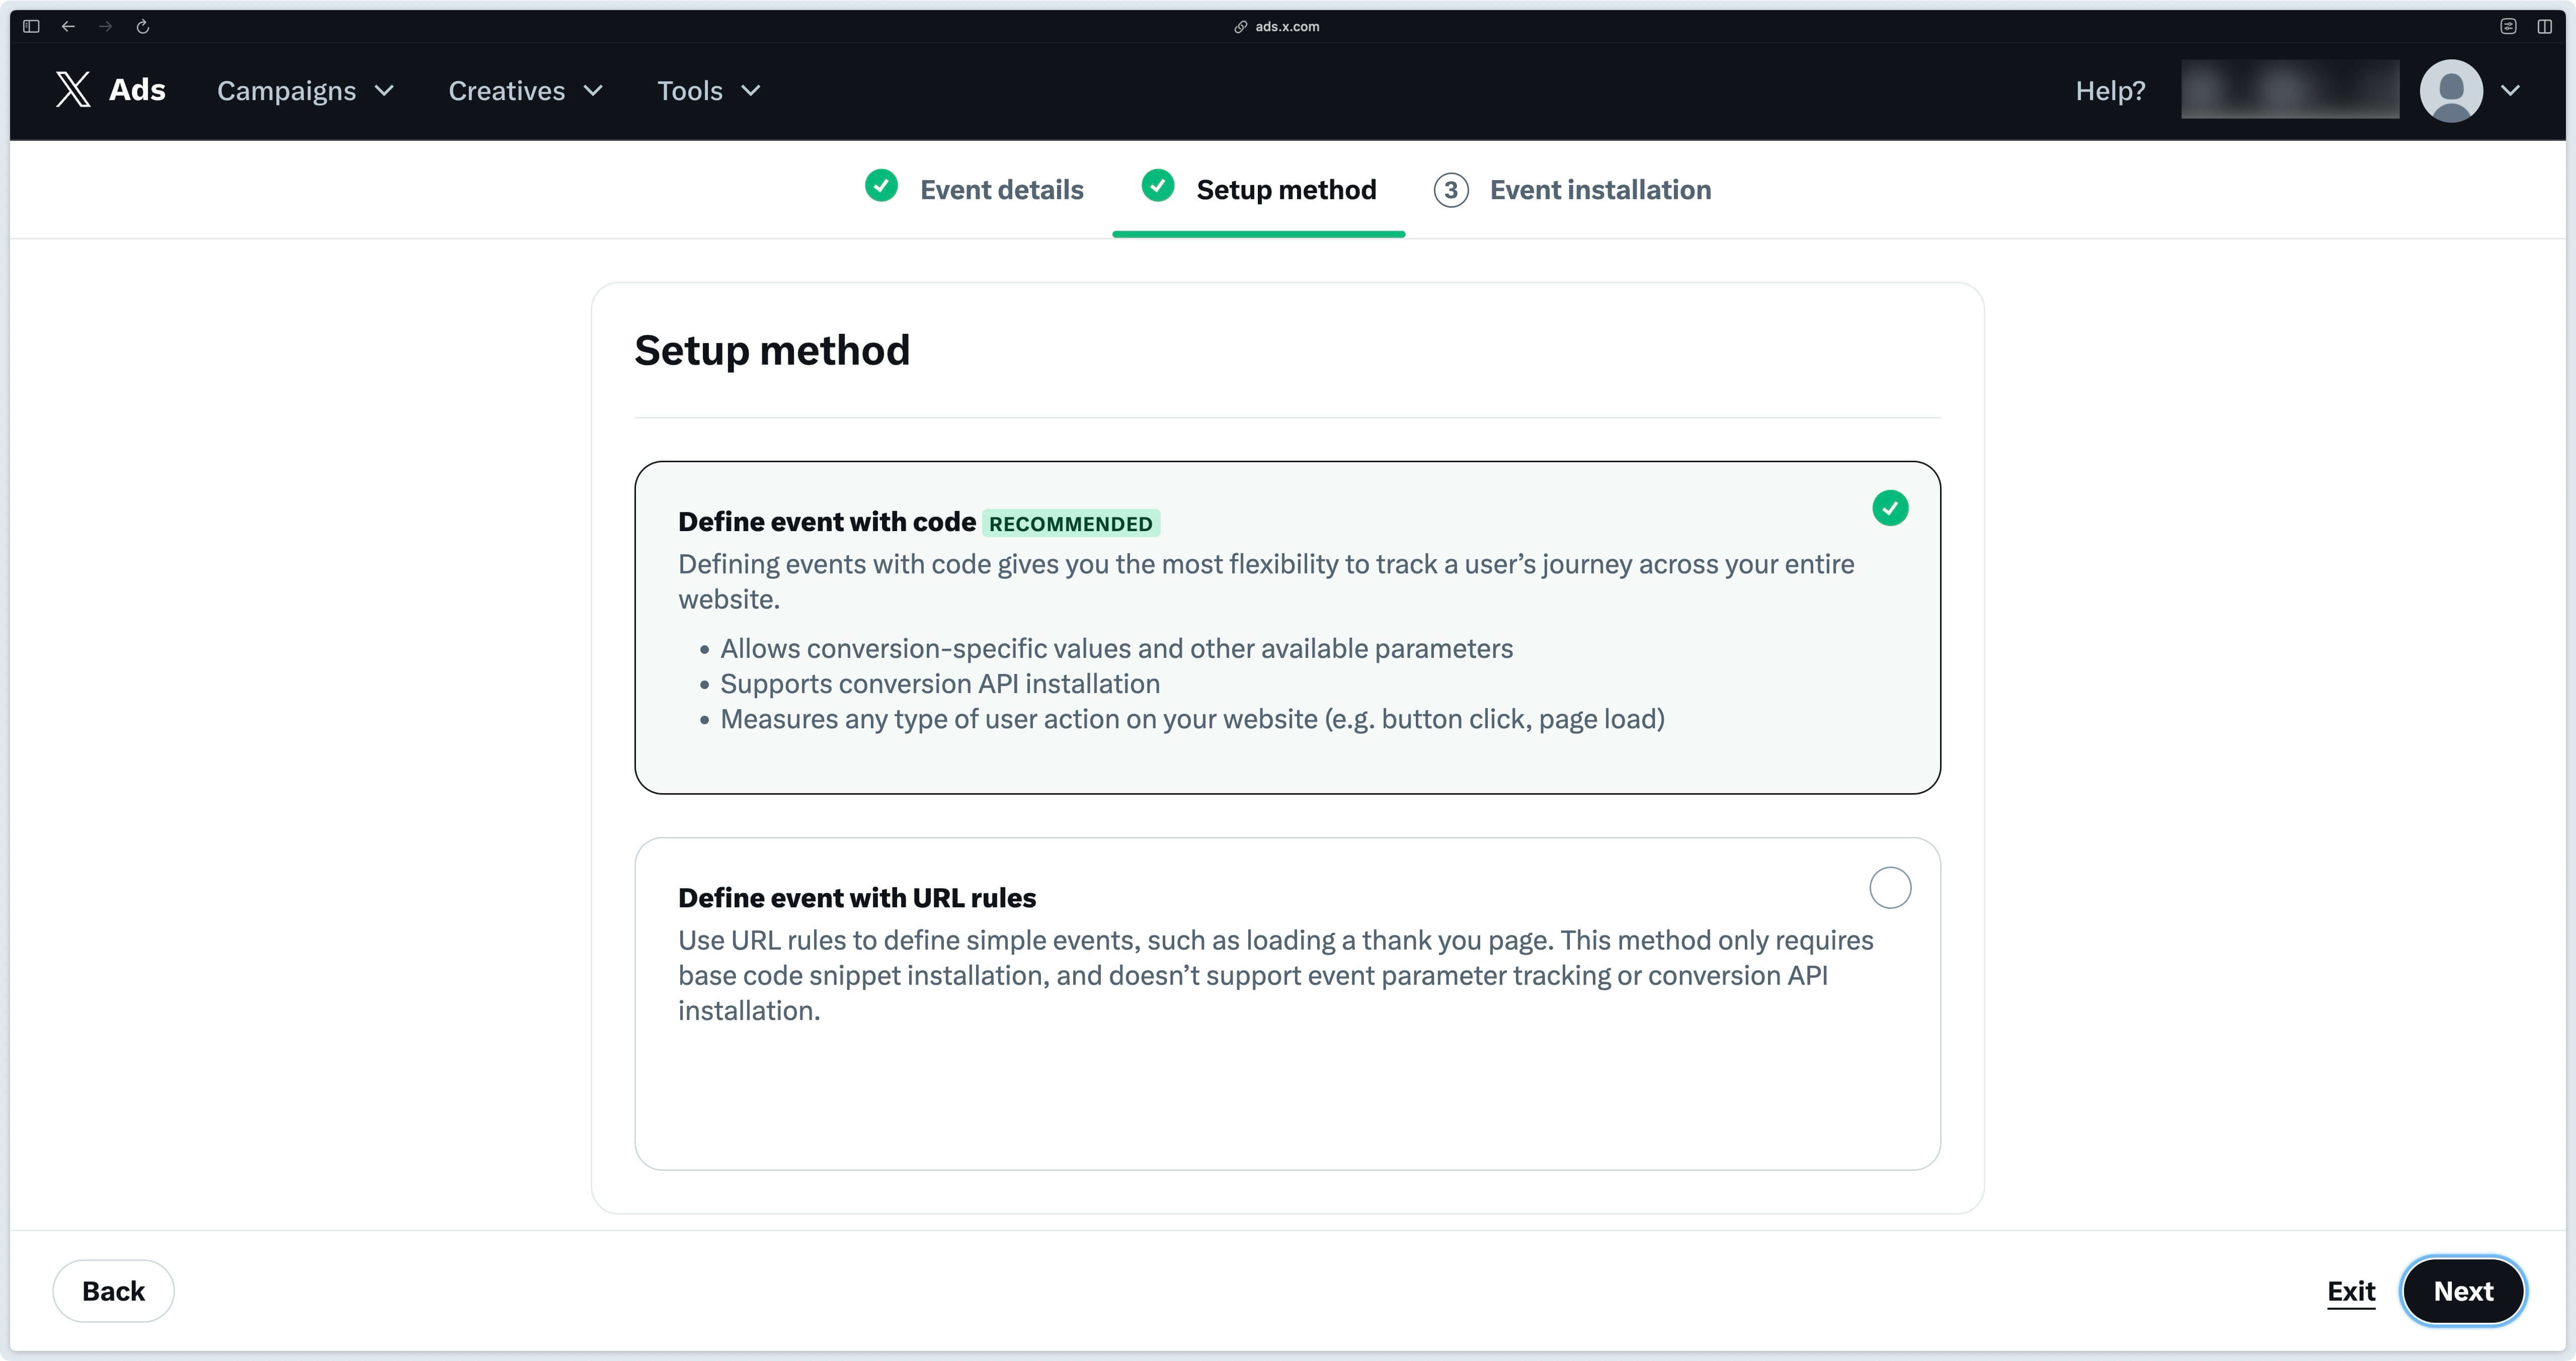
In step 3, if you have nothing to configure, click Save.
Purchase
To create a Purchase event, select Purchase as Event Type and click Next.
If you get an error at this point, change the name you’ve given to your event.
Then select Define event with code.
In step 3, if you have nothing to configure, click Save.
Here’s the event manager with these two events and their respective Event IDs.
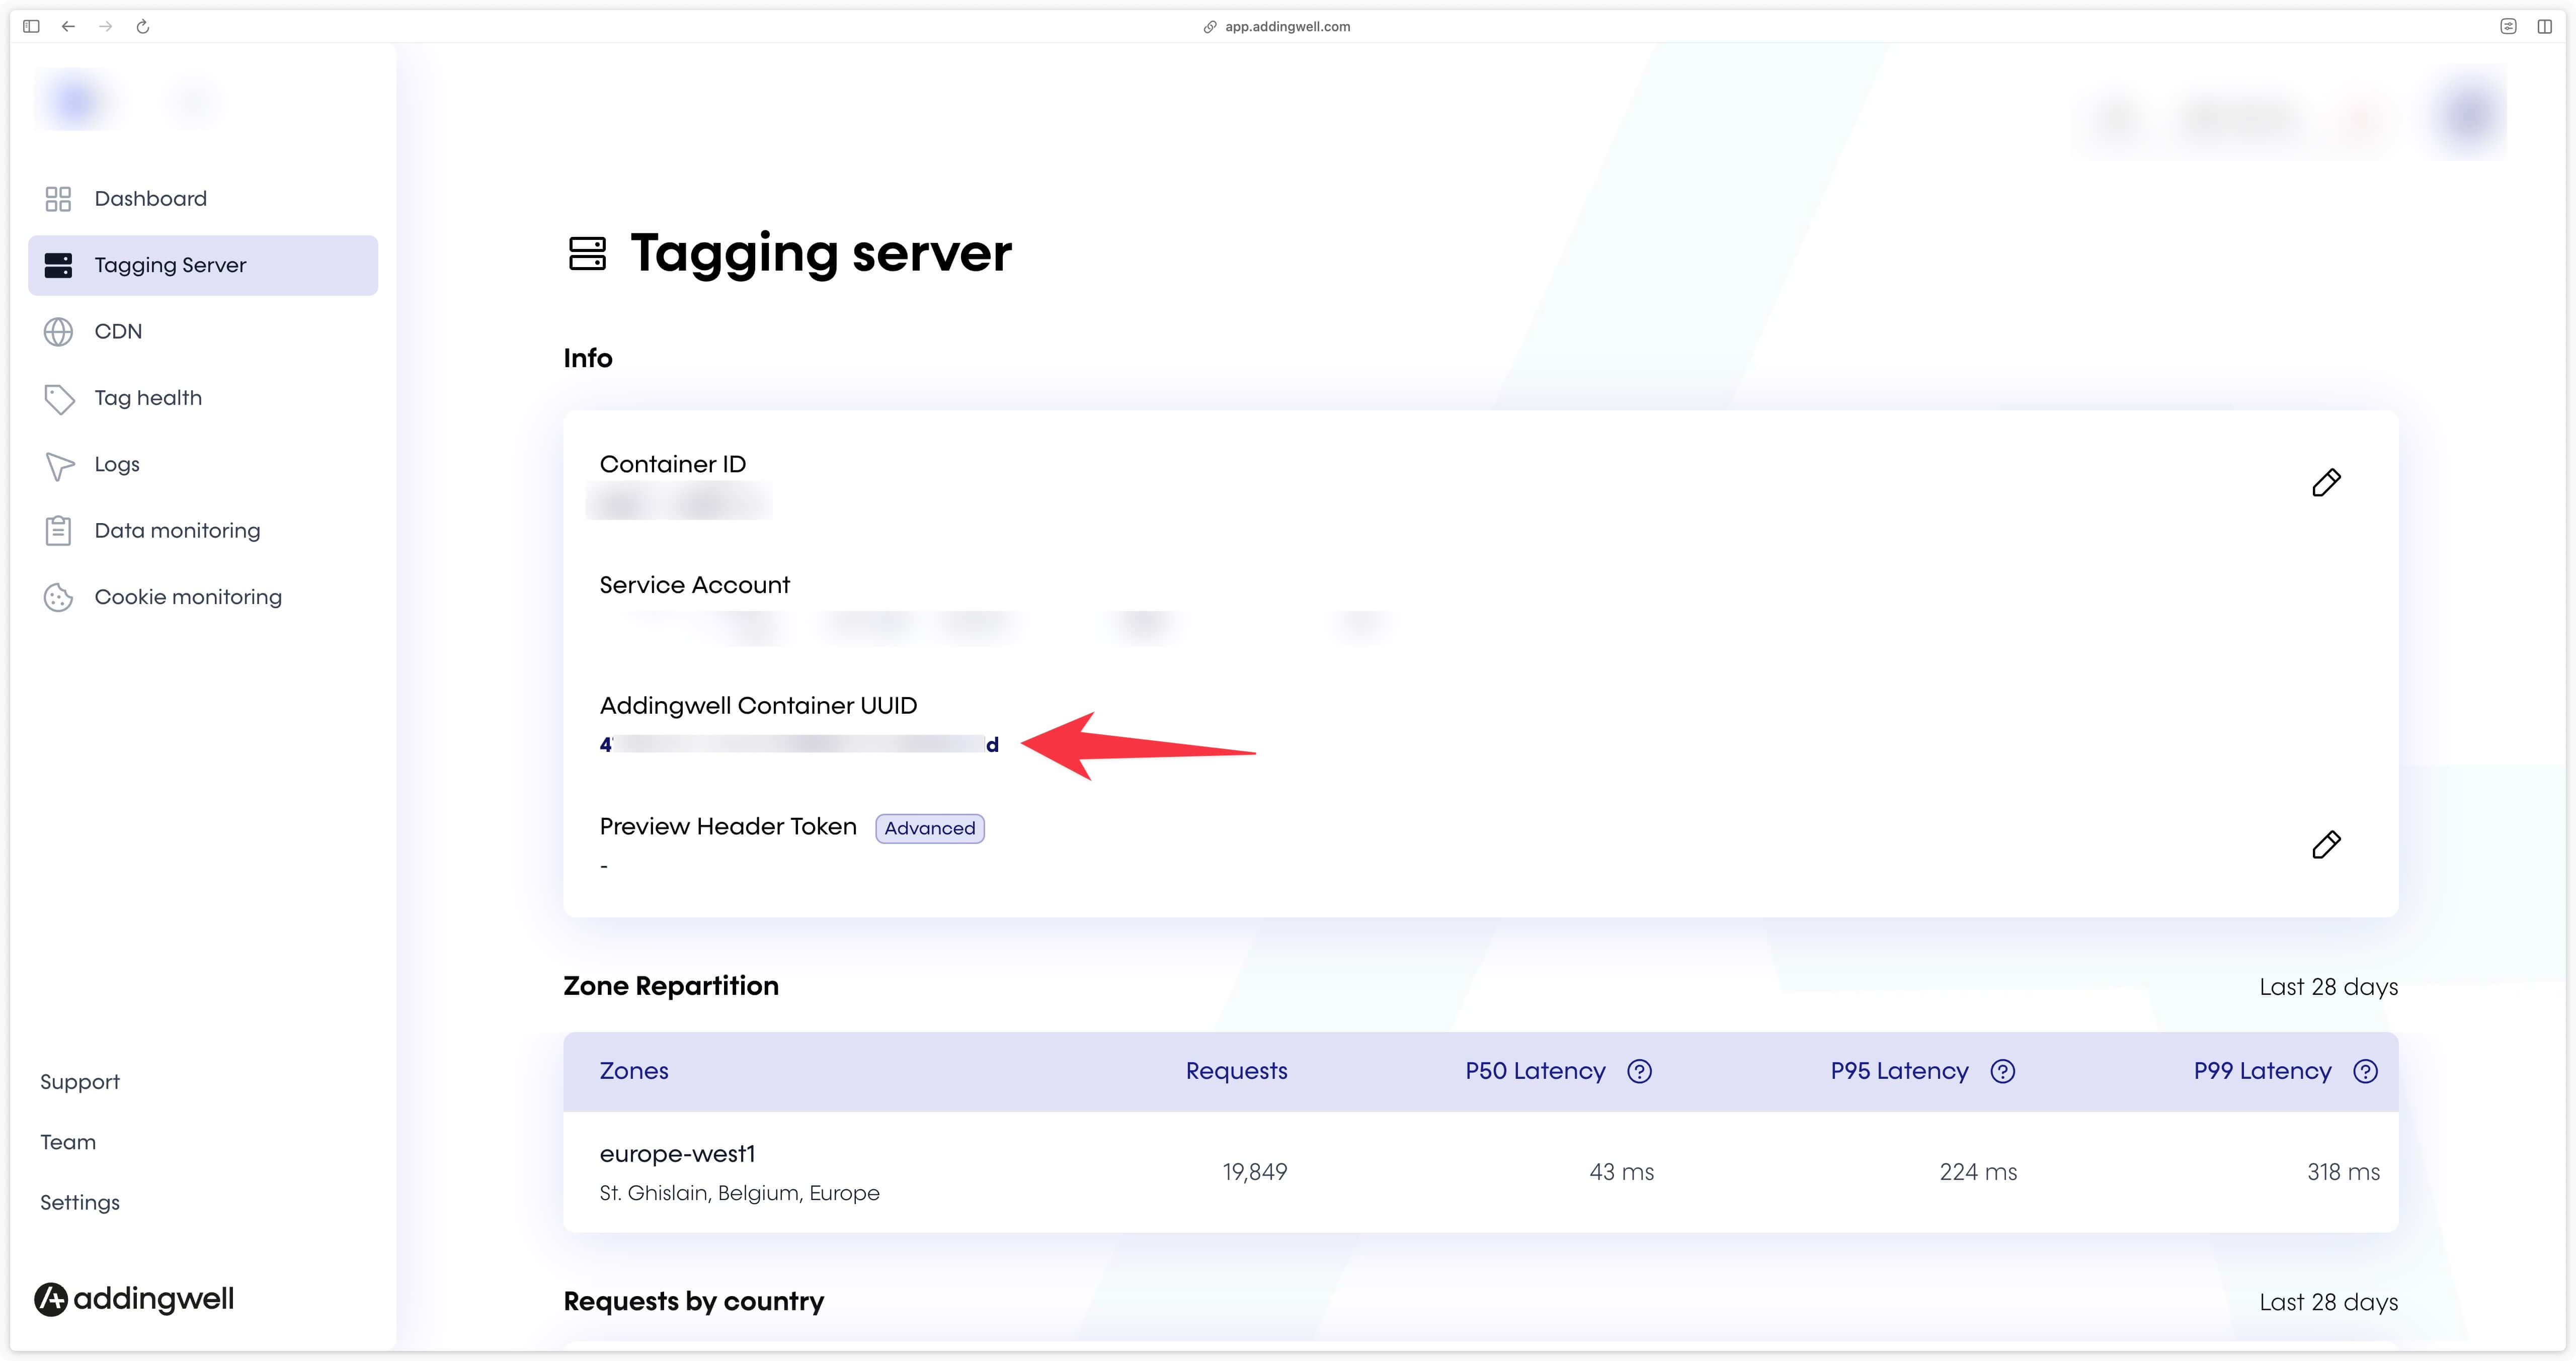
Addingwell Container UUID
In your Addingwell container, in the Tagging Server section, you can copy the UUID.
Tag configuration in GTM Server side
Before you start configuring the tag in GTM Server side, make sure you check all the following boxes:
- I have obtained the tokens consumerKey, consumerSecret, oauthToken, oauthTokenSecret on the X Developer Portal
- I have obtained access to the conversion API via this form
- I got my Pixel ID and my Event IDs in my X Events Manager
- I got my container UUID on Addingwell
We can now move on to configuration.
Import tag into sGTM
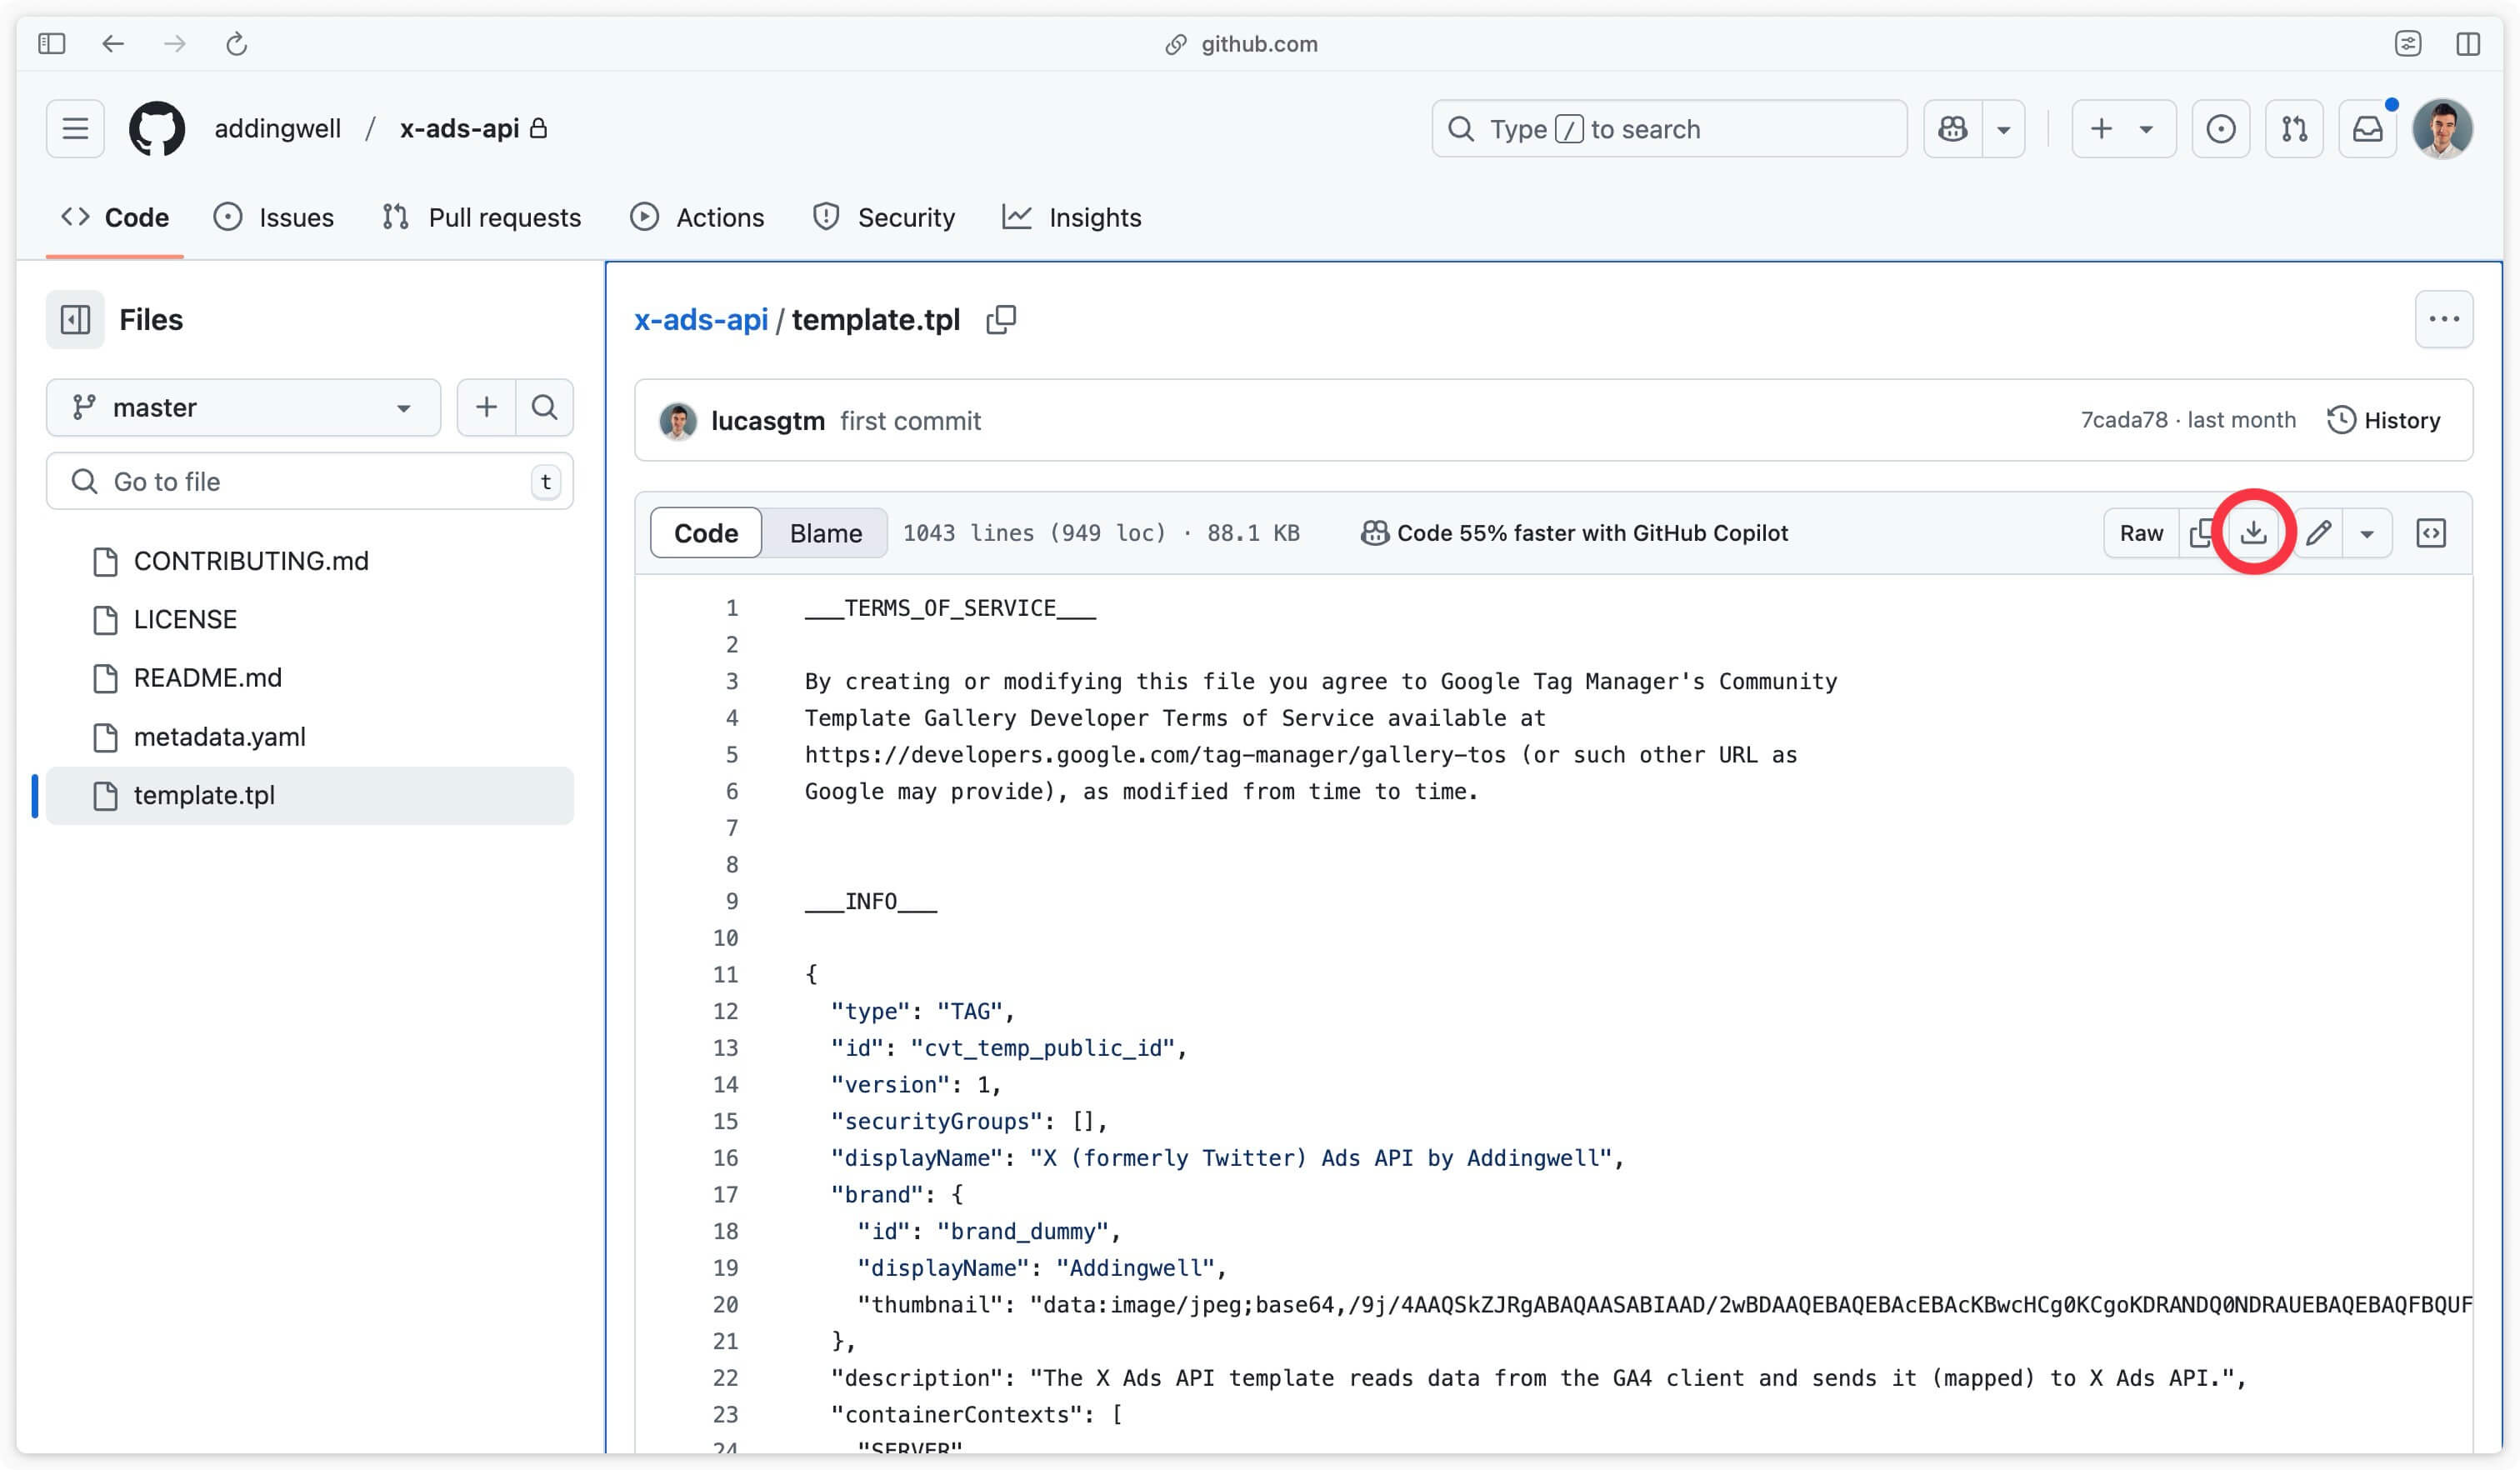
Click here to download the tag X (formerly Twitter) Ads API then click on the icon to download the file.
Then go to the Templates tab of the server container, and in the Tag templates section, click on New.

Then click on the three small dots in the top right-hand corner, and select Import.
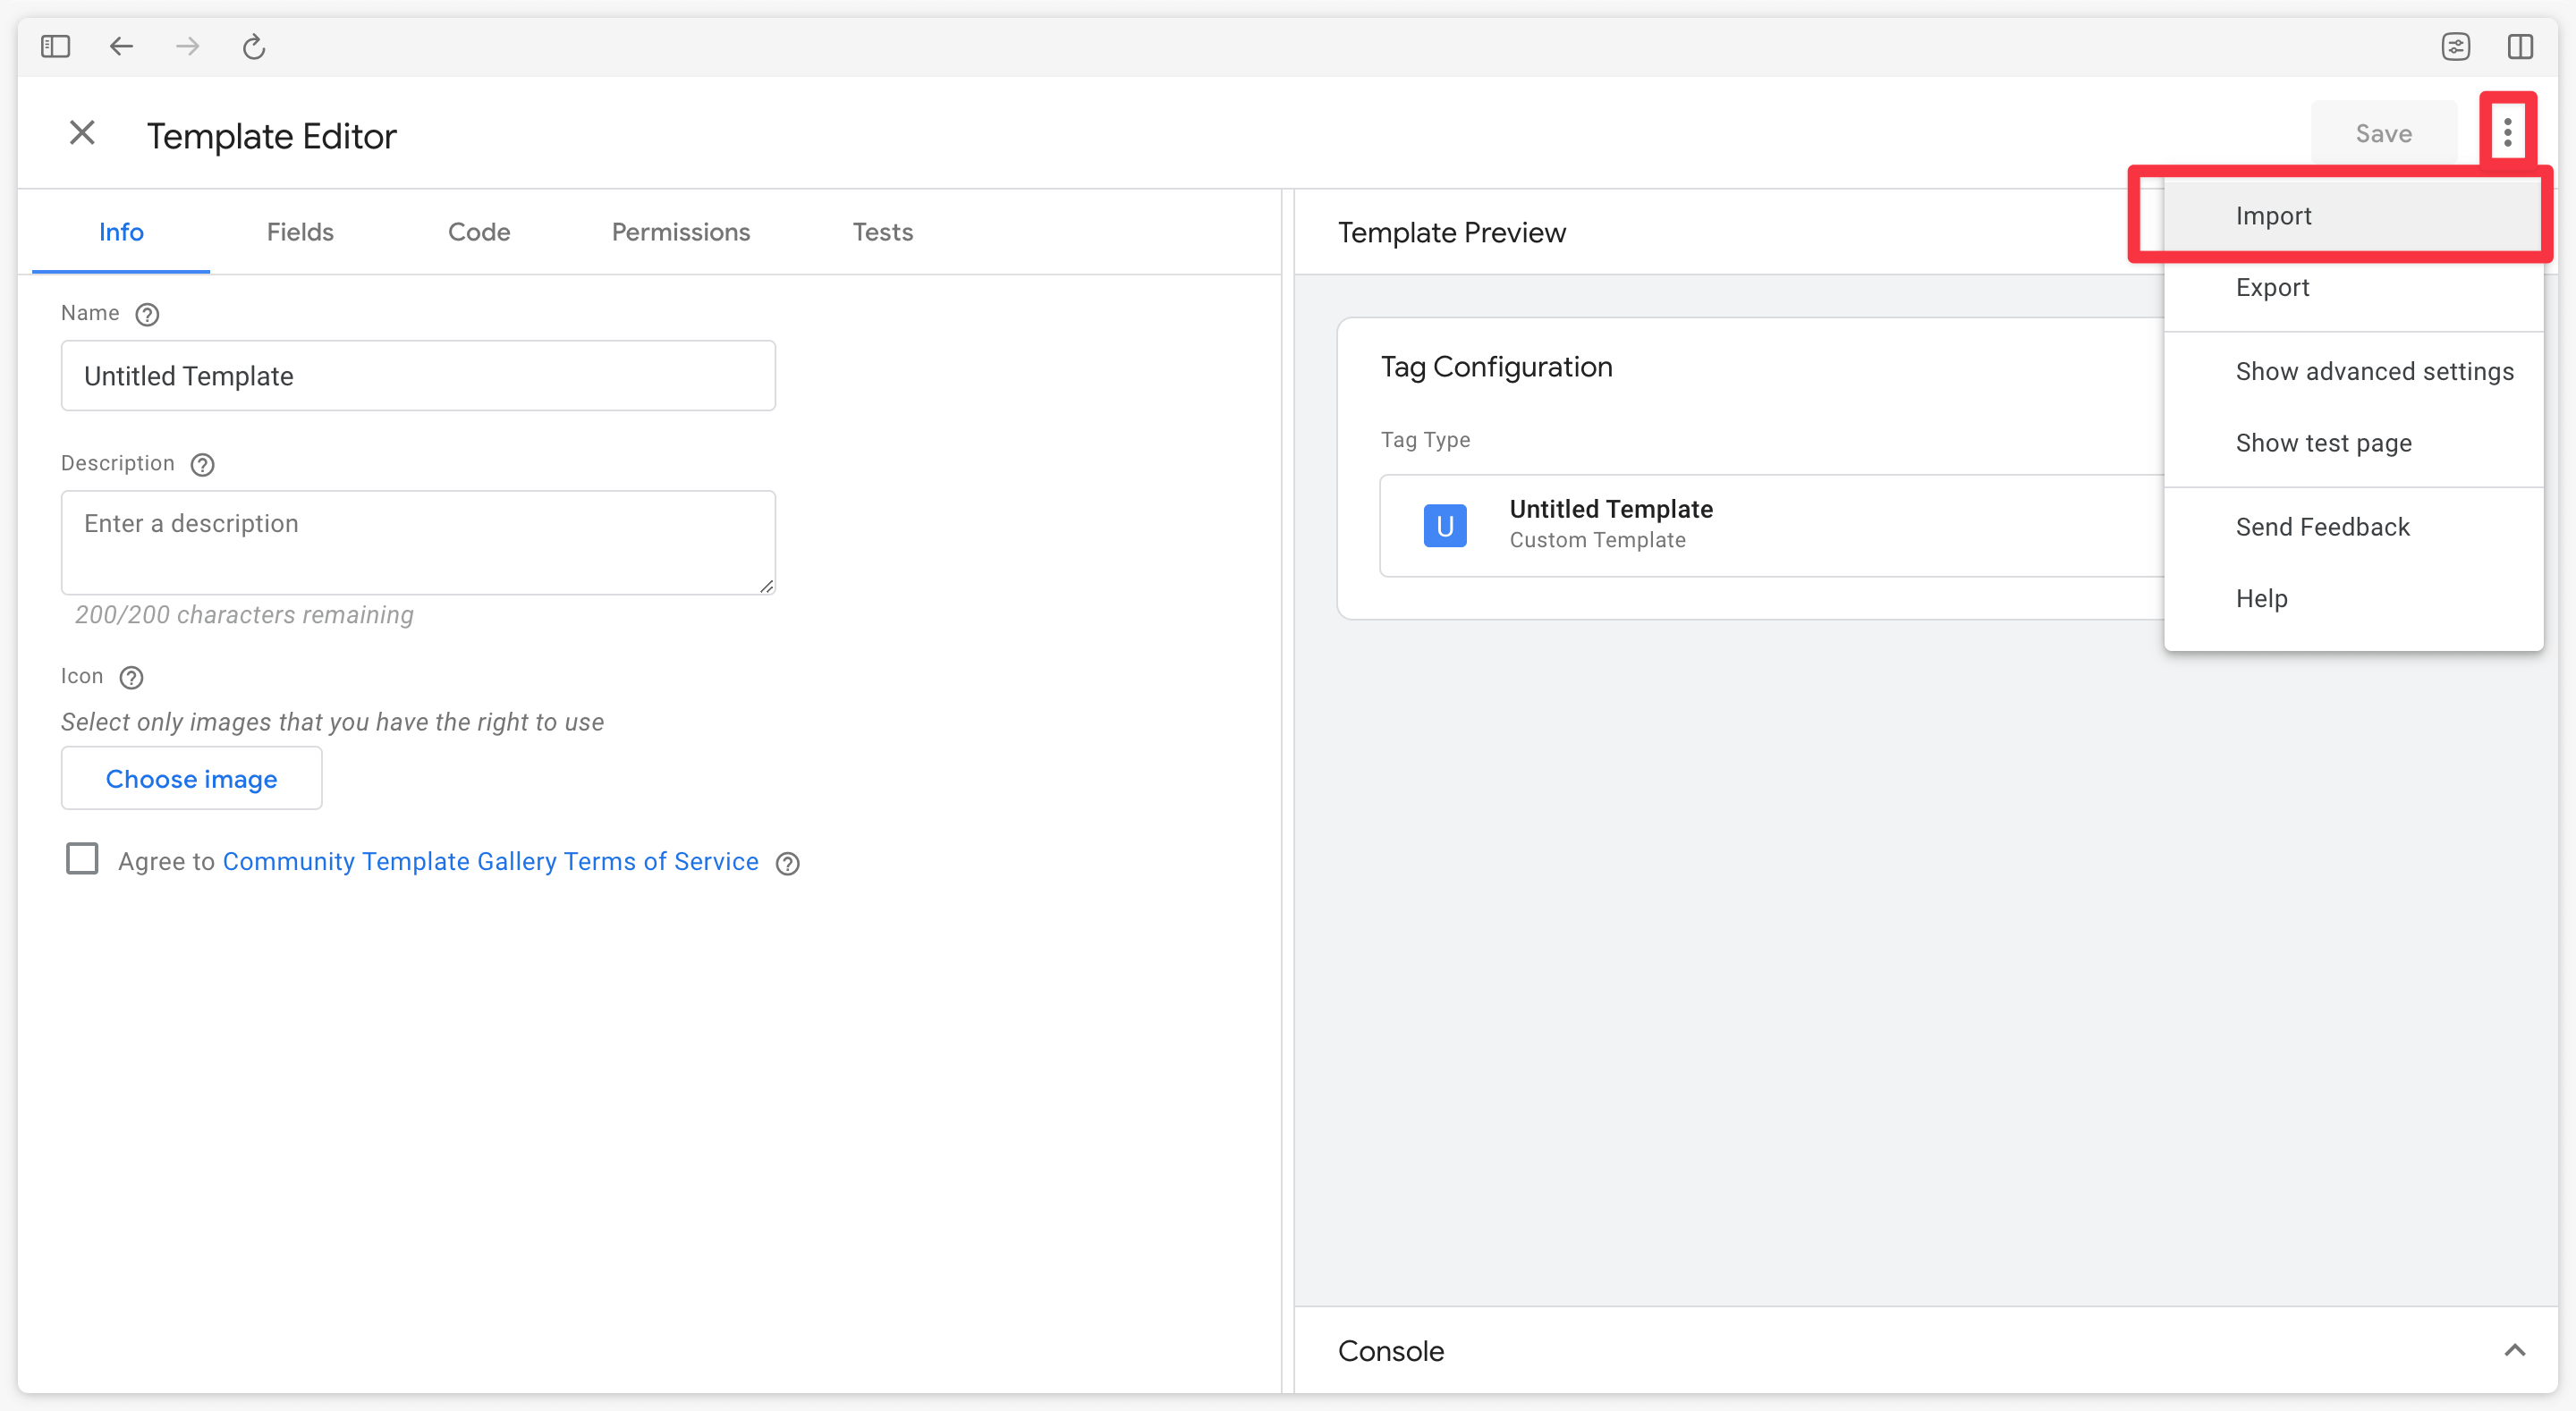
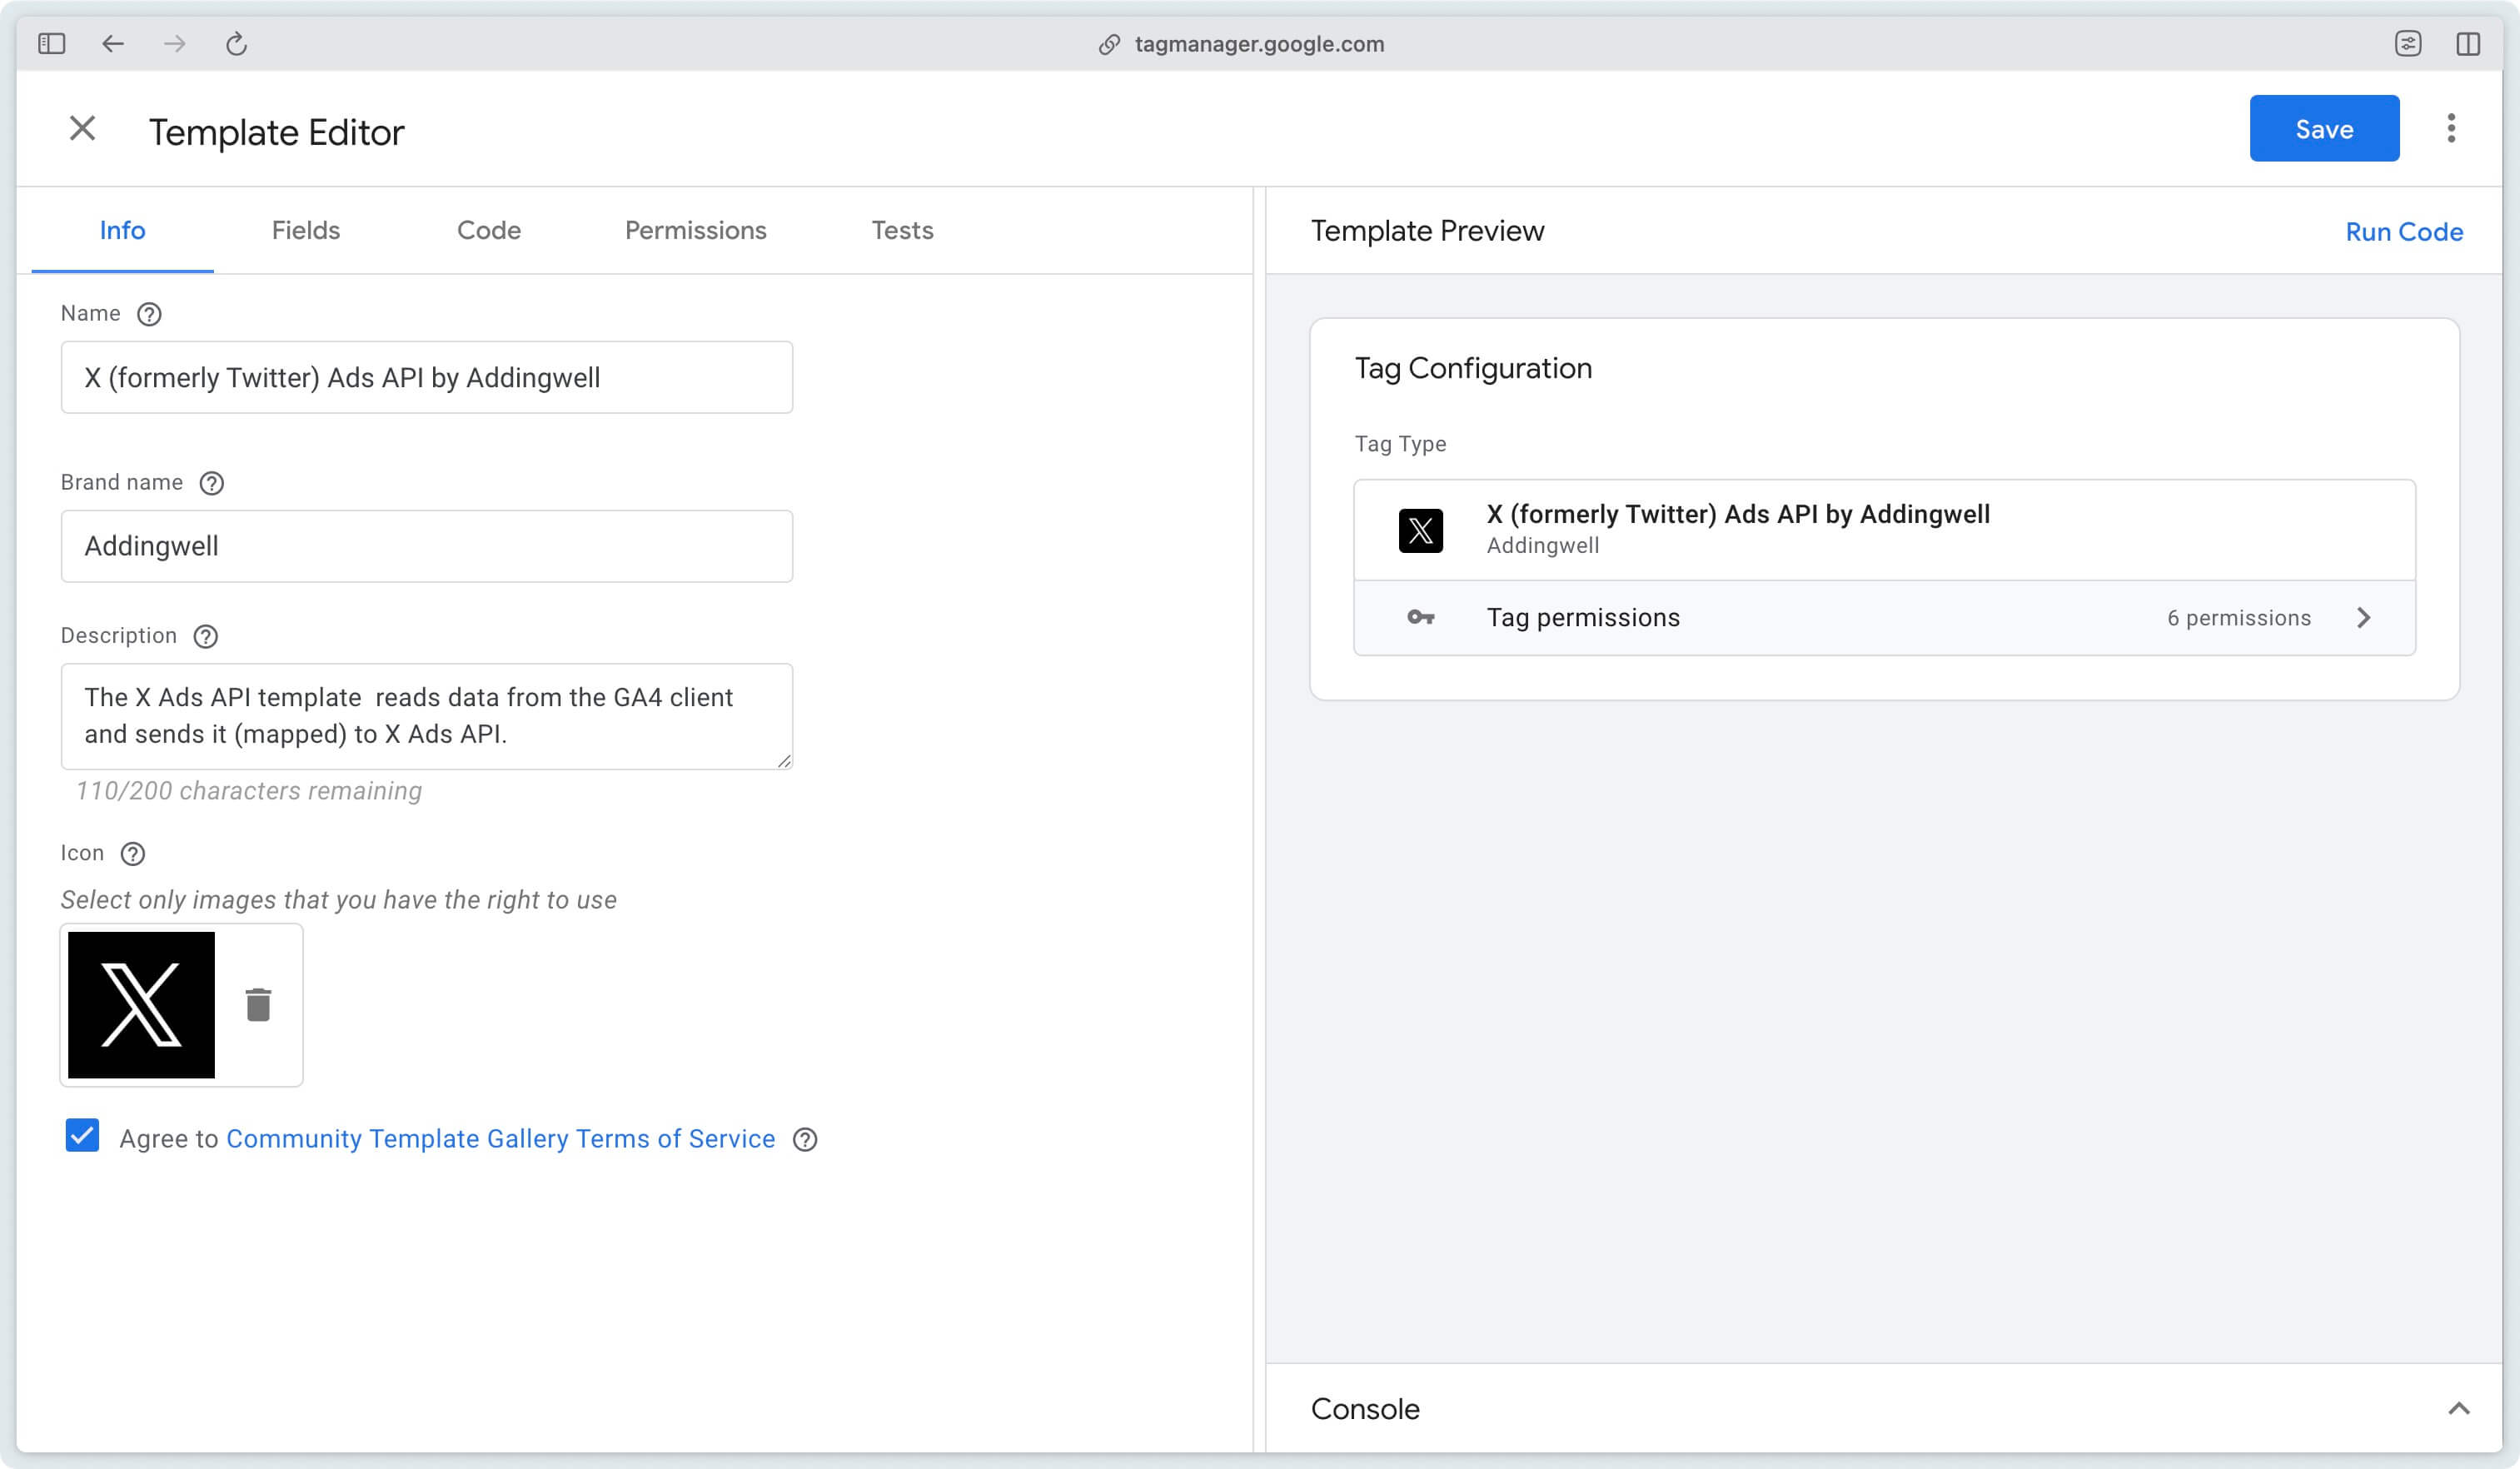
Then select the newly uploaded template.tpl file, and click Save.
Configure tag in sGTM
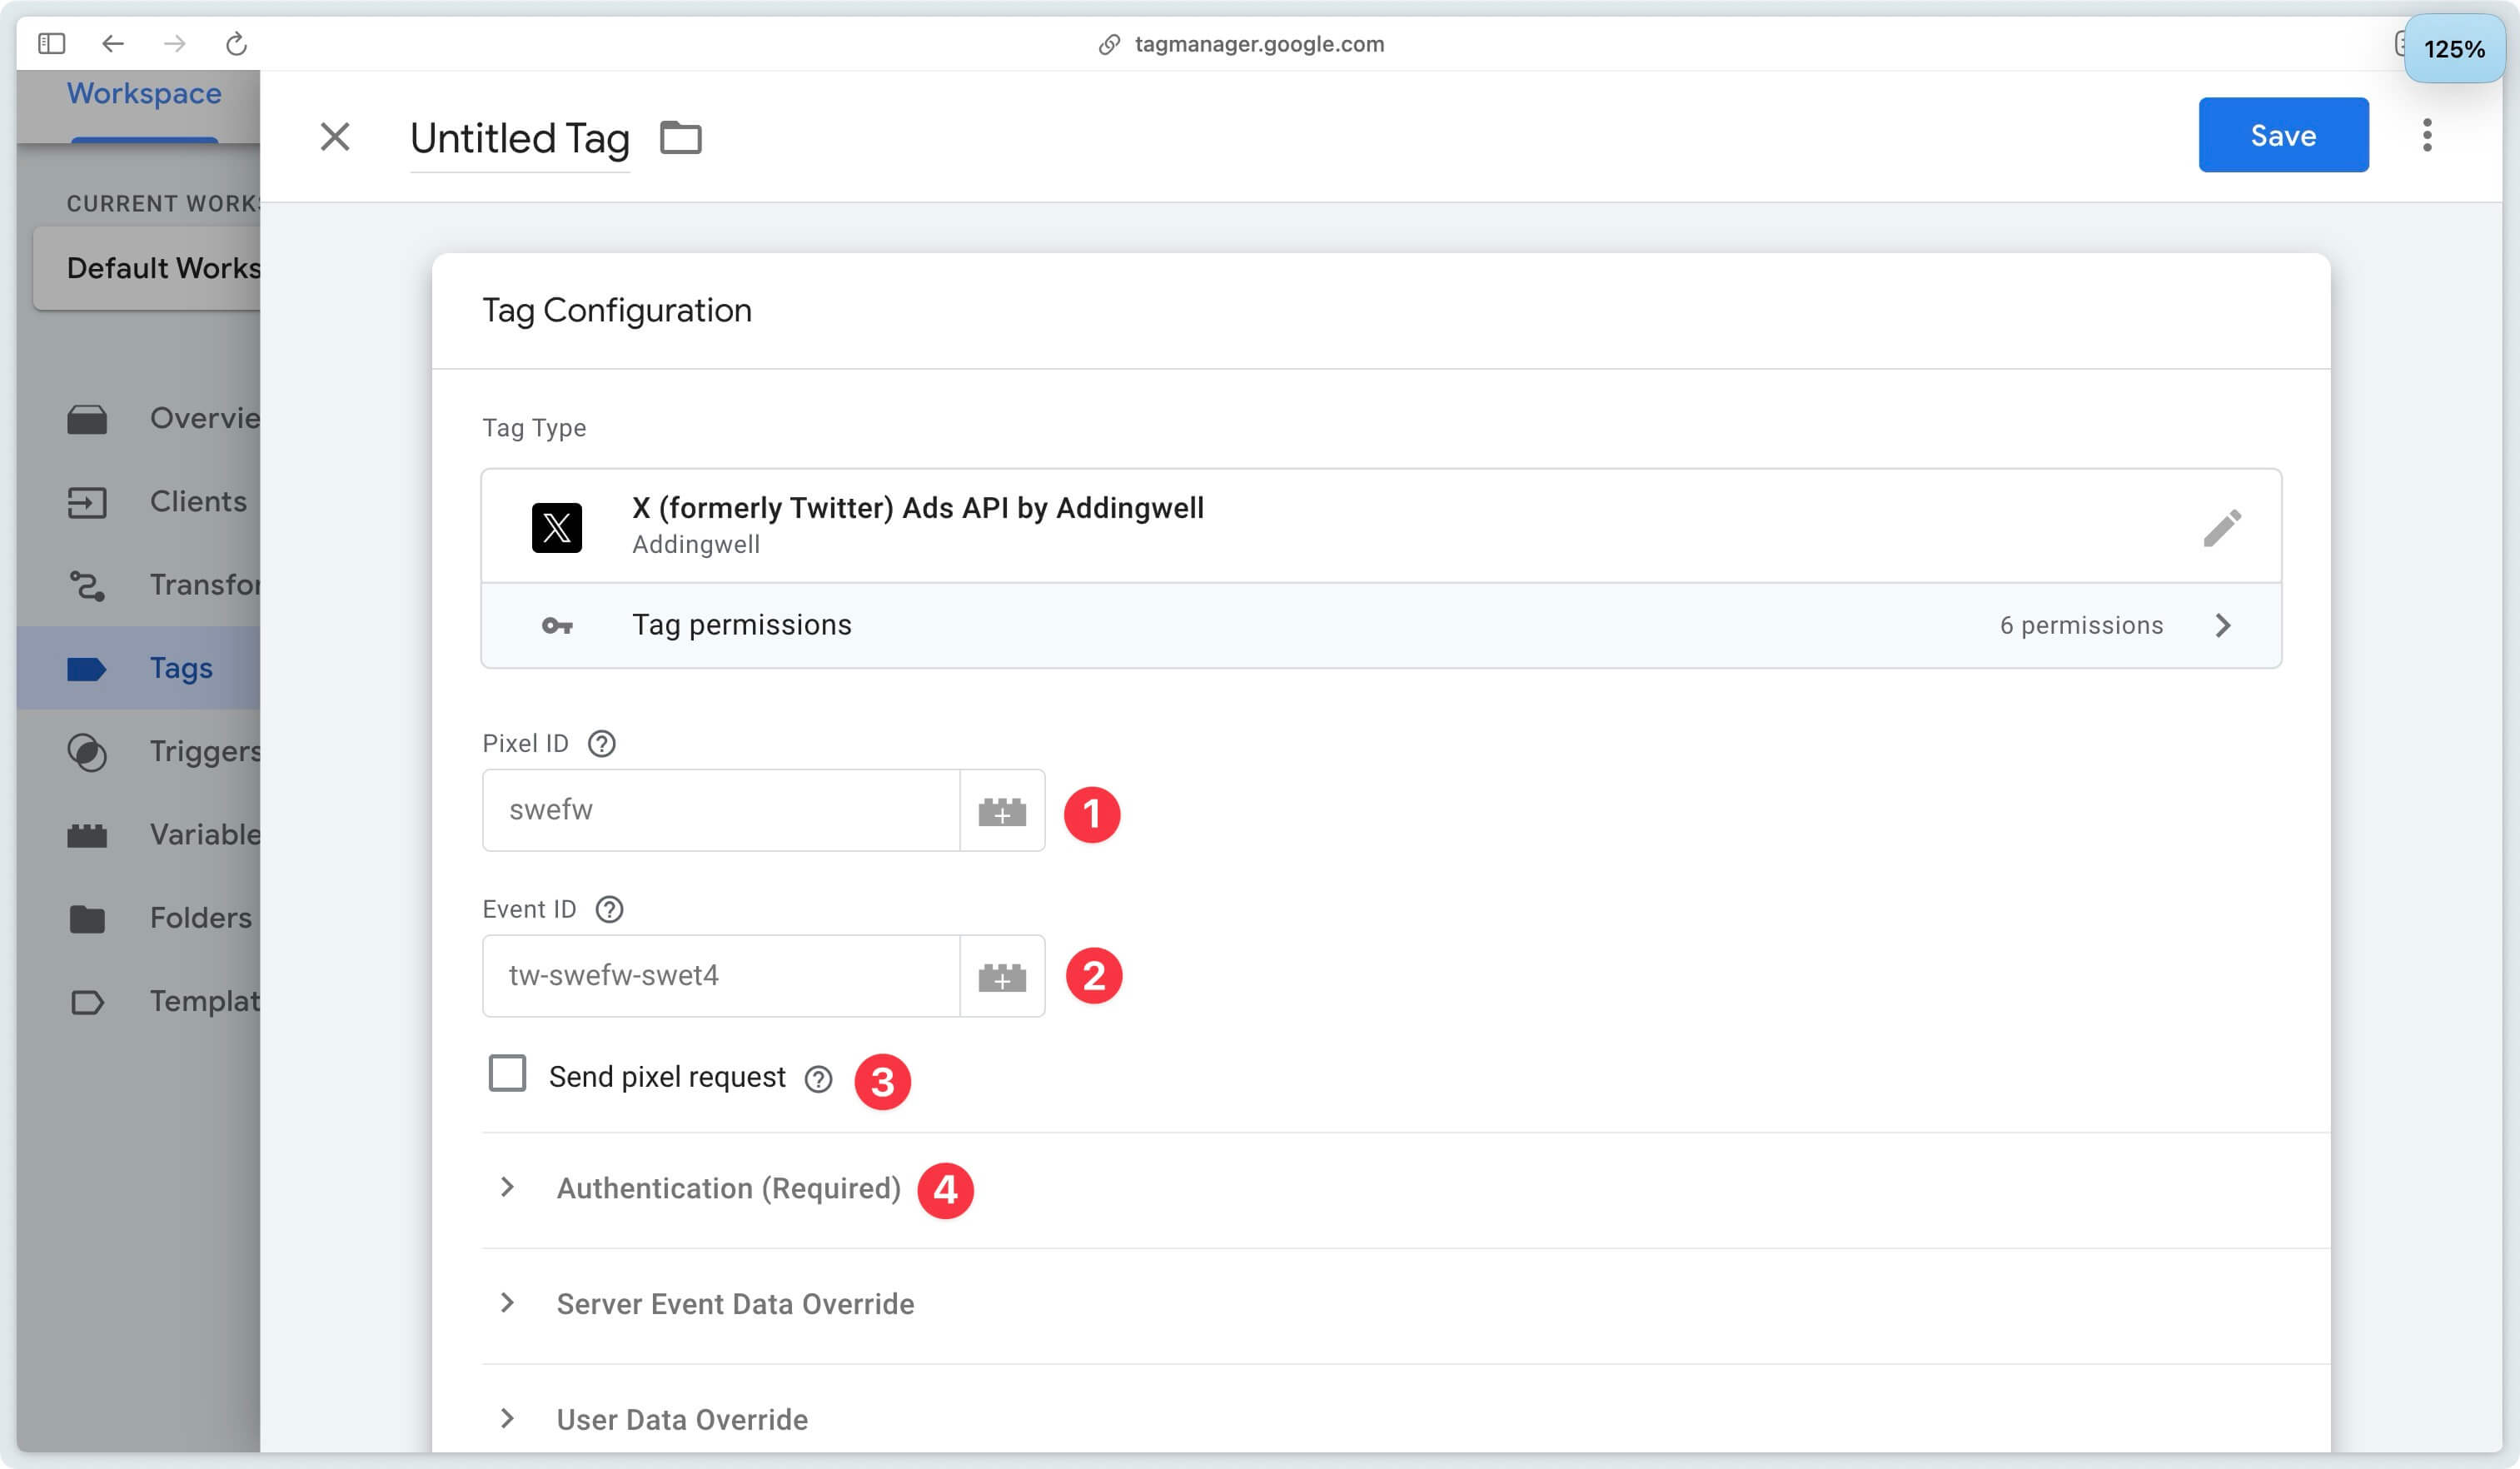
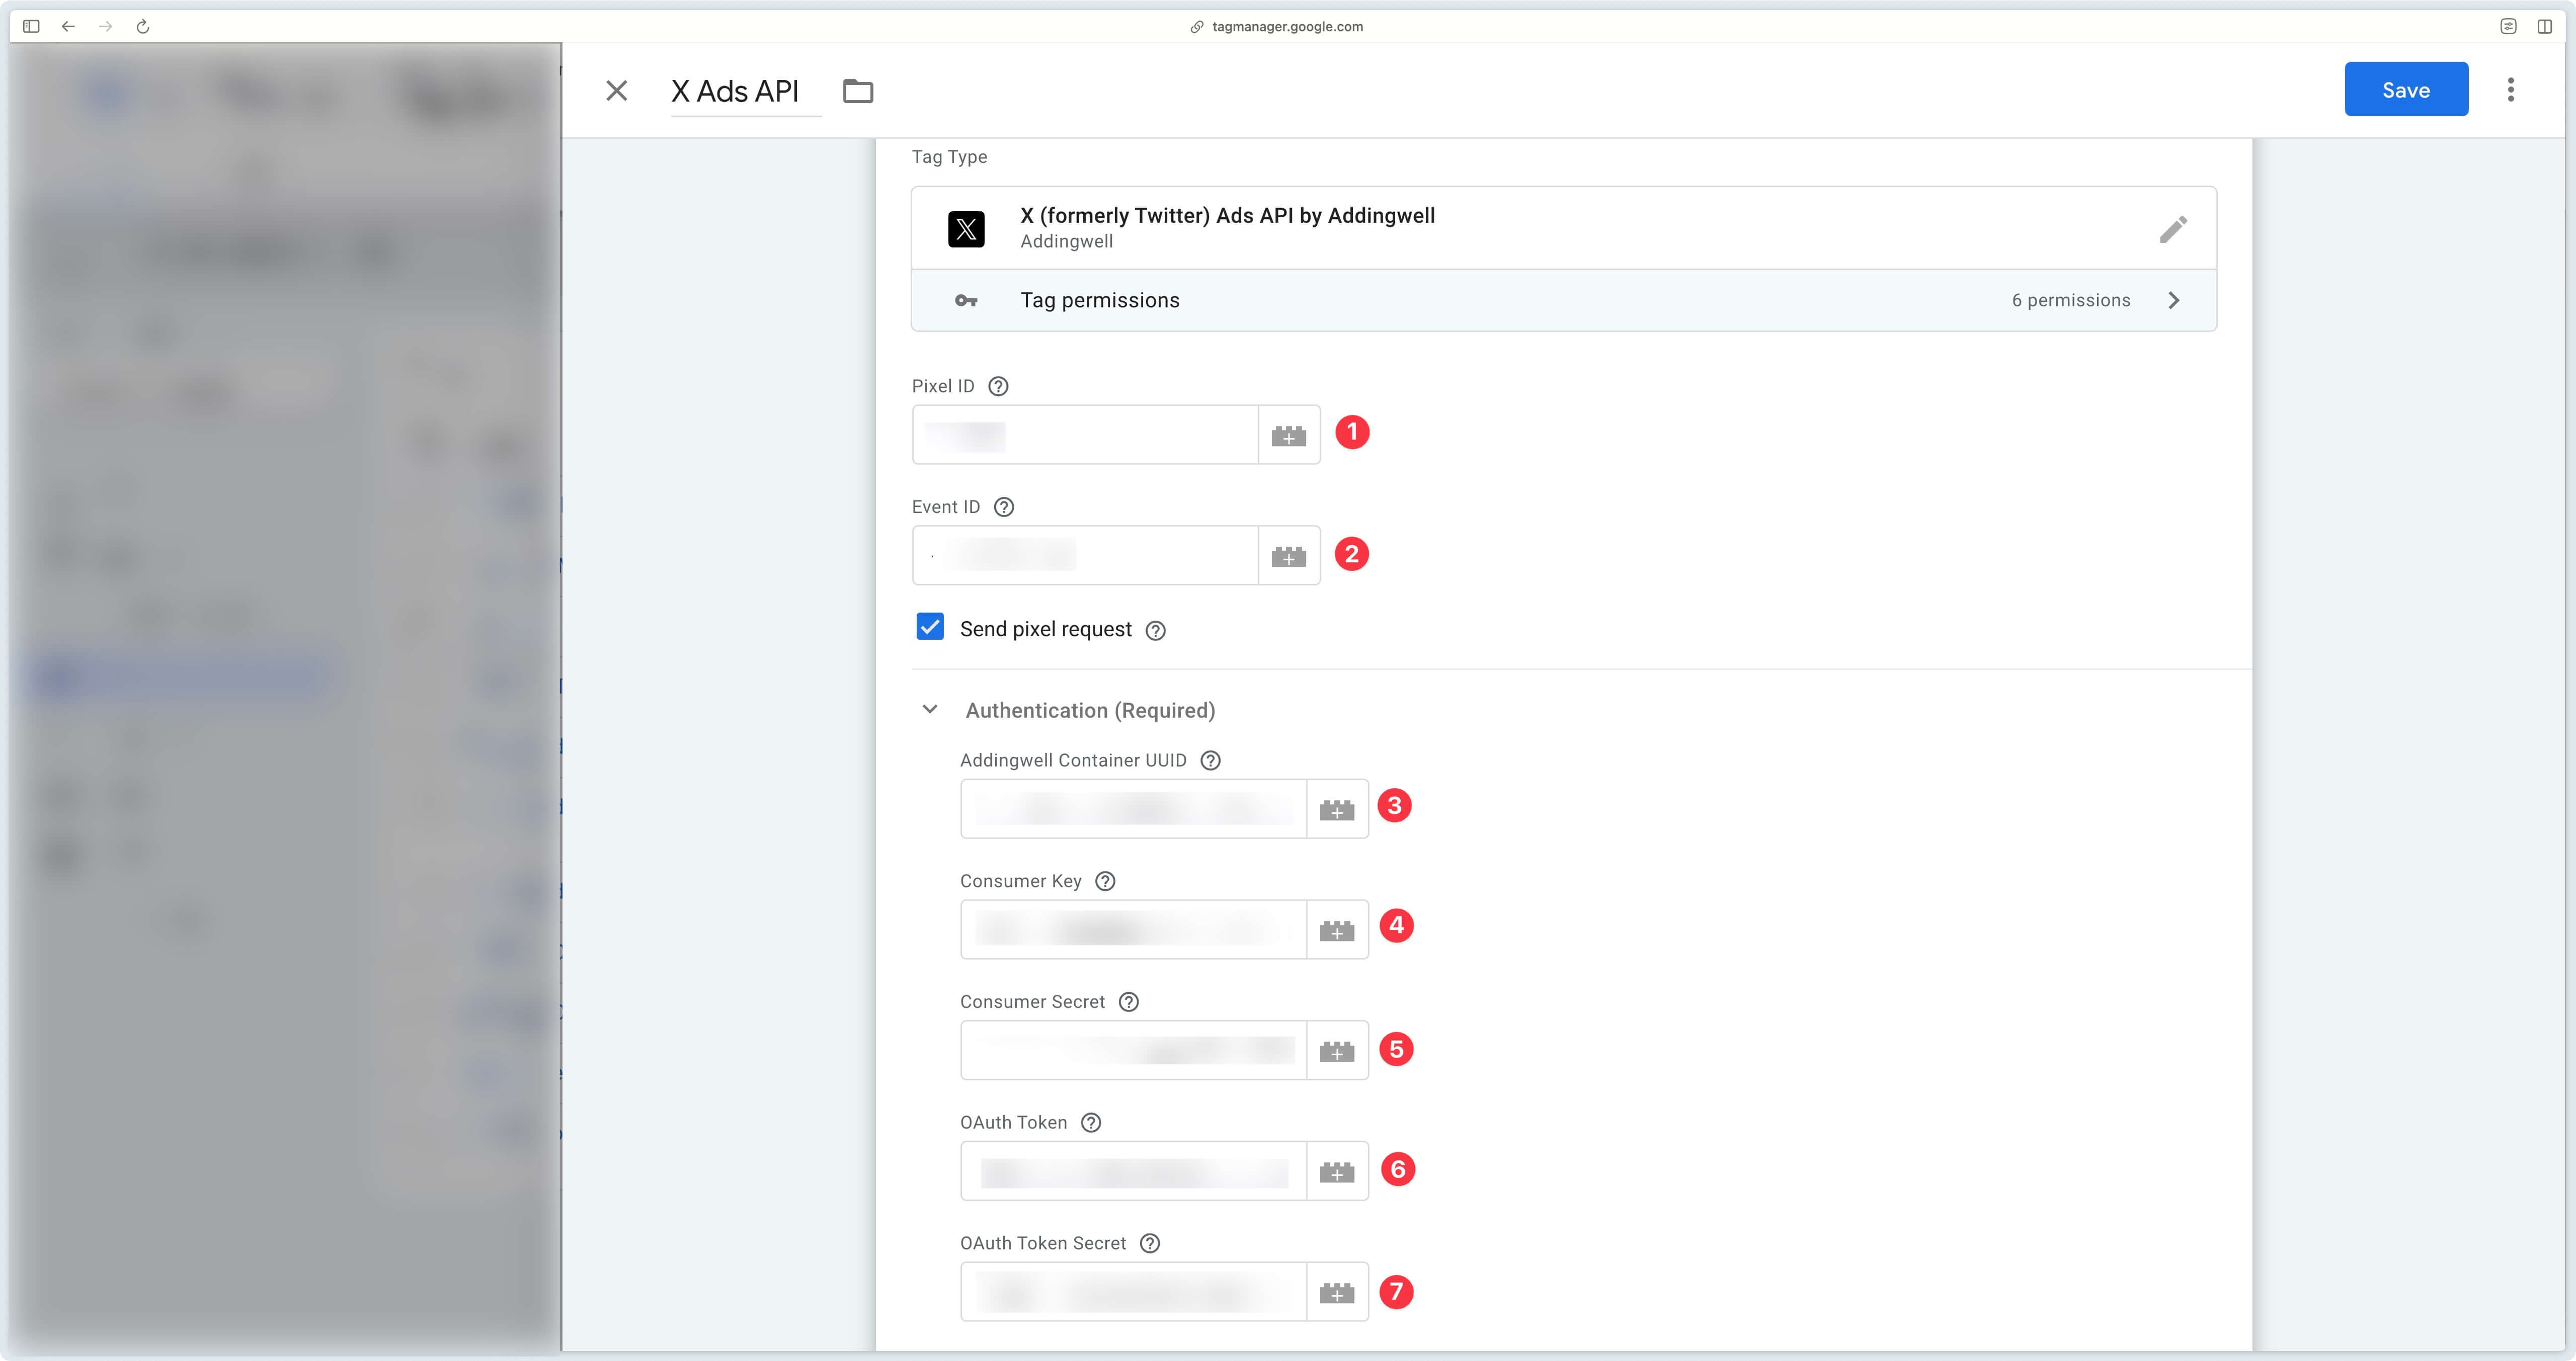
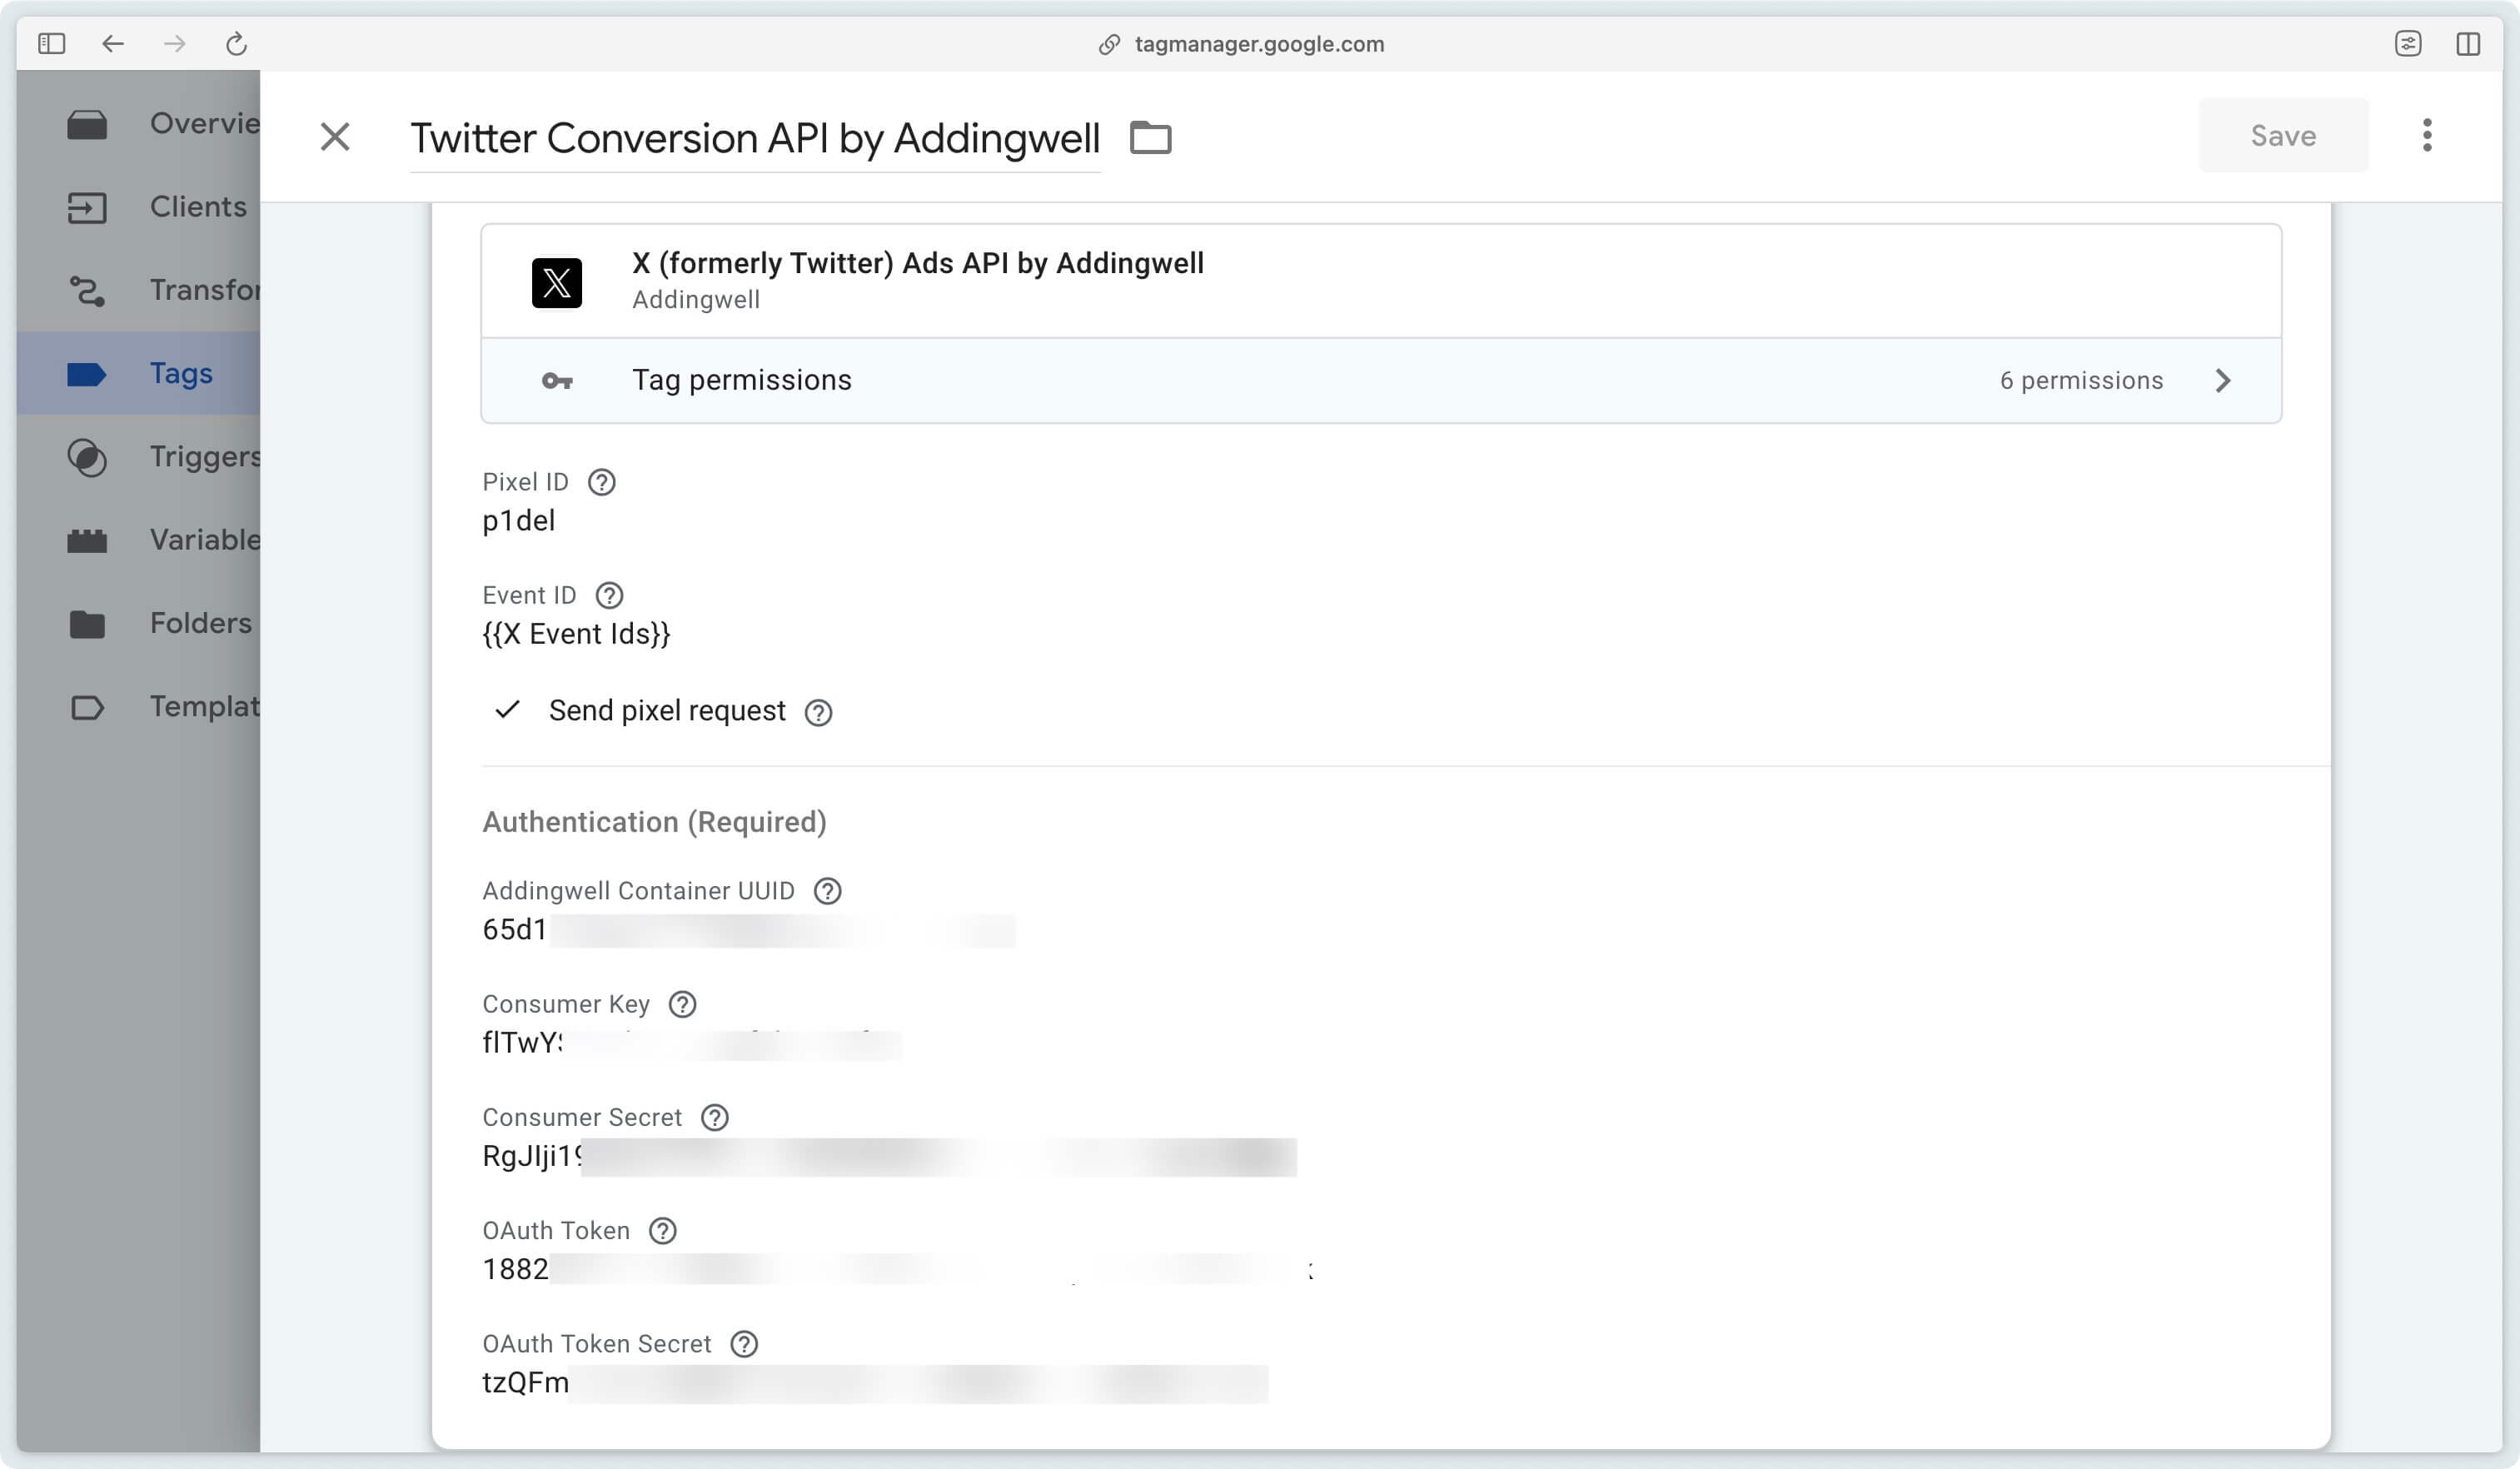
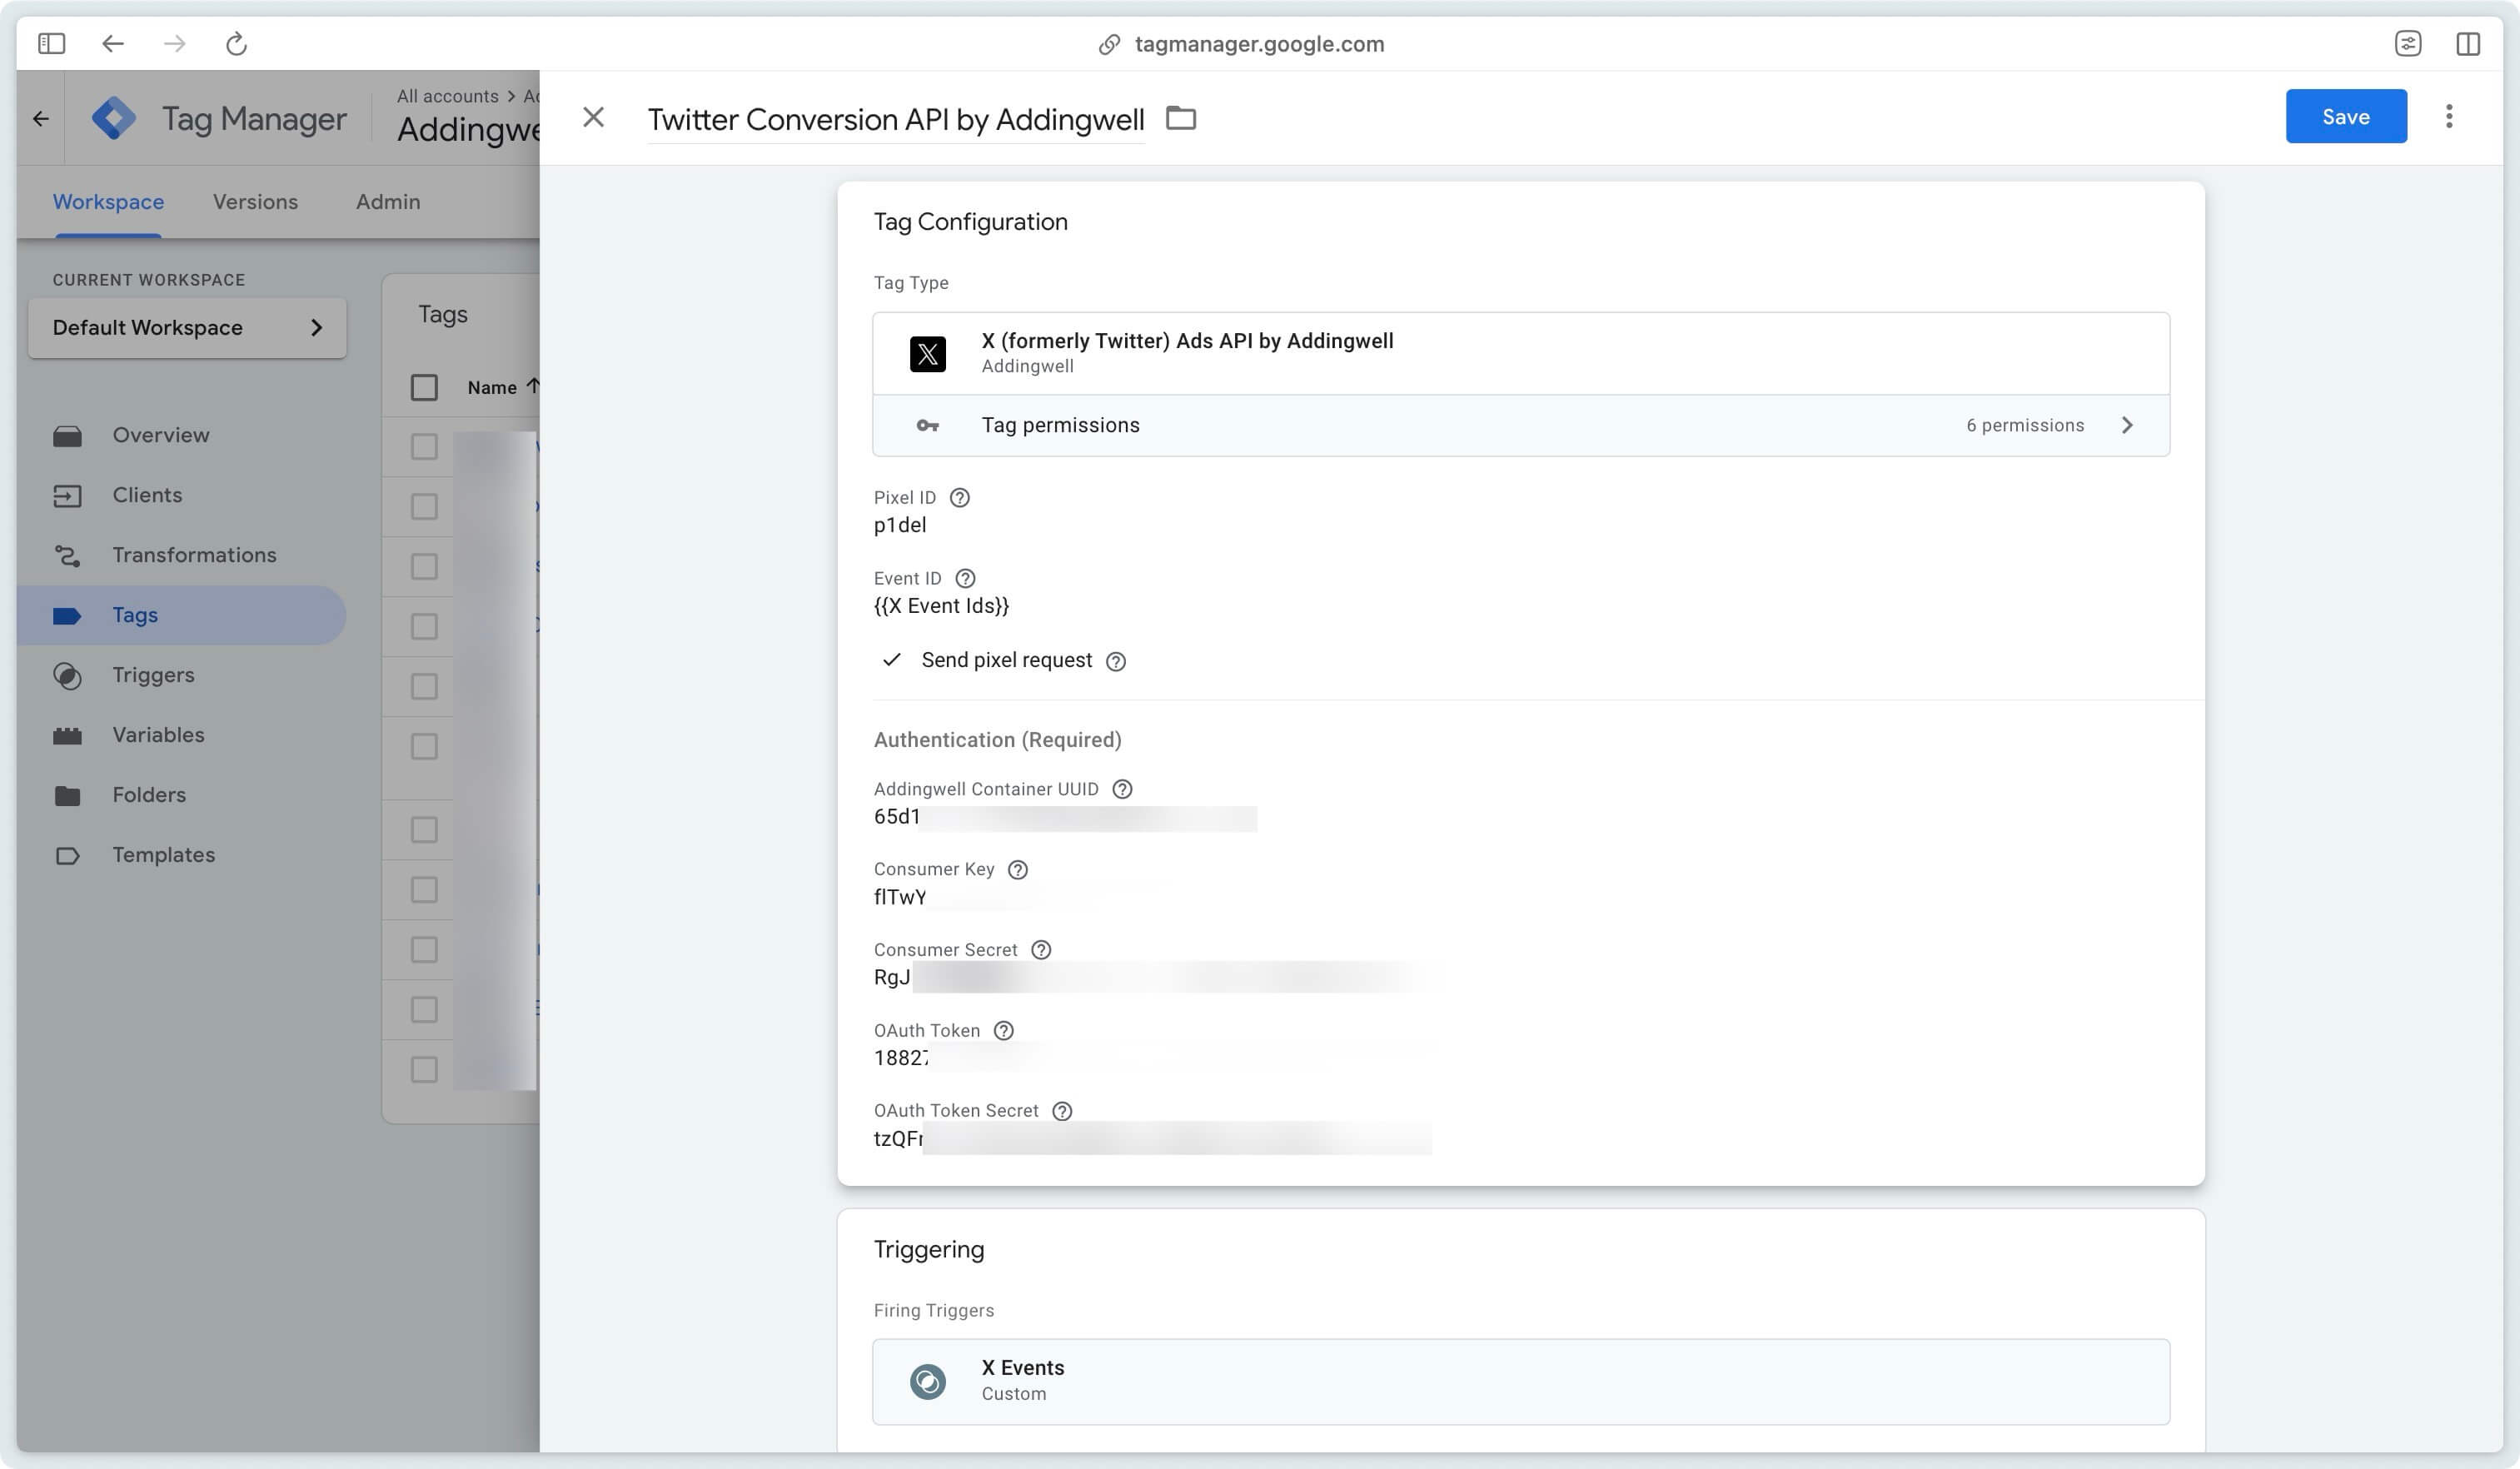
1. Pixel ID
Enter the pixel ID available in your X Events Manager.
In our example, the Pixel ID is: p1del.
2. Event IDs
For event IDs, you can create one tag per event or create a Lookup Table that groups your events into a single tag. In this documentation we’ll opt for the second option with the Lookup Table.
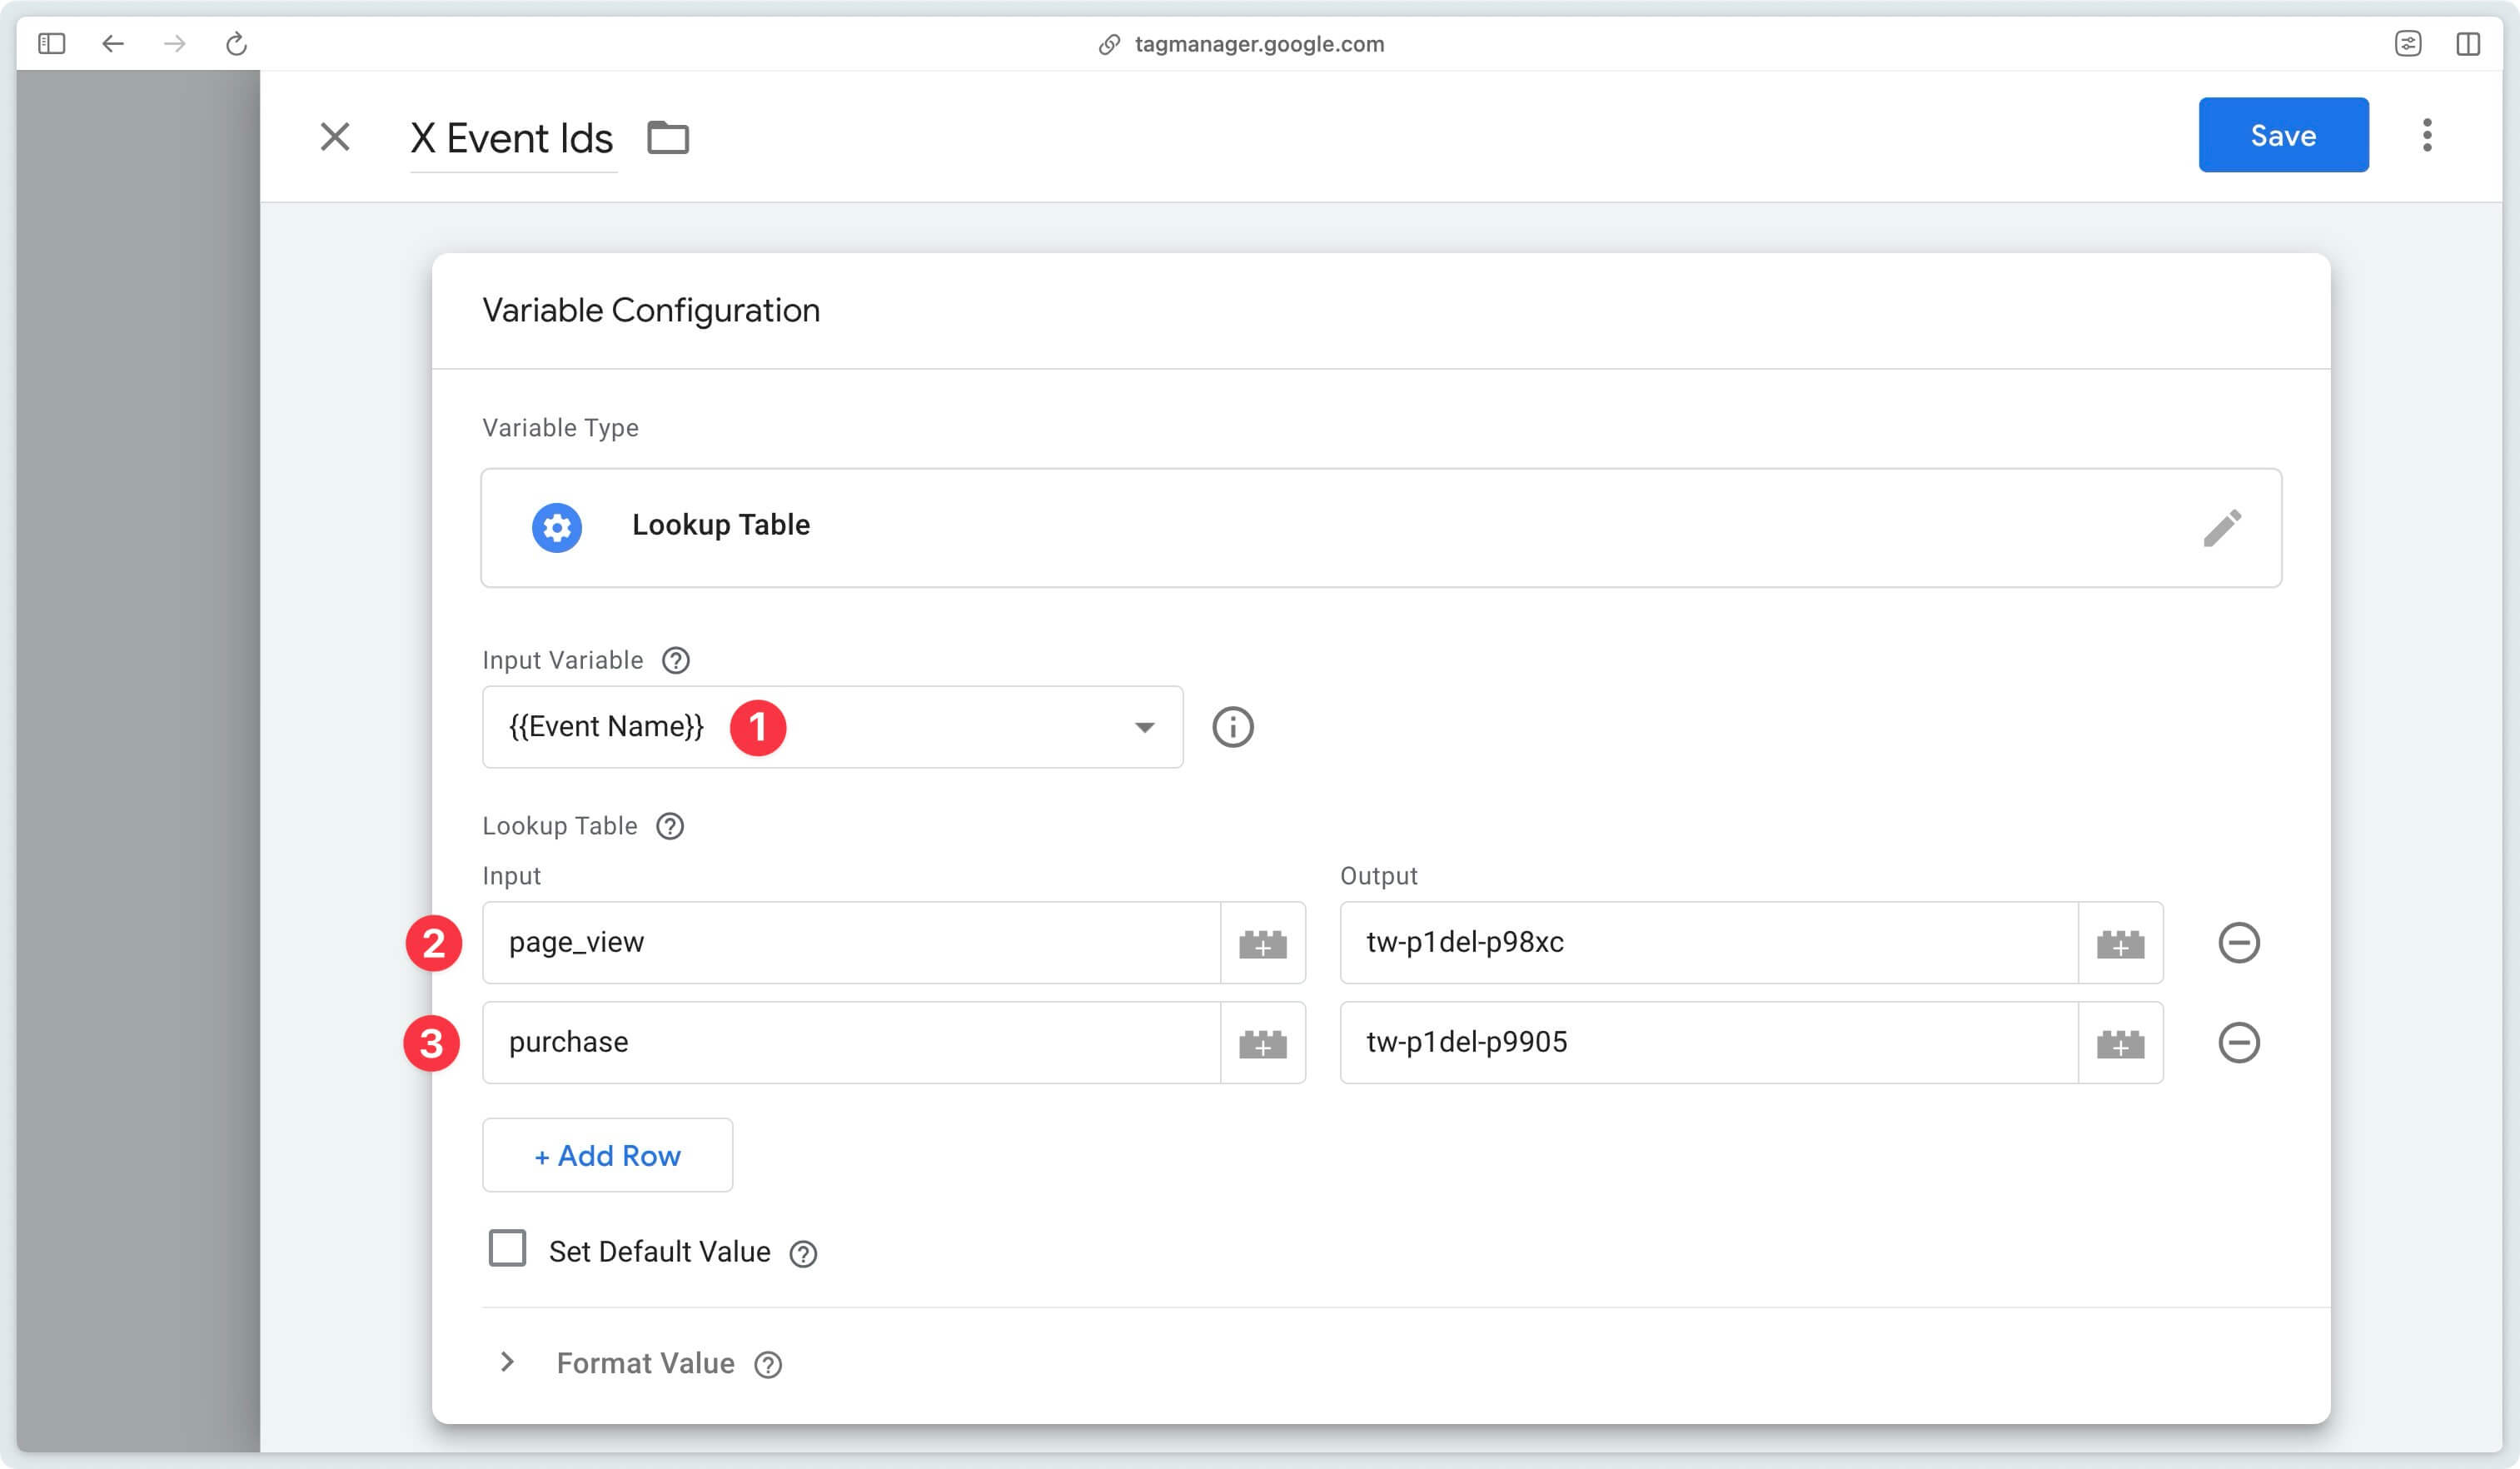
In our example, the Event IDs are as follows:
- Page View:
tw-p1del-p98xc - Purchase :
tw-p1del-p9905
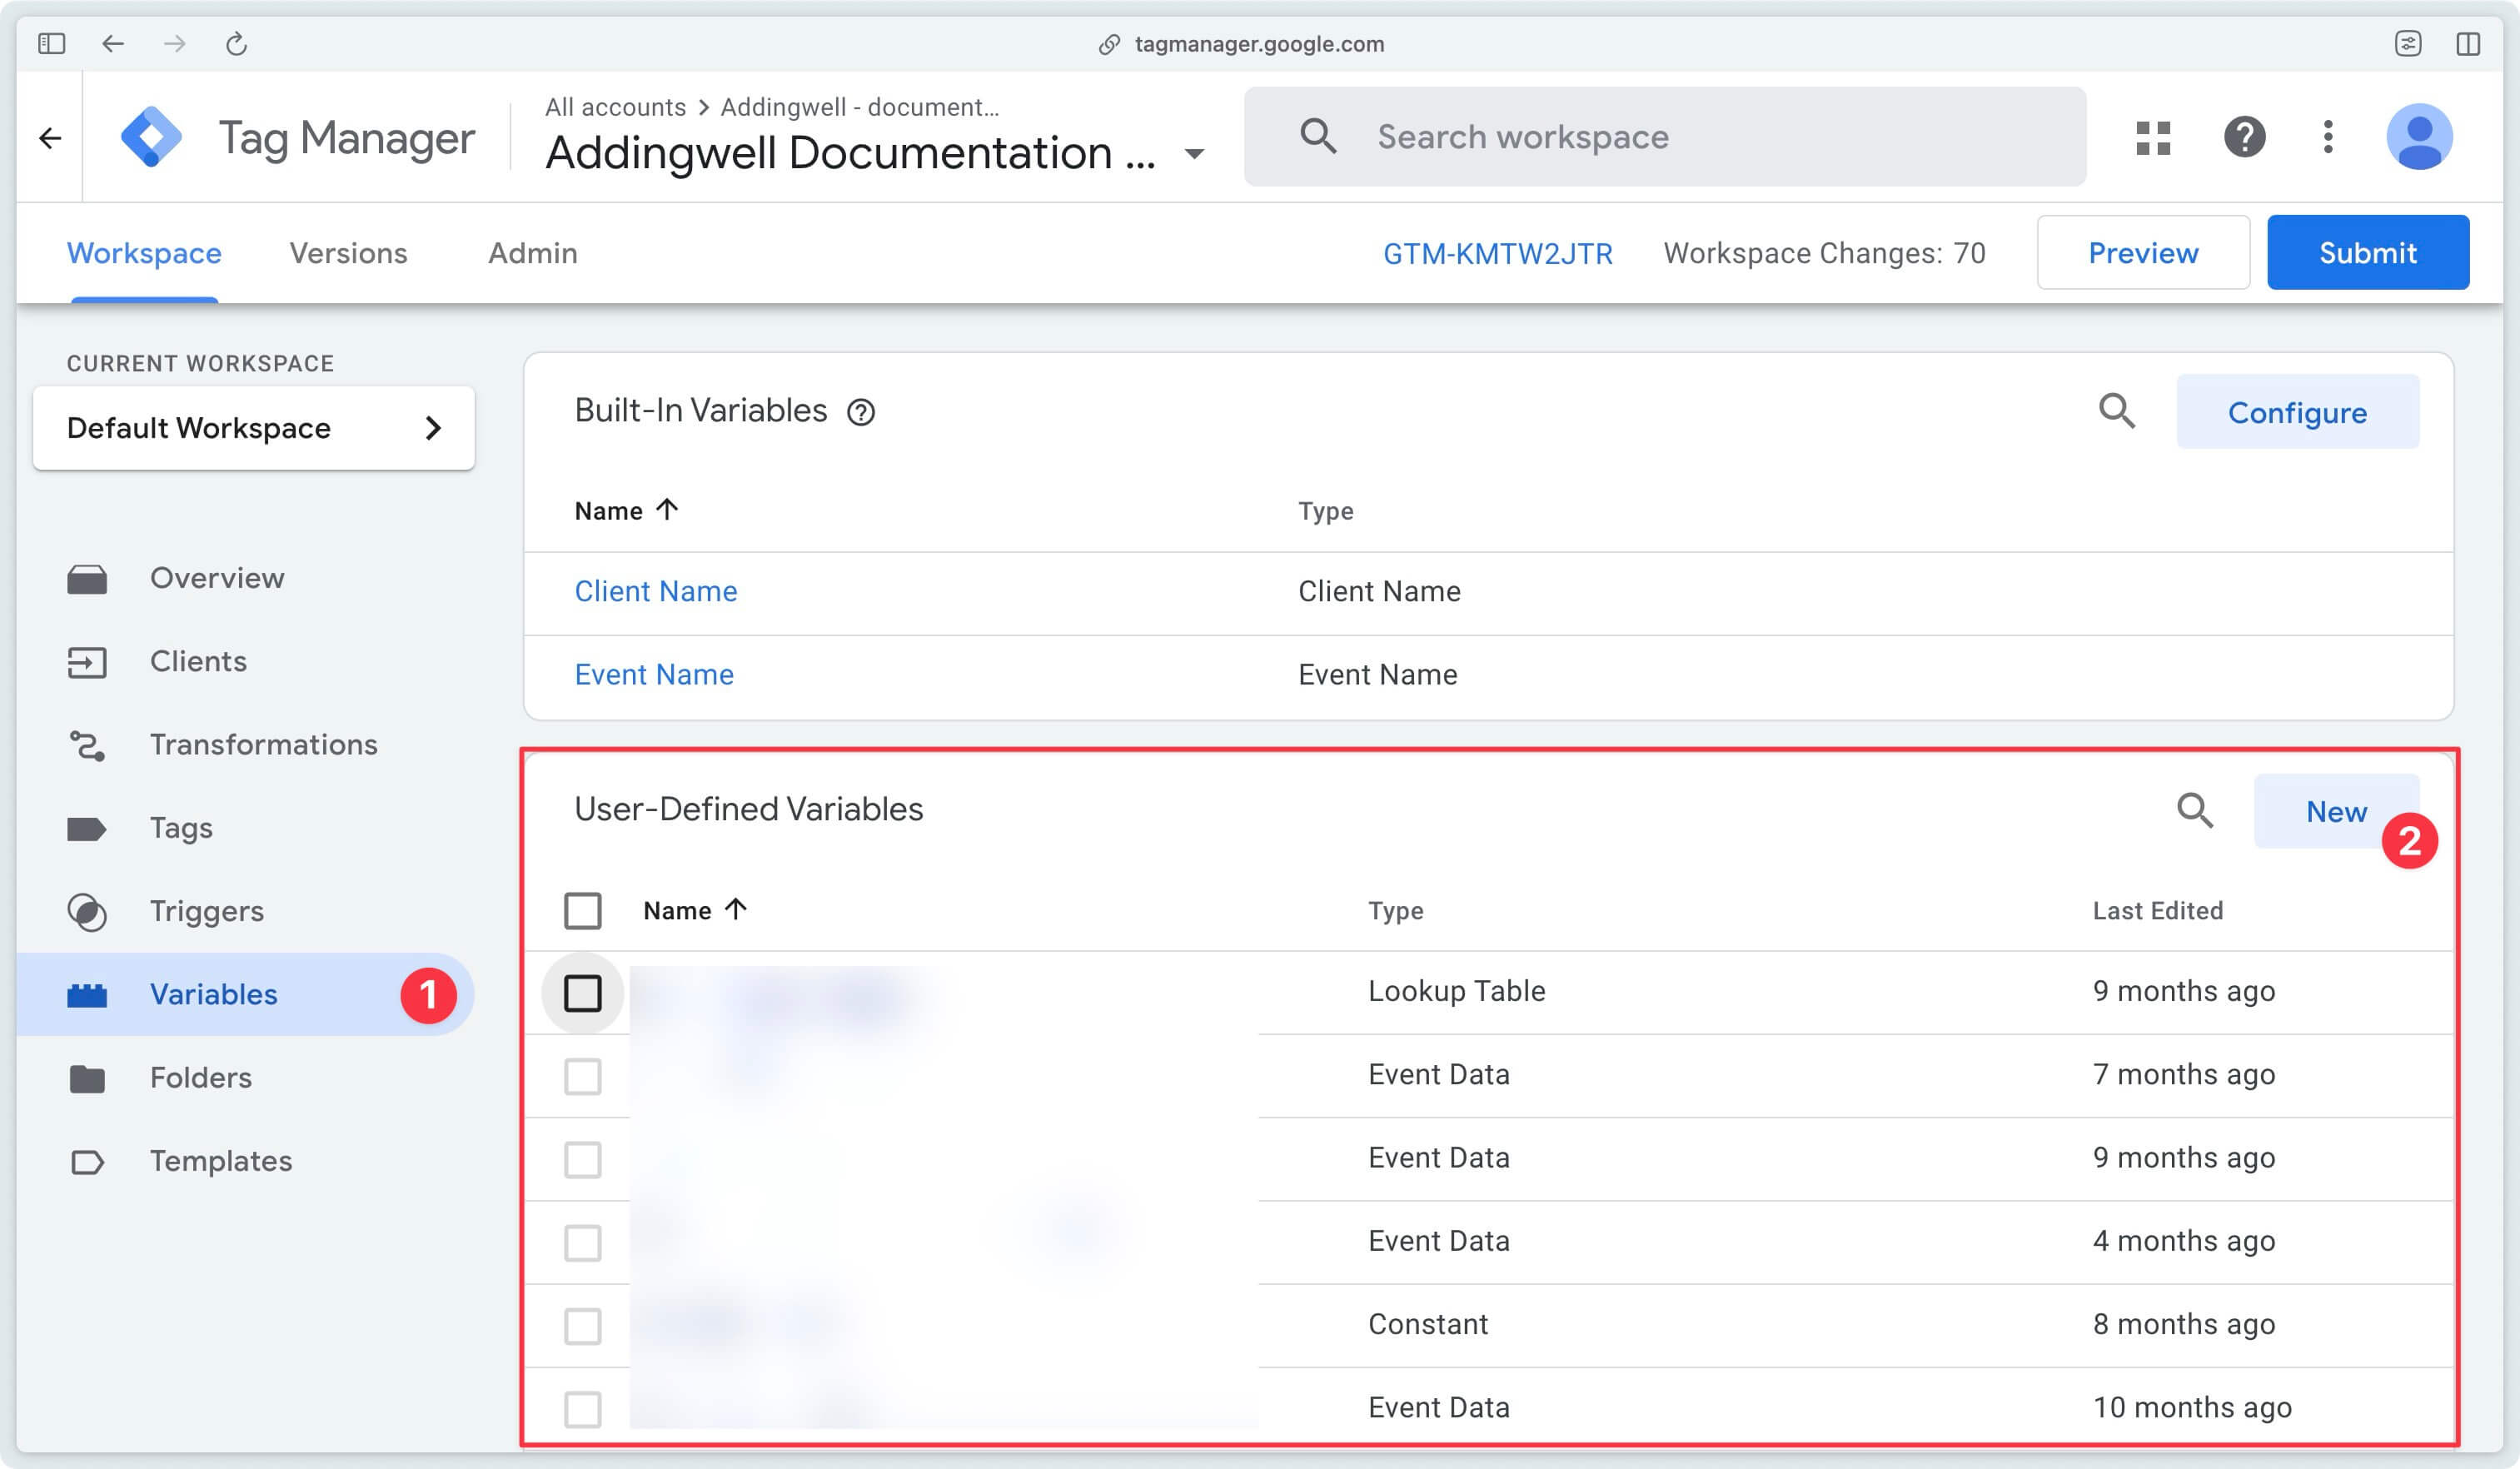
In your GTM server container, go to Variables and click on New. Then select Lookup Table.
3. Send pixel request
Check this box to send requests to the X pixel.
If you check this box, make sure to remove the X pixel from your website.
4. Authentication
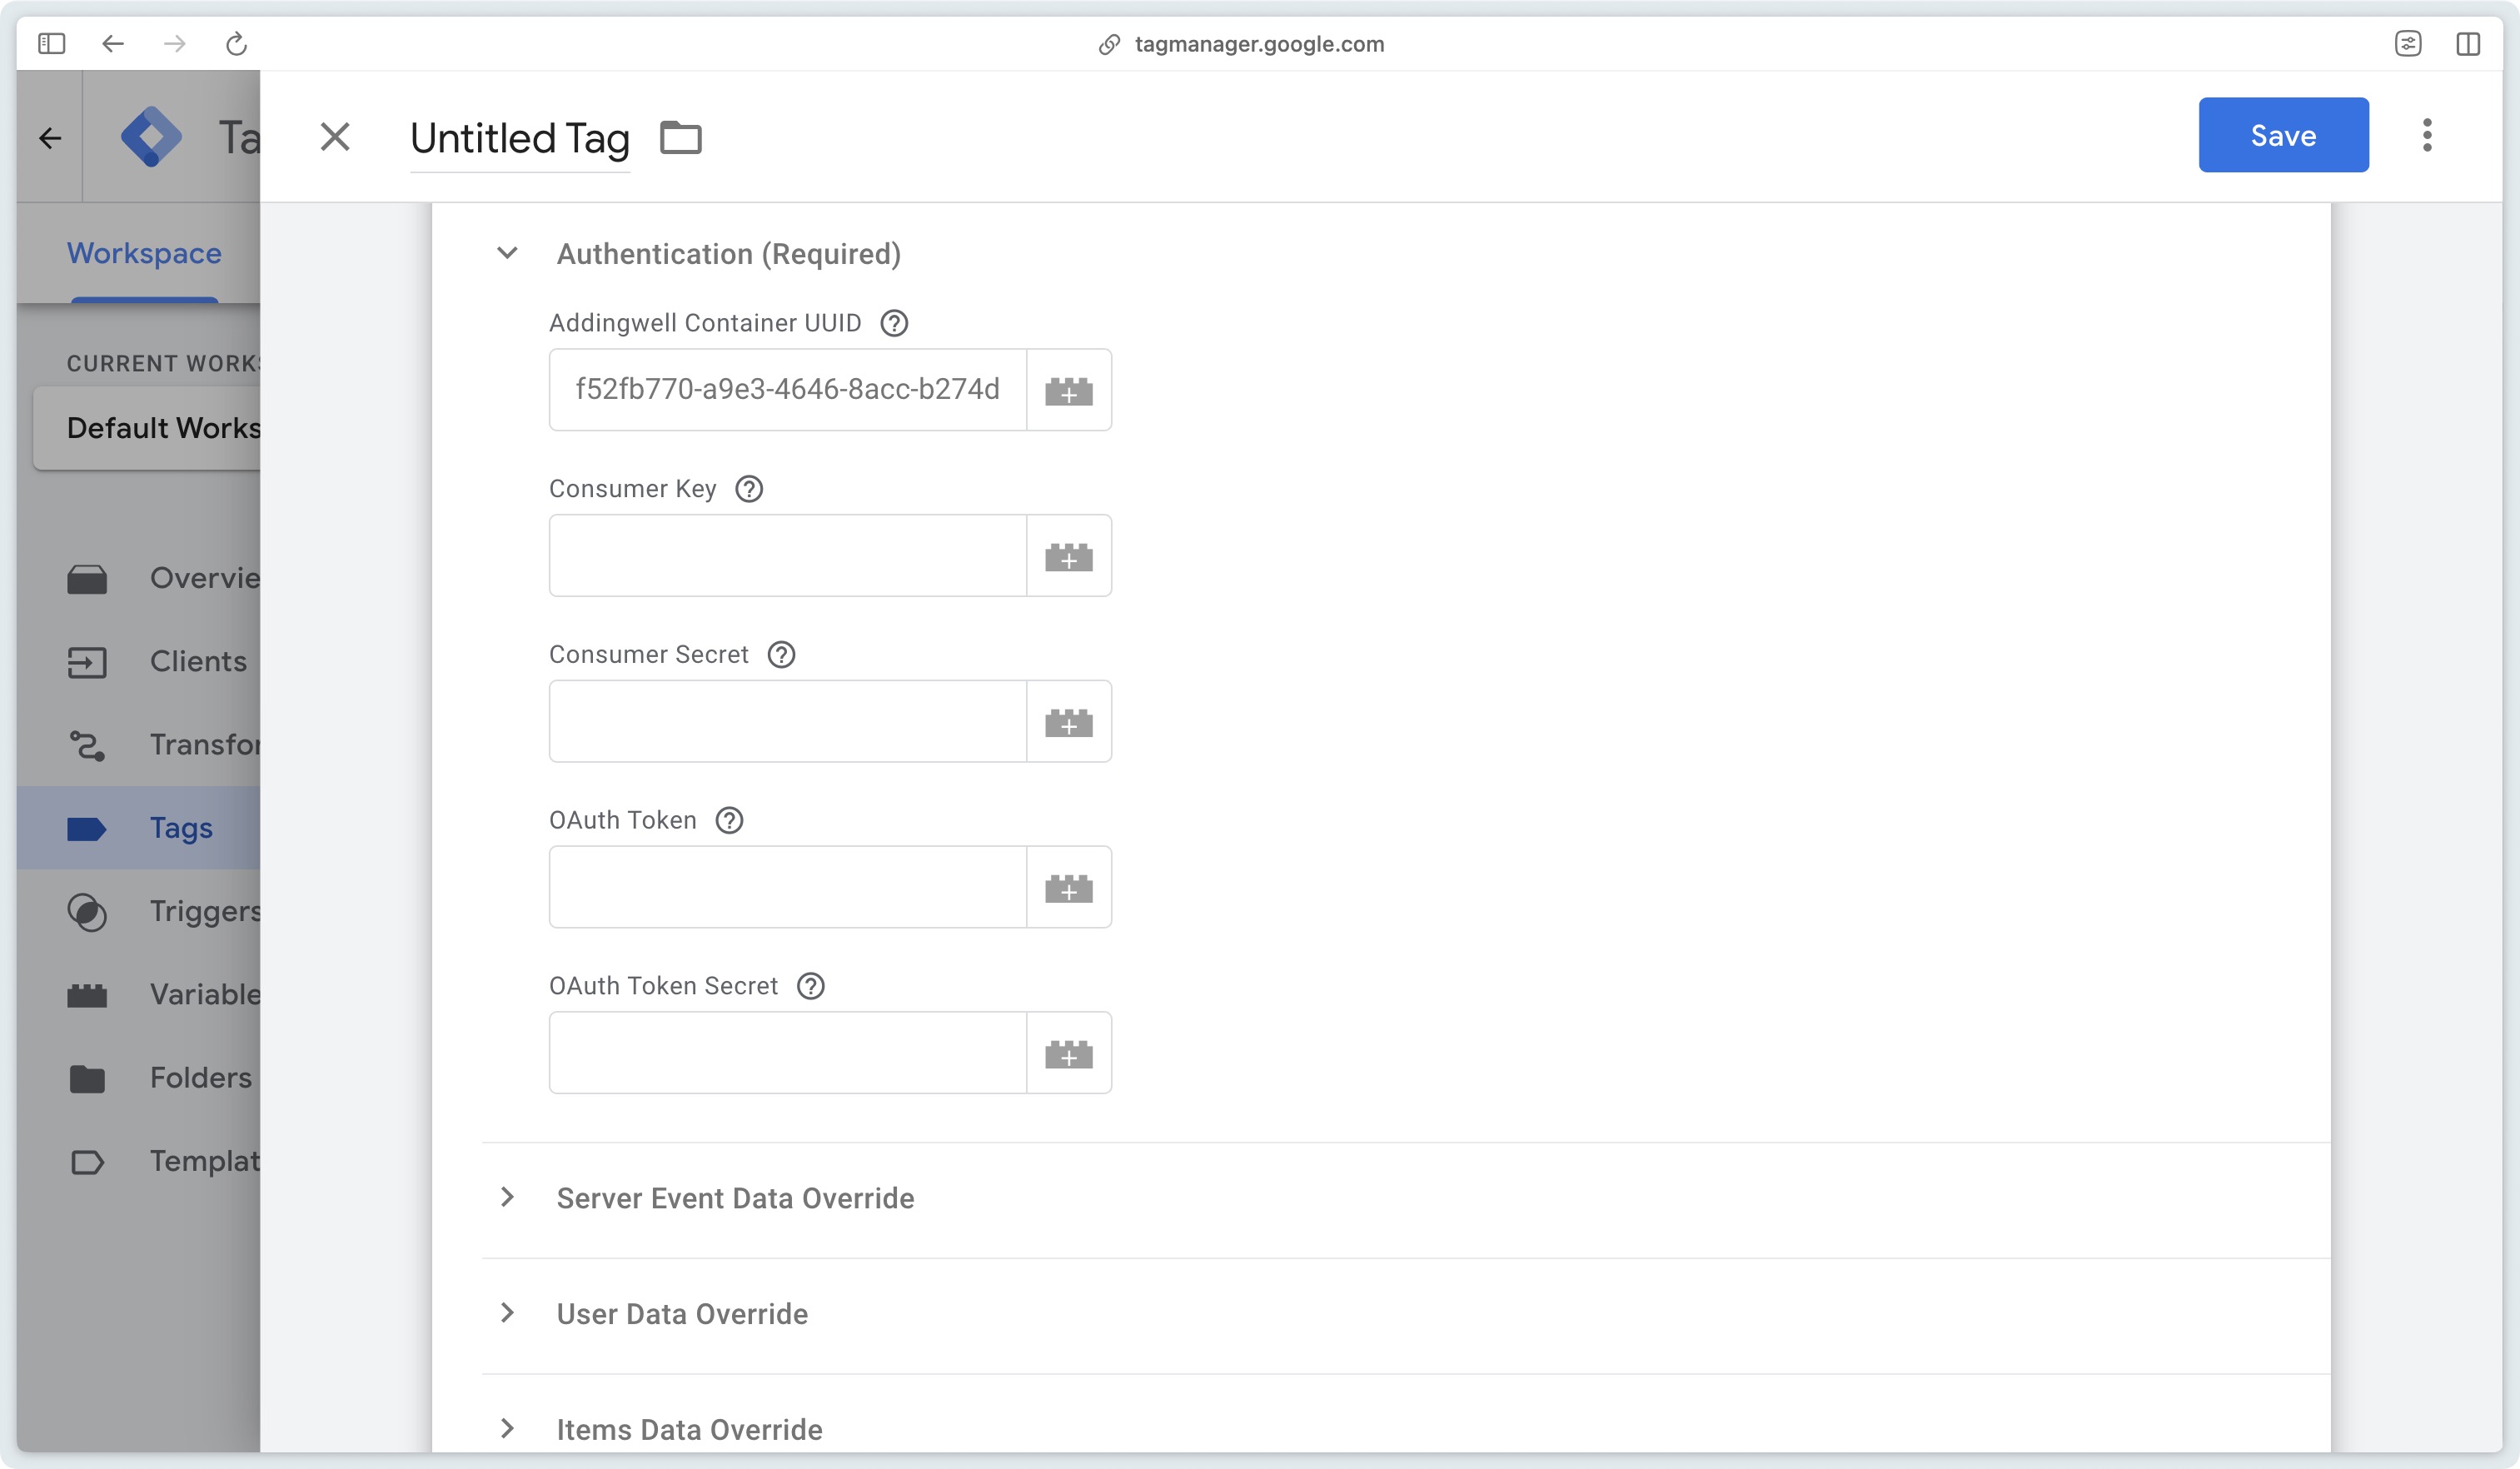
Fill in the fields here with the information retrieved from Addingwell and the X Developer Portal.
Now that we’ve finished configuring the tag, let’s move on to its trigger.
Configure trigger
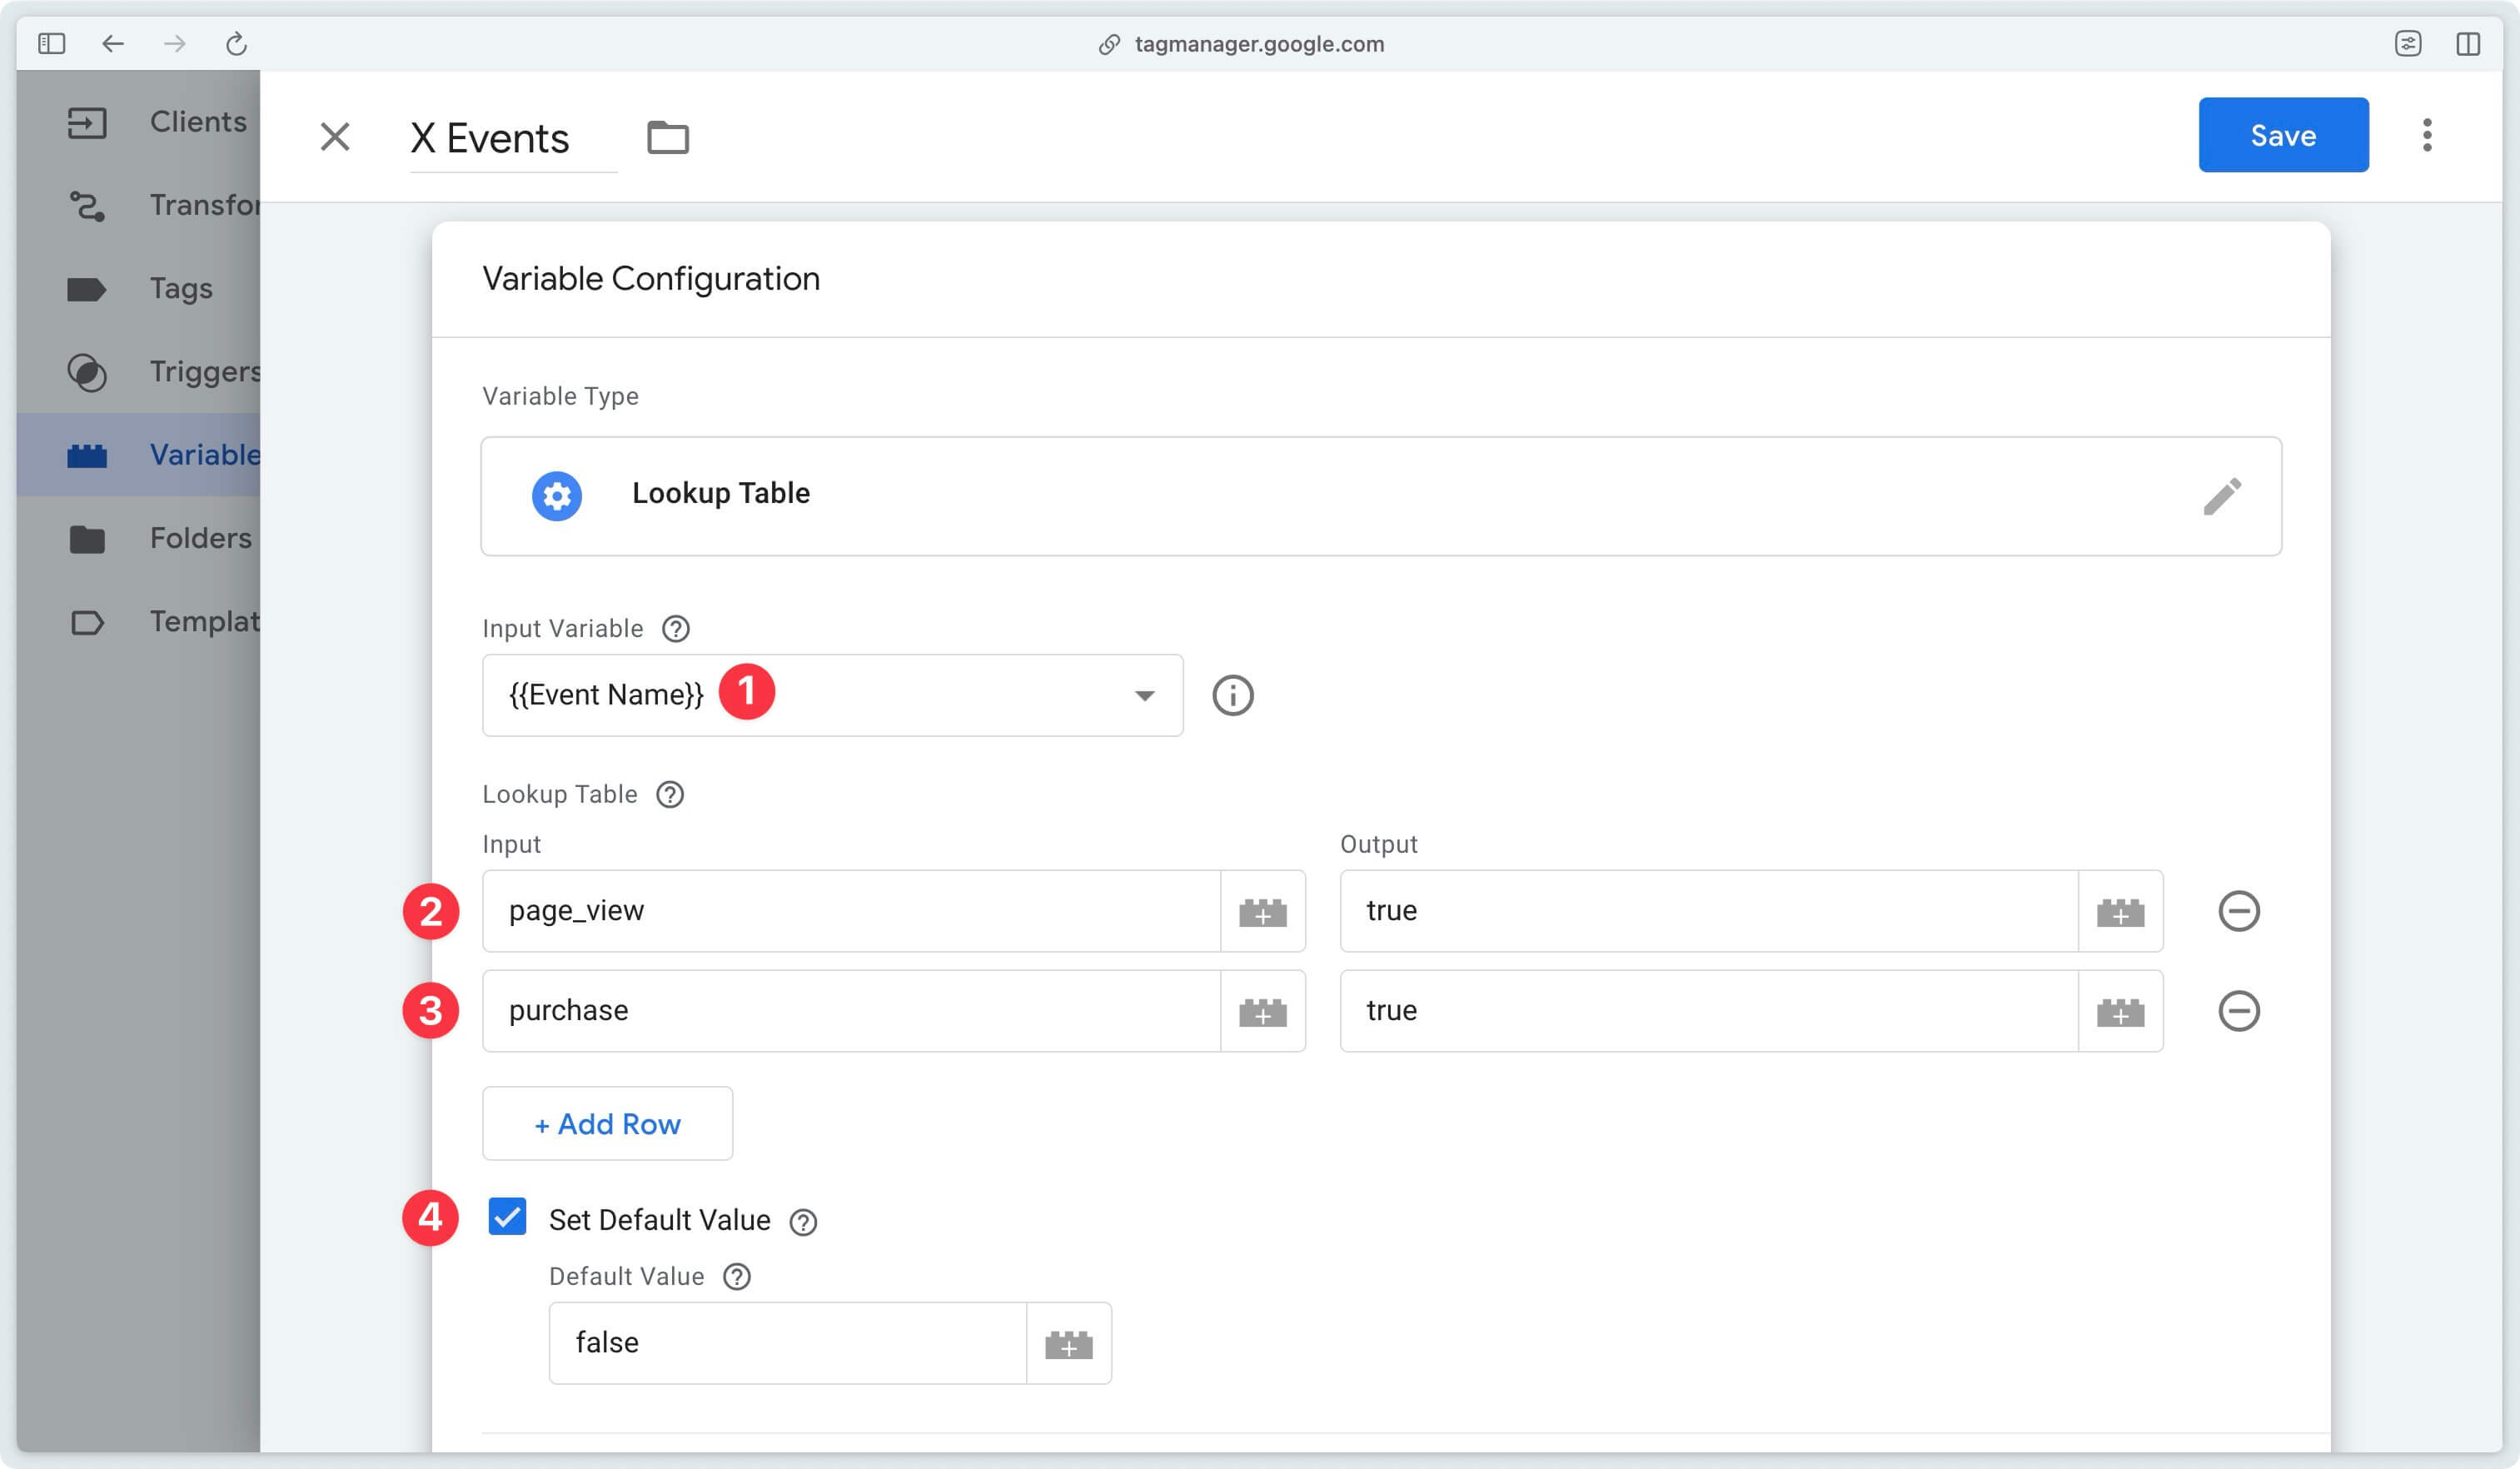
Go to Variables and click on New.
Then select Lookup Table and configure your variable like this, then click Save.
Now you can configure your trigger.
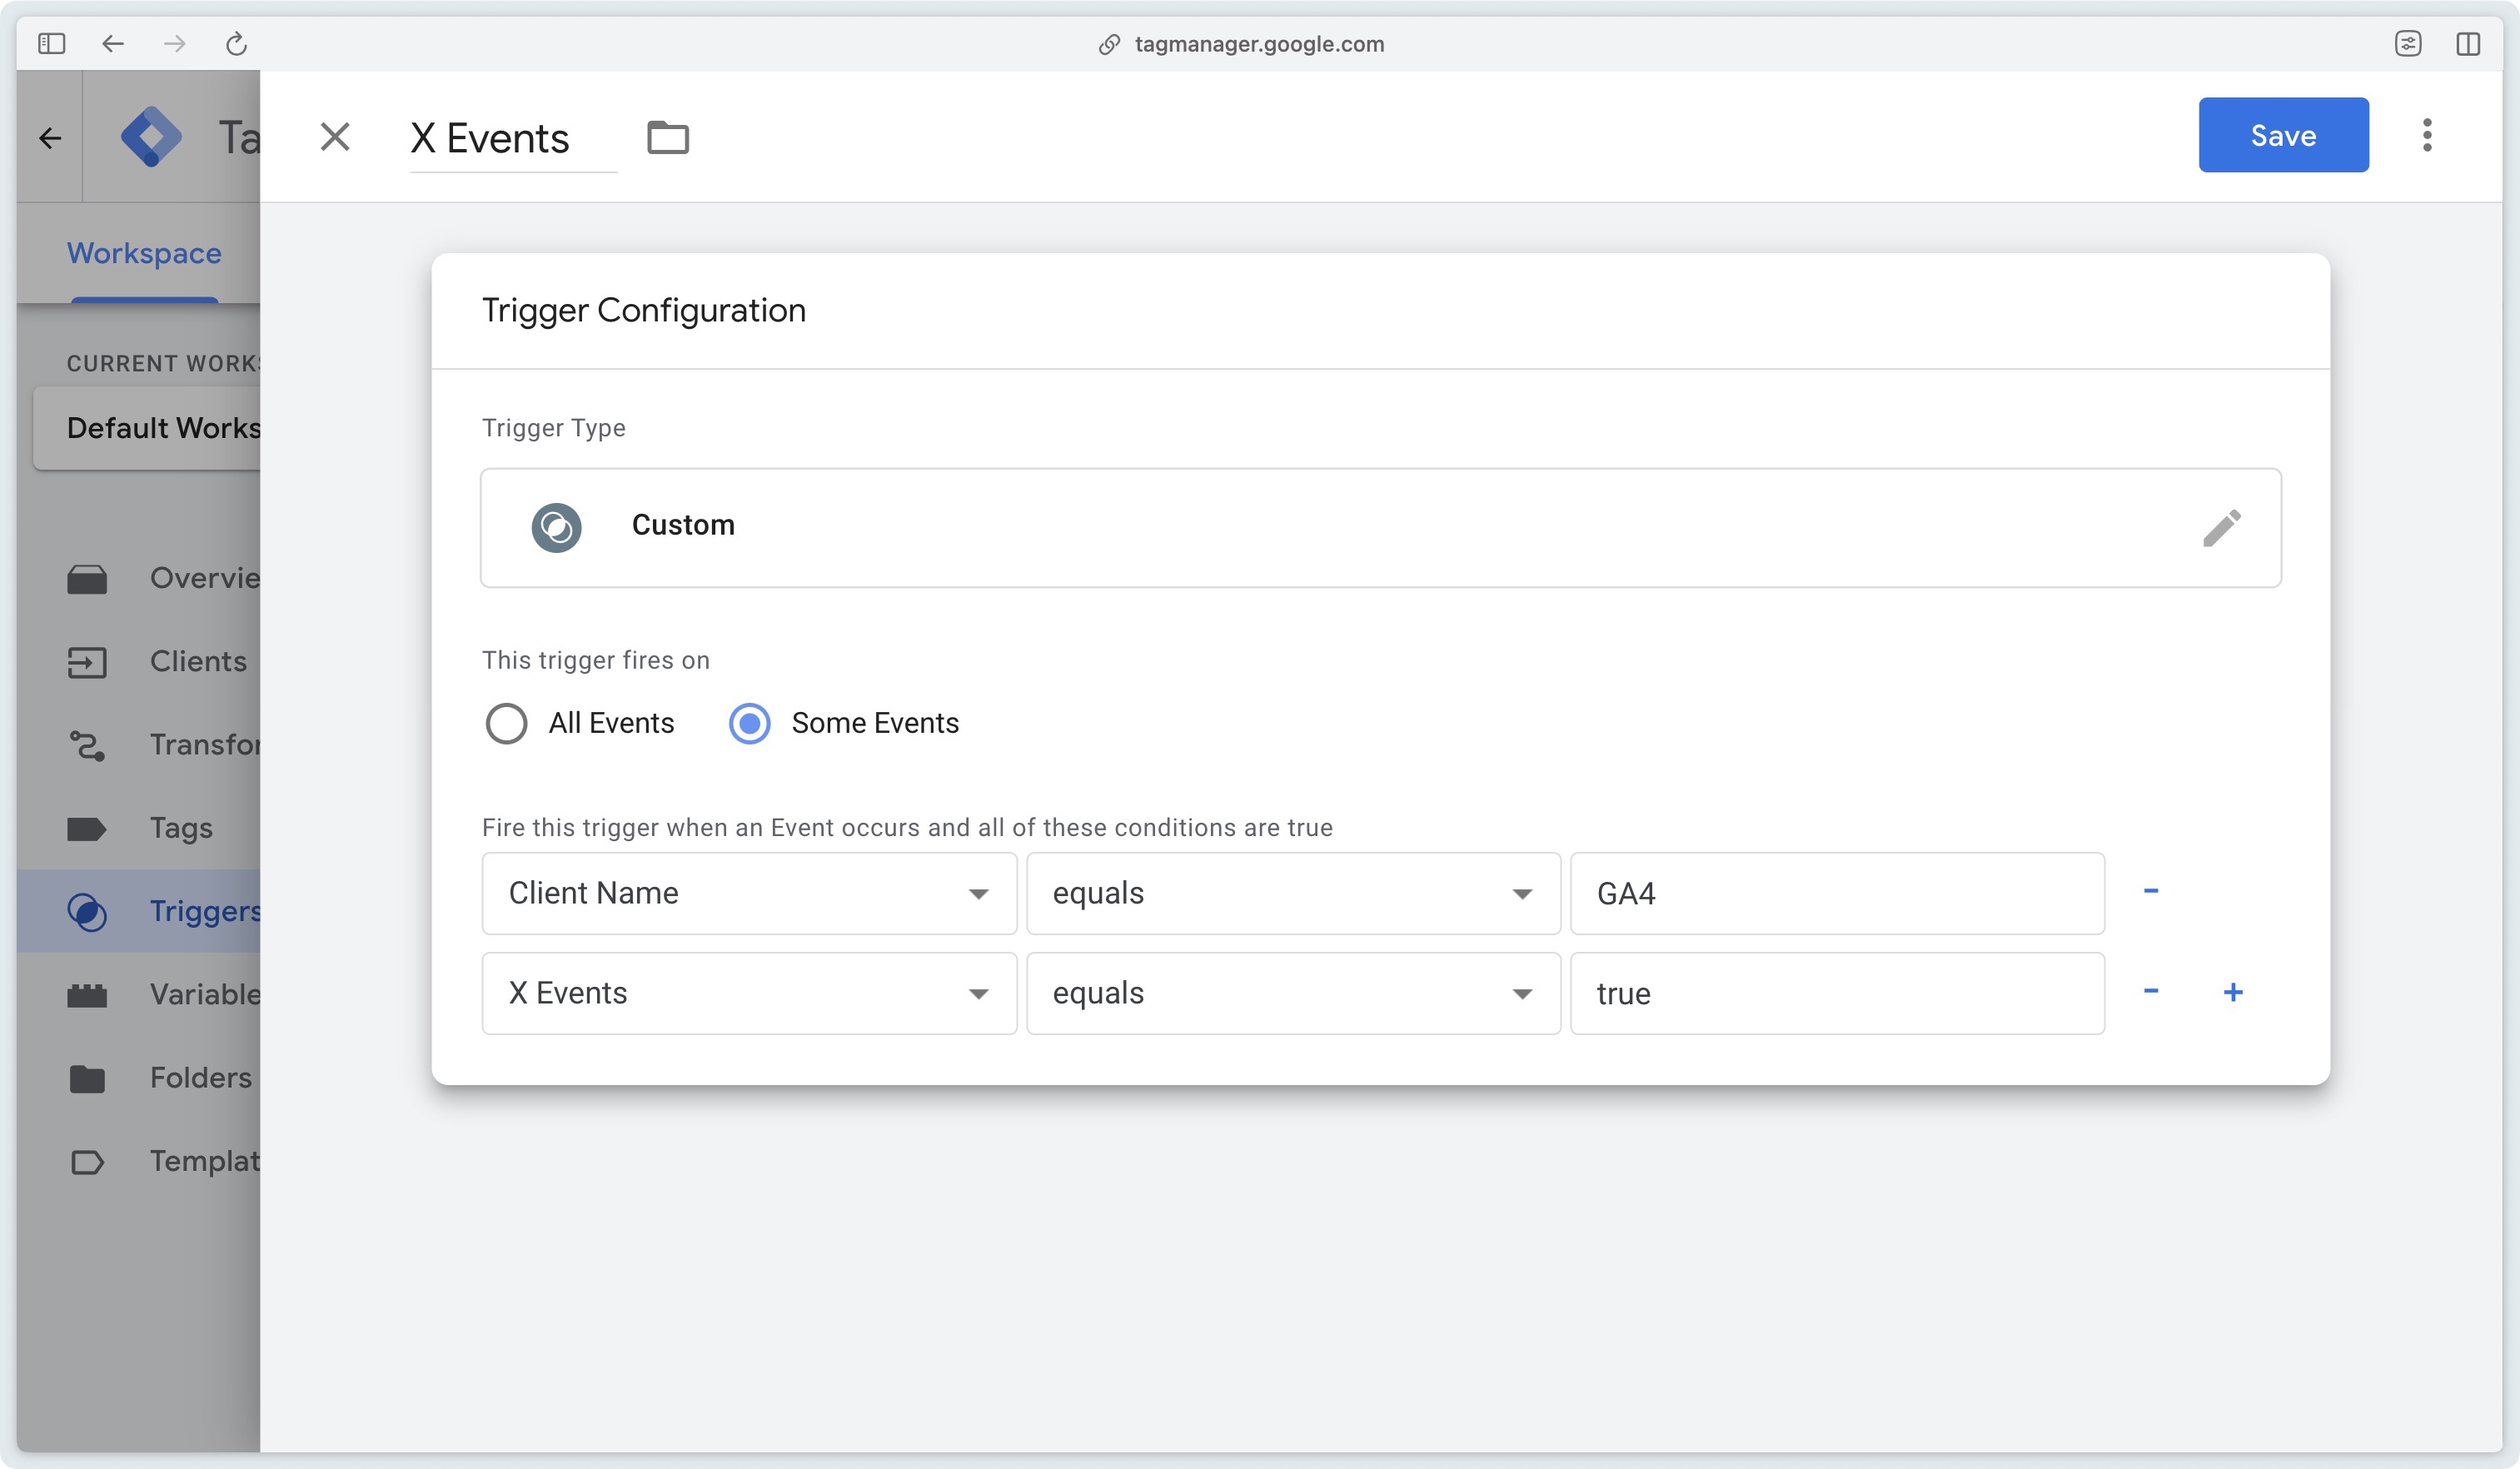
Then add the trigger to your tag, and you’re done!
Depending on the country in which your website operates and the regulations in force regarding data collection (GDPR in Europe, CCPA in California, Law 25 in Quebec, etc.), it is imperative to configure the tag trigger based on user consent. Ensure that the tag is triggered only when the appropriate consent has been obtained, in accordance with applicable legal requirements.
Implementation testing and validation
In the GTM Server-Side preview
Page View
In this test, we can see that the tag sends no requests from the server and two requests from the browser.
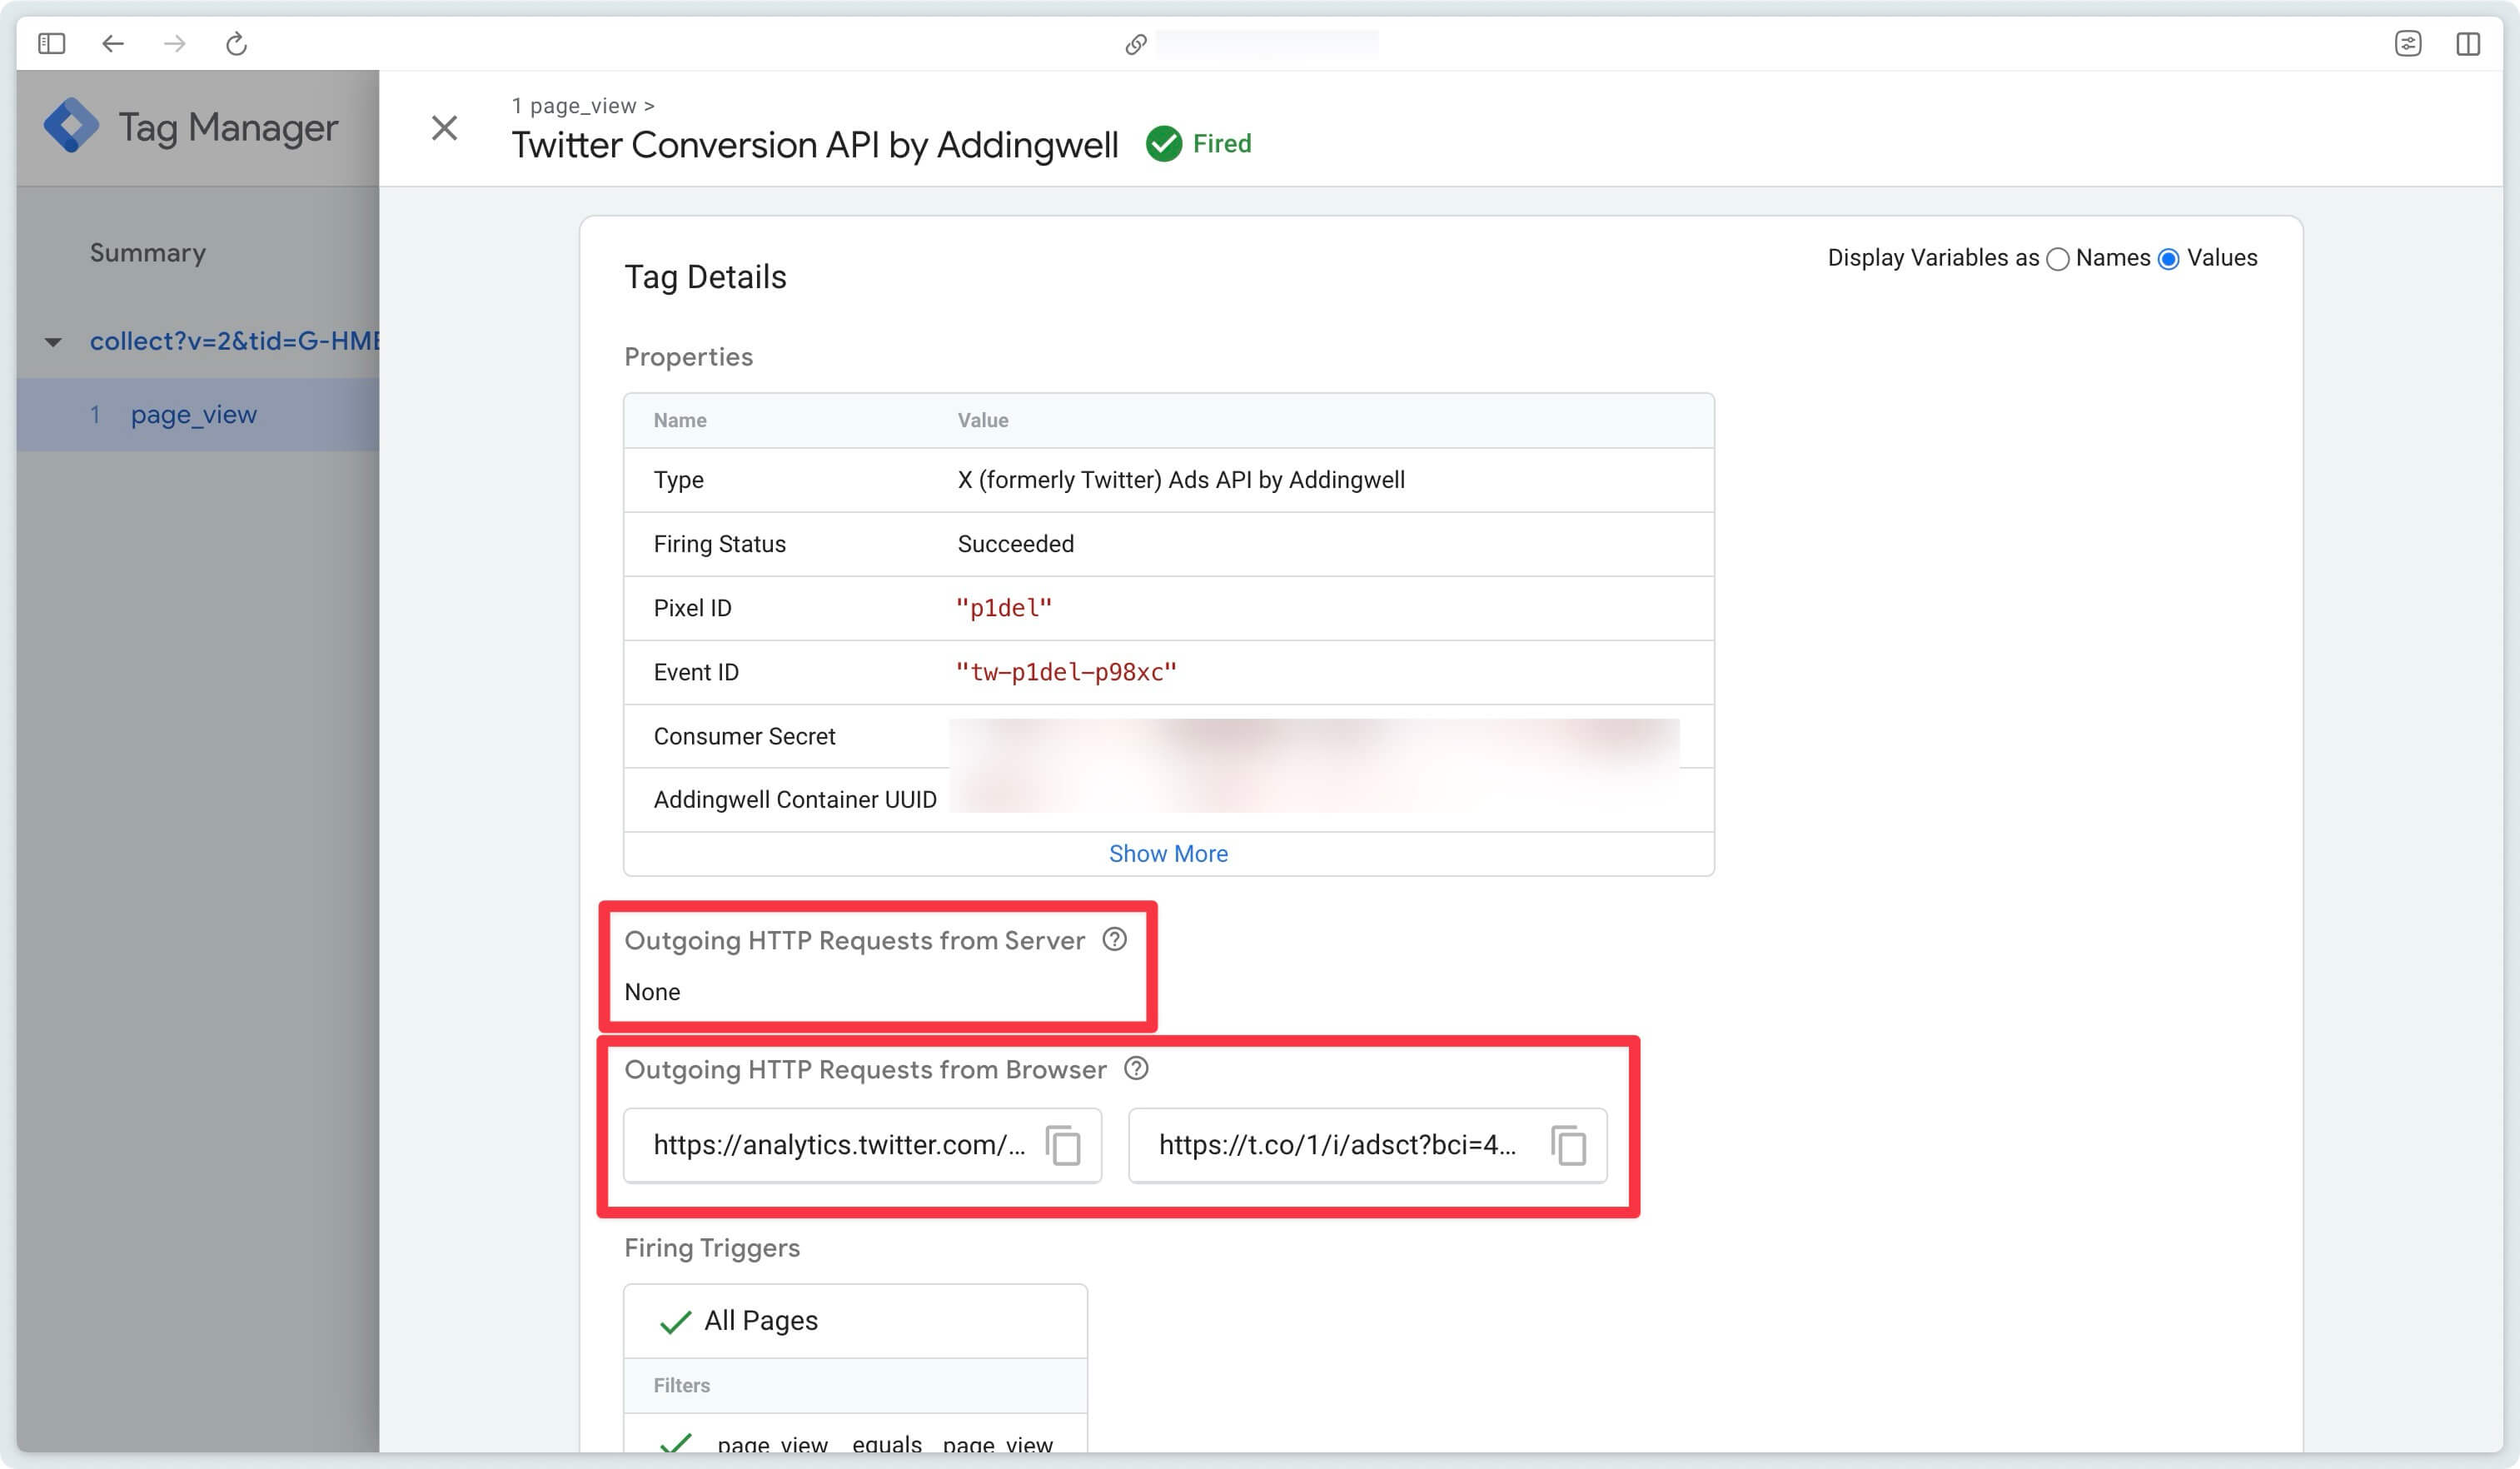
For the tag to send a request also from the server, it is necessary for the visitor to come from Ads X or for his email address to be available in event data at the time the tag is triggered.
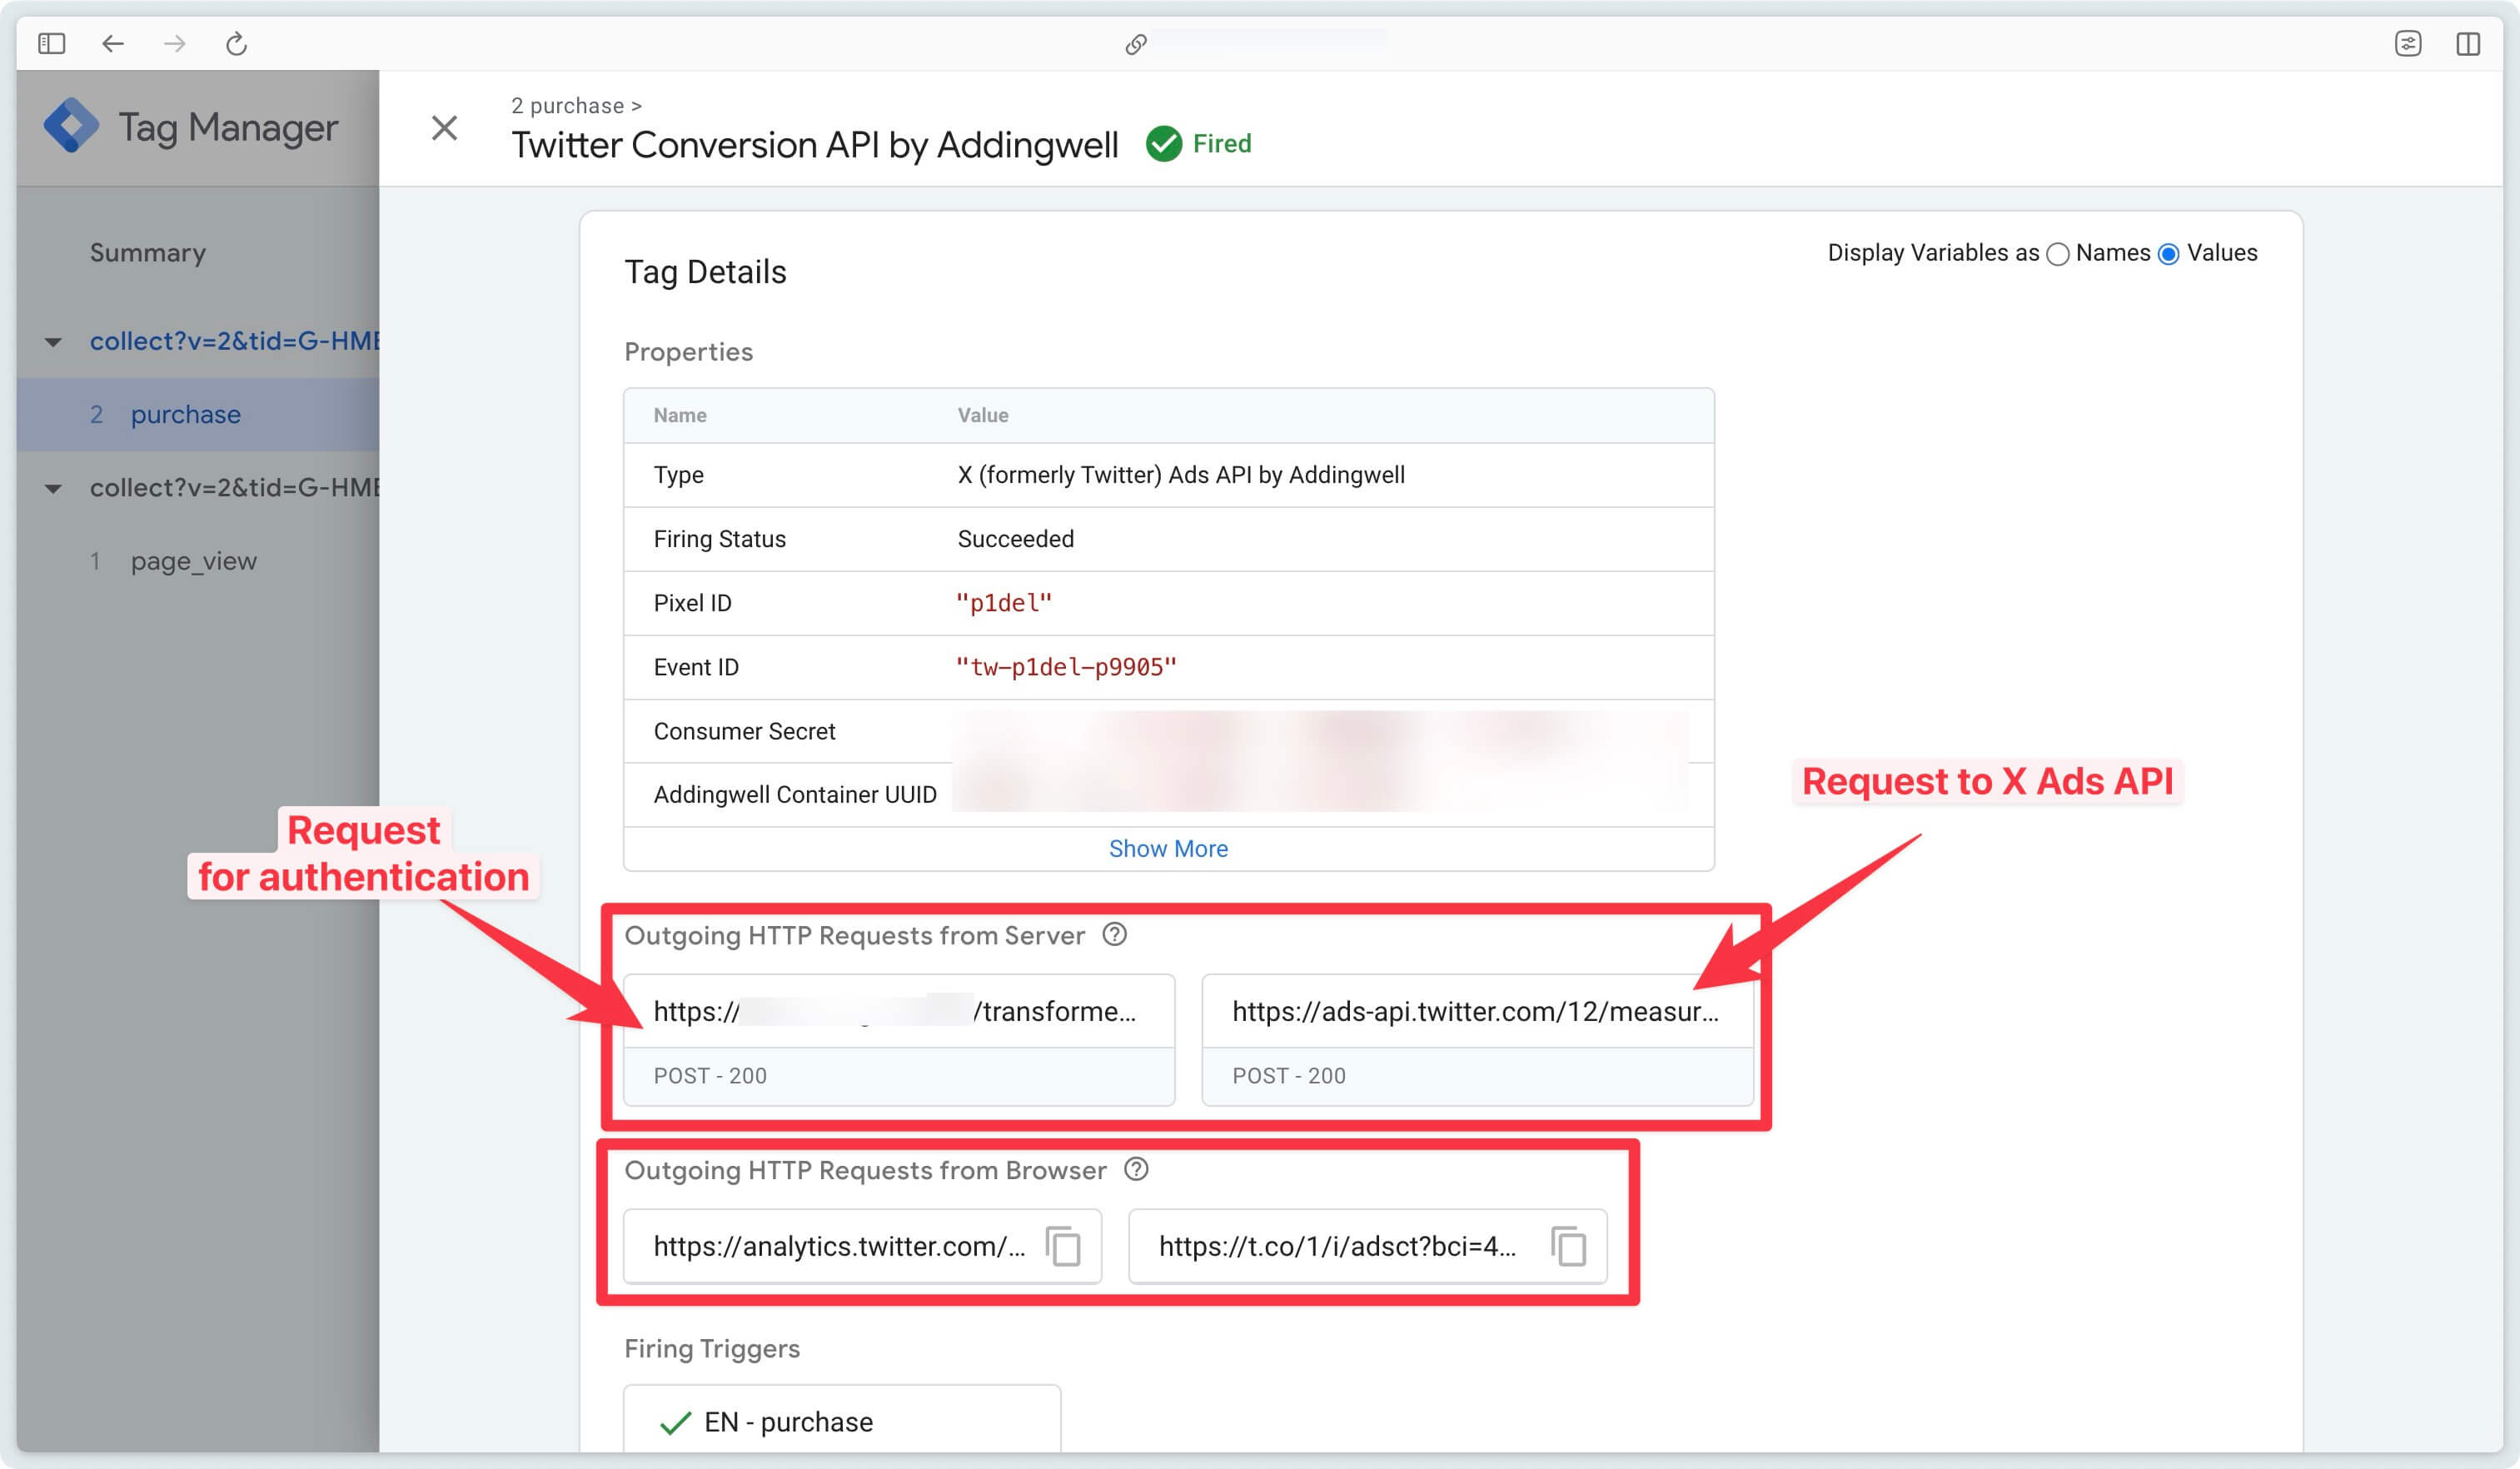
Purchase
In the case of Purchase server requests are sent because even if the click ID is not available (the visitor is not from X), the email is available in the event data.
An authentication request is required in addition to the conversion request sent to the X Ads API.
Monitoring Addingwell
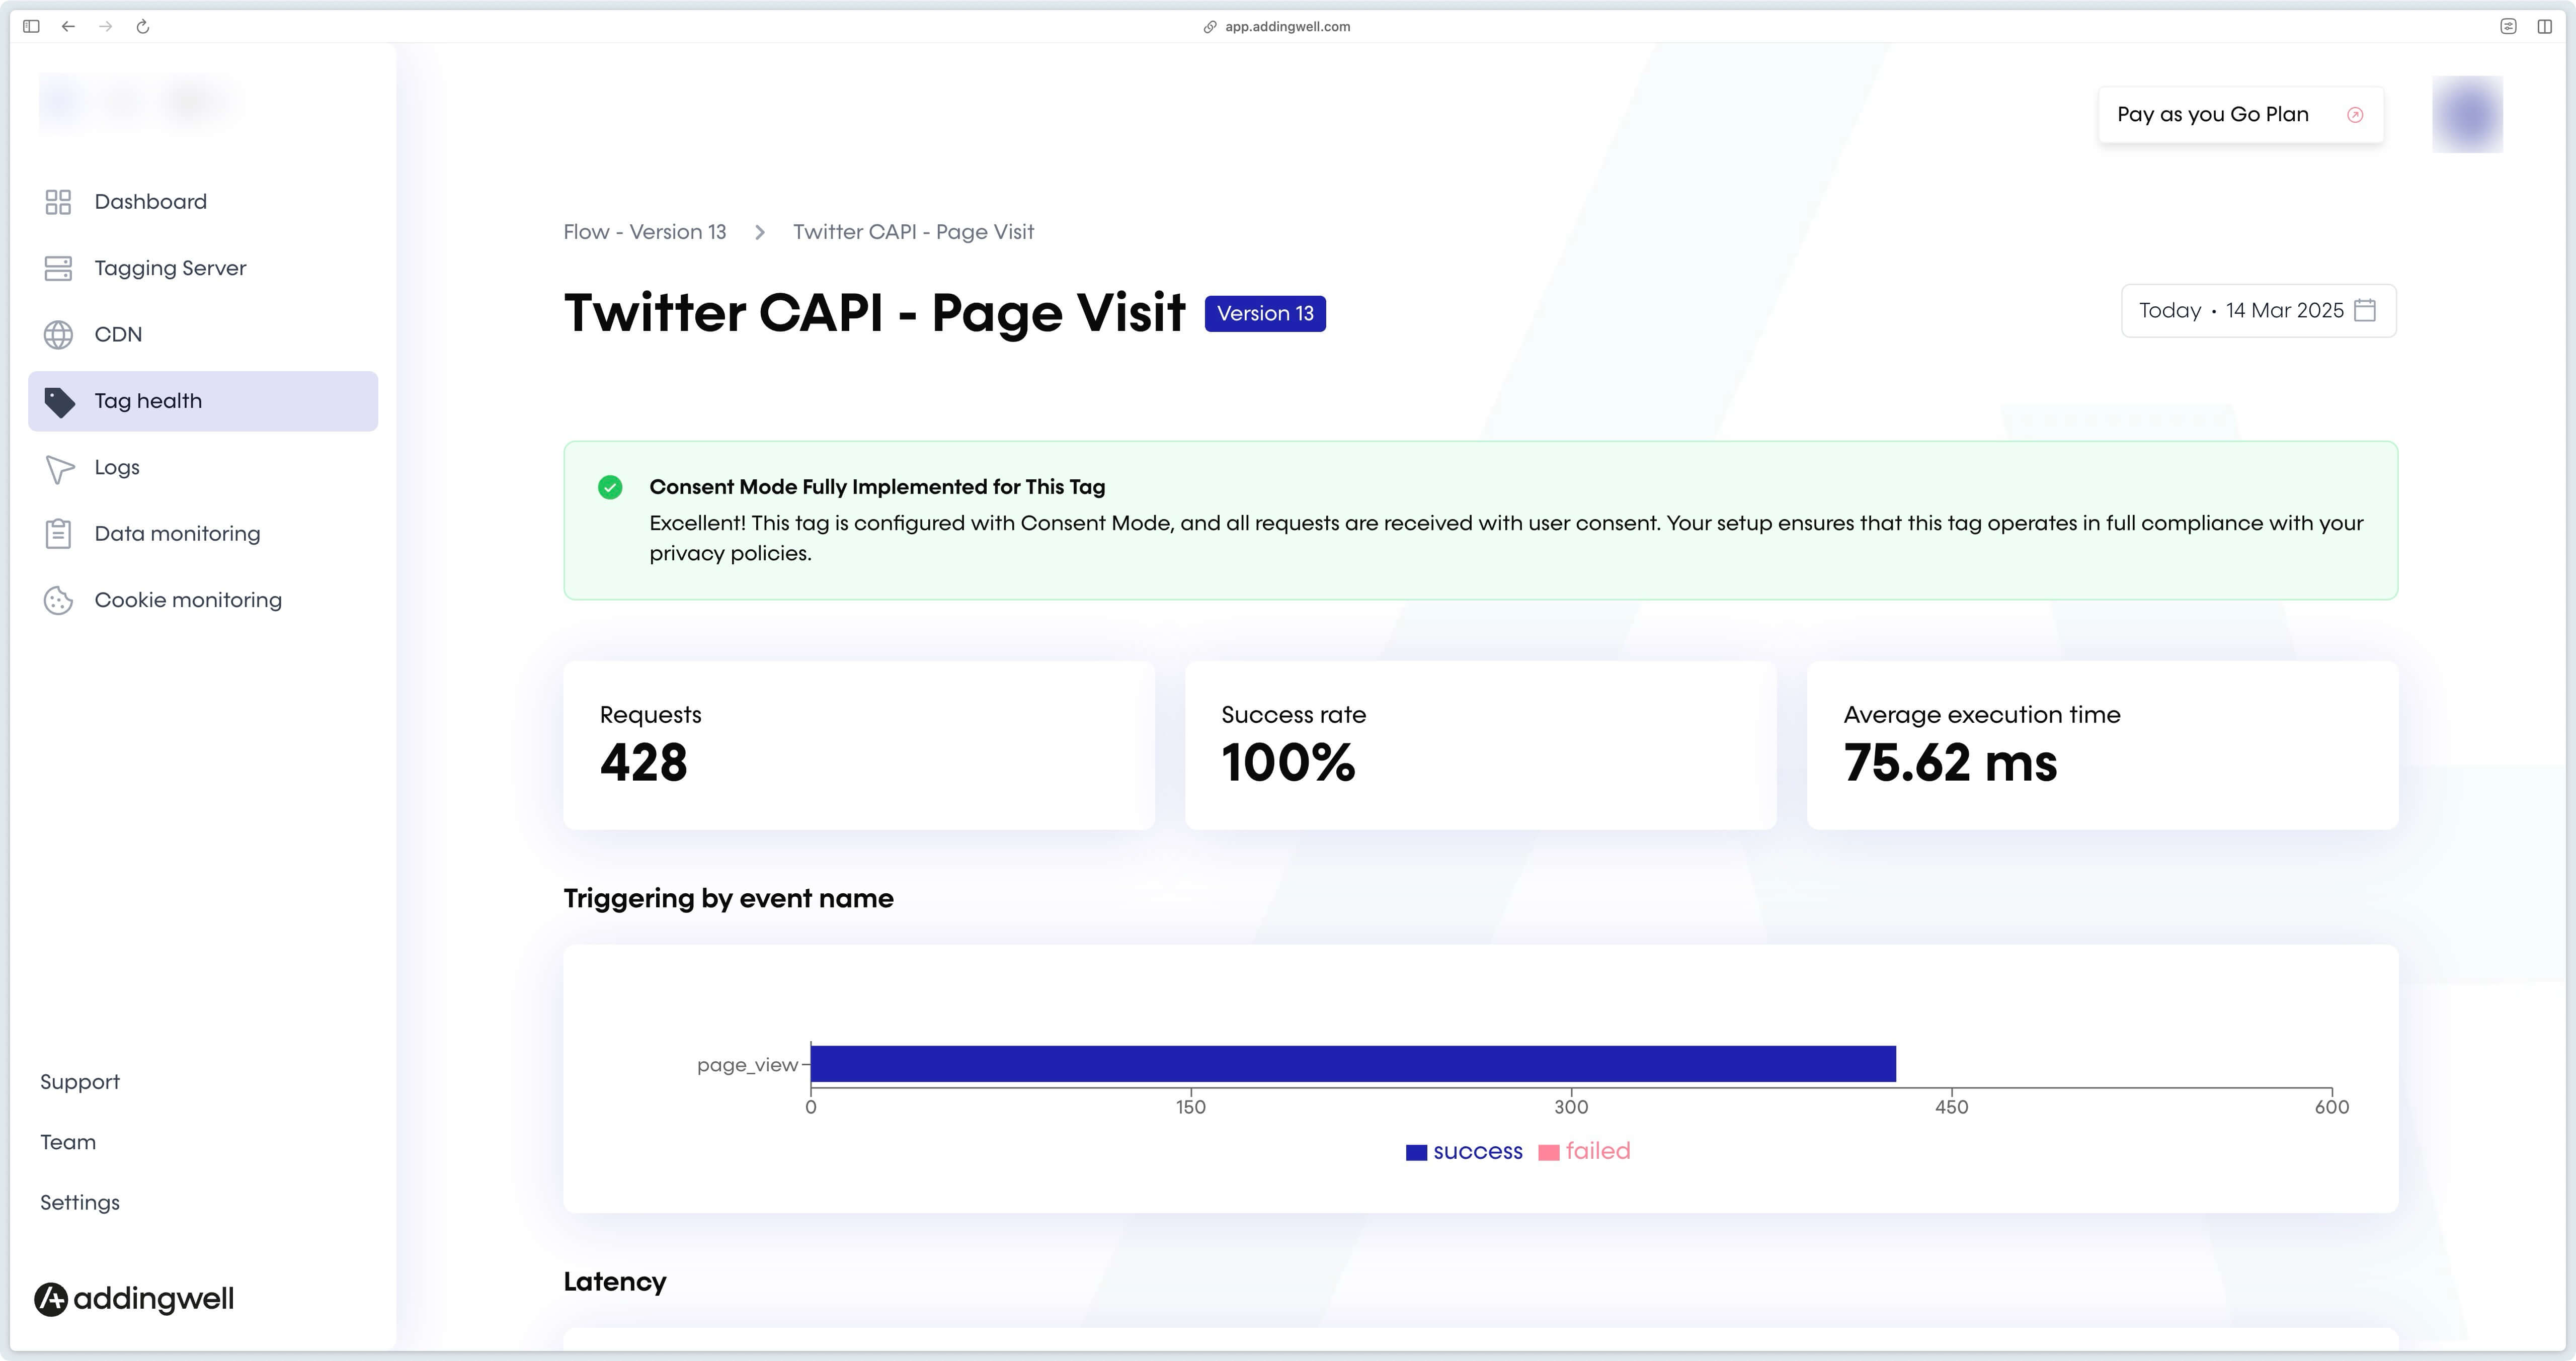
Tag Health
In your Addingwell container monitoring (Tag Health tab), you can view Twitter tags.

By clicking on a Twitter tag, you can see on which events it has been triggered.
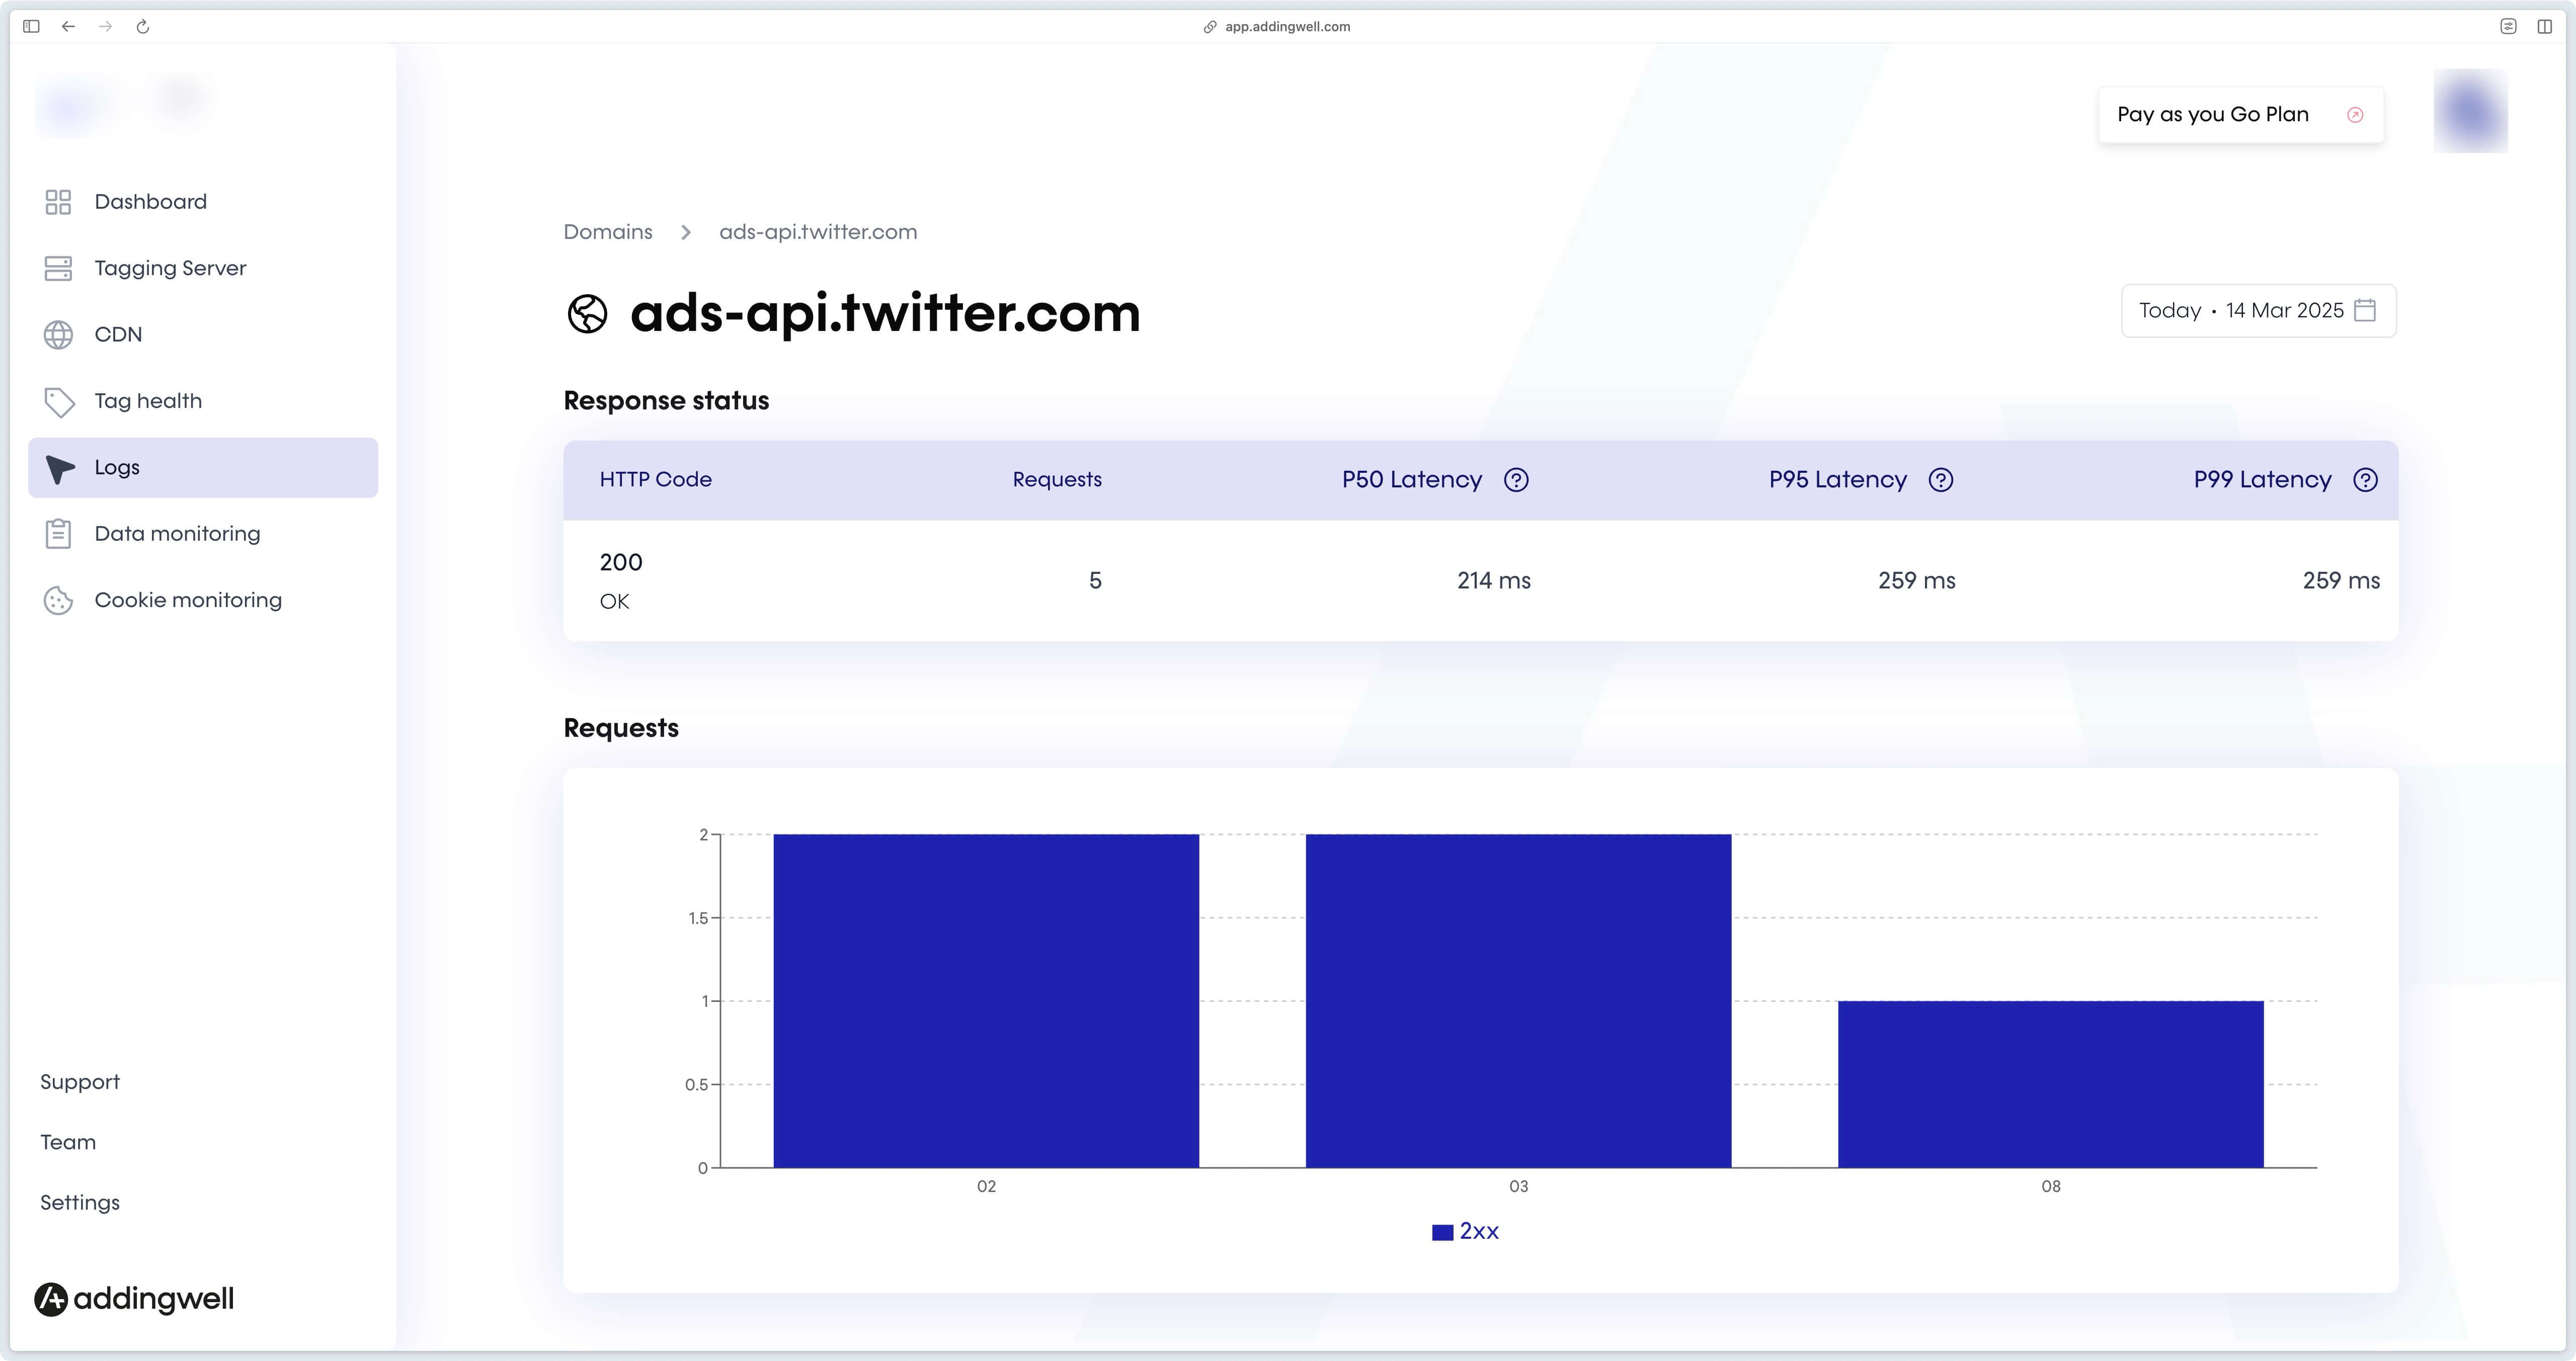
Logs
In the Logs section of your Addingwell container, you can see the success rate of requests sent to Twitter.

By clicking on the Logs link, you can access more information on Twitter requests.
For more details on Addingwell monitoring, see our documentation on the subject.
Congratulations, you’ve finished configuring the X (formerly Twitter) Ads API tag and now you have the keys to check that everything’s working properly. If you have any problems with the configuration, please contact support.