Google Ads Remarketing with GTM Server-Side
What is Google Ads remarketing?
Remarketing is an essential strategy for retargeting visitors who have already visited your website. For example, it enables you to display personalized ads to someone who has viewed a product, performed a search or even added an item to cart without finalizing the purchase, etc.
For this strategy to work effectively, it’s essential to collect user behavior signals and pass them on to Google Ads. This is where the re-marketing tag via Google Tag Manager Server-Side (sGTM) comes in.
In this documentation, we’ll take you step-by-step through setting up Google Ads server-side remarketing, from the basic tag to the dynamic remarketing recommended for e-commerce sites.
Setting up the Google Ads remarketing server-side configuration
This section shows you how to create and configure the various tags required. You’ll start by installing the Conversion Linker tag, then configure the Google Ads Remarketing tag, and you’ll also see how to perform classic or dynamic remarketing.
Configure Conversion Linker tag
Before starting the technical configuration, keep this in mind:
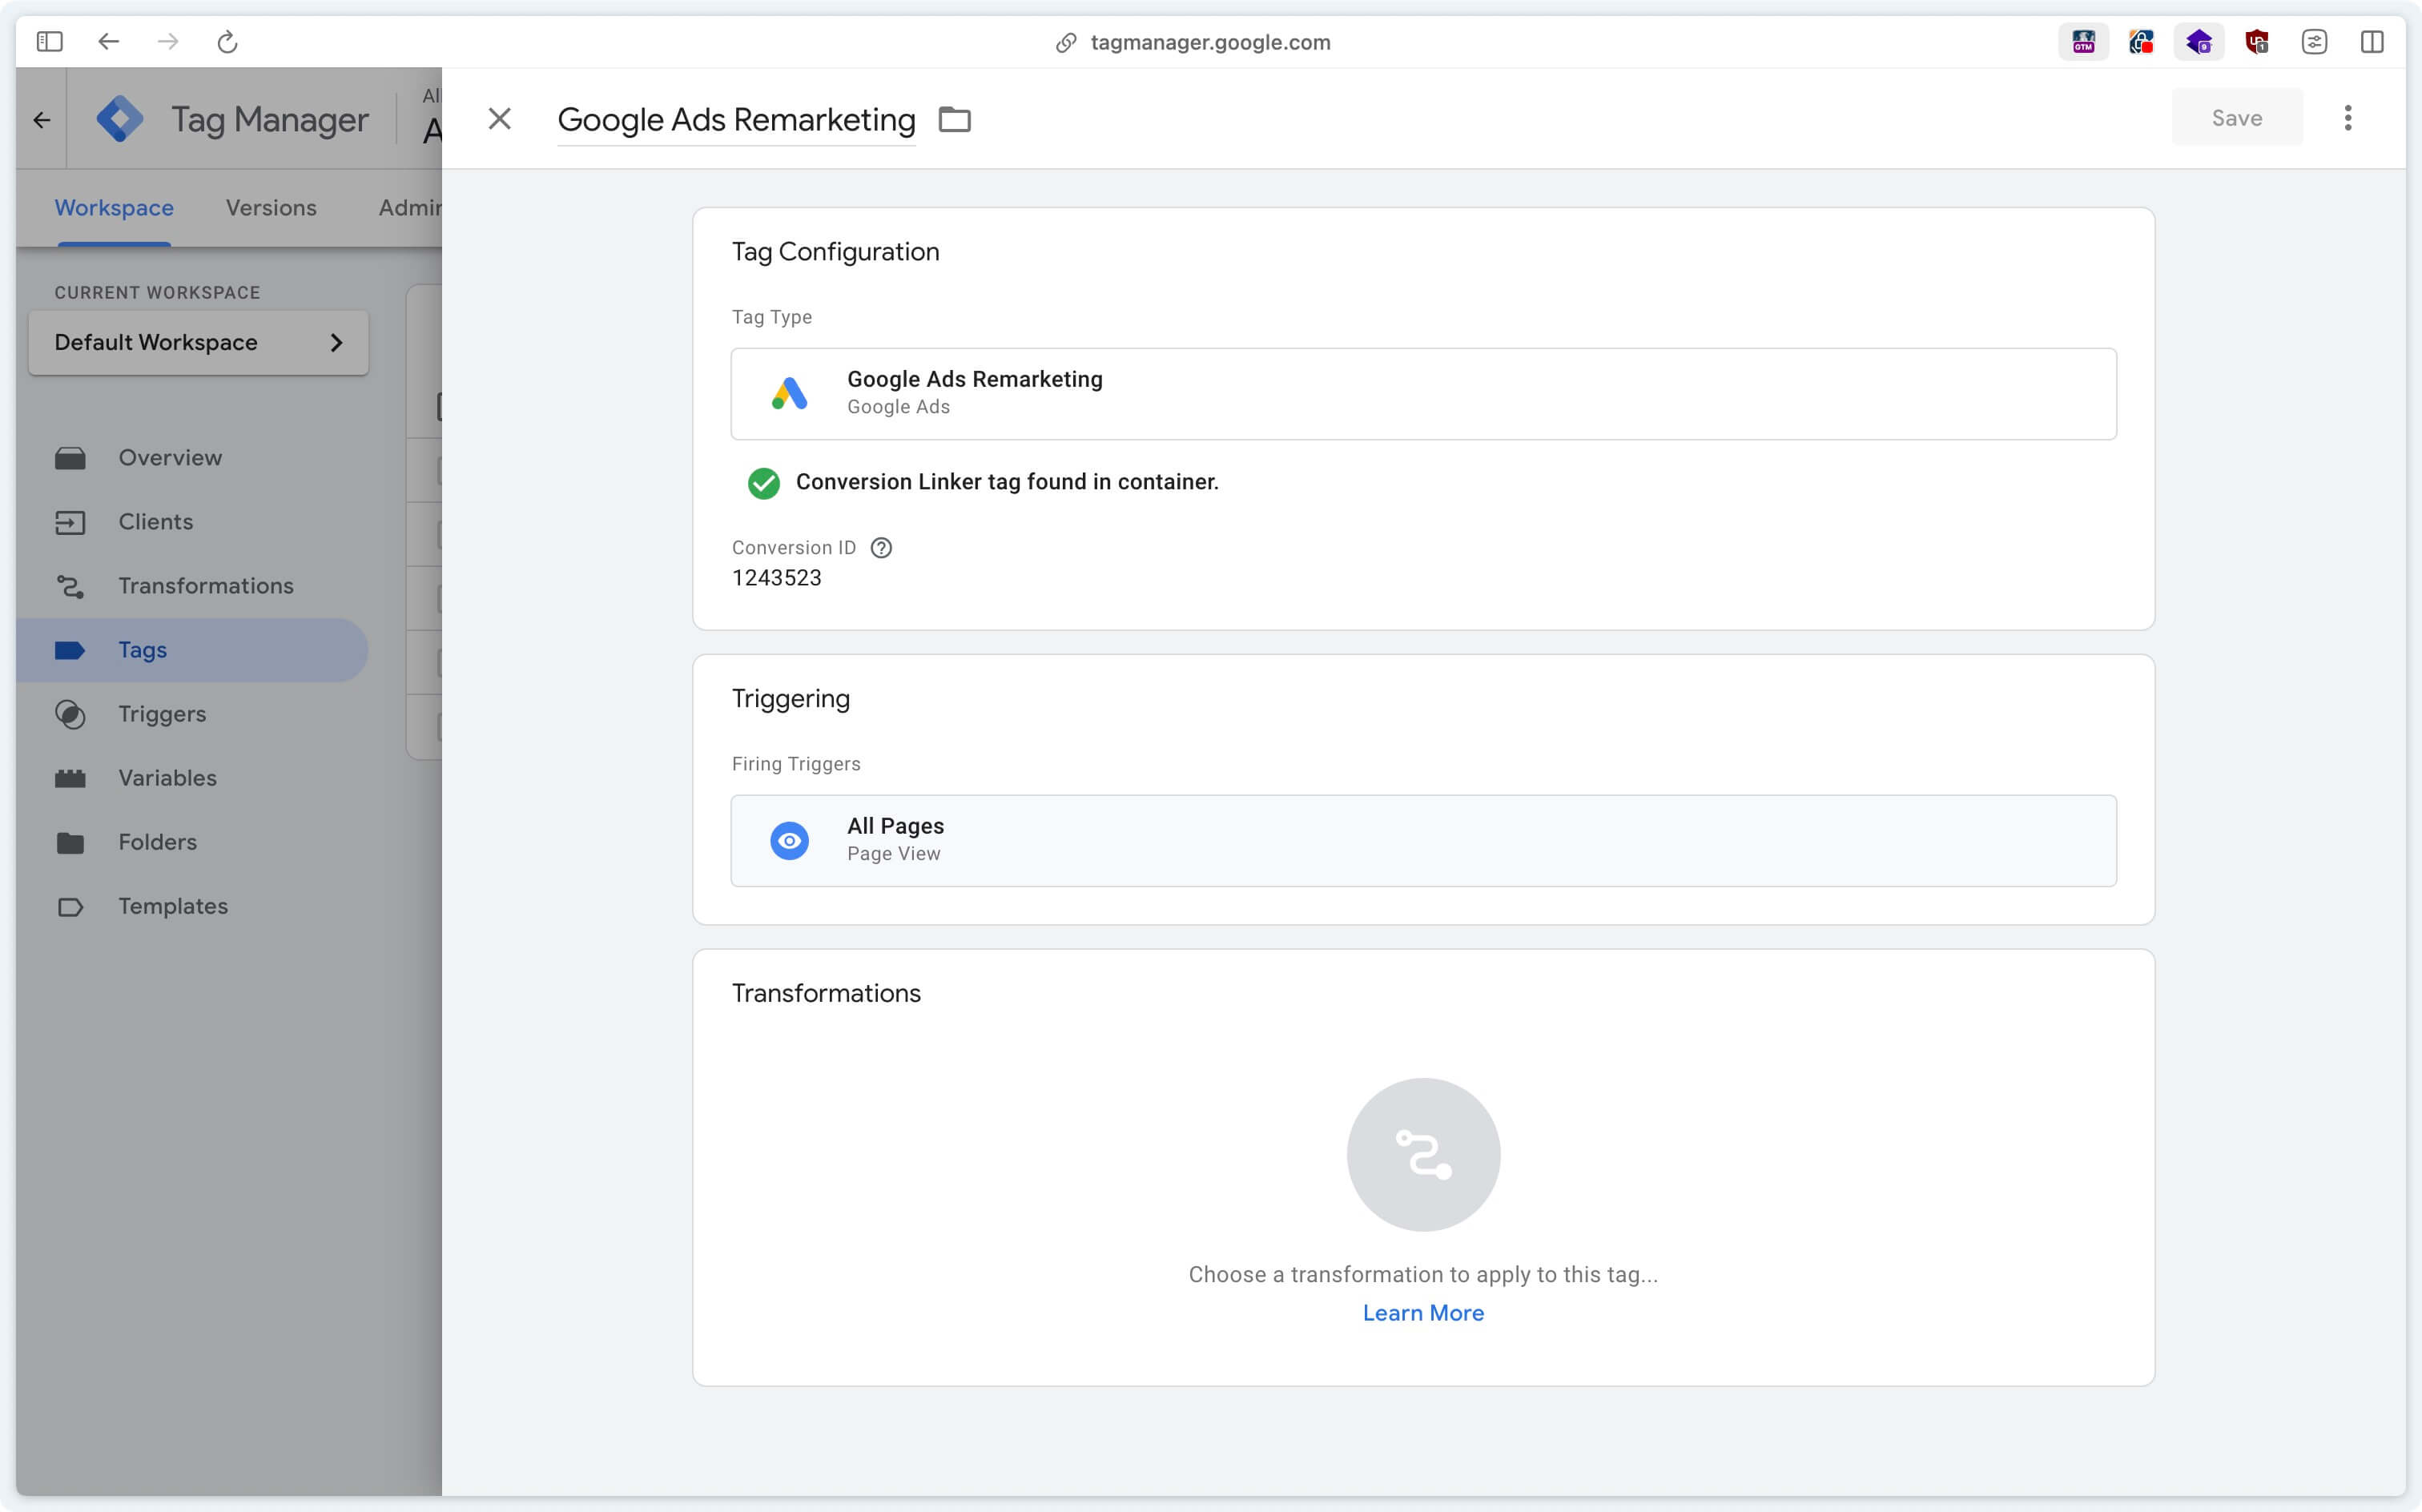
The Conversion Linker tag is an essential prerequisite, as it enables Google Ads to correctly attribute visits from your campaigns.
Whatever type of remarketing you wish to implement, the Conversion Linker tag must be configured upstream (if you haven’t already done so).
In your GTM Server-Side container, in the Tags section, click on New.
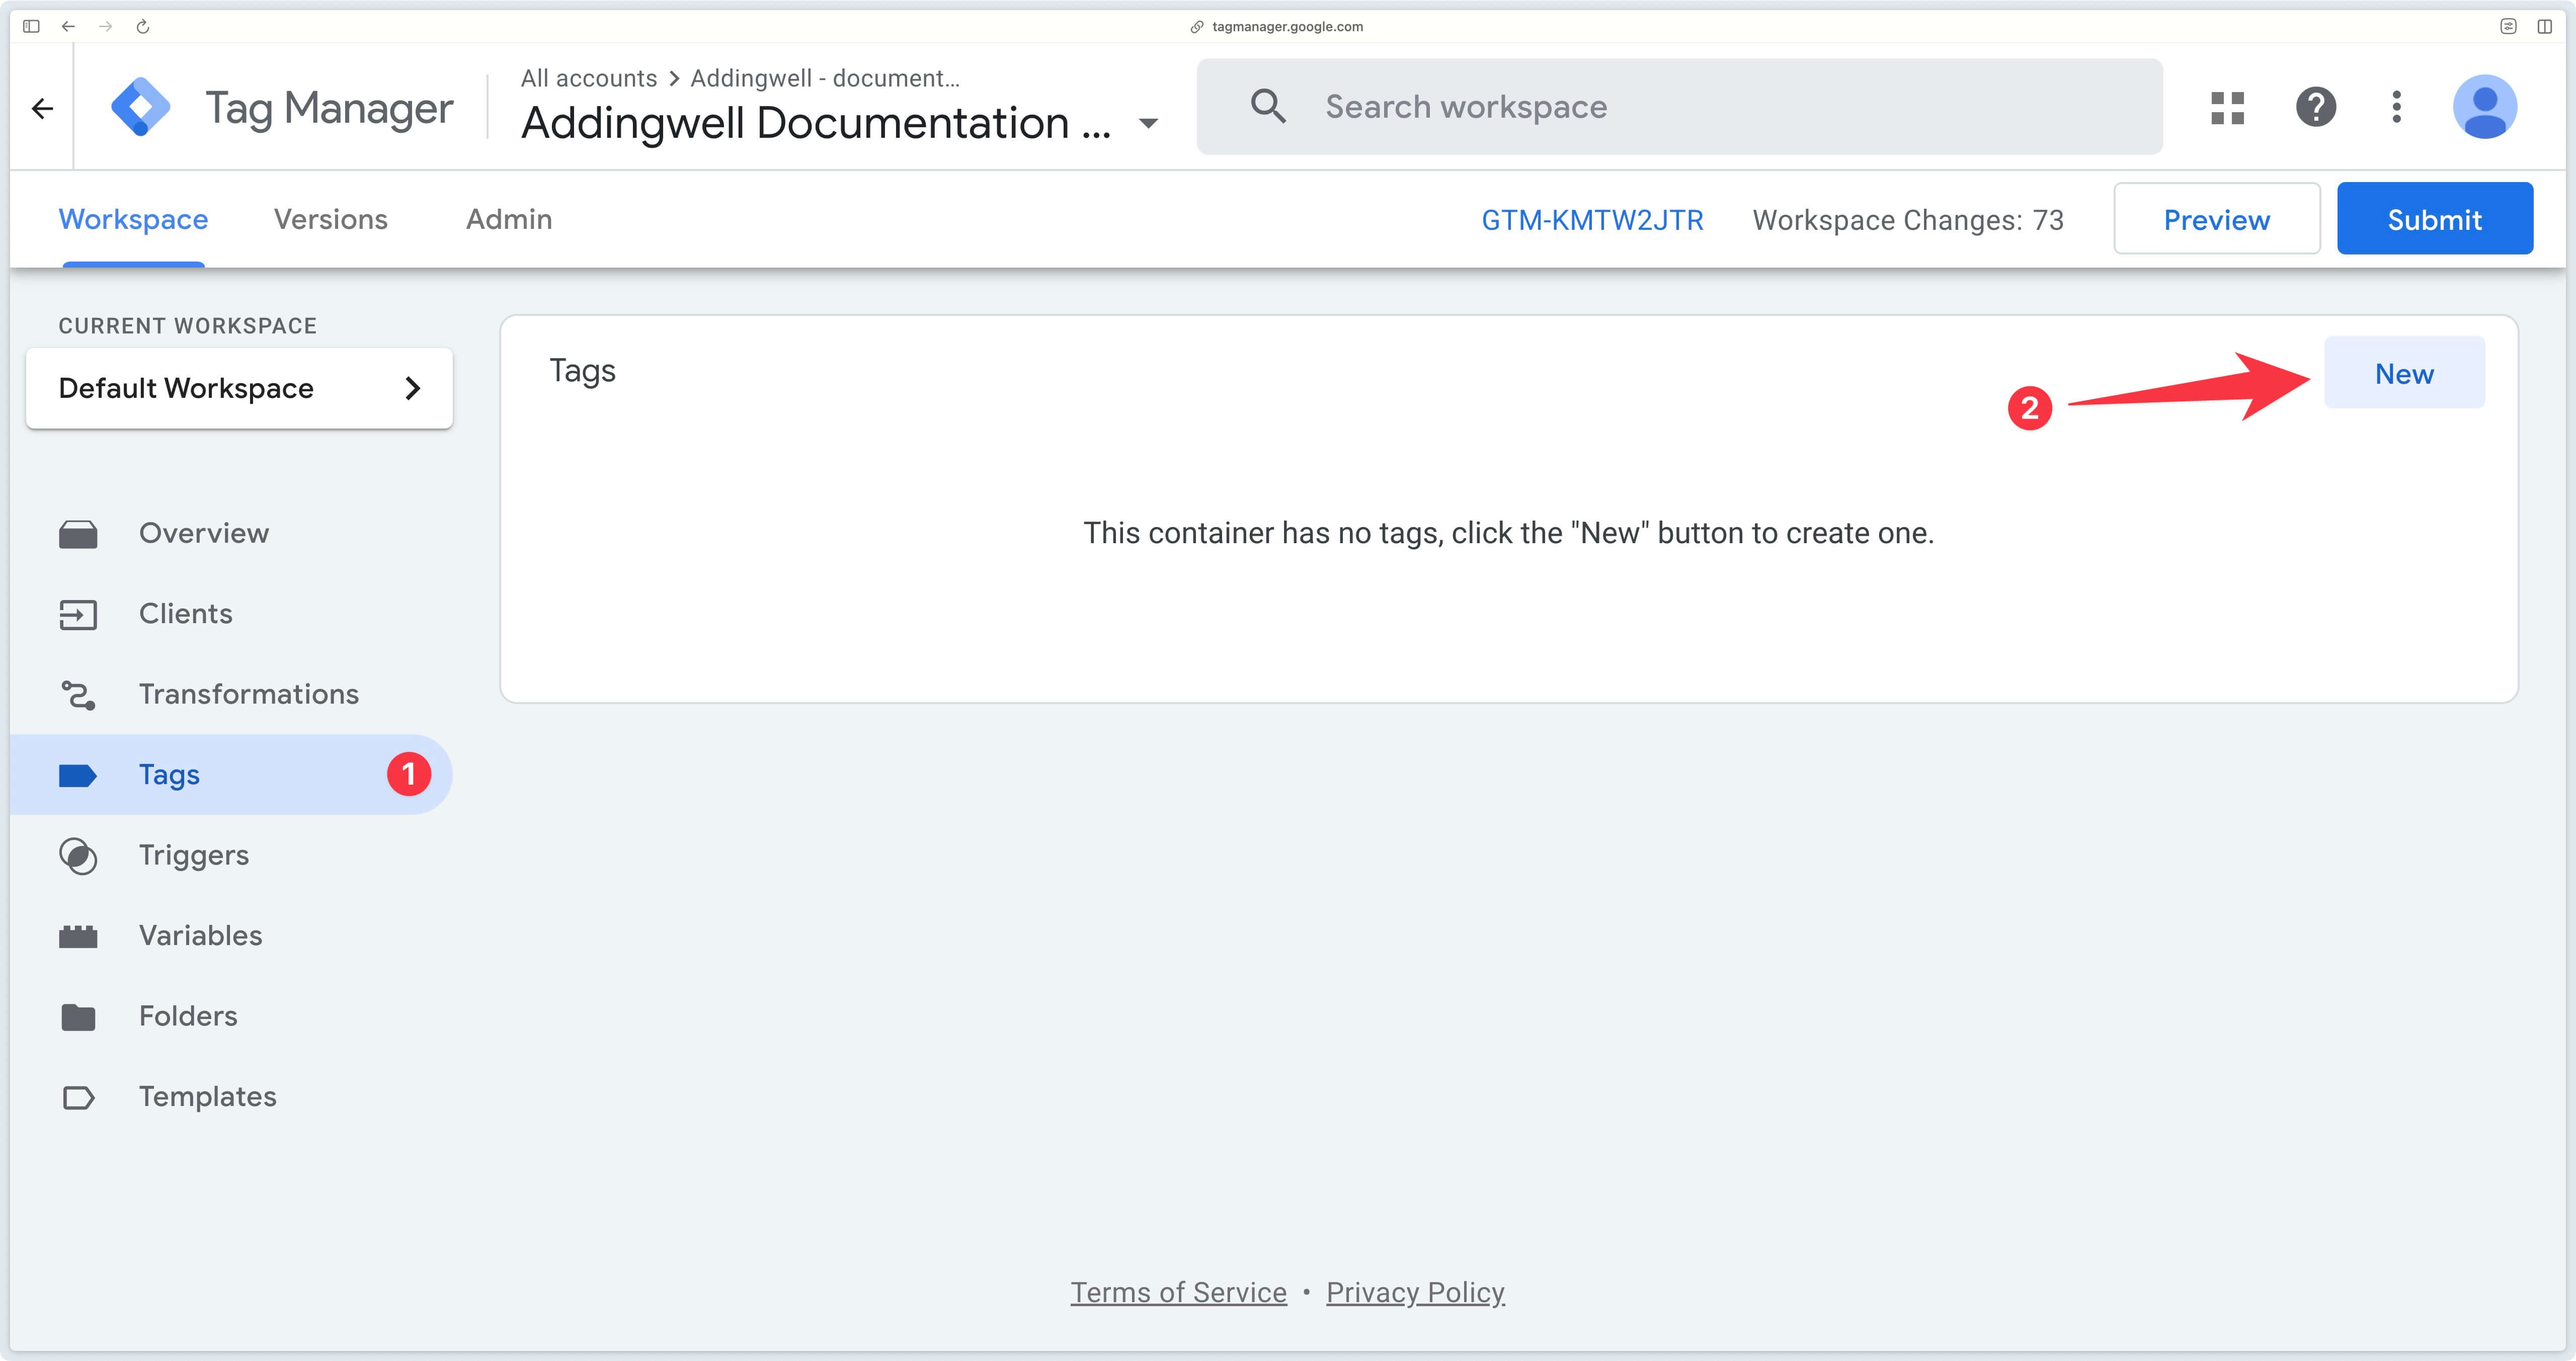
Next, select the Conversion Linker tag.
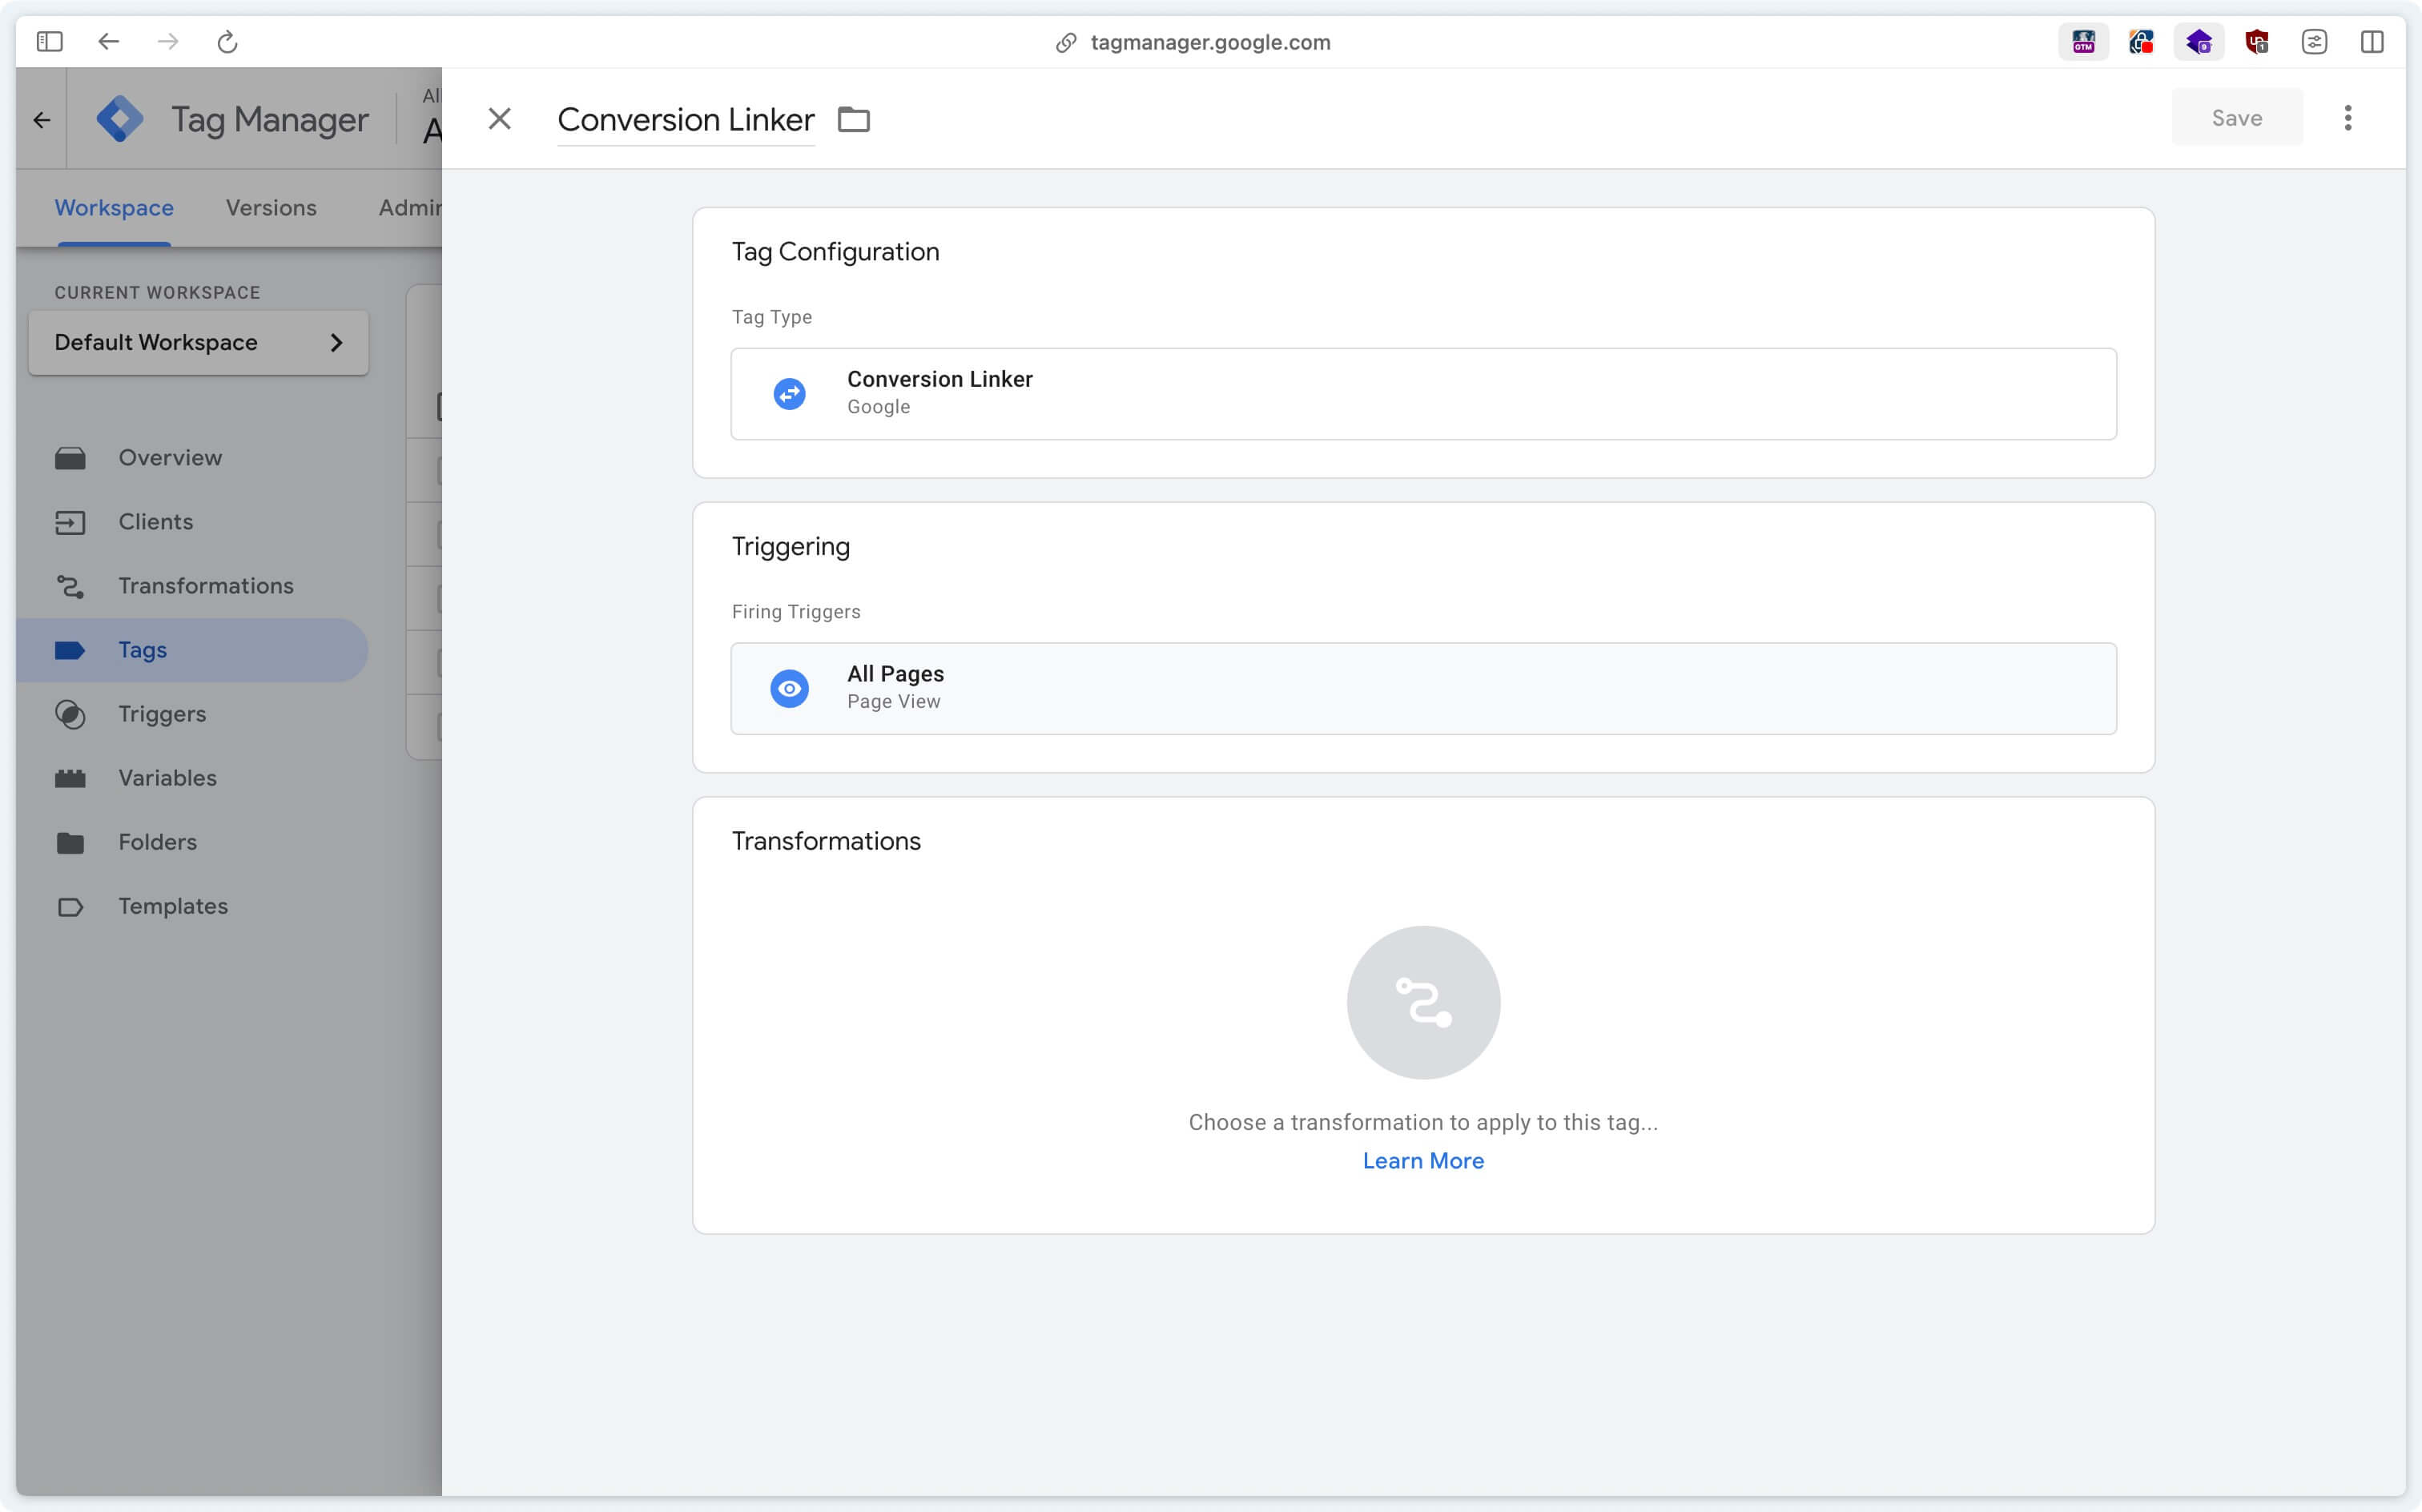
Then trigger this tag on all page views.
To remember: This tag must always be in place before configuring the remarketing tag.
Option 1: Configure classic remarketing
What is classic remarketing?
Classic remarketing allows you to retarget visitors who have already visited your site with Google Ads.
Good to know: if you have an e-commerce site, go directly to the next step to configure dynamic remarketing, which is more suitable for e-commerce.
The Google Ads Remarketing tag must be triggered on all page views.
Congratulations, you’ve completed the classic remarketing configuration. This is the most basic configuration you can do with the Google Ads Remarketing tag.
If you have an e-commerce website, we recommend that you set up dynamic remarketing, as we’ll see in the next step.
Option 2: Set up dynamic remarketing
Now that you’ve laid the foundations of classic remarketing, let’s see how to take it a step further with dynamic remarketing.
This step is particularly useful for e-commerce sites, as it allows you to reconstruct the conversion funnel of each visitor, and pass it on to Google Ads.
What is Google Ads dynamic remarketing?
In Google Ads, dynamic remarketing opens the door to :
- personalized audiences based on products viewed, searched for, added to cart
- a match with your Merchant Center catalog.
- and more intelligent bidding on Performance Max or Google Shopping
If you have Google Shopping and/or Performance Max campaigns running on products from your Merchant Center catalog, dynamic remarketing will also enable you to optimize your bids based on the best-performing products.
How to set up dynamic remarketing with Google Ads Server-Side
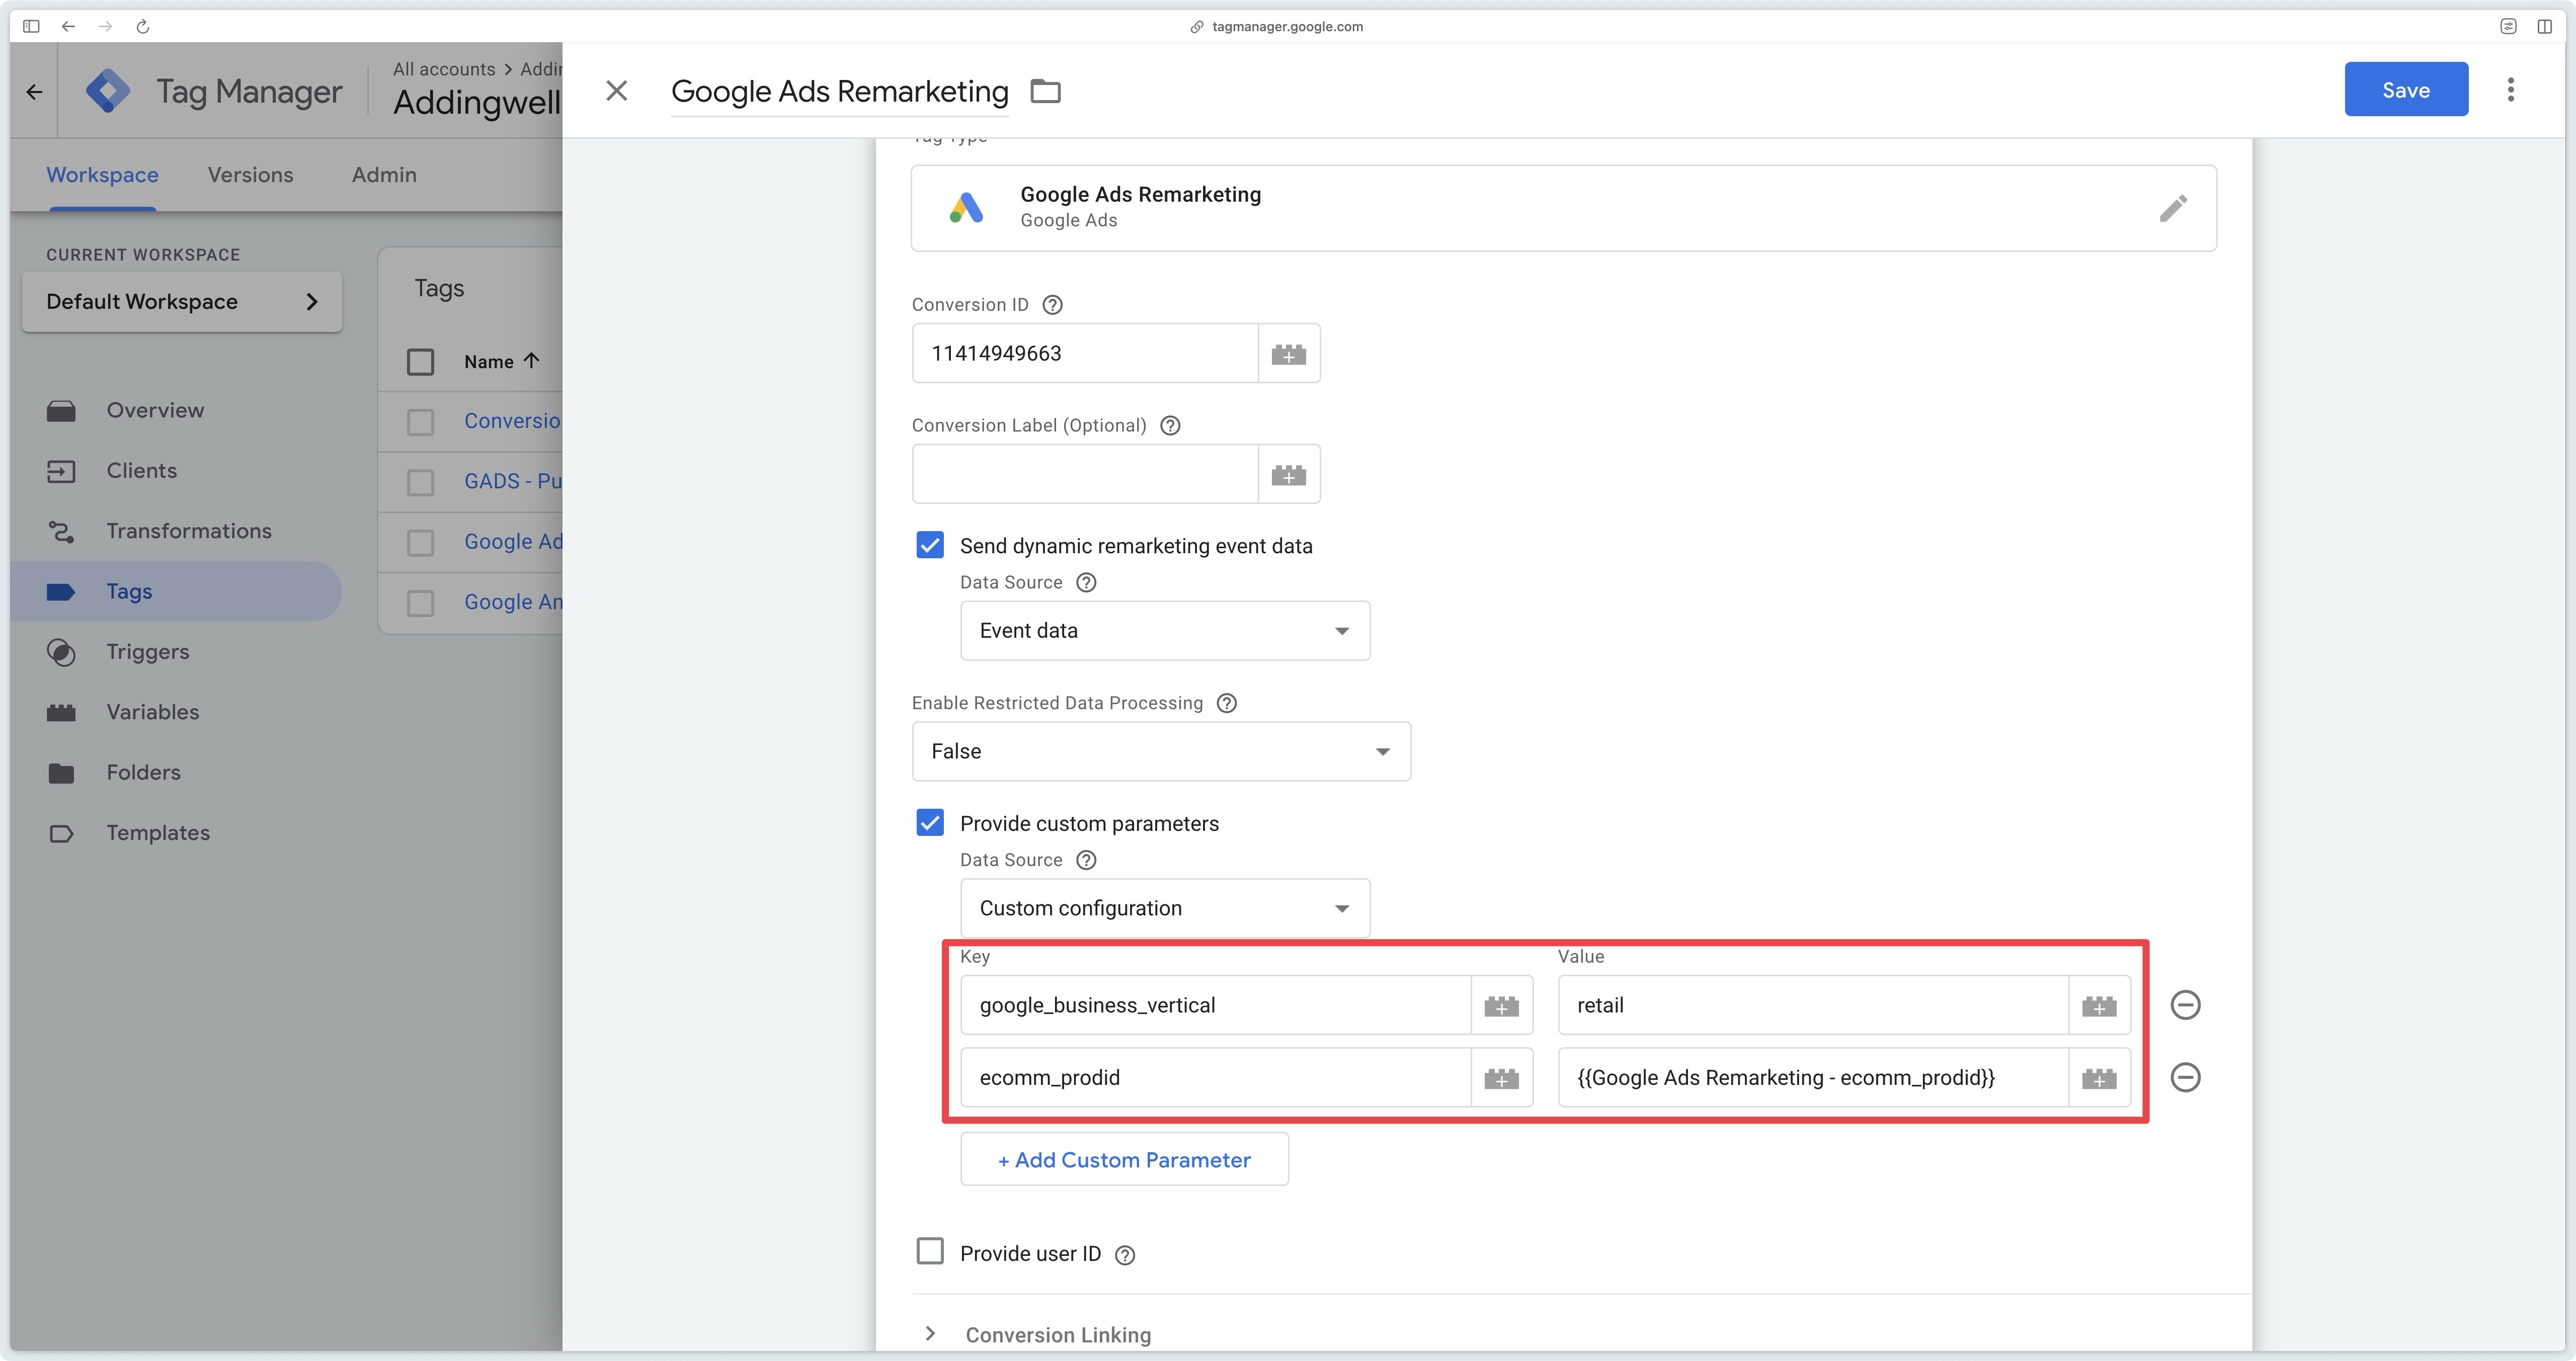
To activate dynamic remarketing, you need to check the Send dynamic remarketing event data box and select the Event data data source.
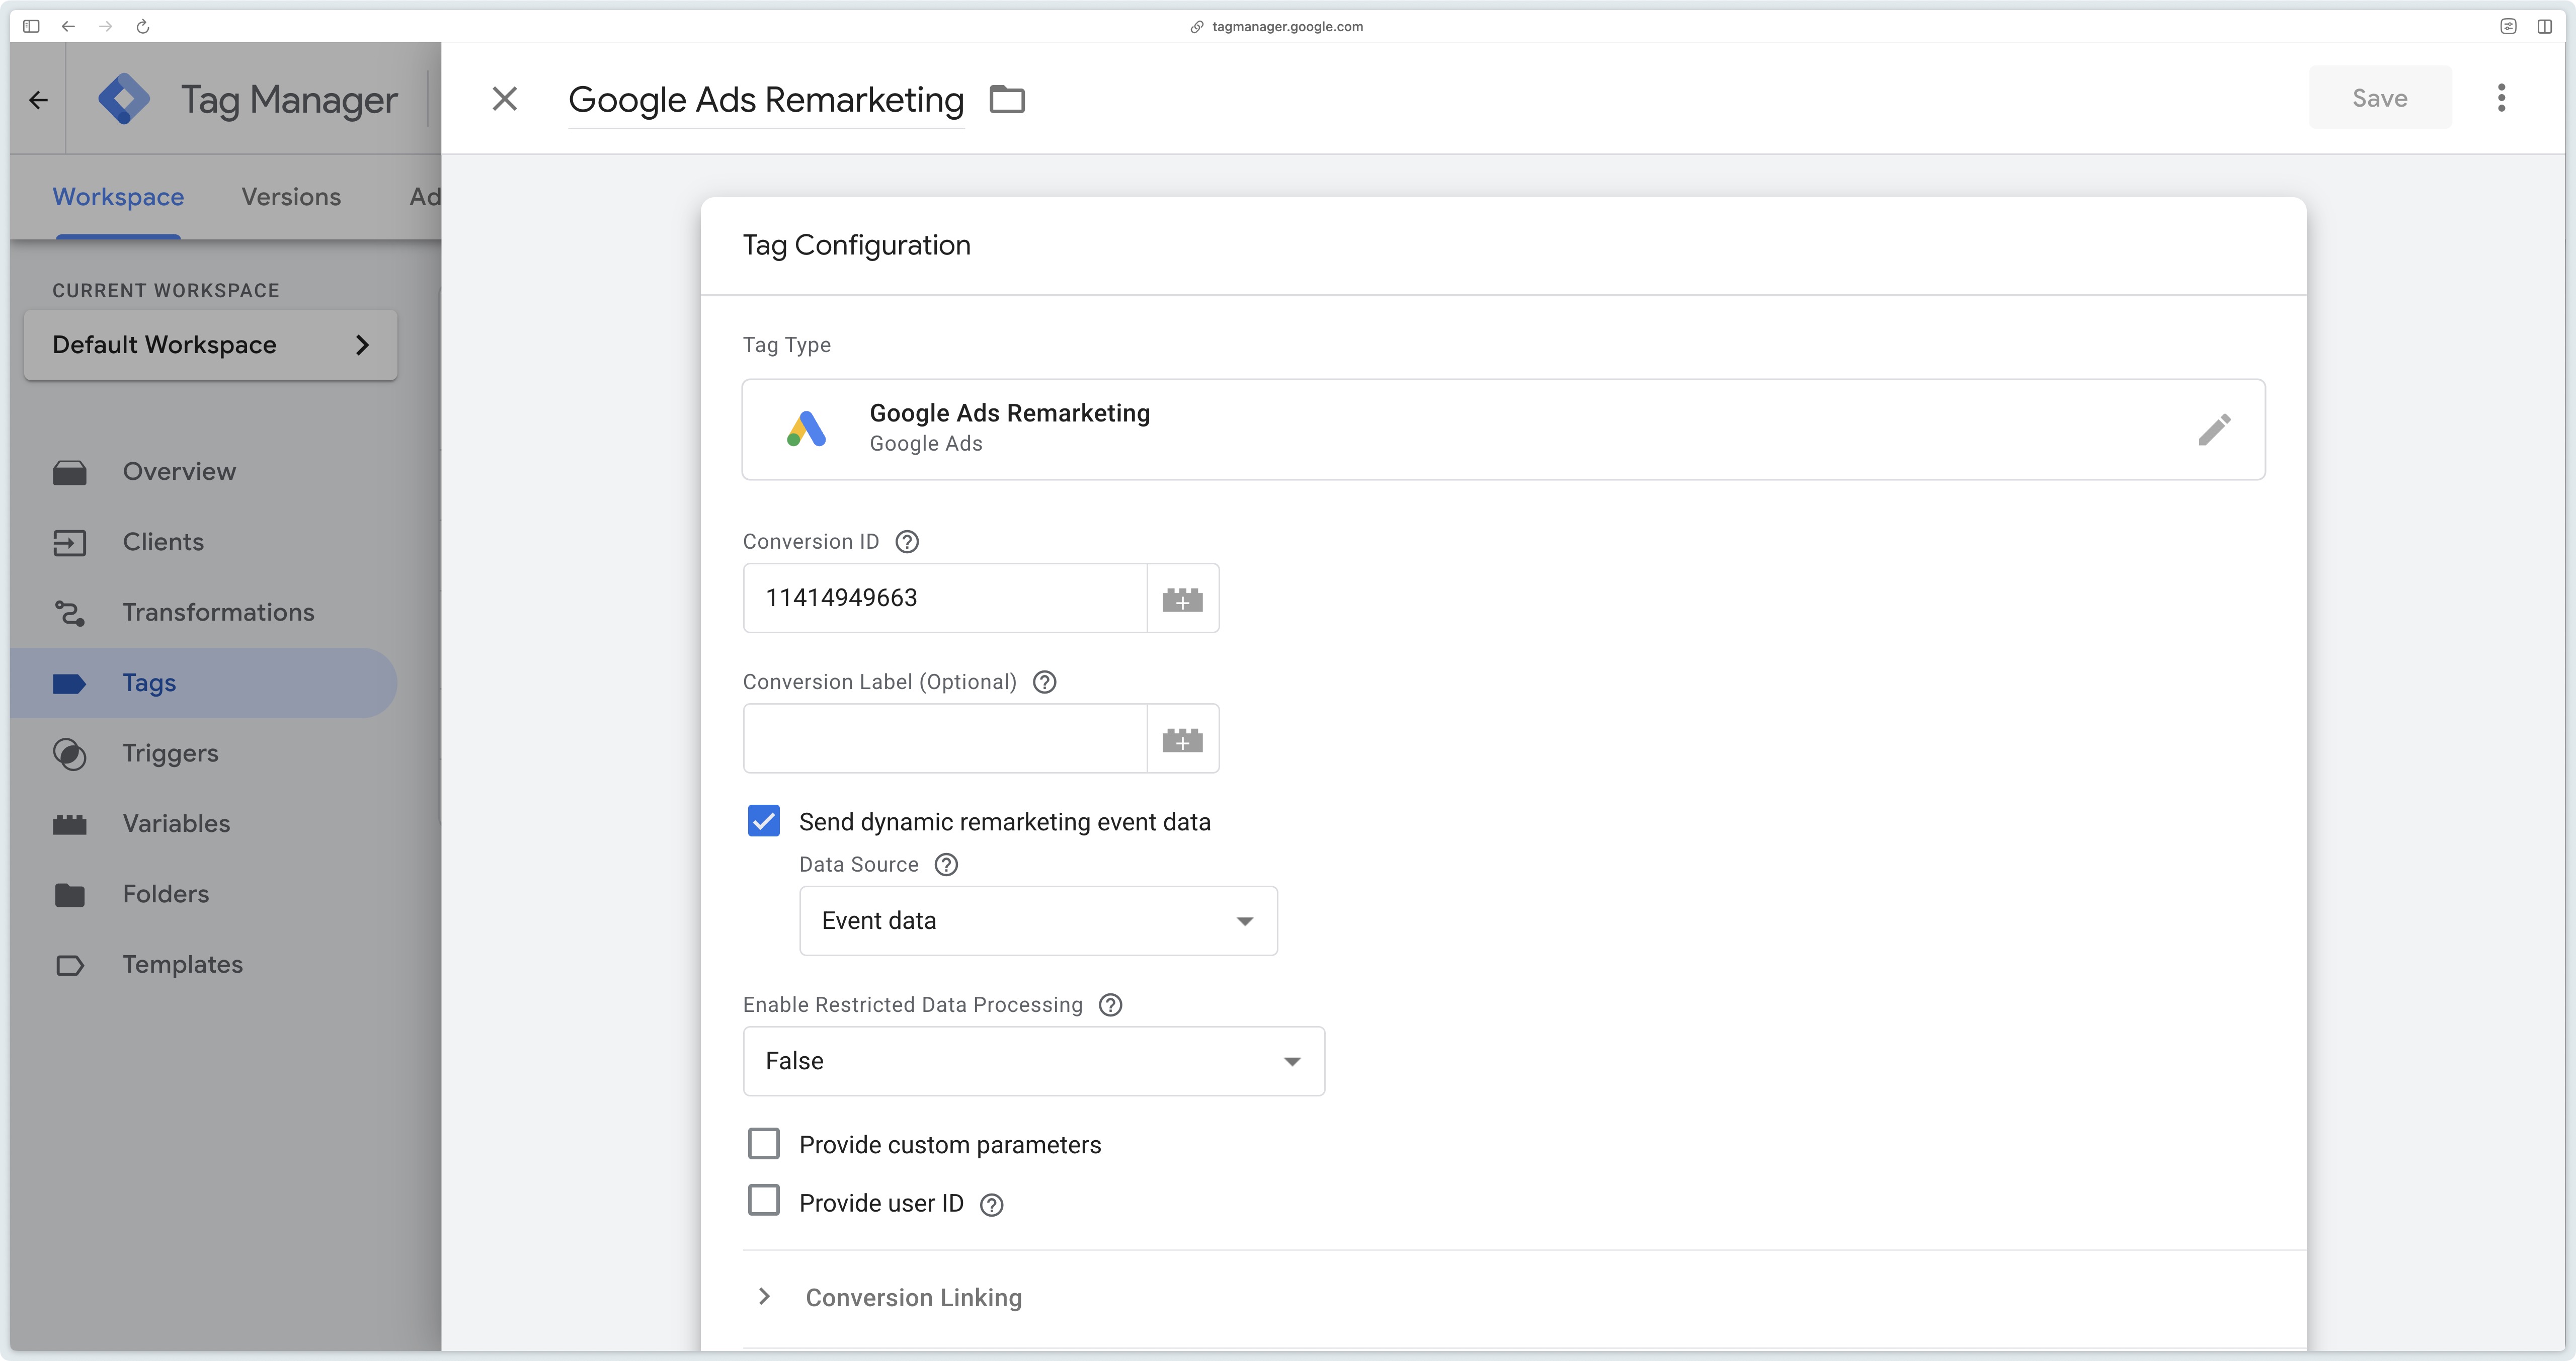
With this configuration, the tag will fetch by default the event_name and value event data parameters that are used for dynamic remarketing.
If the parameters you send have names other than event_name and value you’ll have to do the matching yourself by choosing Custom configuration as the data source.
Send product IDs
Why send product IDs?
In order for Google Ads to know which products have been viewed, added to cart or purchased, you need to send it product identifiers. You must first synchronize your product catalog with the Google Merchant Center.
To send product identifiers from the Google Ads Remarketing tag in Server-Side, you need to send the custom parameters google_business_vertical and ecomm_prodid.
| Parameter | Type | Example value |
|---|---|---|
ecomm_prodid | array | ["123", "456", "789"] (these identifiers must match the product identifiers in your Merchant Center) |
google_business_vertical | string | retail (adapt to your vertical) |
Recover product IDs
In the GA4 events arriving on your server, you have an items array that includes your product identifiers.
In most cases, the desired identifier will be in the item_id field of the items array, but in some cases it may be in another field (e.g. item_variant_id).
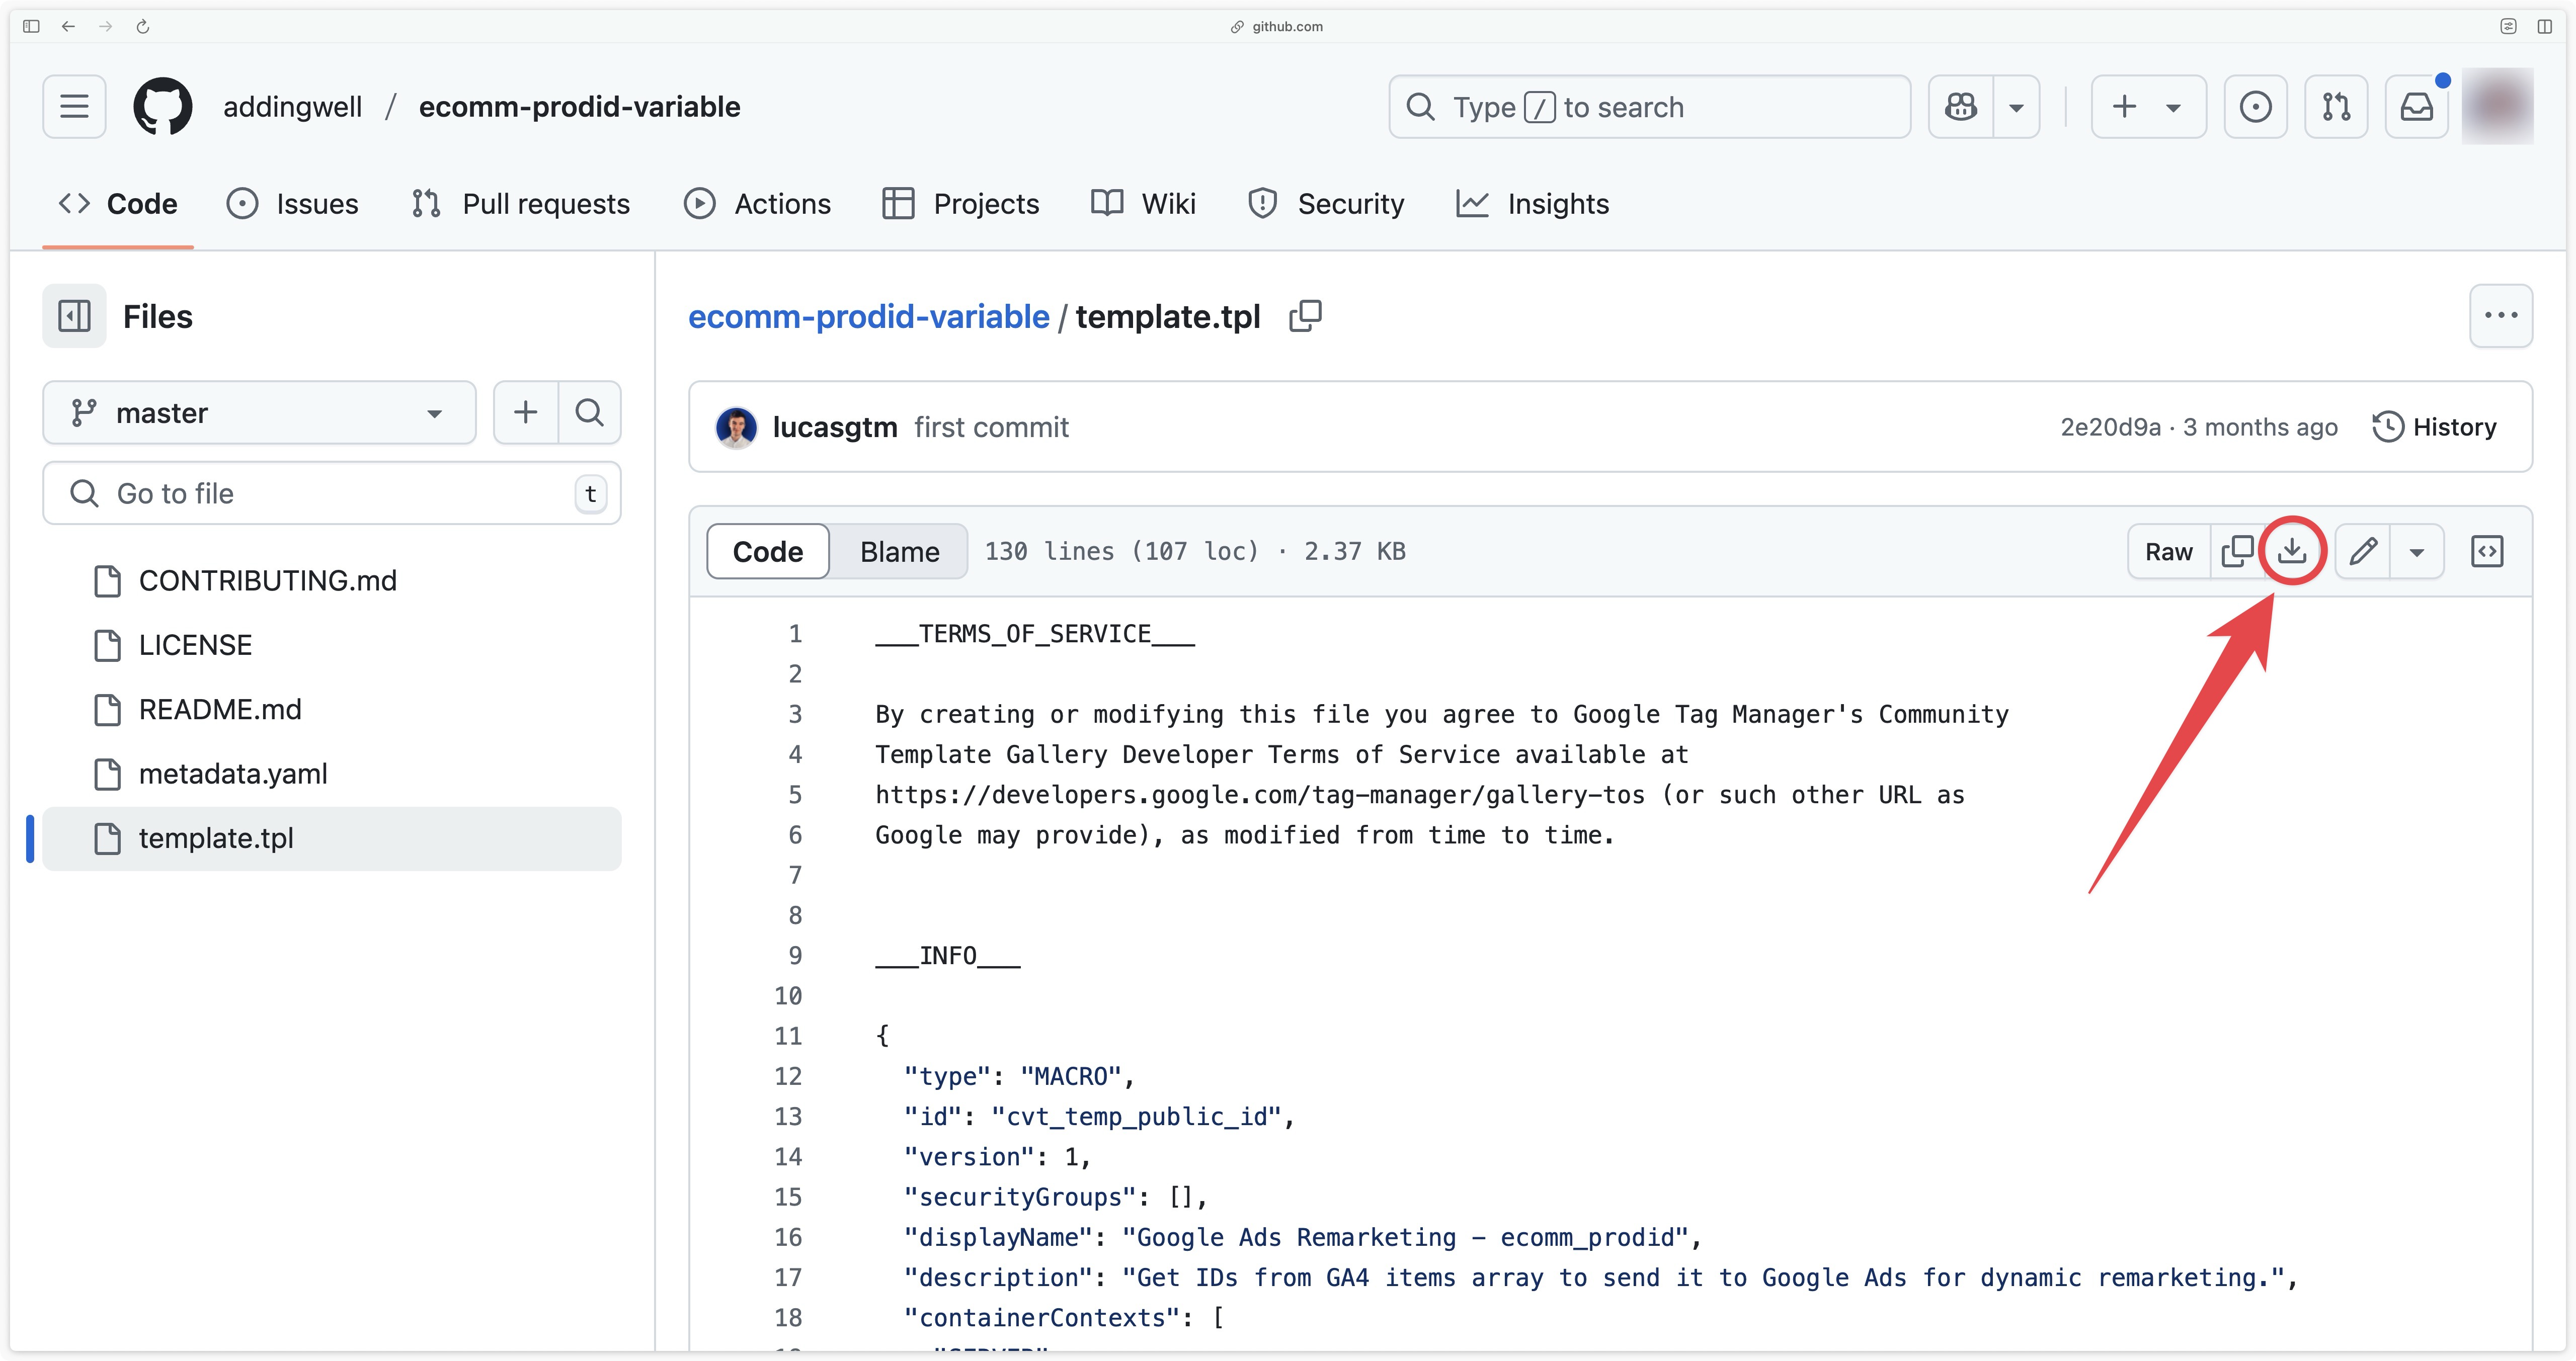
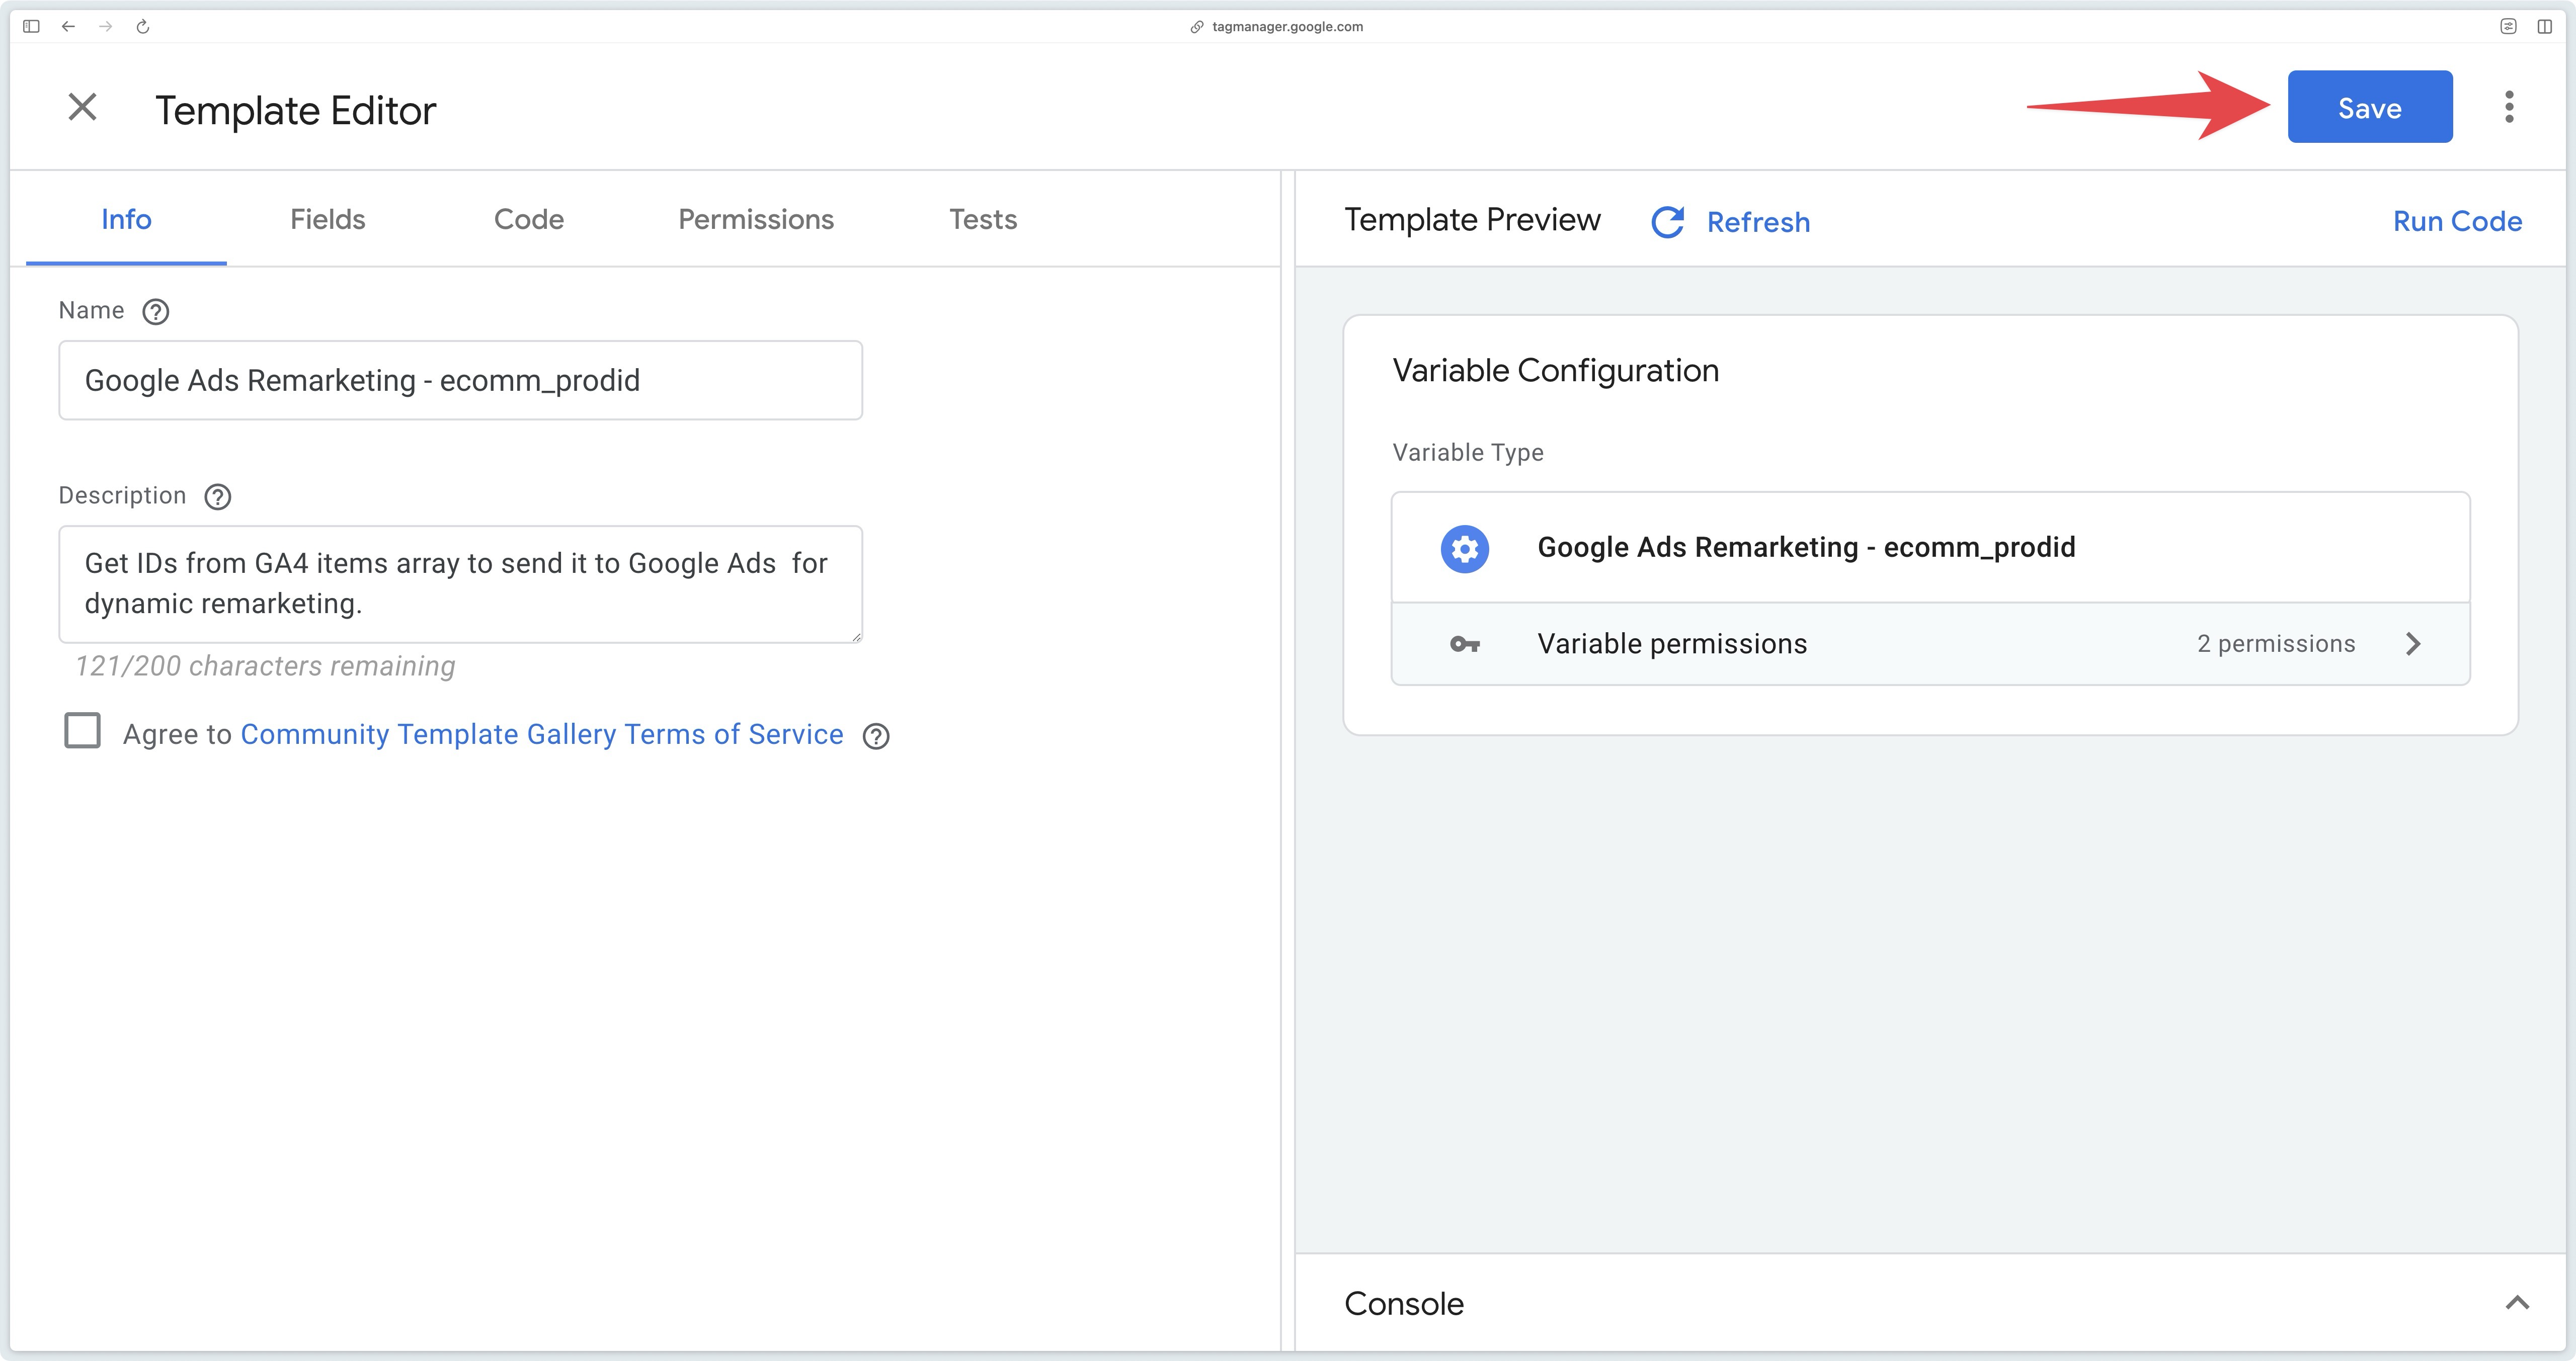
To enable you to retrieve your product identifiers correctly, we’ve created a Google Ads Remarketing - ecomm_prodid variable that you can download here .
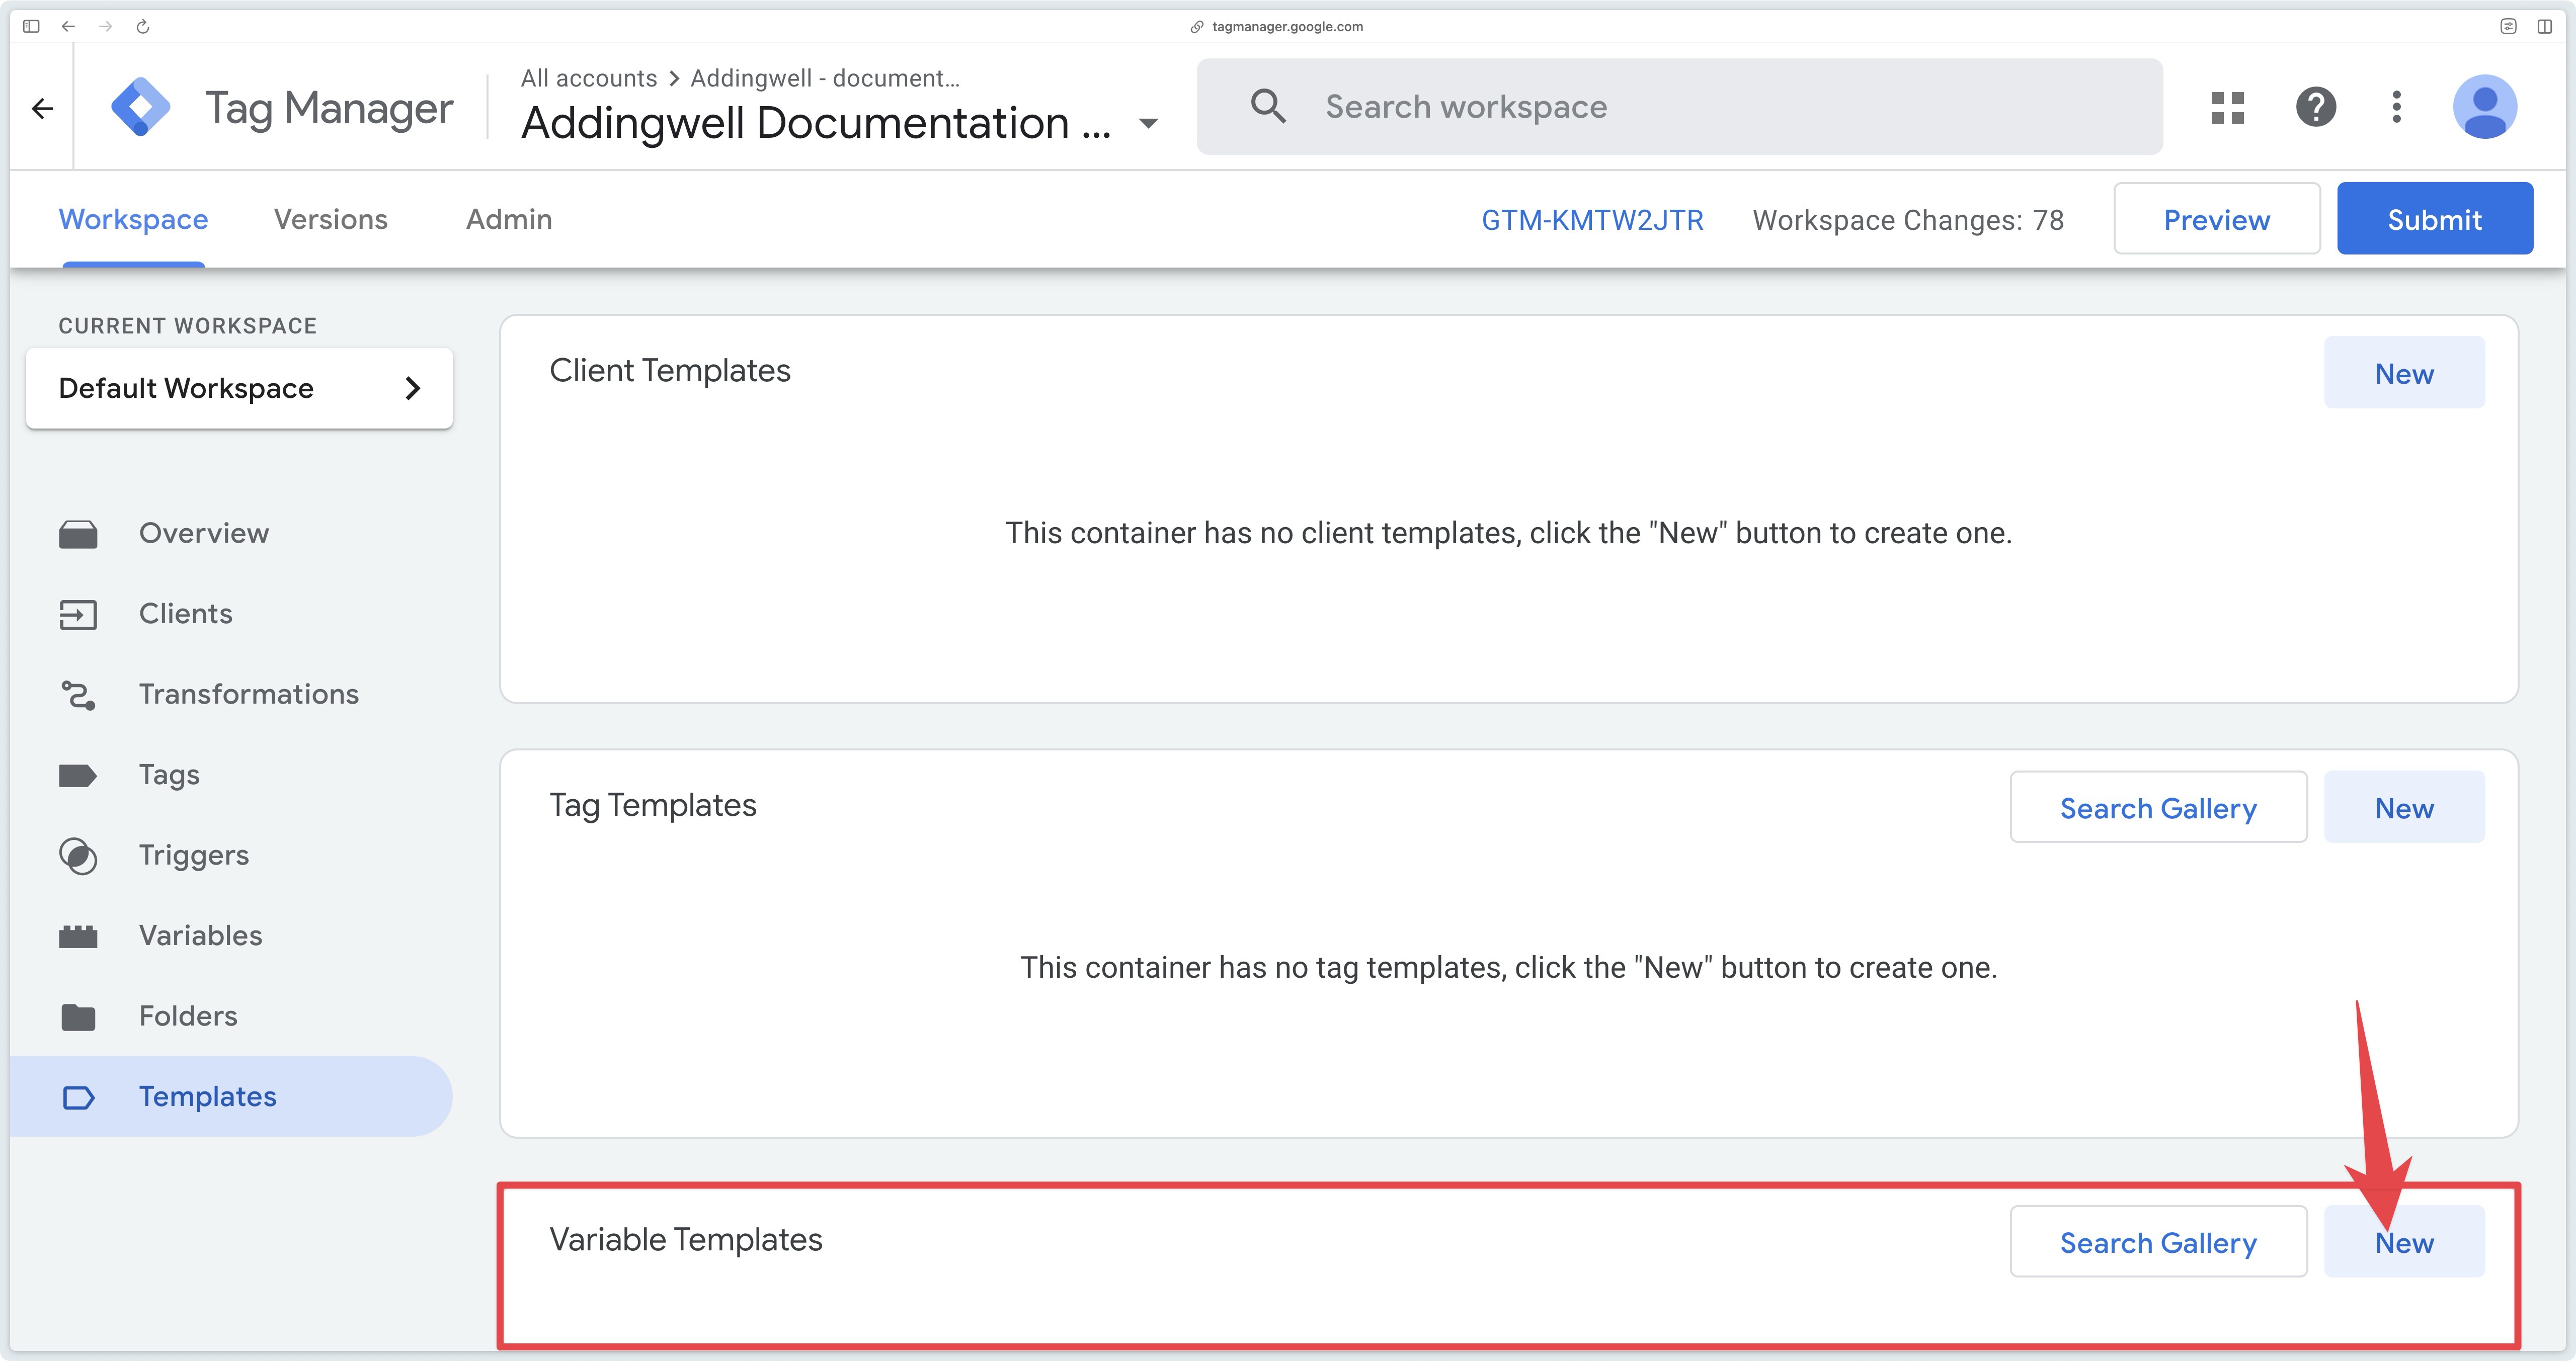
Then go to the Templates then Variable Templates section of your GTM Server container and click New.
Then click on the three small dots in the top right-hand corner and click on Import.
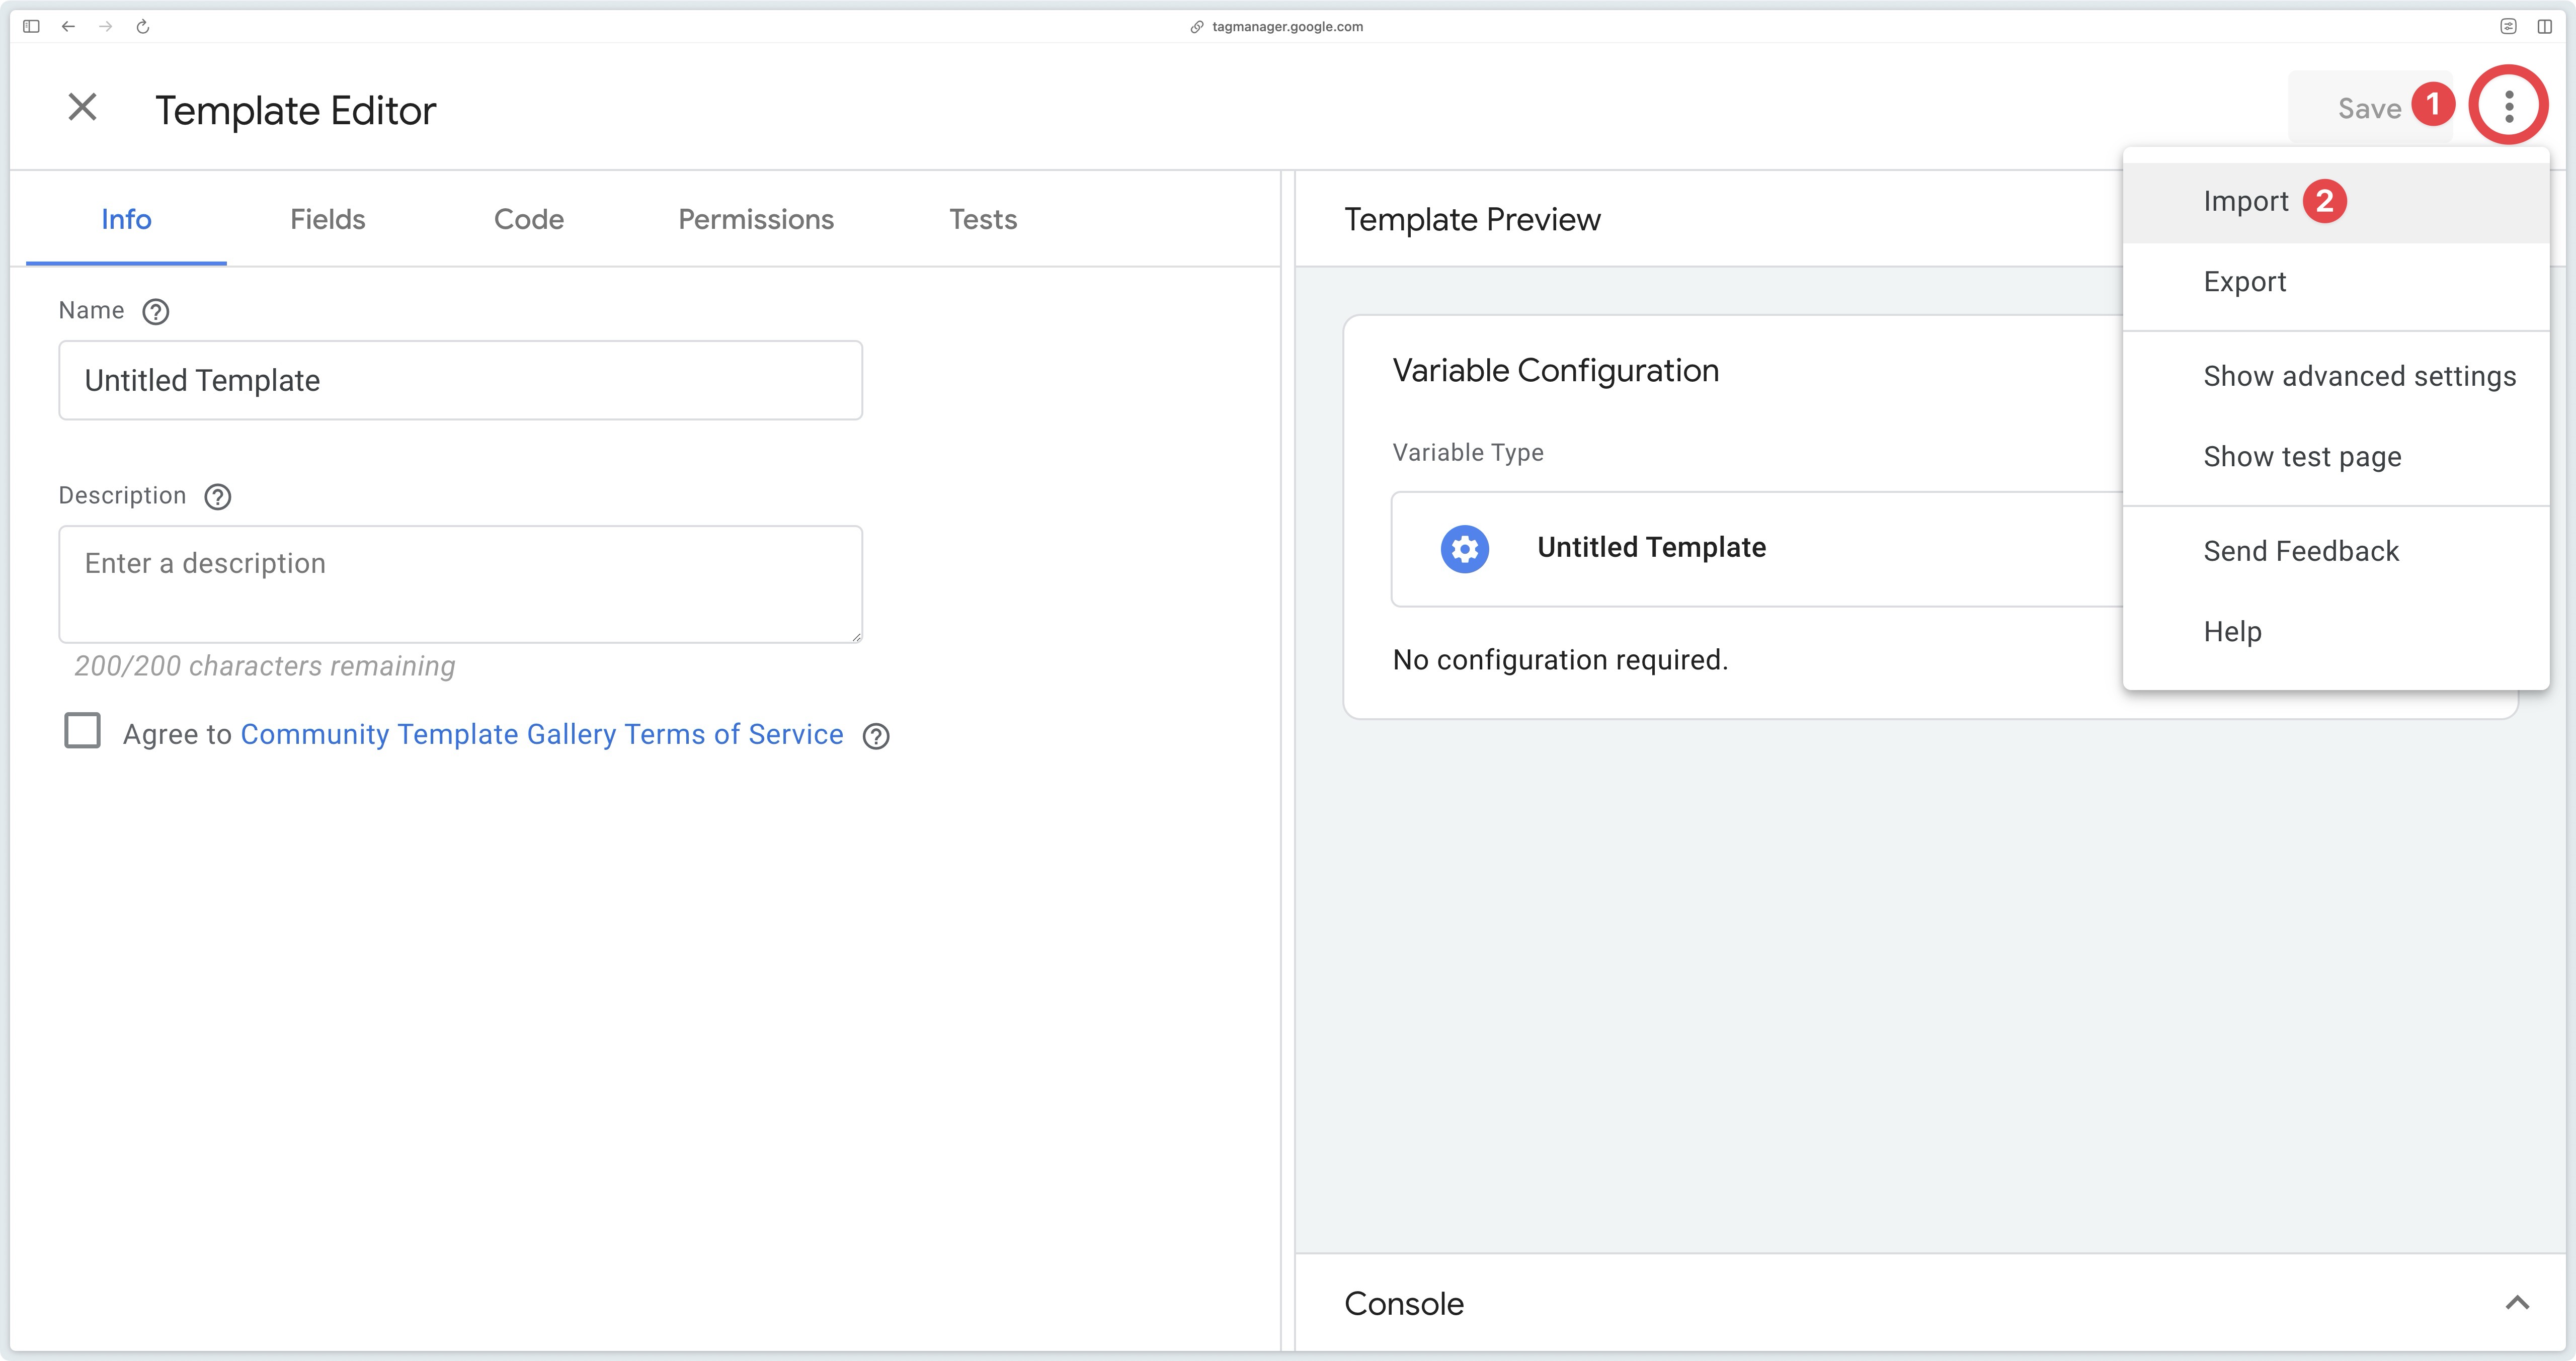
Select the file you have just downloaded and click Save.
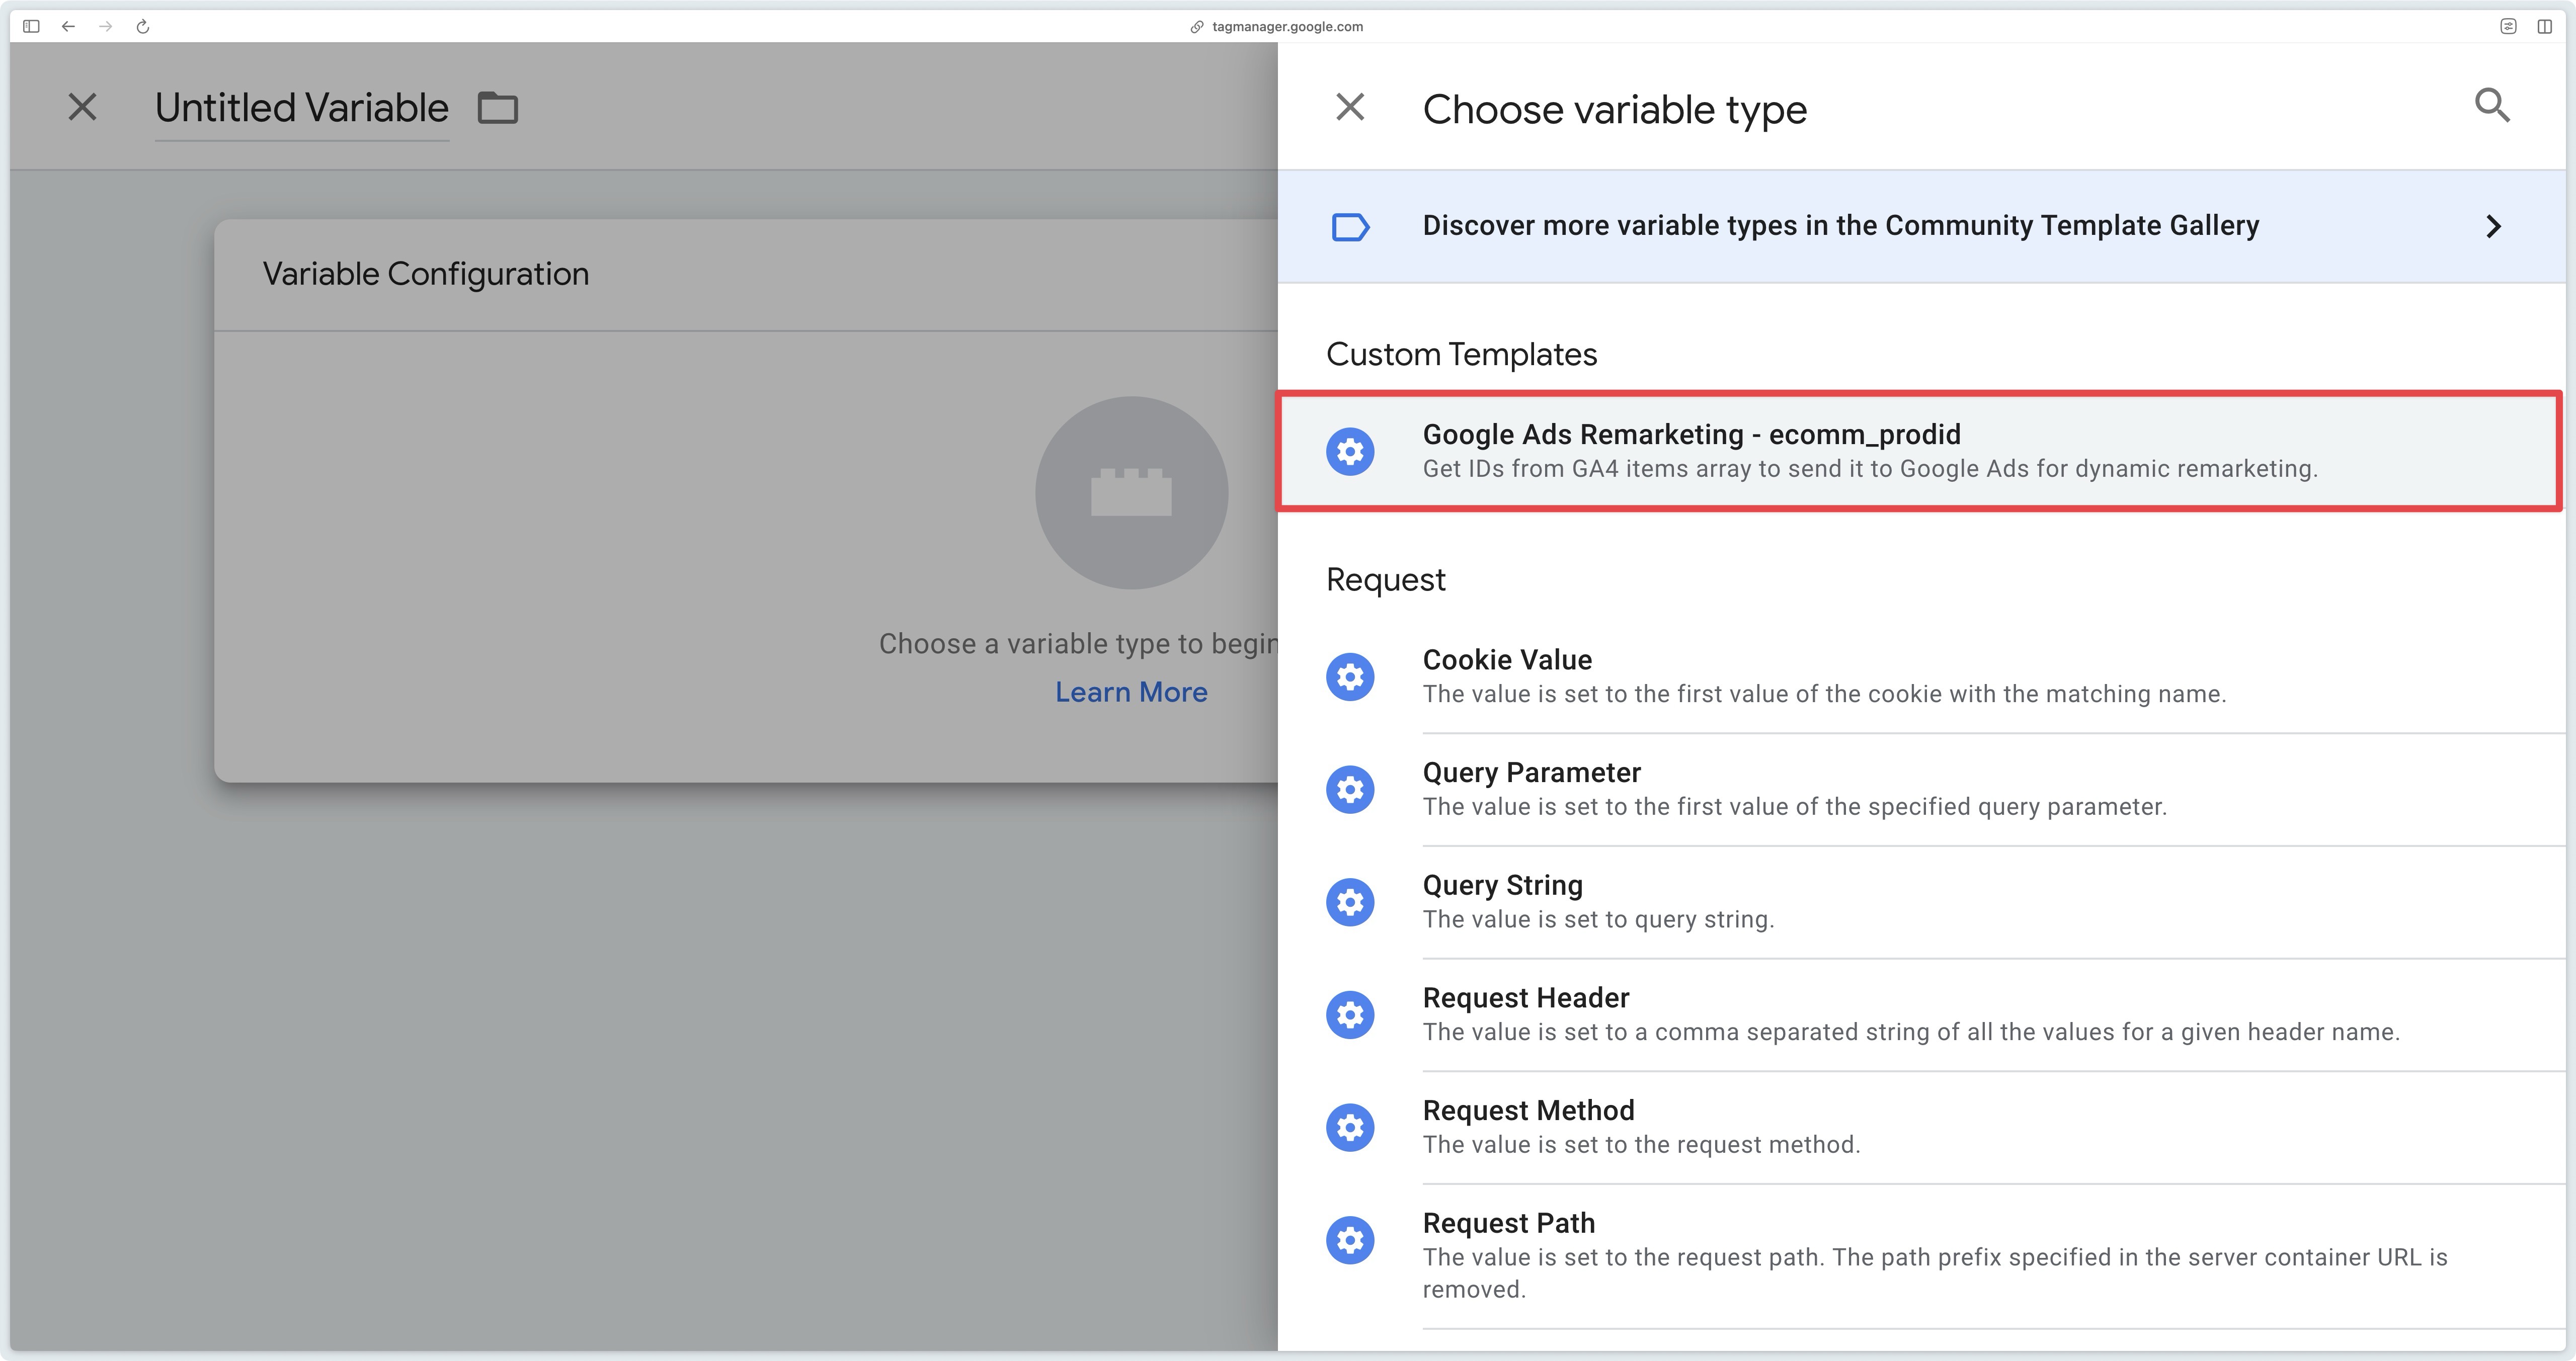
Now go to the Variables section of GTM Server, then under User-Defined Variables click on New.
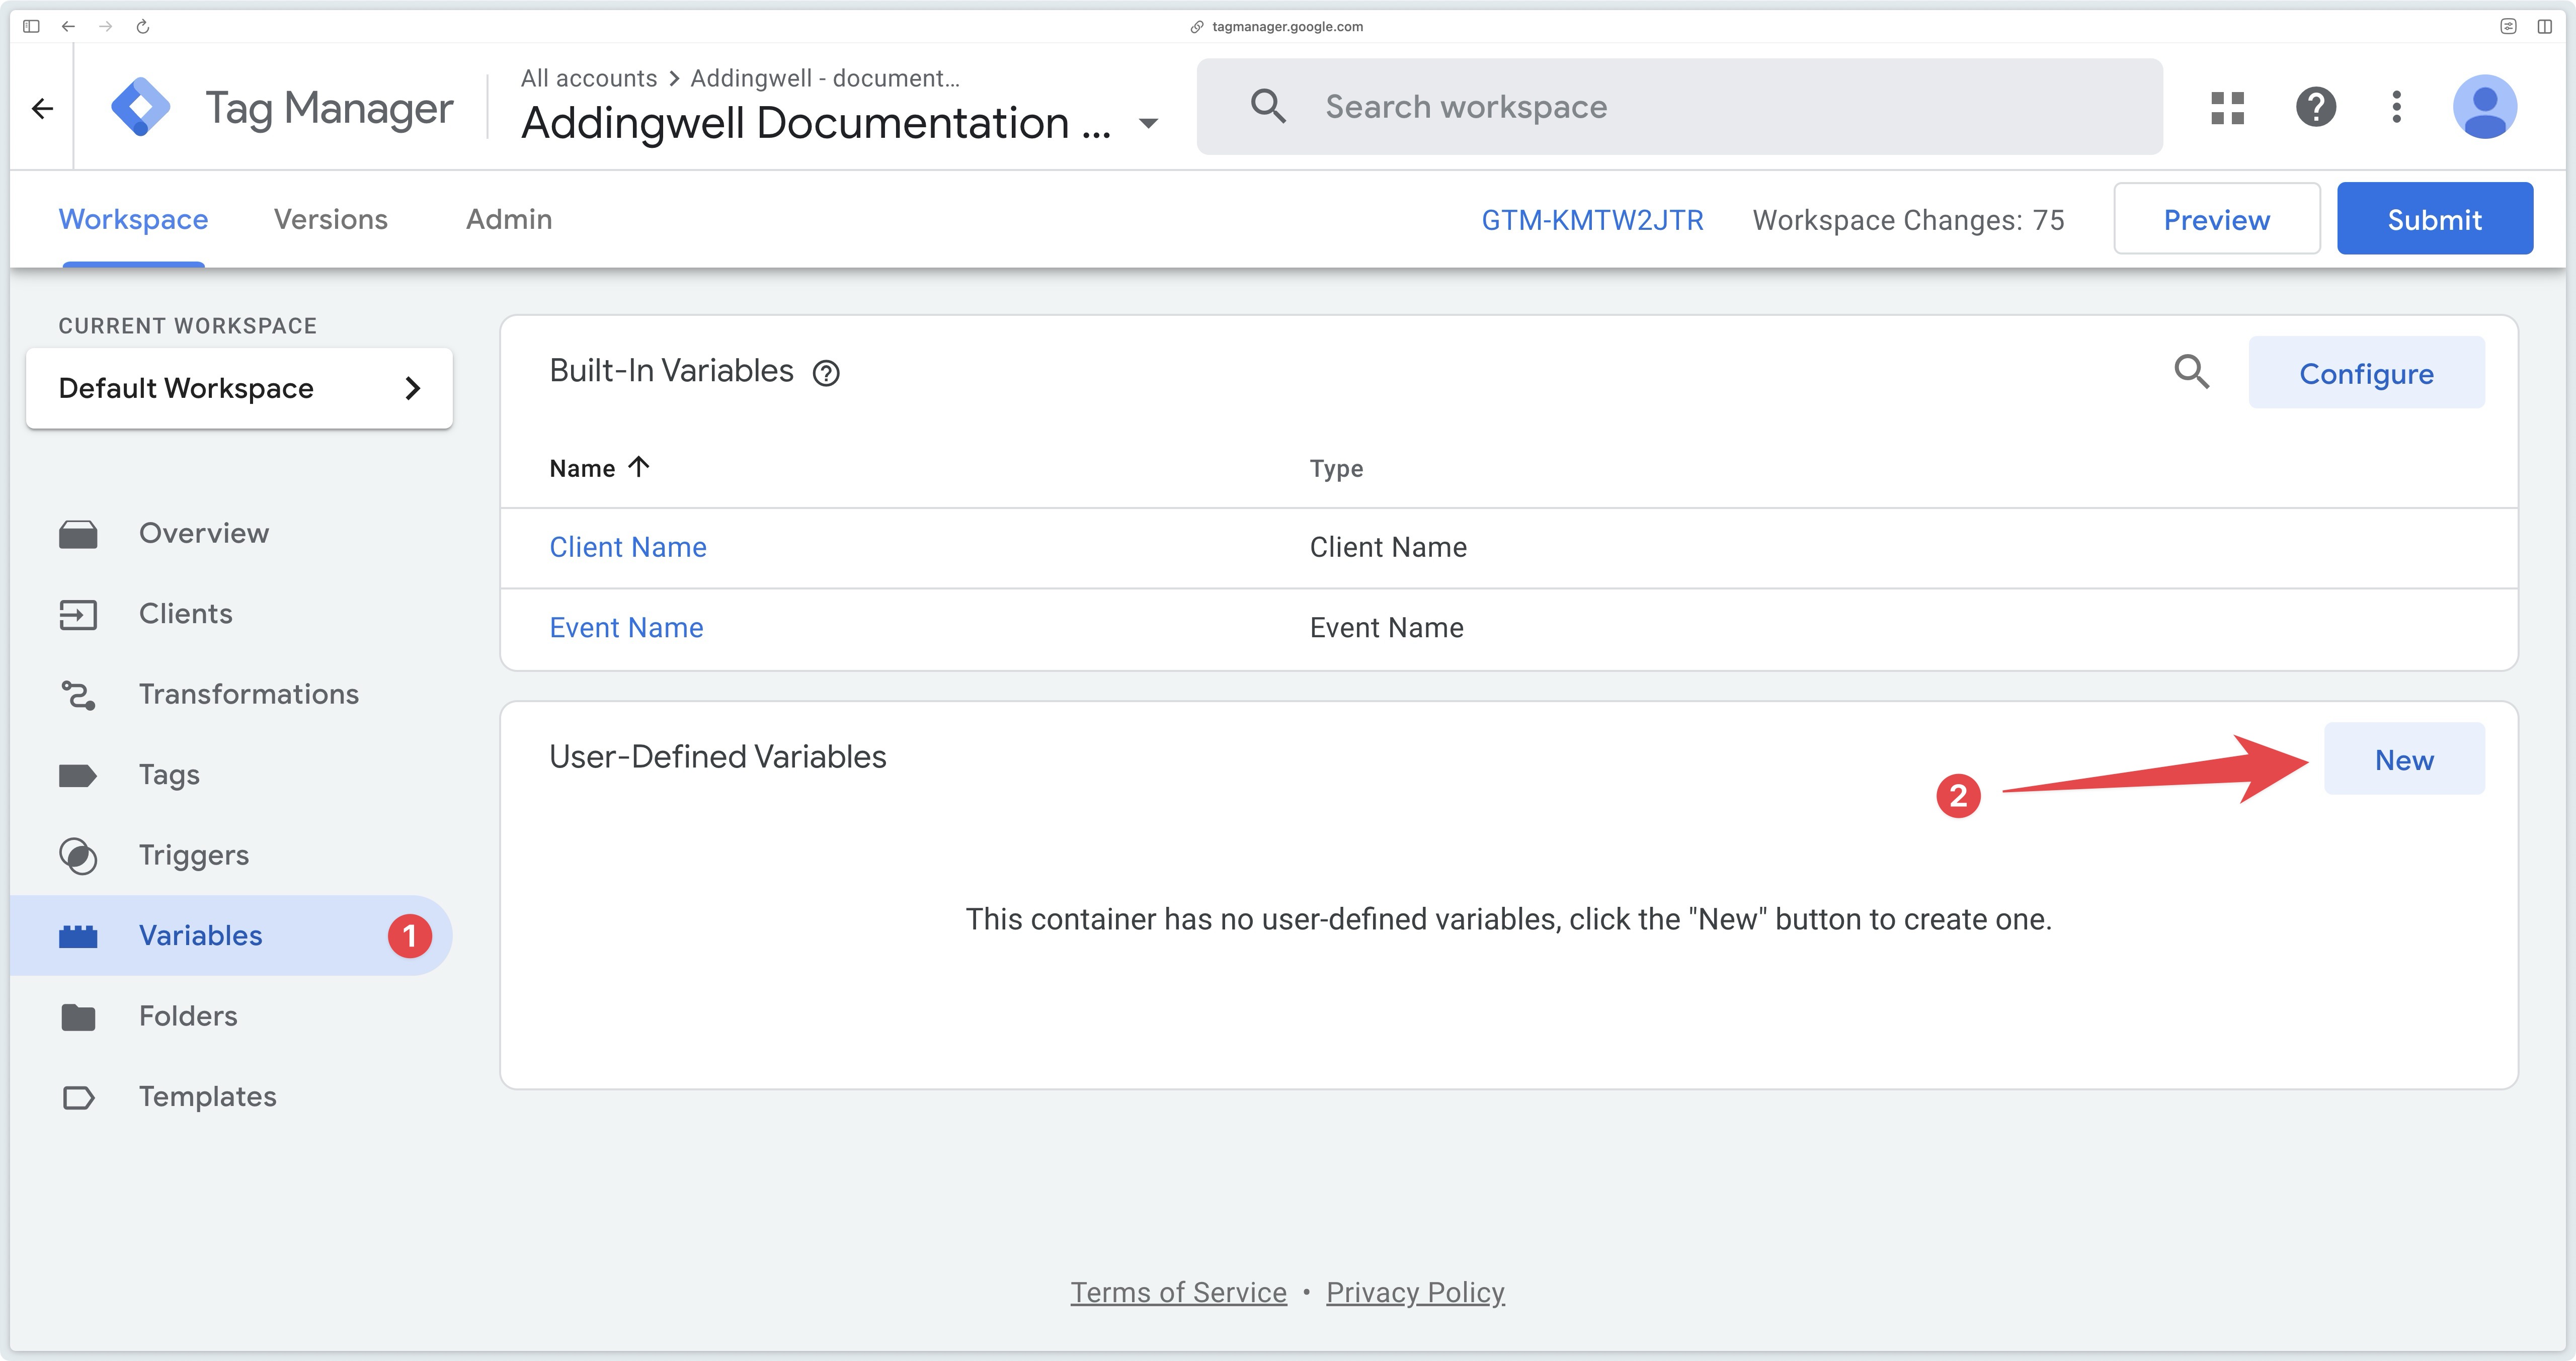
Then select the variable you’ve just imported.
Enter the name of the items array field to be used to retrieve product identifiers synchronized with the Merchant Center. In this example, we’ll use item_id.
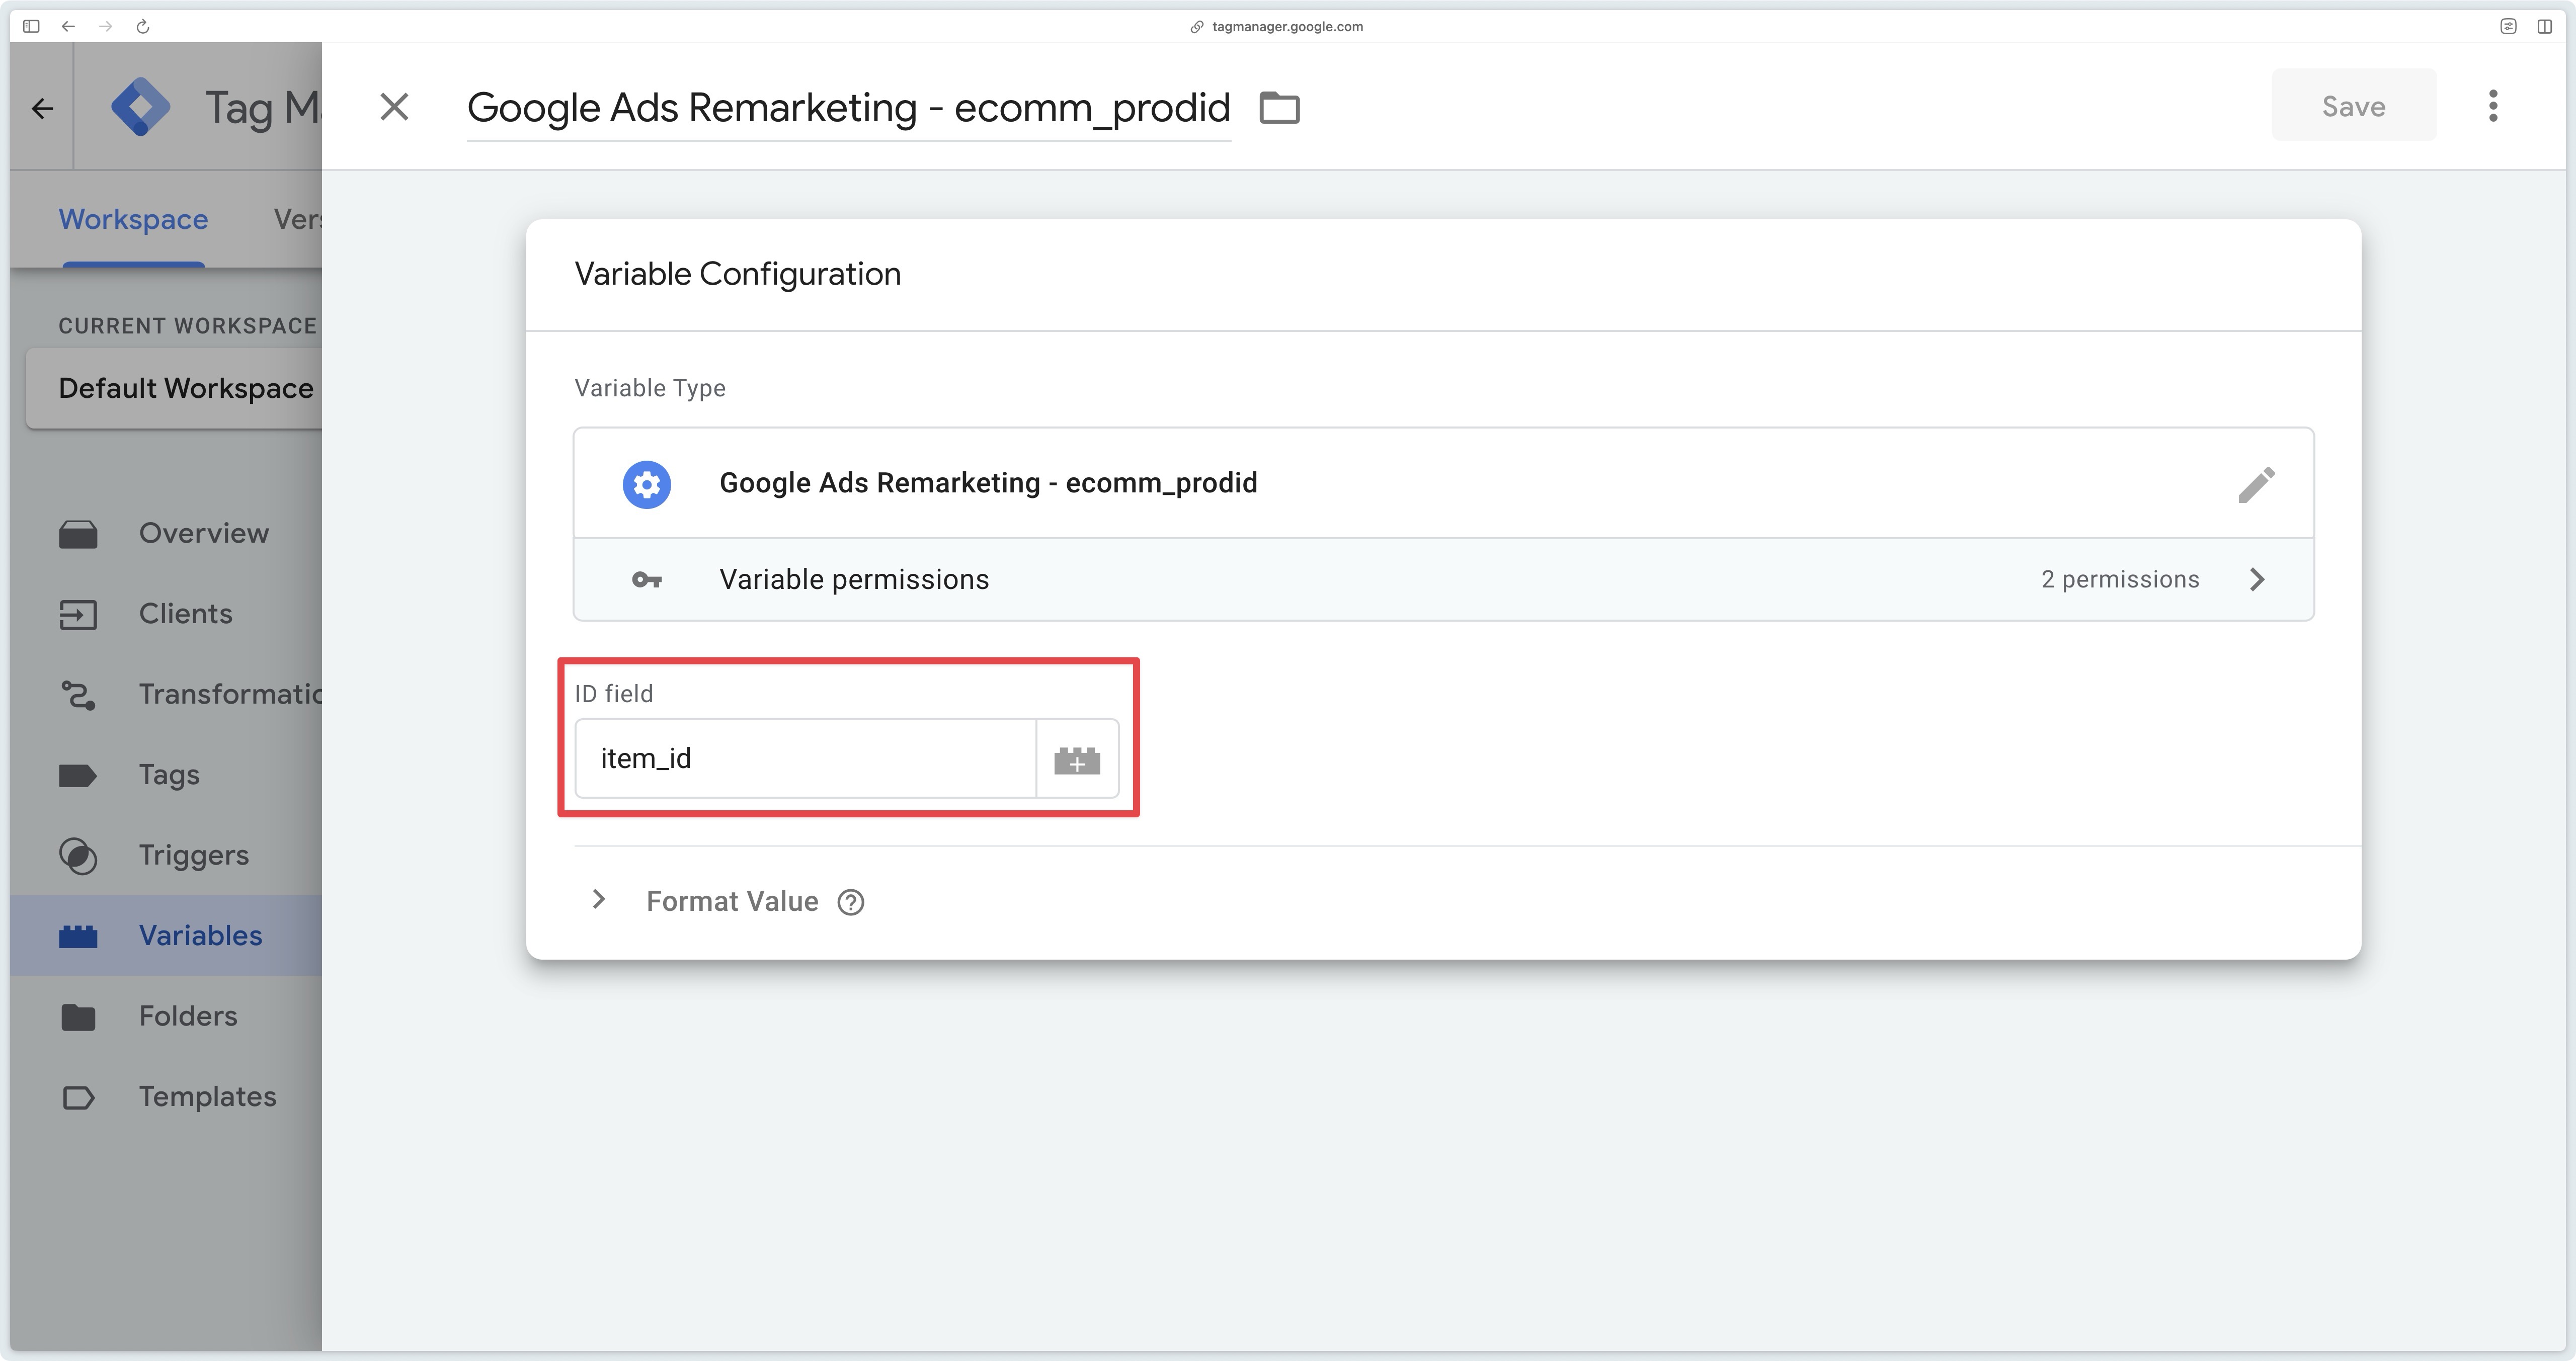
In the Google Ads Remarketing tag, check the Provide custom parameters box and select Custom configuration as Data Source. Then enter the two parameters google_business_vertical and ecomm_prodid.
The ecomm_prodid parameter takes the value of the variable you created earlier.
How to trigger this tag
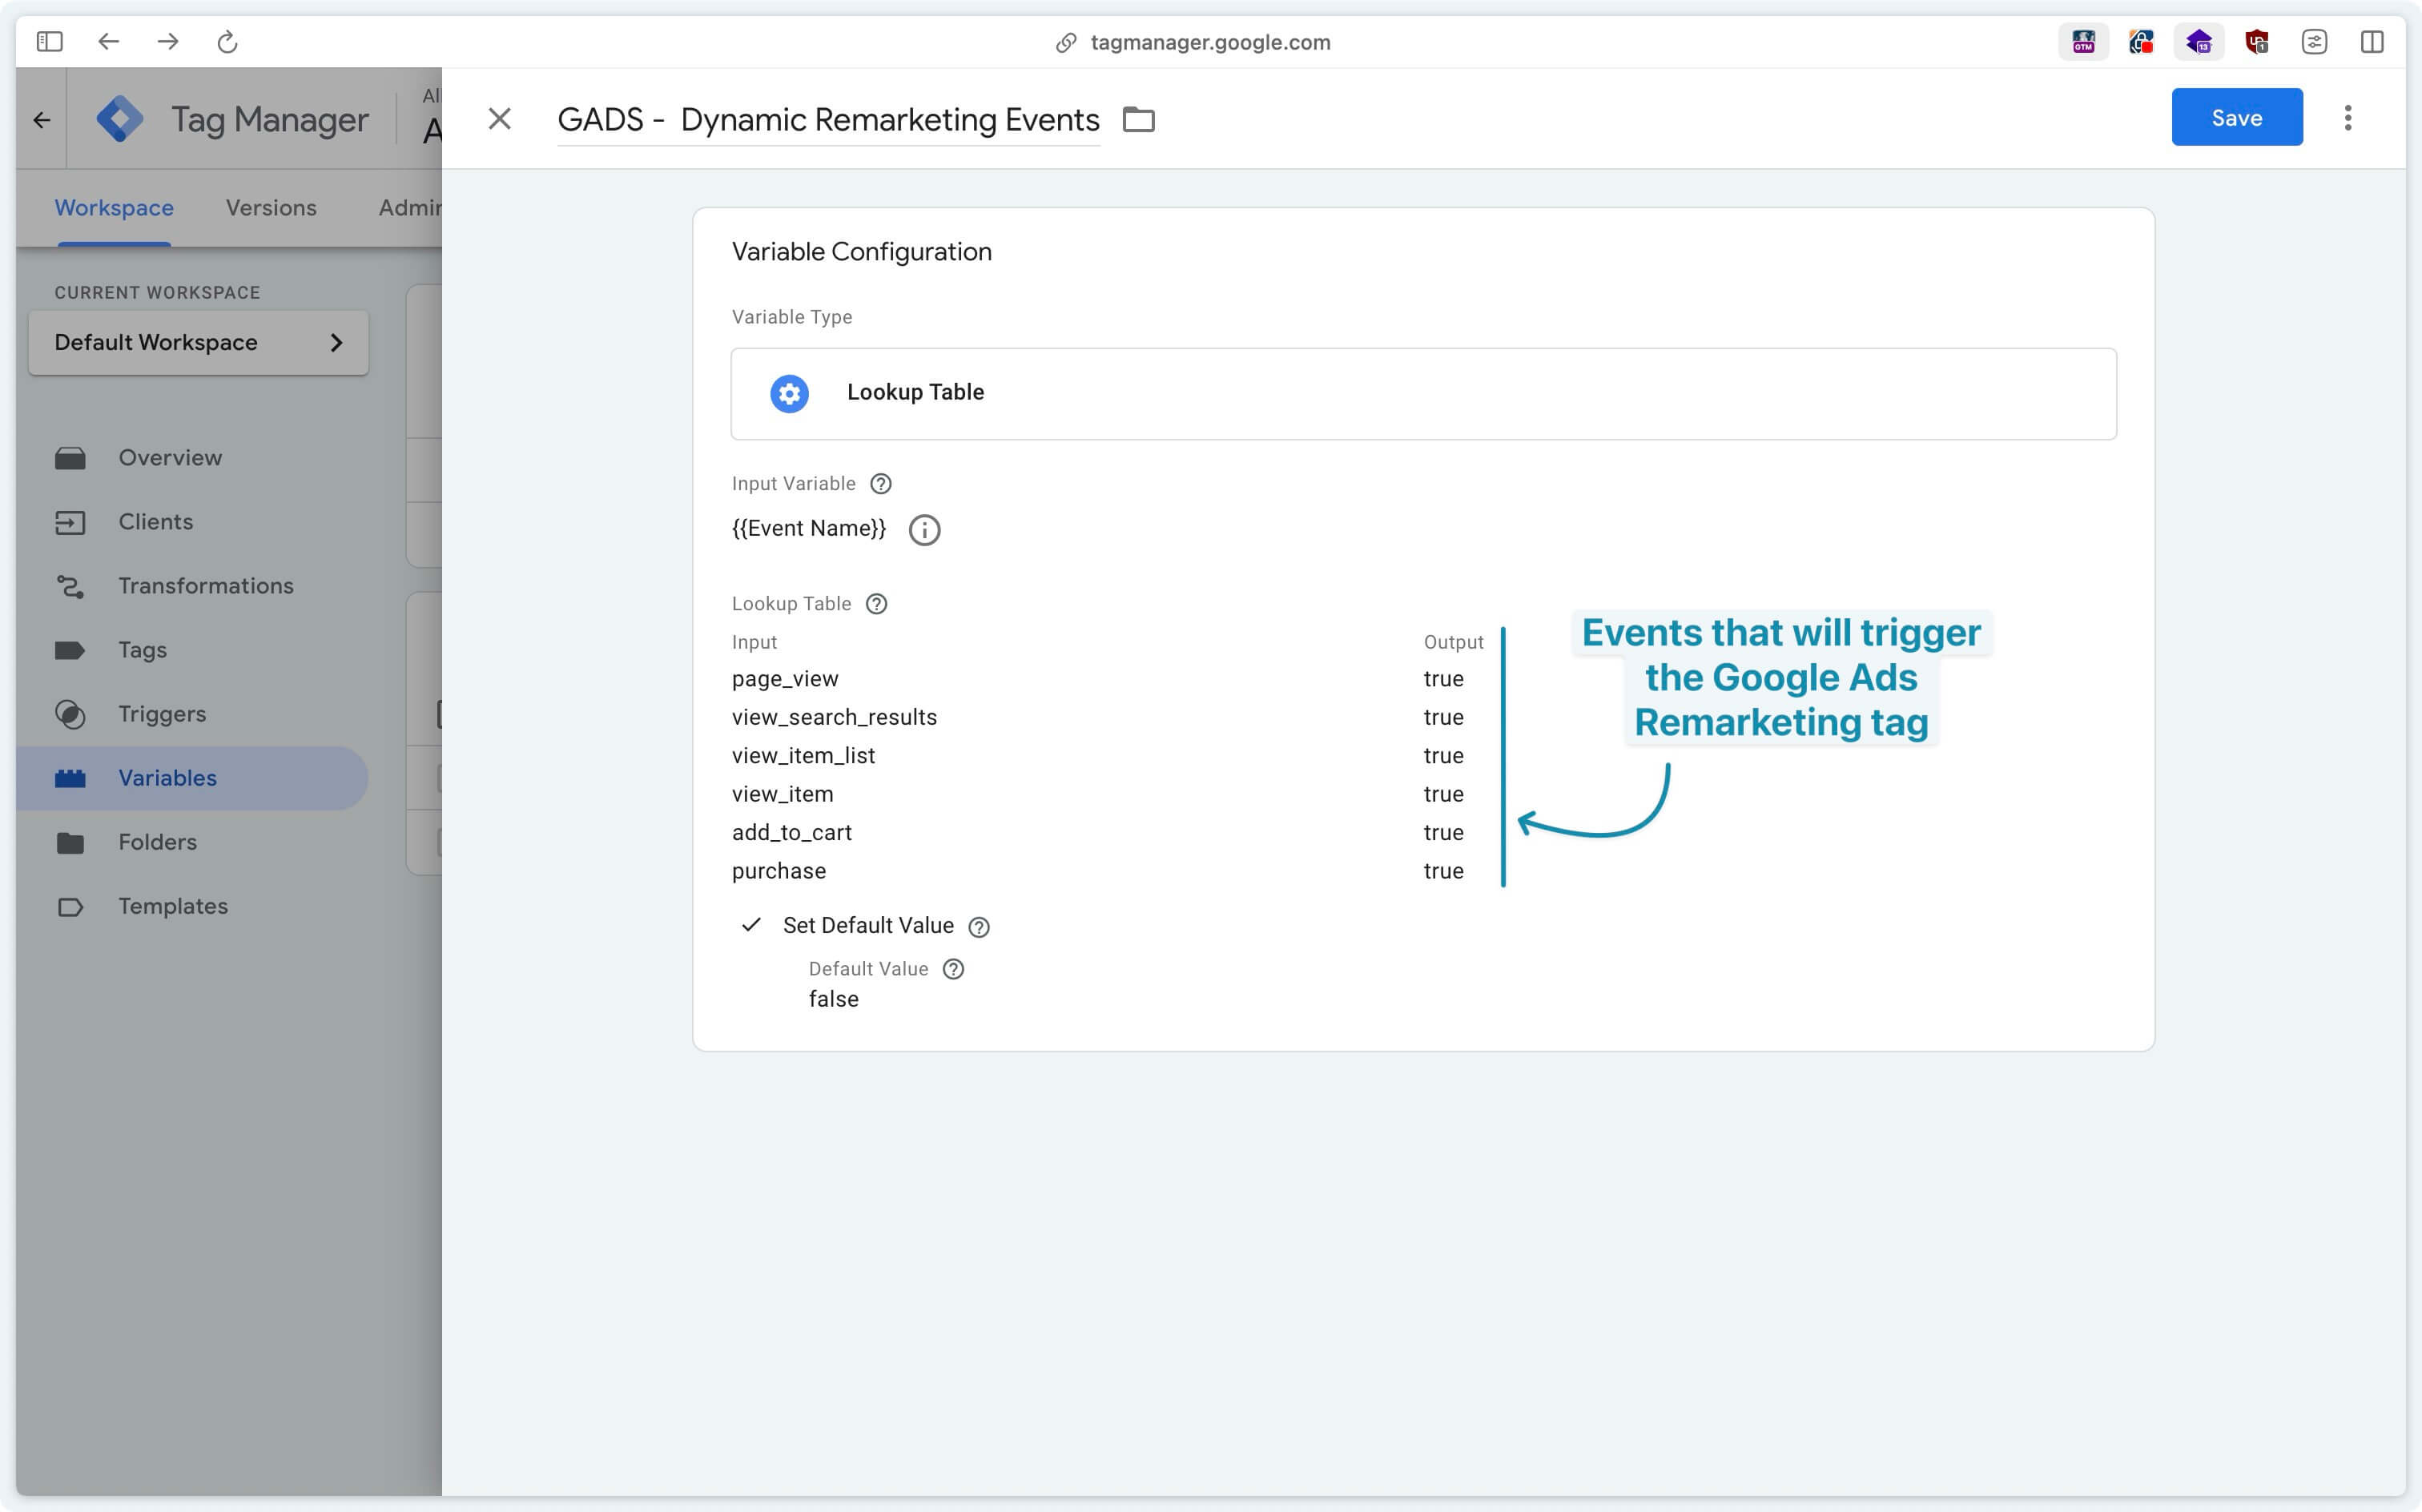
You need to trigger this tag on all of the following events:
| Event name | Description |
|---|---|
page_view | Allows you to keep the classic remarketing functionality. |
view_search_results or search | Allows Google Ads to create a list of users who have performed searches. |
view_item_list | Allows Google Ads to create a list of users who have viewed products. |
view_item | Allows Google Ads to create a list of users who have viewed a product. |
add_to_cart | Allows Google Ads to create a list of users who have abandoned their shopping cart. |
purchase | Allows Google Ads to create a list of users who have purchased a product. |
Create variable: Lookup Table
To facilitate the configuration of this trigger, we’re going to create a Lookup Table in which we’ll list all the events on which the tag should fire.
This variable (Lookup Table) will return true when the event is in the list, and false otherwise. You can then use this variable in the Google Ads Remarketing tag trigger.
Trigger configuration
In the trigger, check that the Lookup Table created earlier returns true.

For Google products:
- If you are using “Basic” consent mode: Depending on the country where your website operates and the current data collection regulations (GDPR in Europe, CCPA in California, Law 25 in Quebec, etc.), it is imperative to configure the tag trigger based on user consent. Ensure that the tag fires only after the appropriate consent has been obtained, in compliance with applicable legal requirements.
- If you are using “Advanced” consent mode: It is not necessary to set the tag to trigger only upon explicit consent.
Check data
In this section, you’ll check that everything is working correctly.
Before publishing your GTM container, take the time to test each step via the preview and diagnostic tools.
This will prevent you from sending incomplete or badly formatted data to Google Ads - which could harm the quality of your audiences later on.
Preview GTM Server-Side
Why check the Server-Side preview?
The server-side preview allows you to unit-test your configuration (on a given event) to identify potential errors before publishing your container and thus apply your changes for all site visitors.
In classic remarketing
To ensure that classic remarketing is correctly configured, you can check that the Google Ads Remarketing and Conversion Linker tags are triggered on the page_view event.

Click on the Google Ads Remarketing tag and check that it sends a request to Google Ads from the browser.

Once these checks have been completed, you can publish your GTM Server container.
Dynamic remarketing
To ensure that dynamic remarketing is correctly configured, you can check that the Conversion Linker tag is triggered on the page_view event and that the Google Ads Remarketing tag is triggered on the page_view, view_search_results or search, view_item_list, view_item, add_to_cart, purchase events.
The idea here is to check that the tag does trigger on the events you’ve added to its trigger (not all of which may be available/relevant to you).
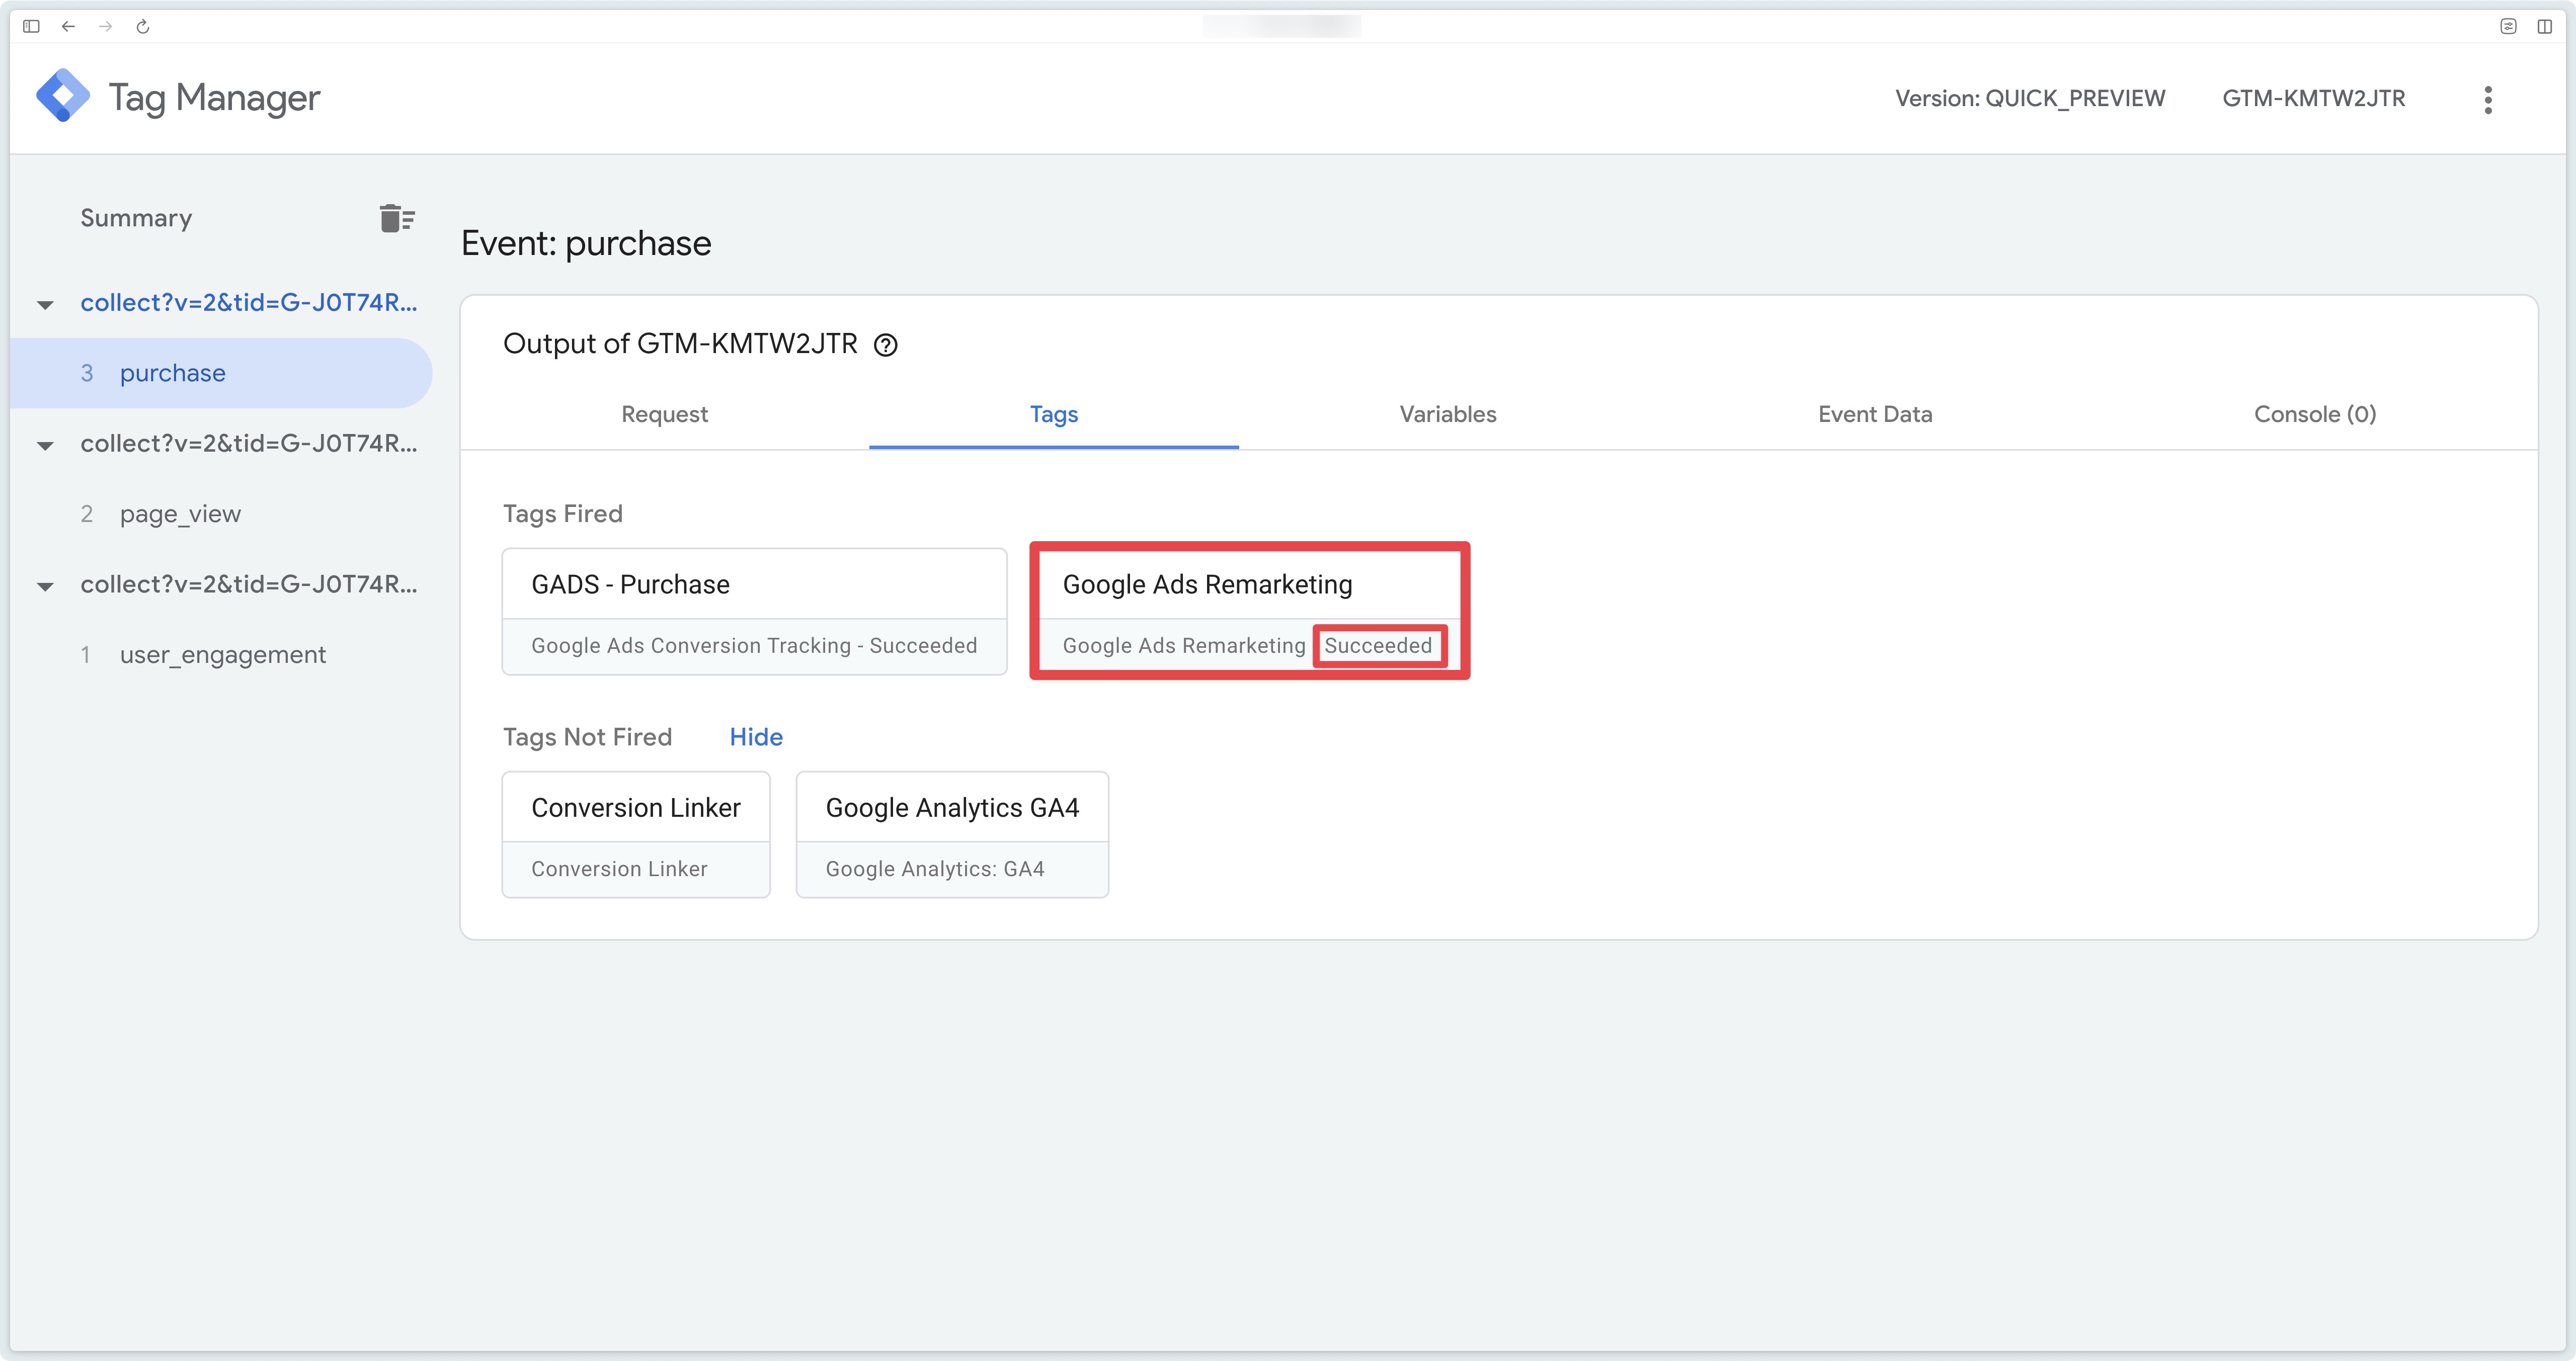
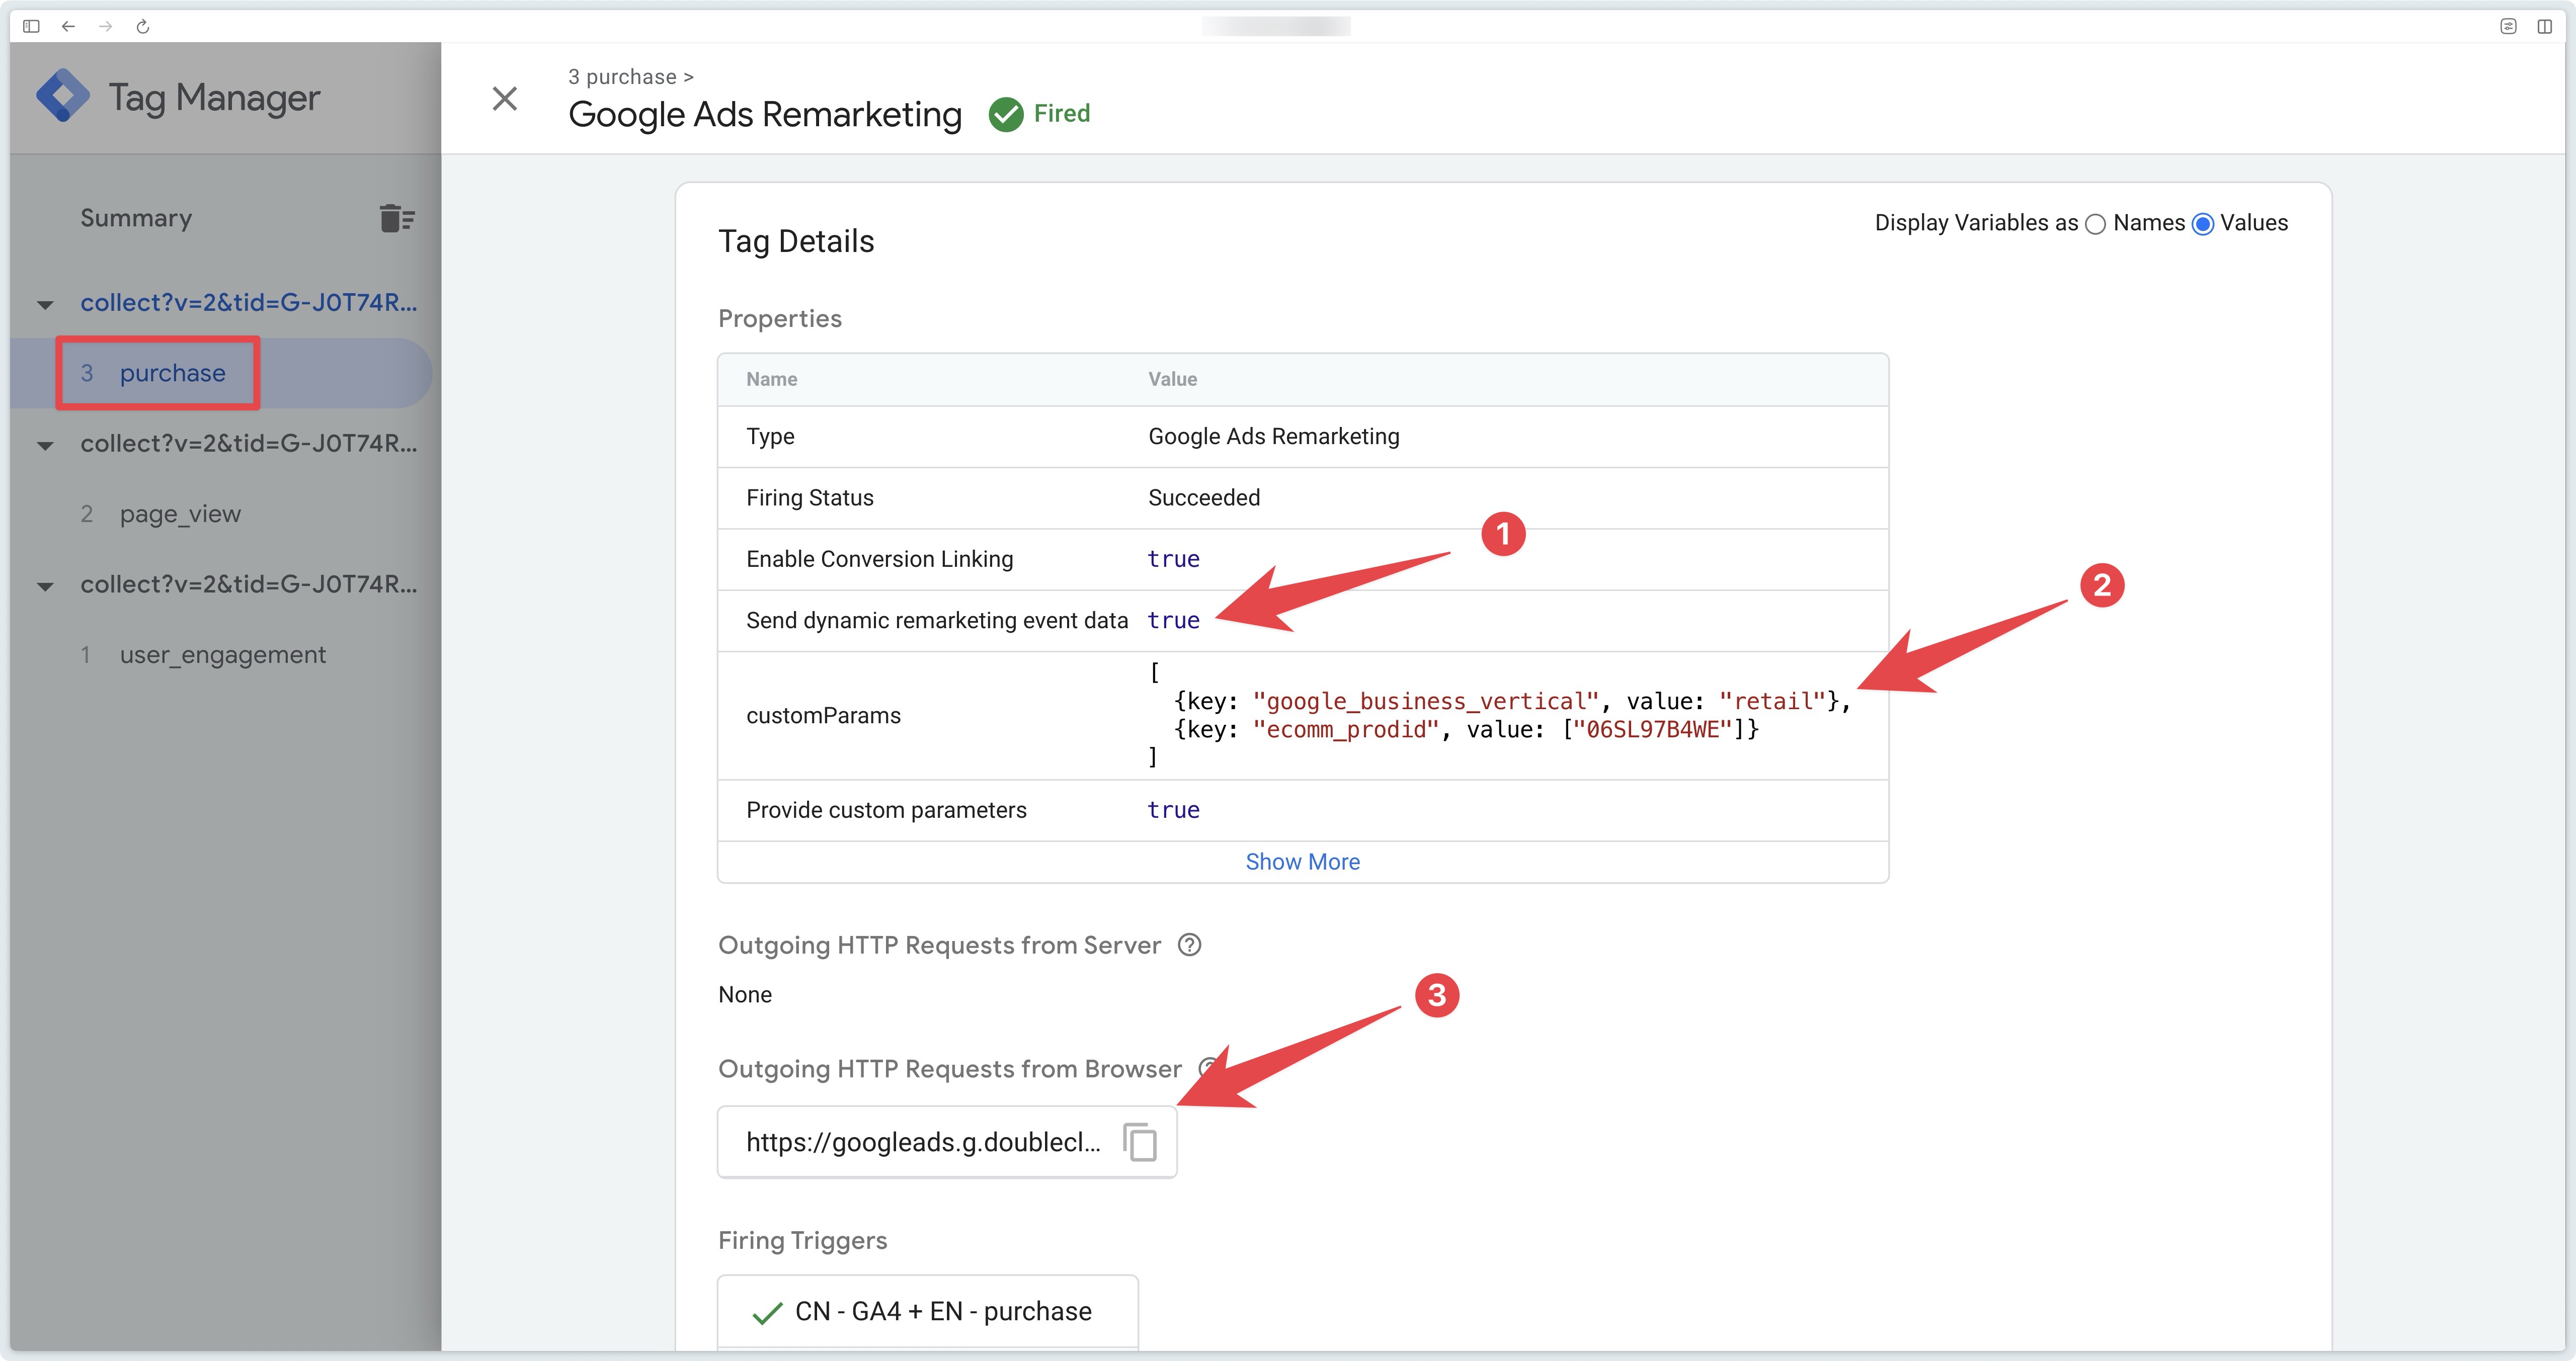
Click on the Google Ads Remarketing tag and check that :
-
the Send dynamic remarketing data box is set to
true. -
custom parameters
ecomm_prodidandgoogle_business_verticalare populated -
a request is sent to Google Ads from the browser
Once these checks have been completed, you can publish your GTM Server container.
On the Addingwell Side via Events Monitoring
Why check Events Monitoring? Sometimes, the Server-Side Preview isn’t enough to detect potential issues. Events Monitoring gives you a broader view of all traffic on your site. A tag might work in preview mode but fail for some of your actual visitors.
Click on the Events Monitoring tab from your Addingwell container. Then, click on the Google Ads Remarketing tag and filter by a specific time period.
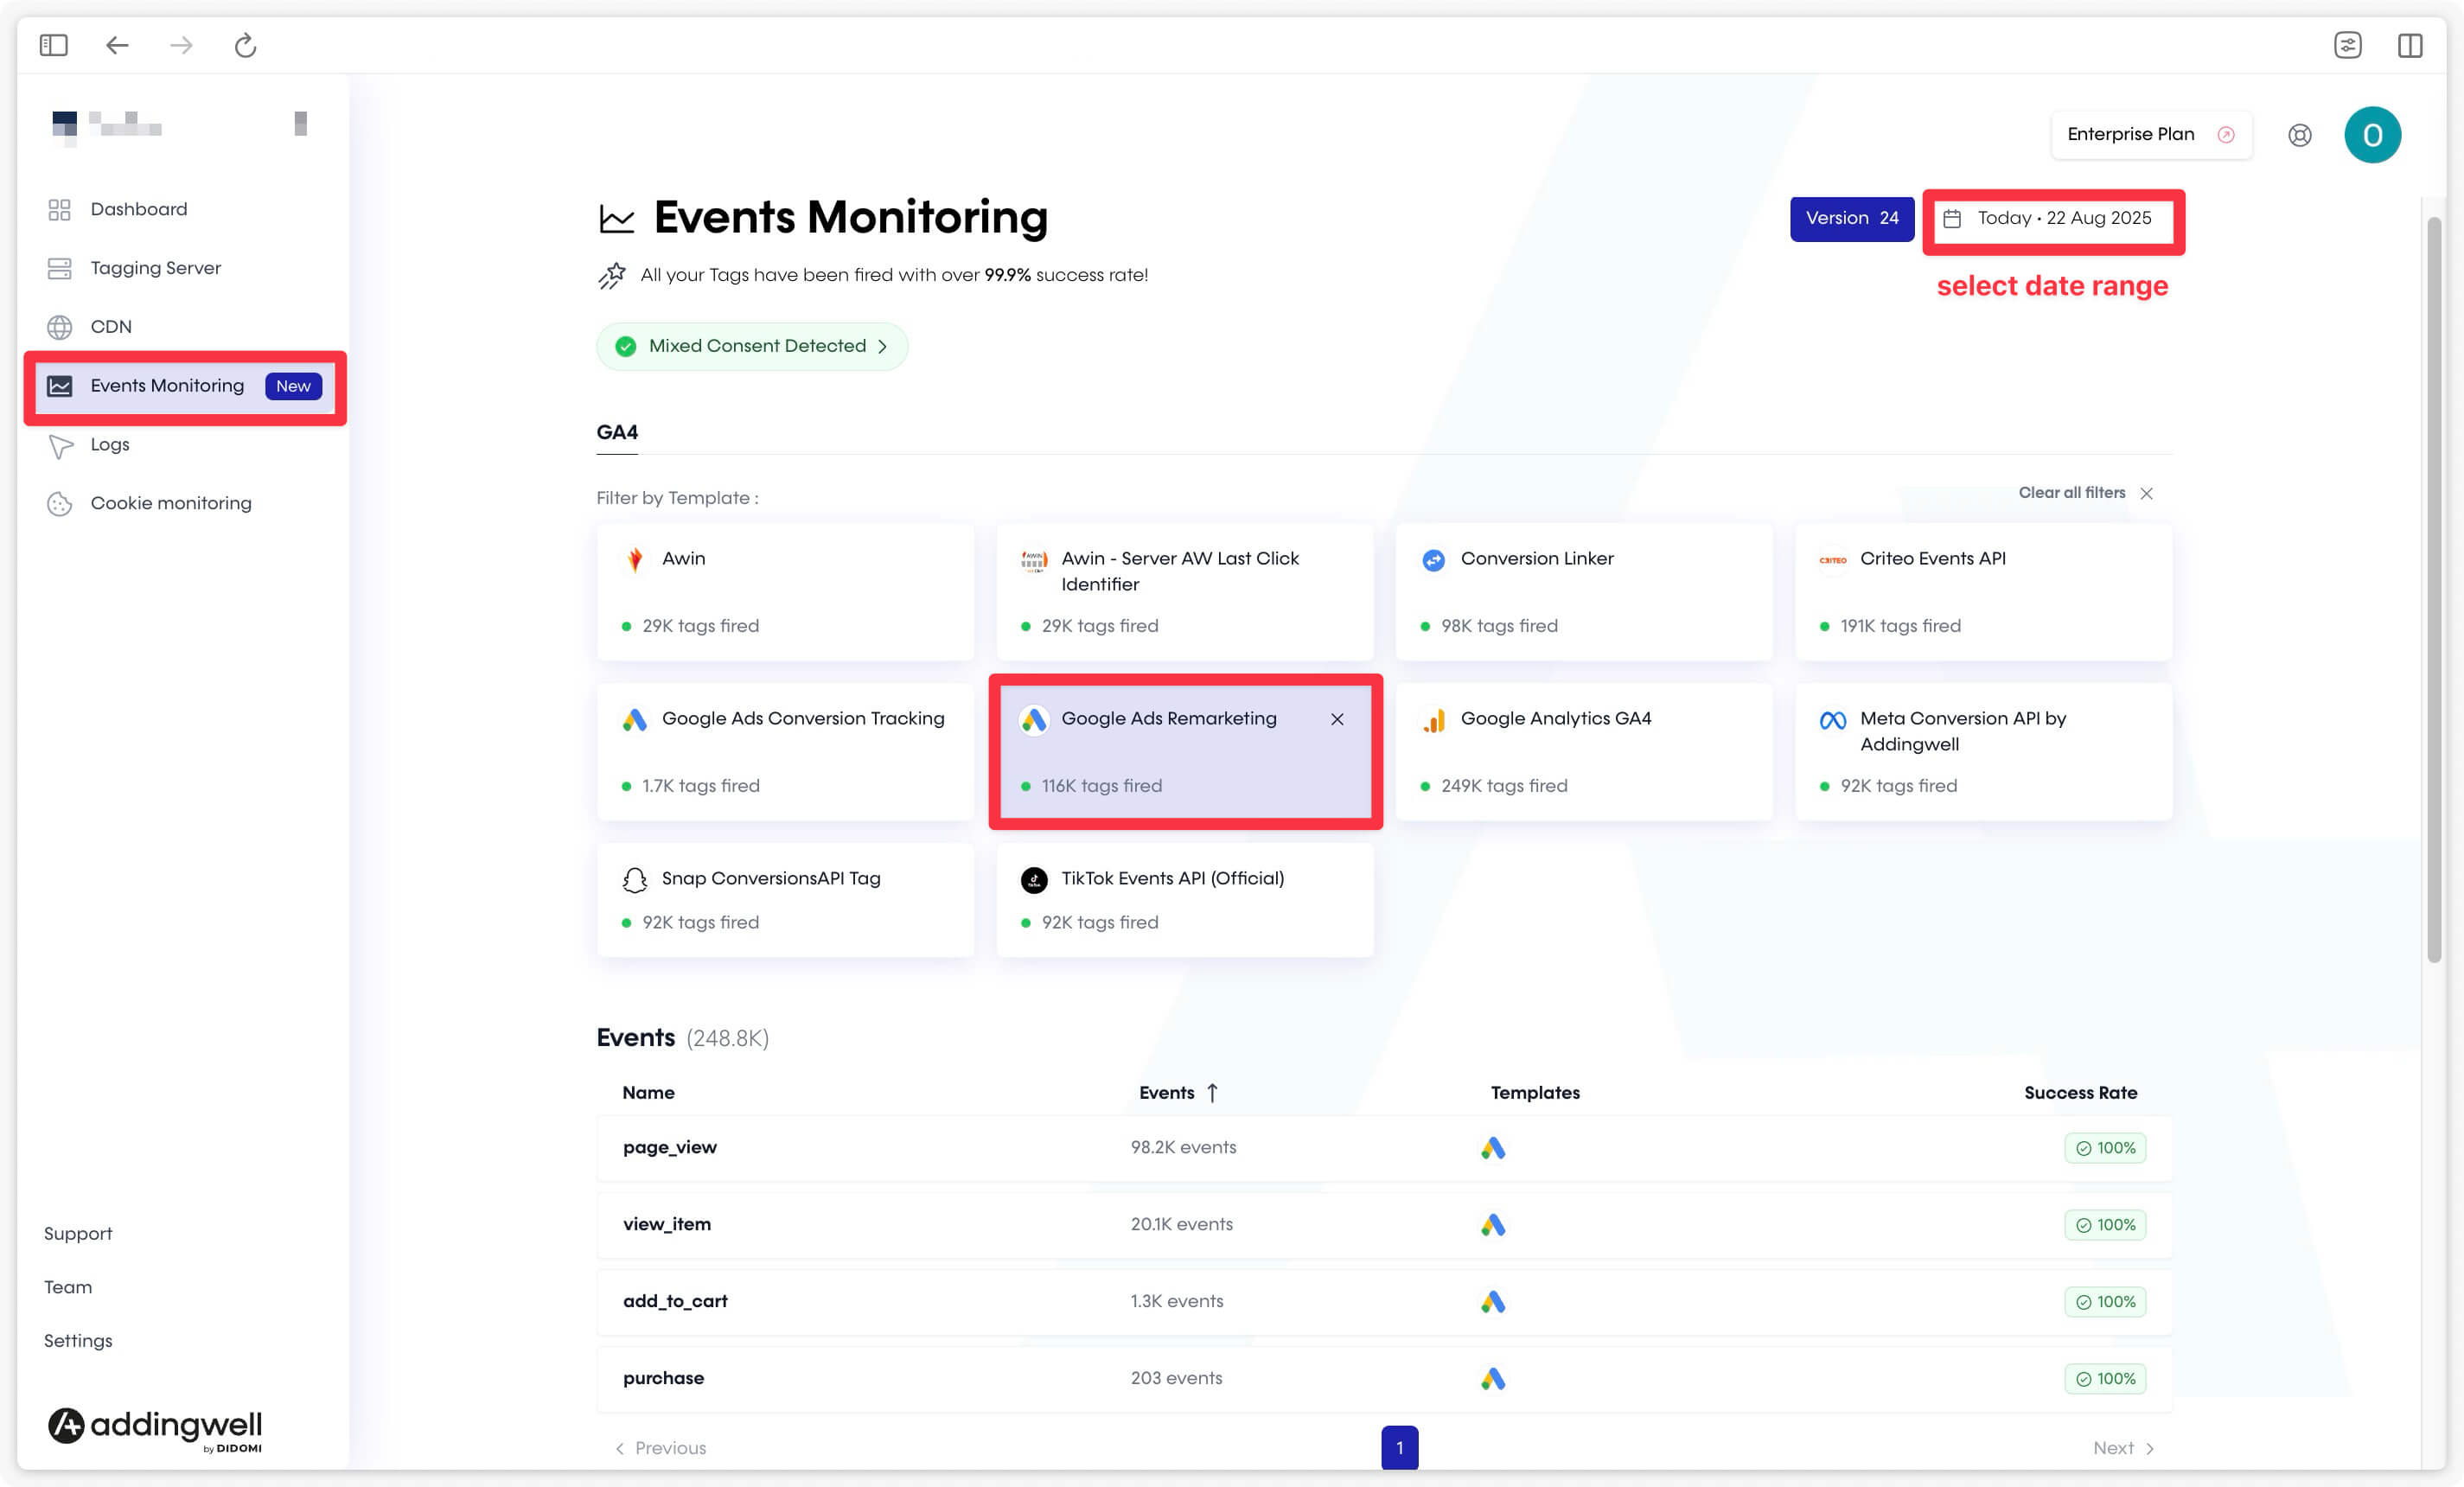
This screen provides detailed insights into the events sent from your server to Google Ads — including their volume and success rate. In our example, each event shows a 100% success rate.
On Google Ads
Why check Google Ads?
Google Ads is the platform that receives the data. Certain reports allow us to determine whether the data is being received and interpreted correctly by Google Ads.
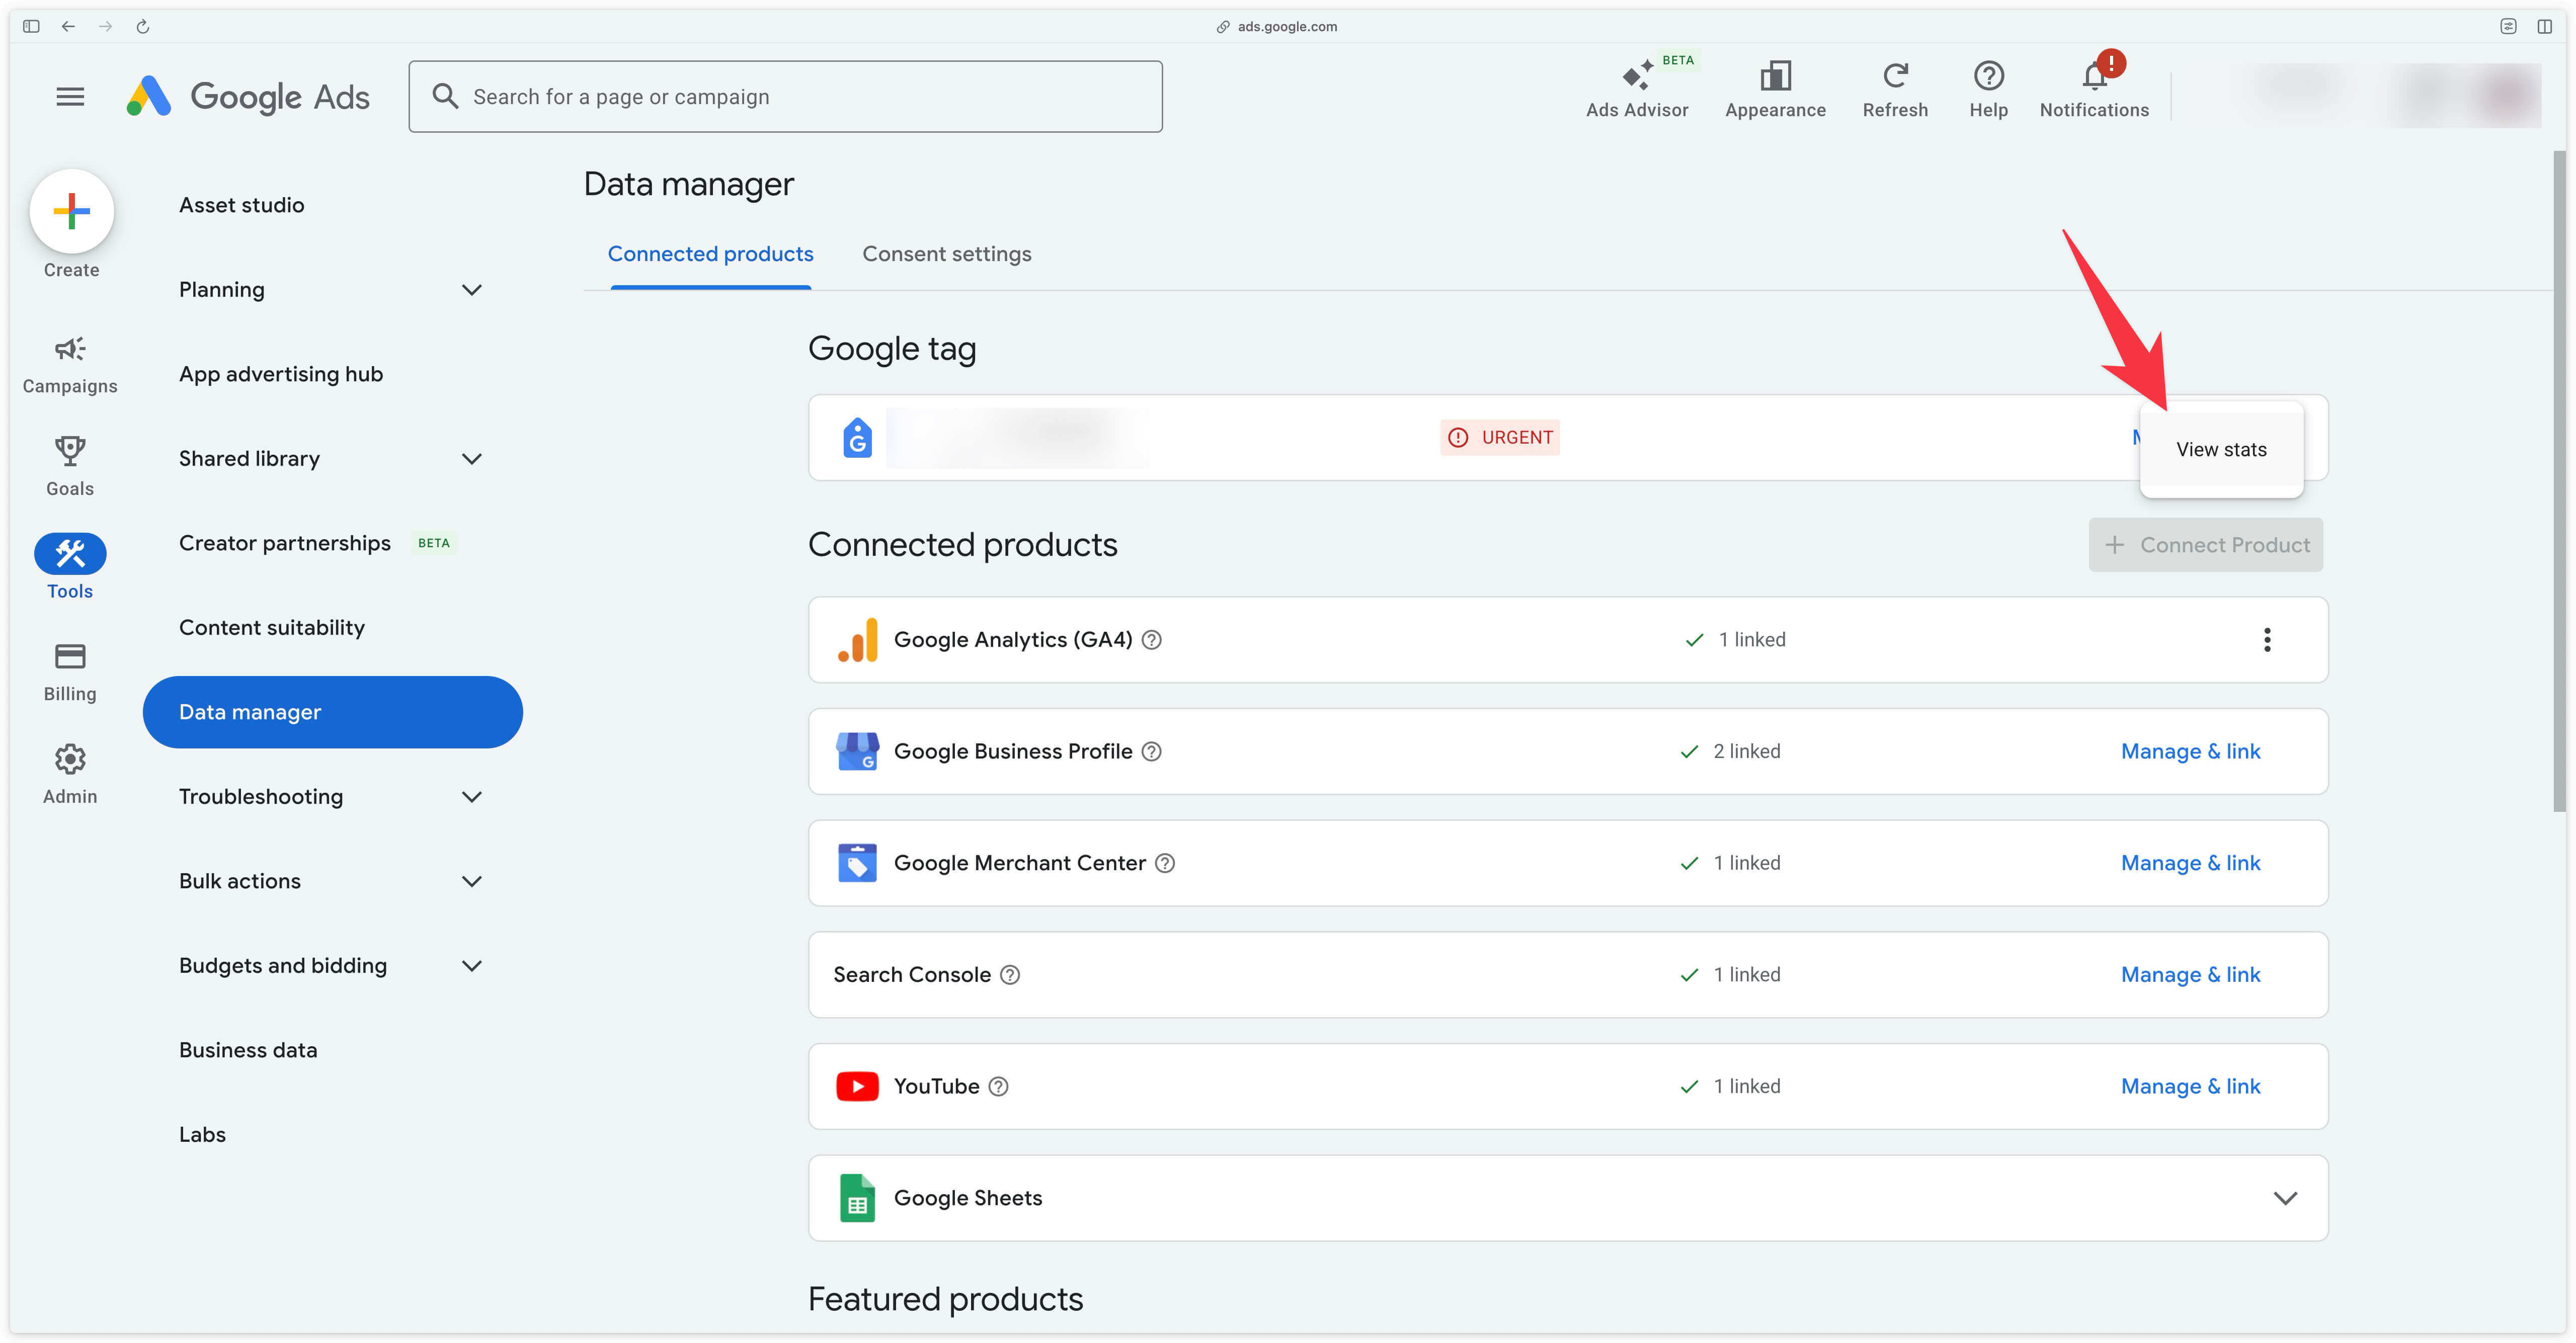
In your Google Ads account, go to Tools > Data Manager then in Google Tag section click on the three dots.
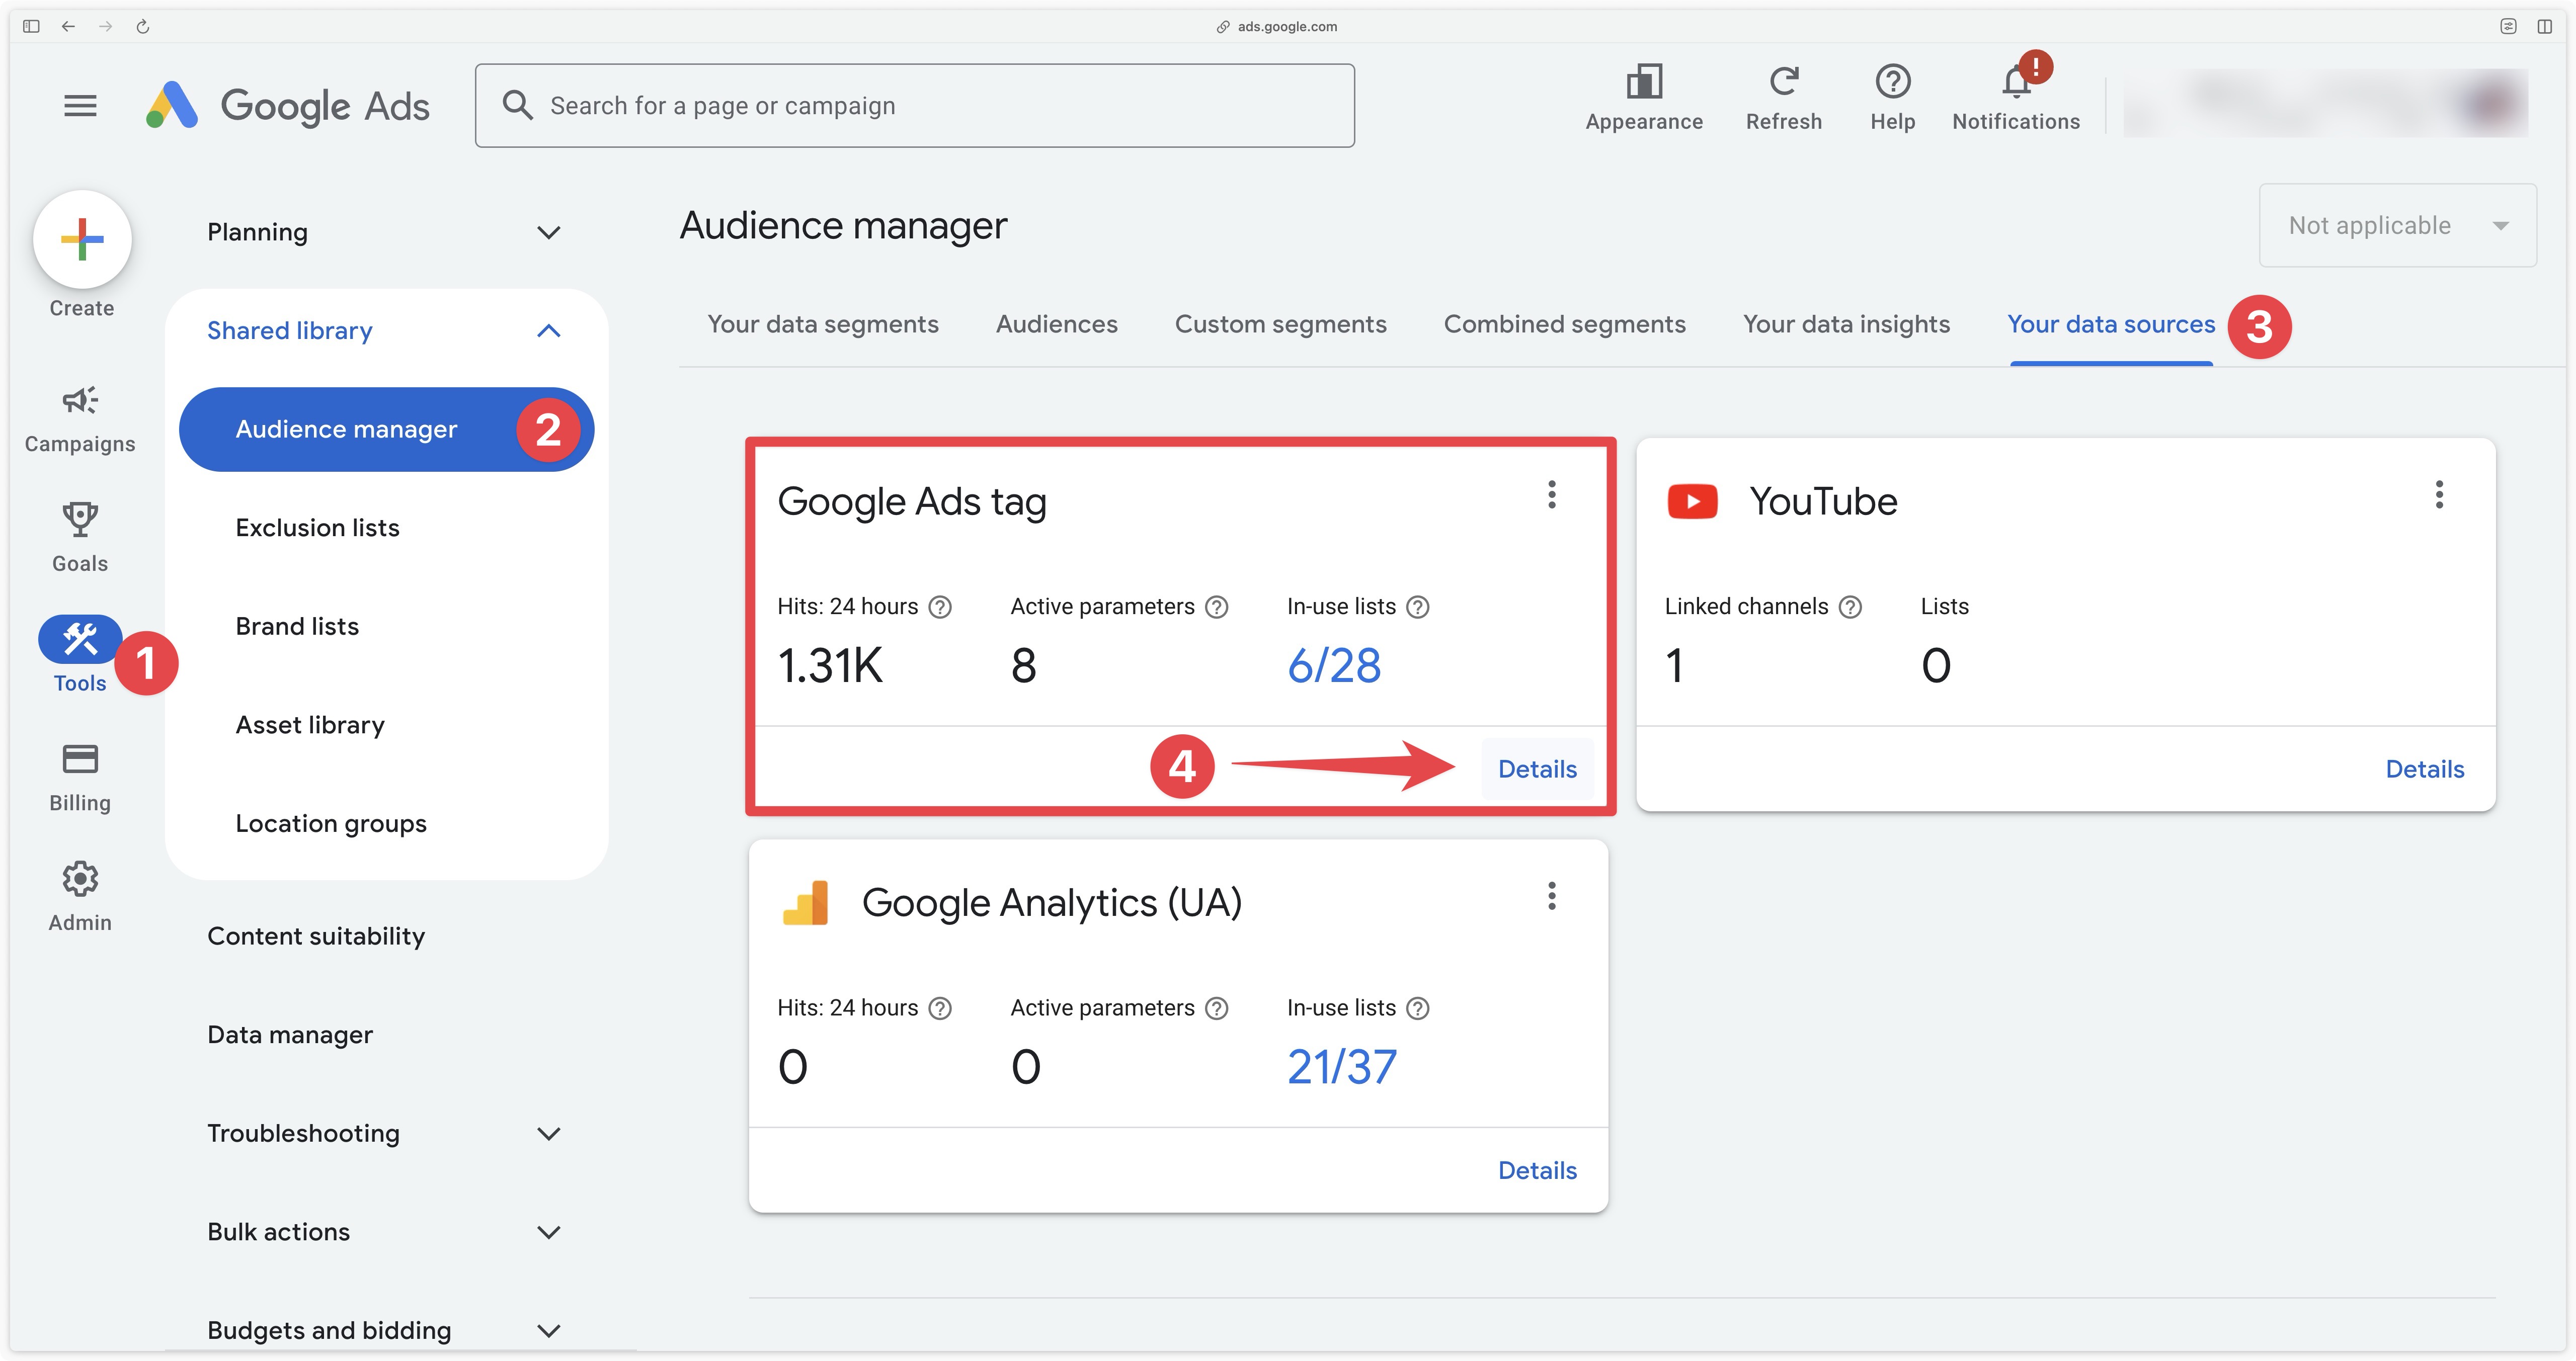
Once you clicked the three dots, a View stats button appears, click on it.
You’ll then come to this screen, where you can check that the Google Ads tag is receiving hits.
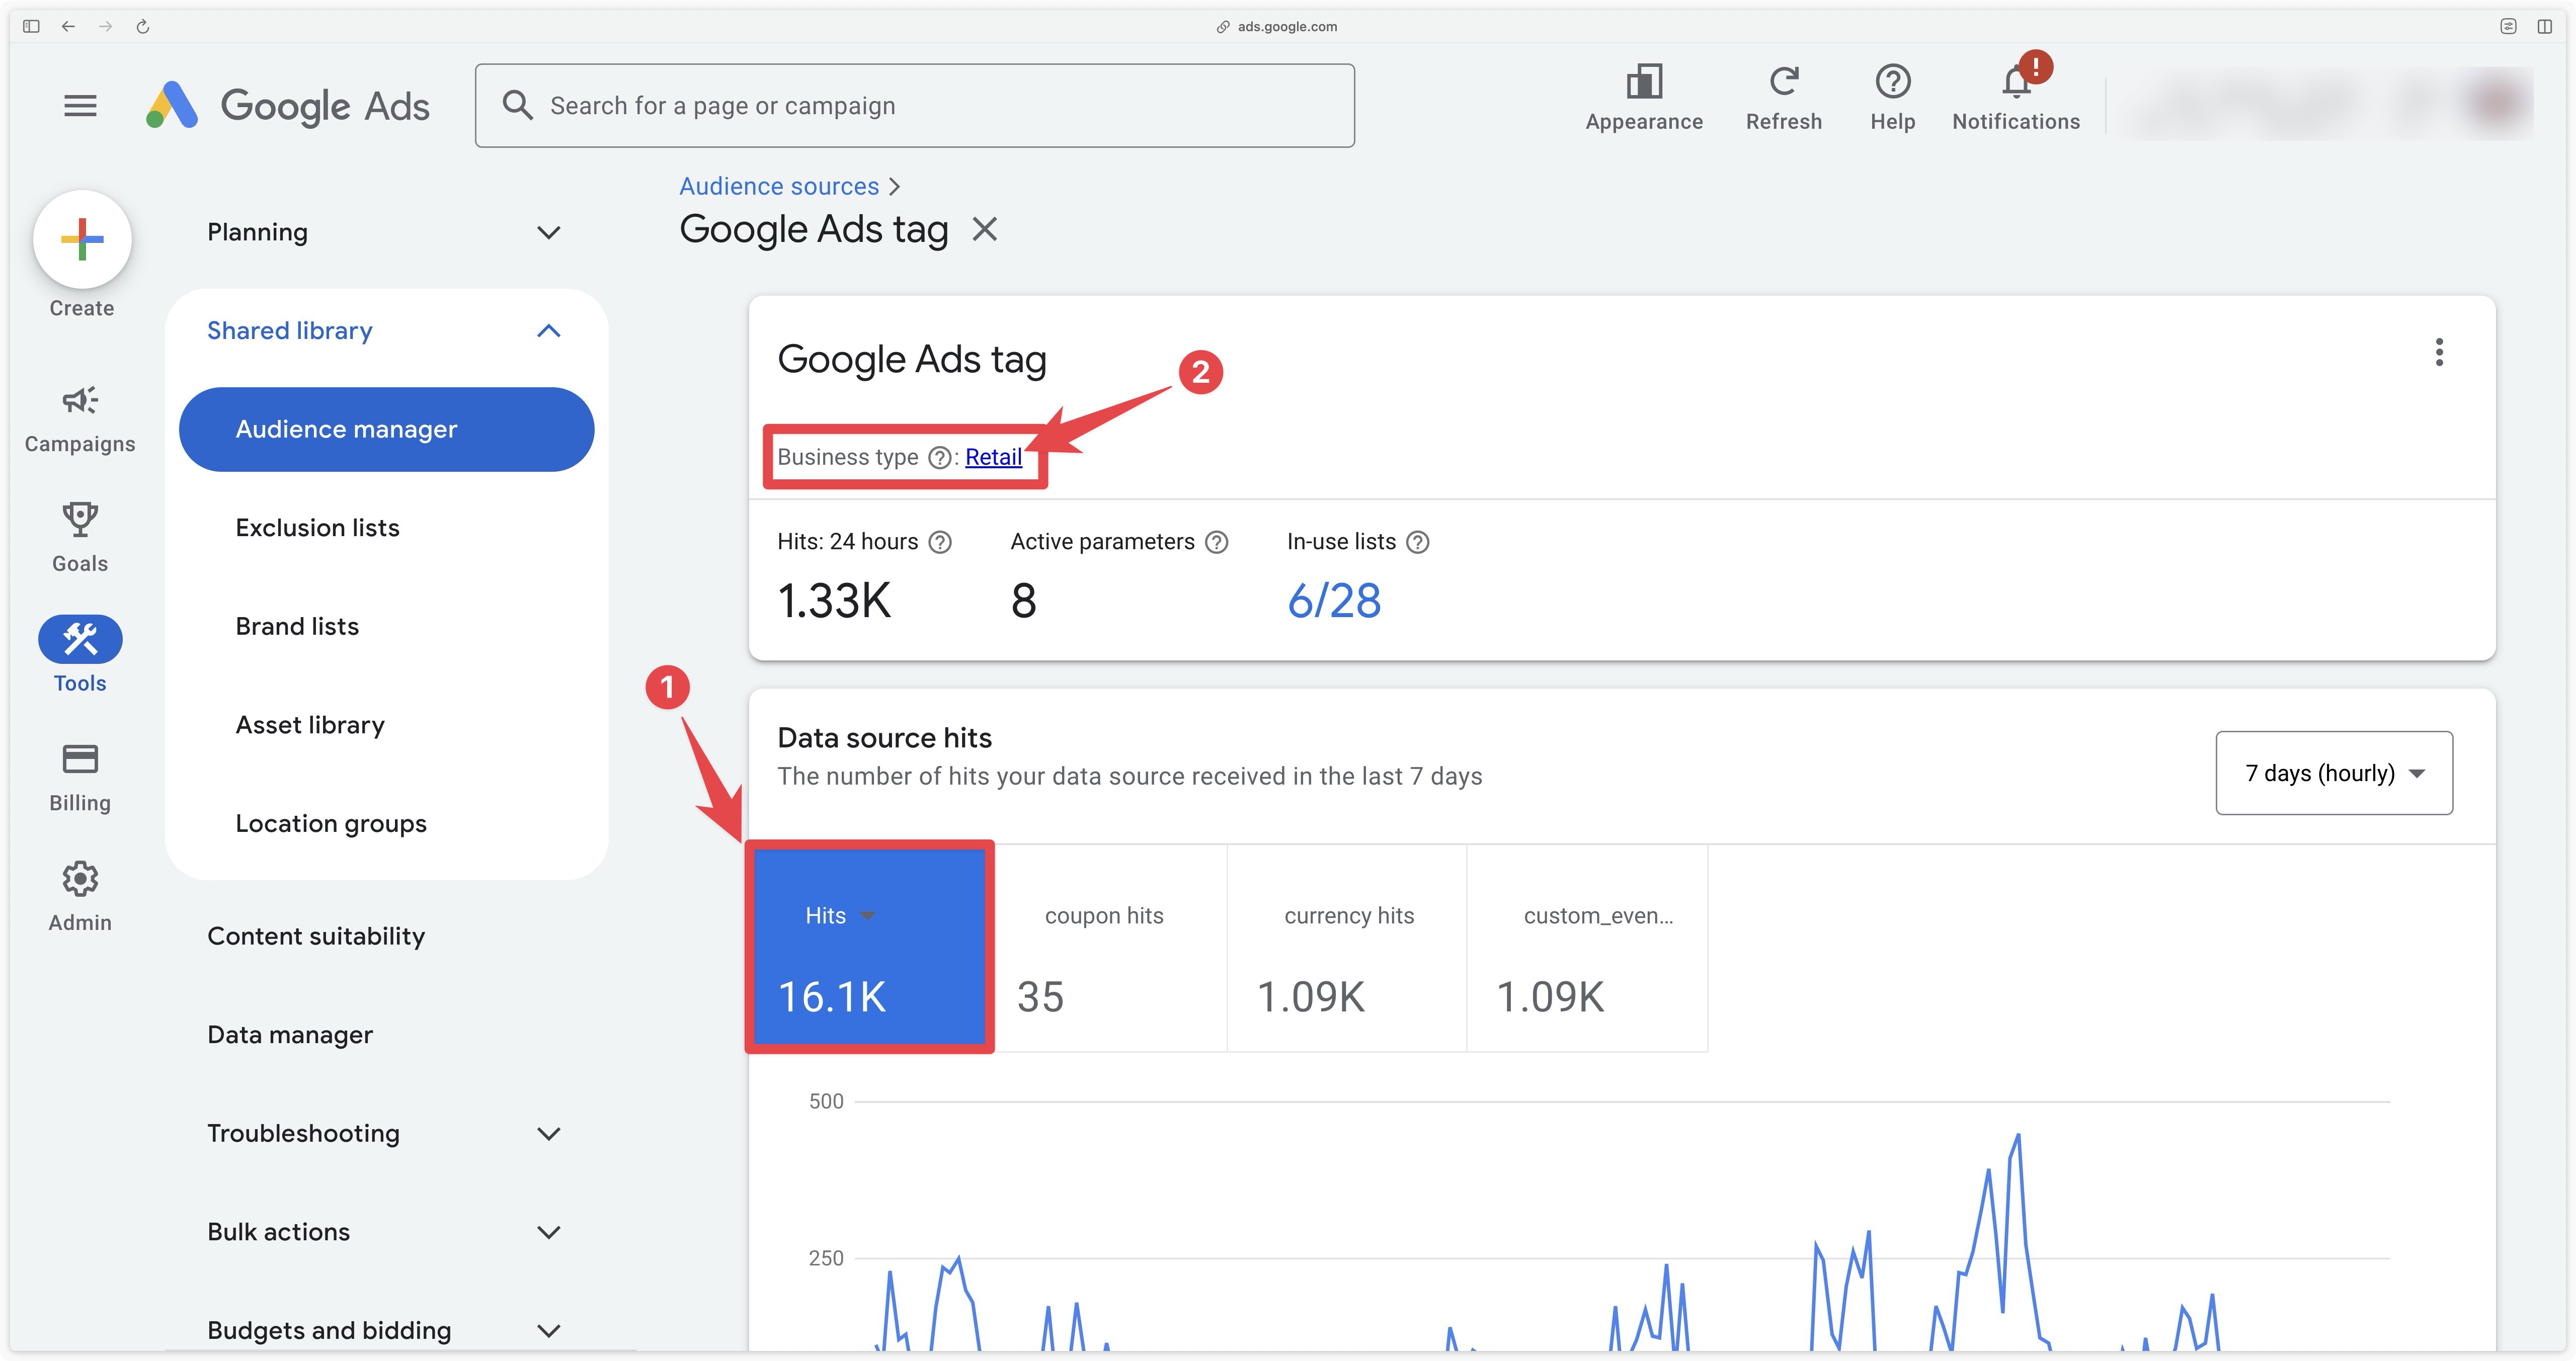
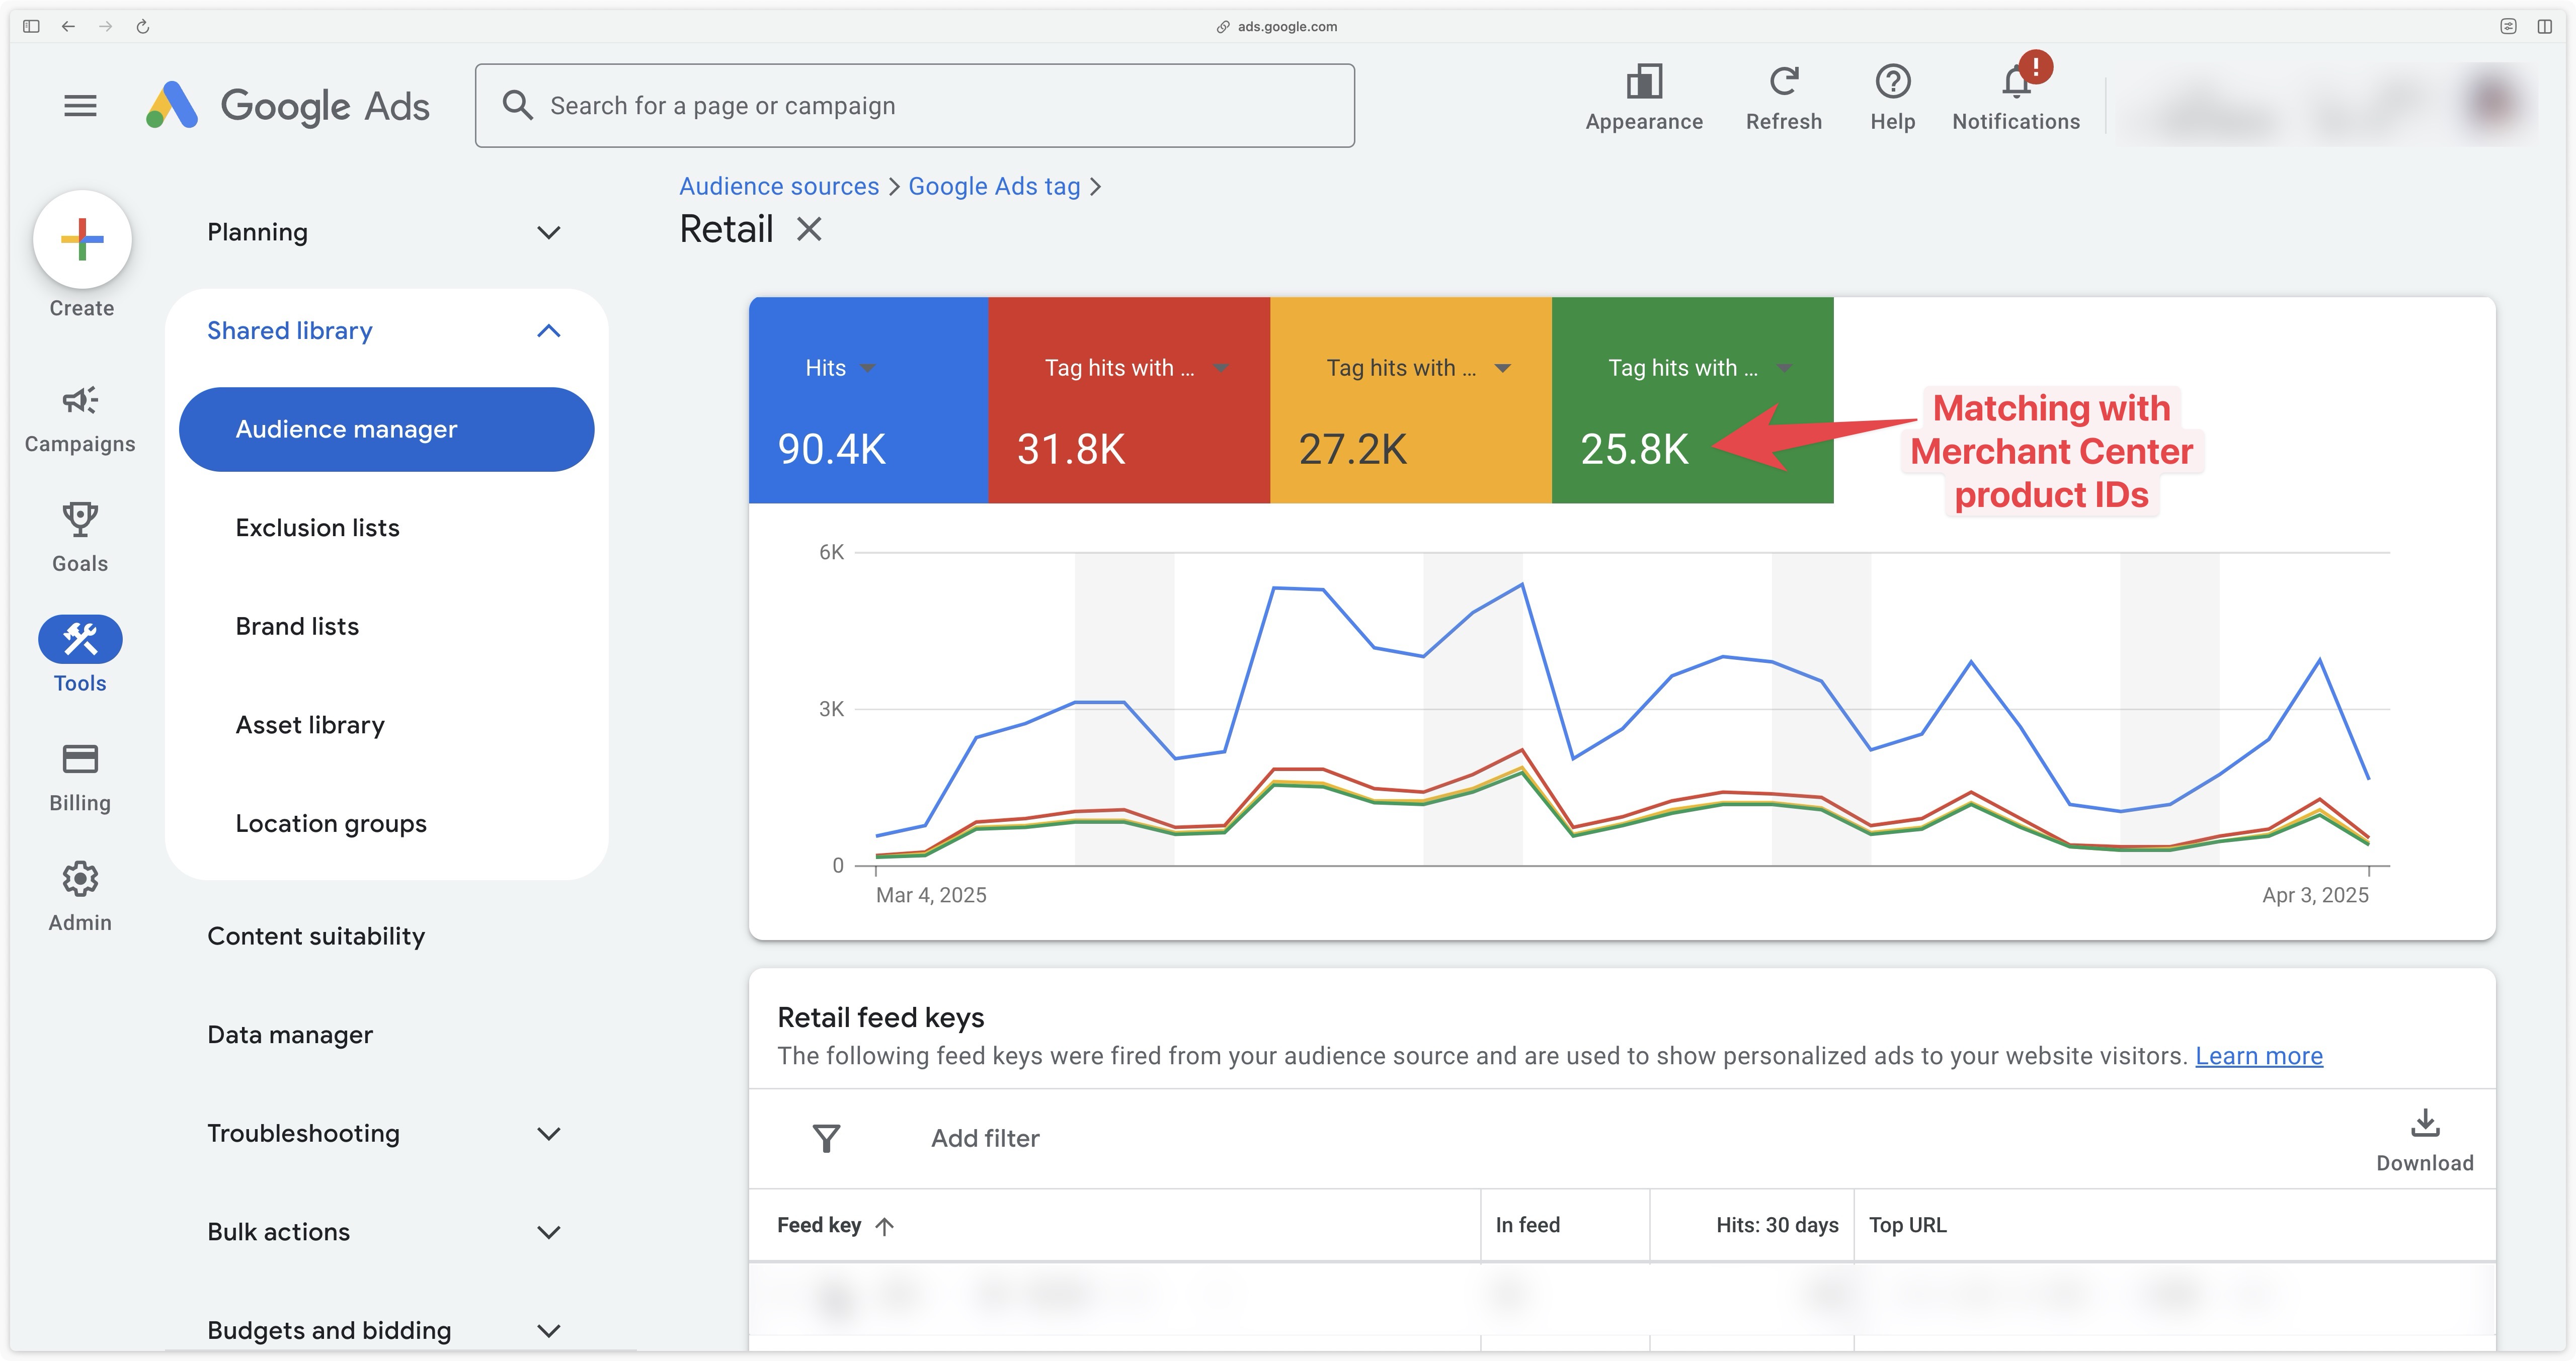
The following is useful to check only if you’ve set up dynamic remarketing with the ecomm_prodid variable.
To check the correspondence of product identifiers with the Merchant Center, click on your Business type (in this example: Retail).
Then check that the green curve is greater than zero. It represents hits that match products in the Merchant Center.
Congratulations
You’ve completed your Google Ads server-side remarketing configuration, and verified that your data is being sent to Google Ads.
If you encounter any problems during these steps, please contact our support team.