Google Ads Server-Side conversion tracking with Google Tag Manager
Google Ads: why set up your conversions in Server-Side mode?
Recent changes in privacy and user tracking (browser restrictions, ad blockers, the end of third-party cookies) are having an impact on the accuracy of tracking and collecting your conversions. By opting for a Google Ads server-side configuration (via sGTM), you largely bypass these obstacles, because the conversion data is first collected on the browser, then sent to your server, bypassing ad blockers. Your server then sends the events to Google Ads.
By eliminating several points of fragility, you maximize the reliability of your data and retain control over its governance, since you decide exactly what information is shared. Thanks to this approach, you improve the quality and scope of your conversion tracking, and provide your advertising campaigns with a more complete database for optimization.
This guide explains how to configure Google Ads in Server-Side, how to create and trigger your tags, and how to check that everything is working correctly from the Addingwell platform and your Google Ads interface.
Setting up Google Ads server-side configuration
This section shows you how to create and set up the various tags you need. You’ll start by installing the Conversion Linker tag, then configure your Google Ads conversion action, and see how to enable enhanced conversion tracking.
Setting up the Conversion Linker tag
Why set up the Conversion Linker?
The role of the Conversion Linker is to detect whether the user is coming from a Google ad and if so to deposit a cookie in the browser.
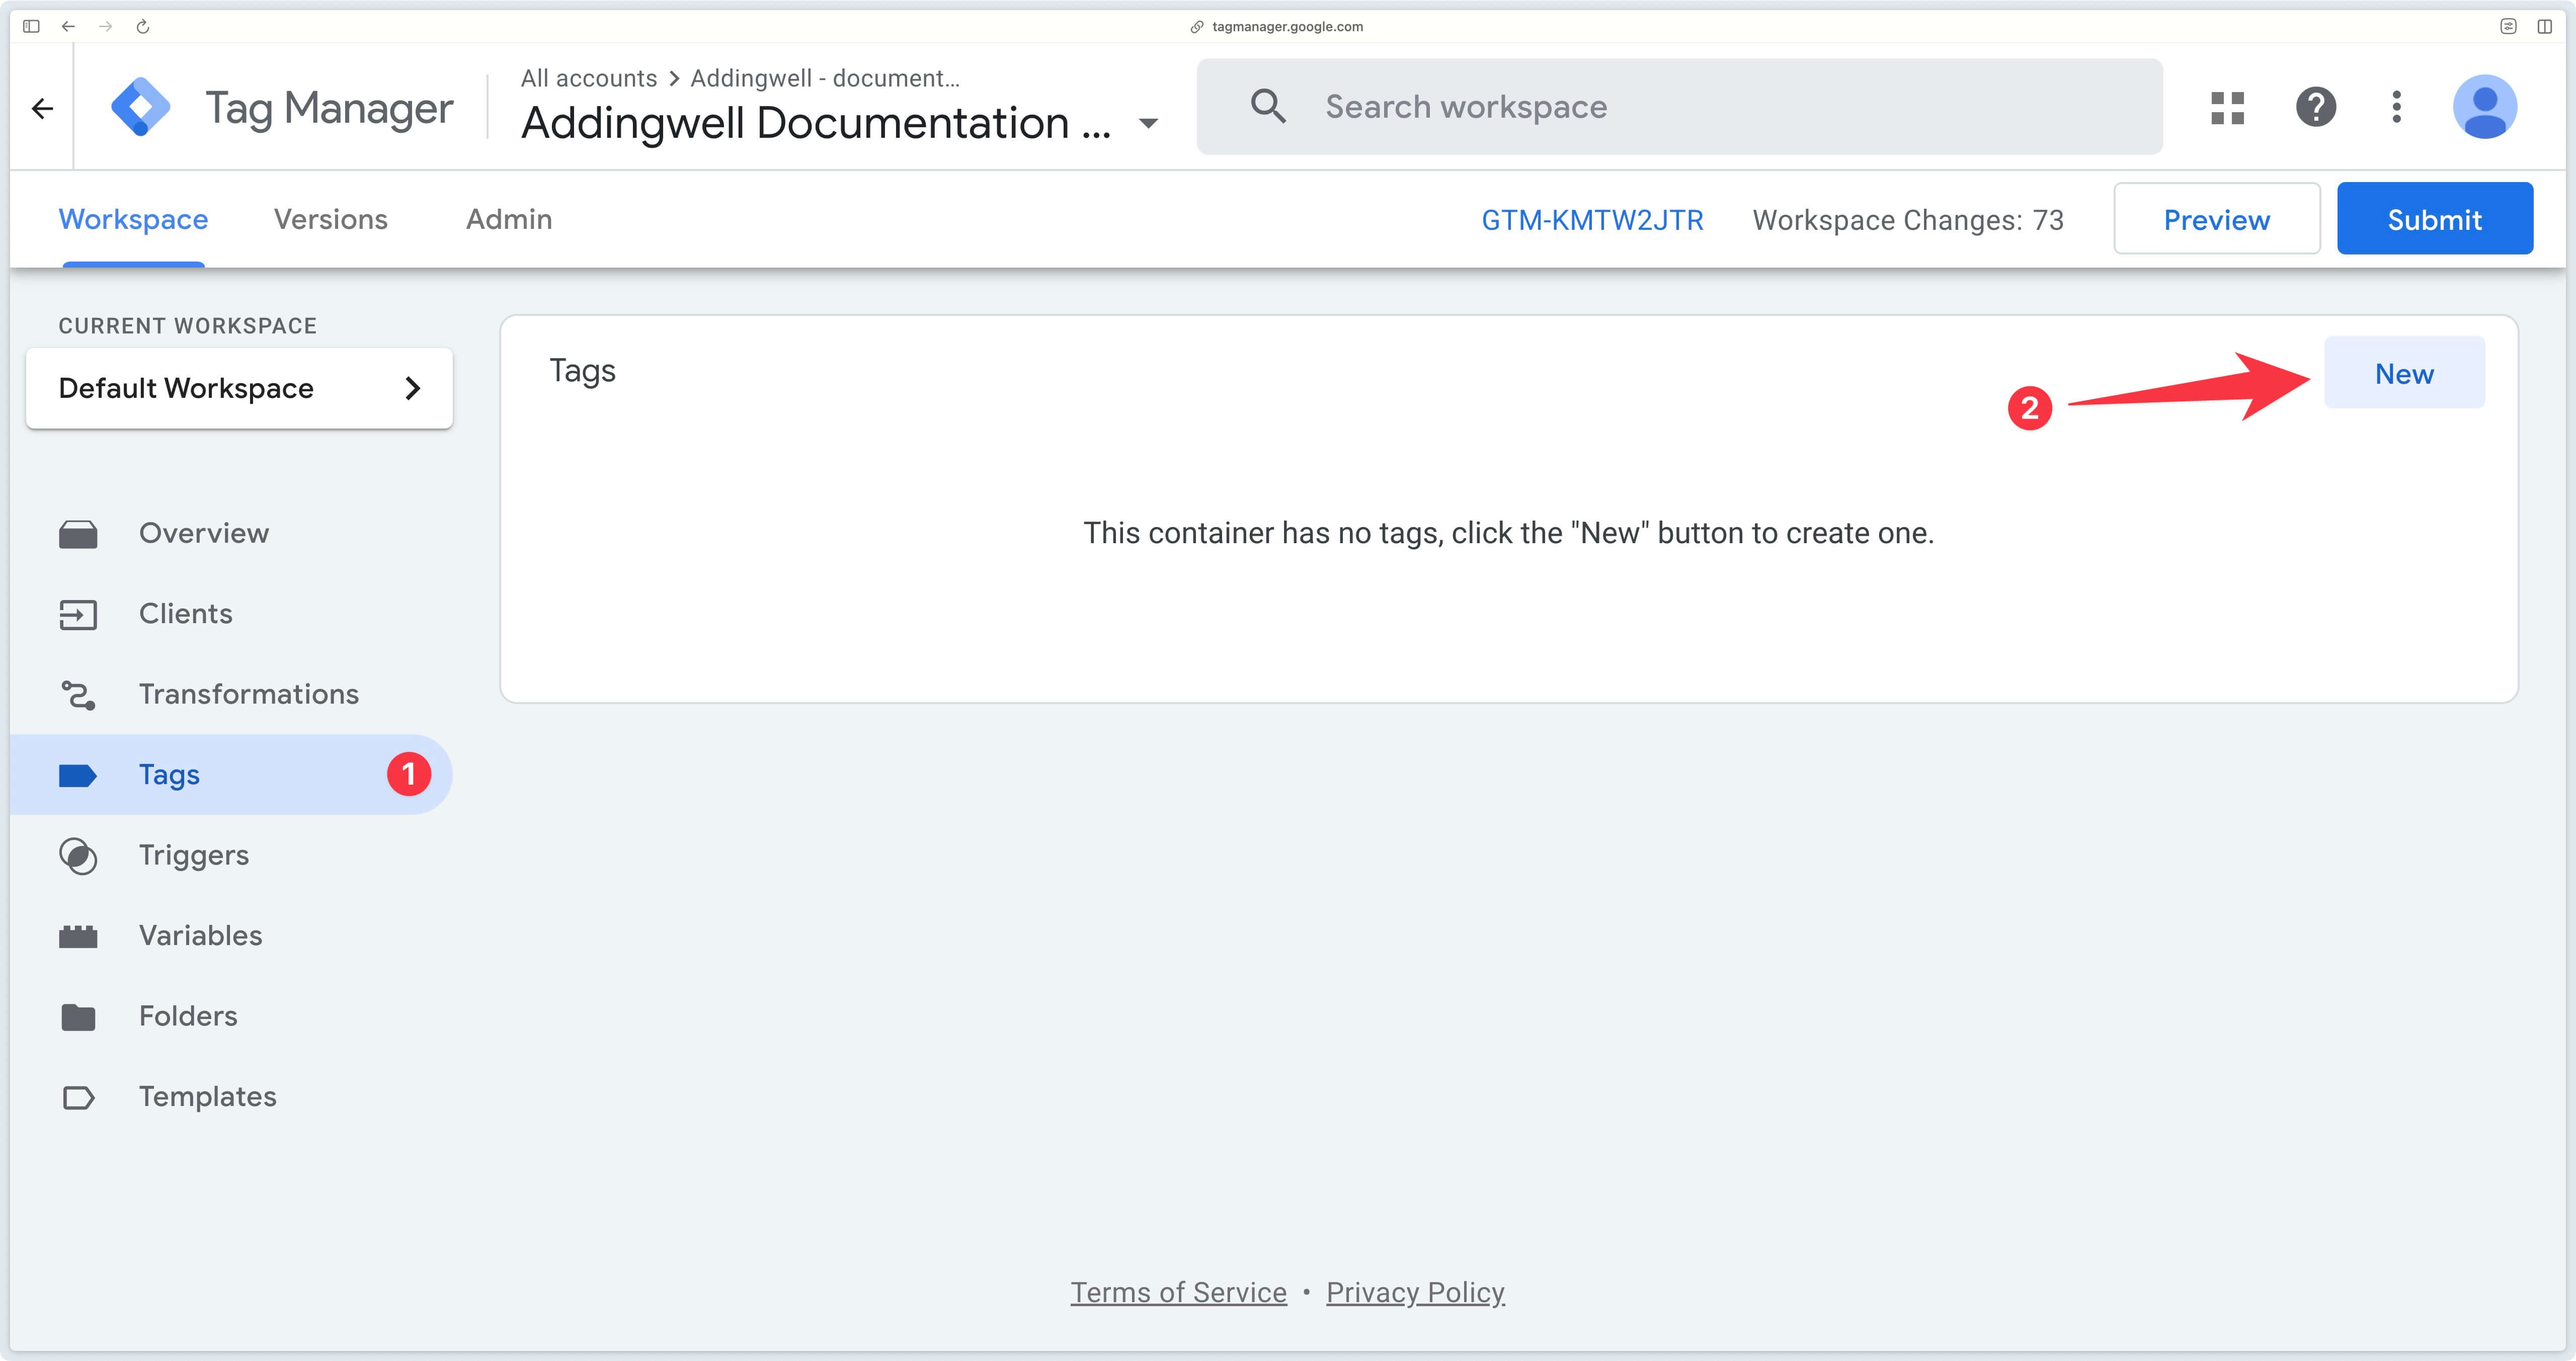
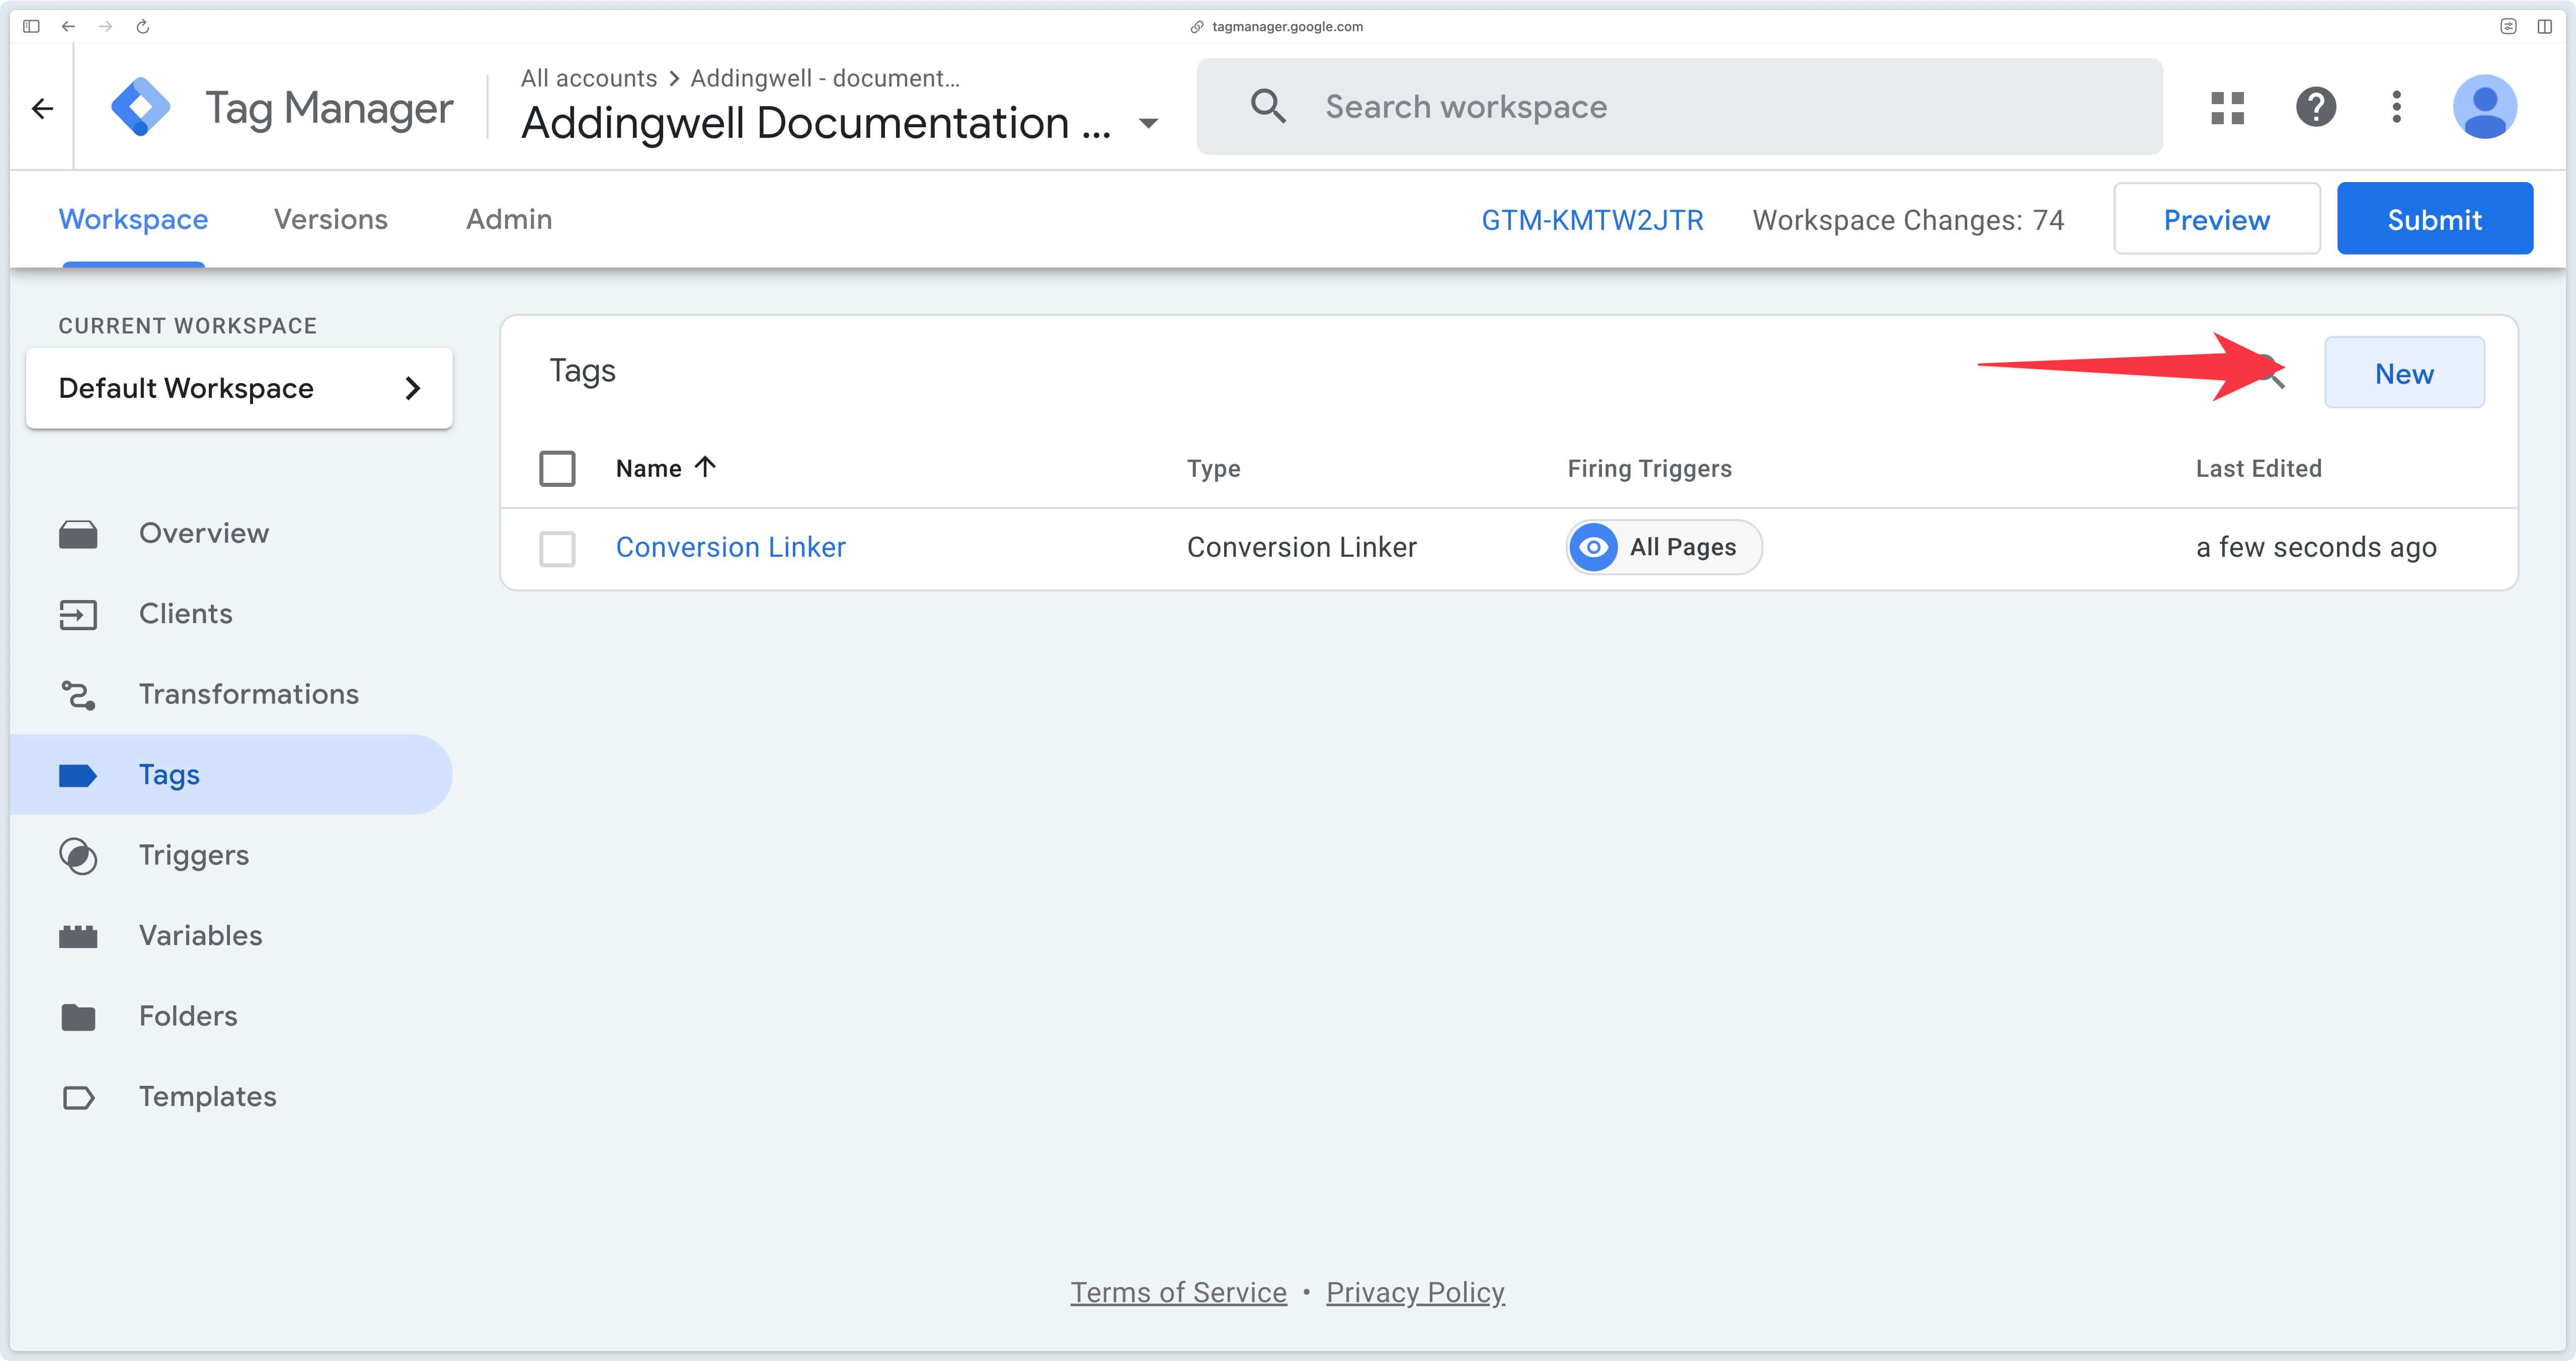
In your GTM Server-Side container, go to the Tags section and click on New to create a new tag:
On the screen that opens, select the Conversion Linker tag:
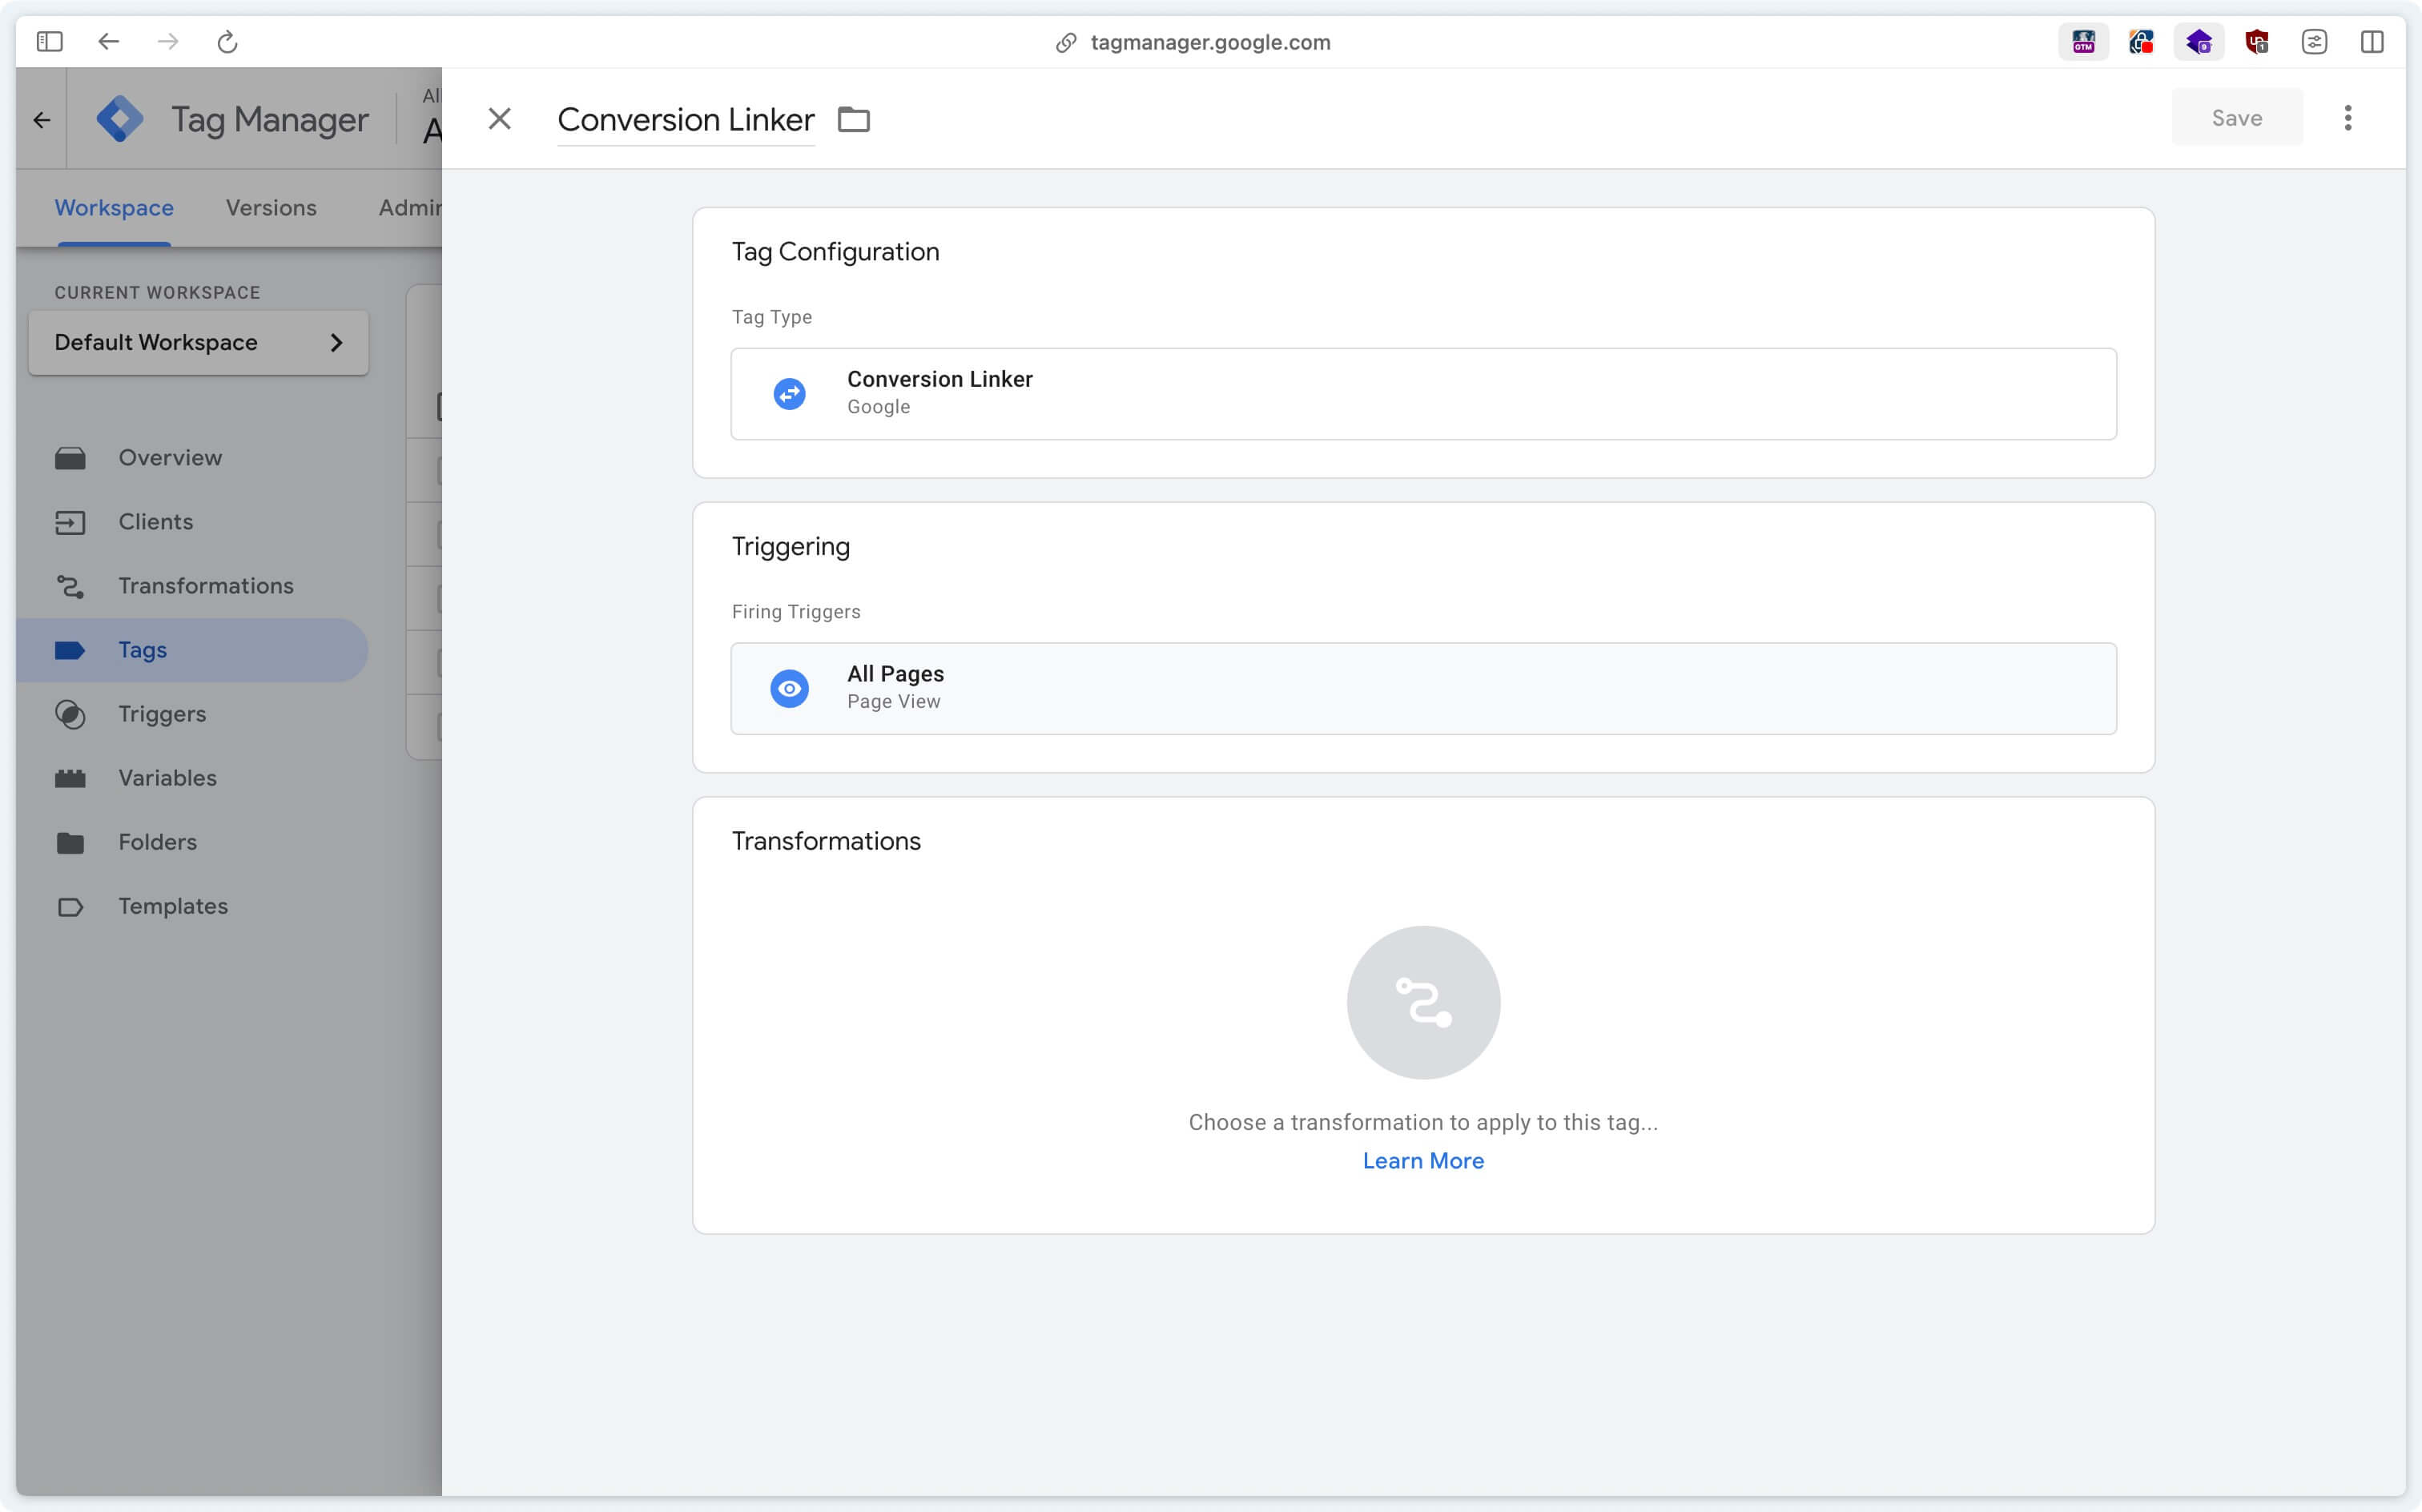
You can then trigger this tag on all pages viewed, so that the server detects whether the user has come from a Google ad and deposits a cookie in the browser if necessary.
The Conversion Linker tag must be triggered on every page view, otherwise you risk losing the initial information indicating that the user comes from a Google Ads campaign.
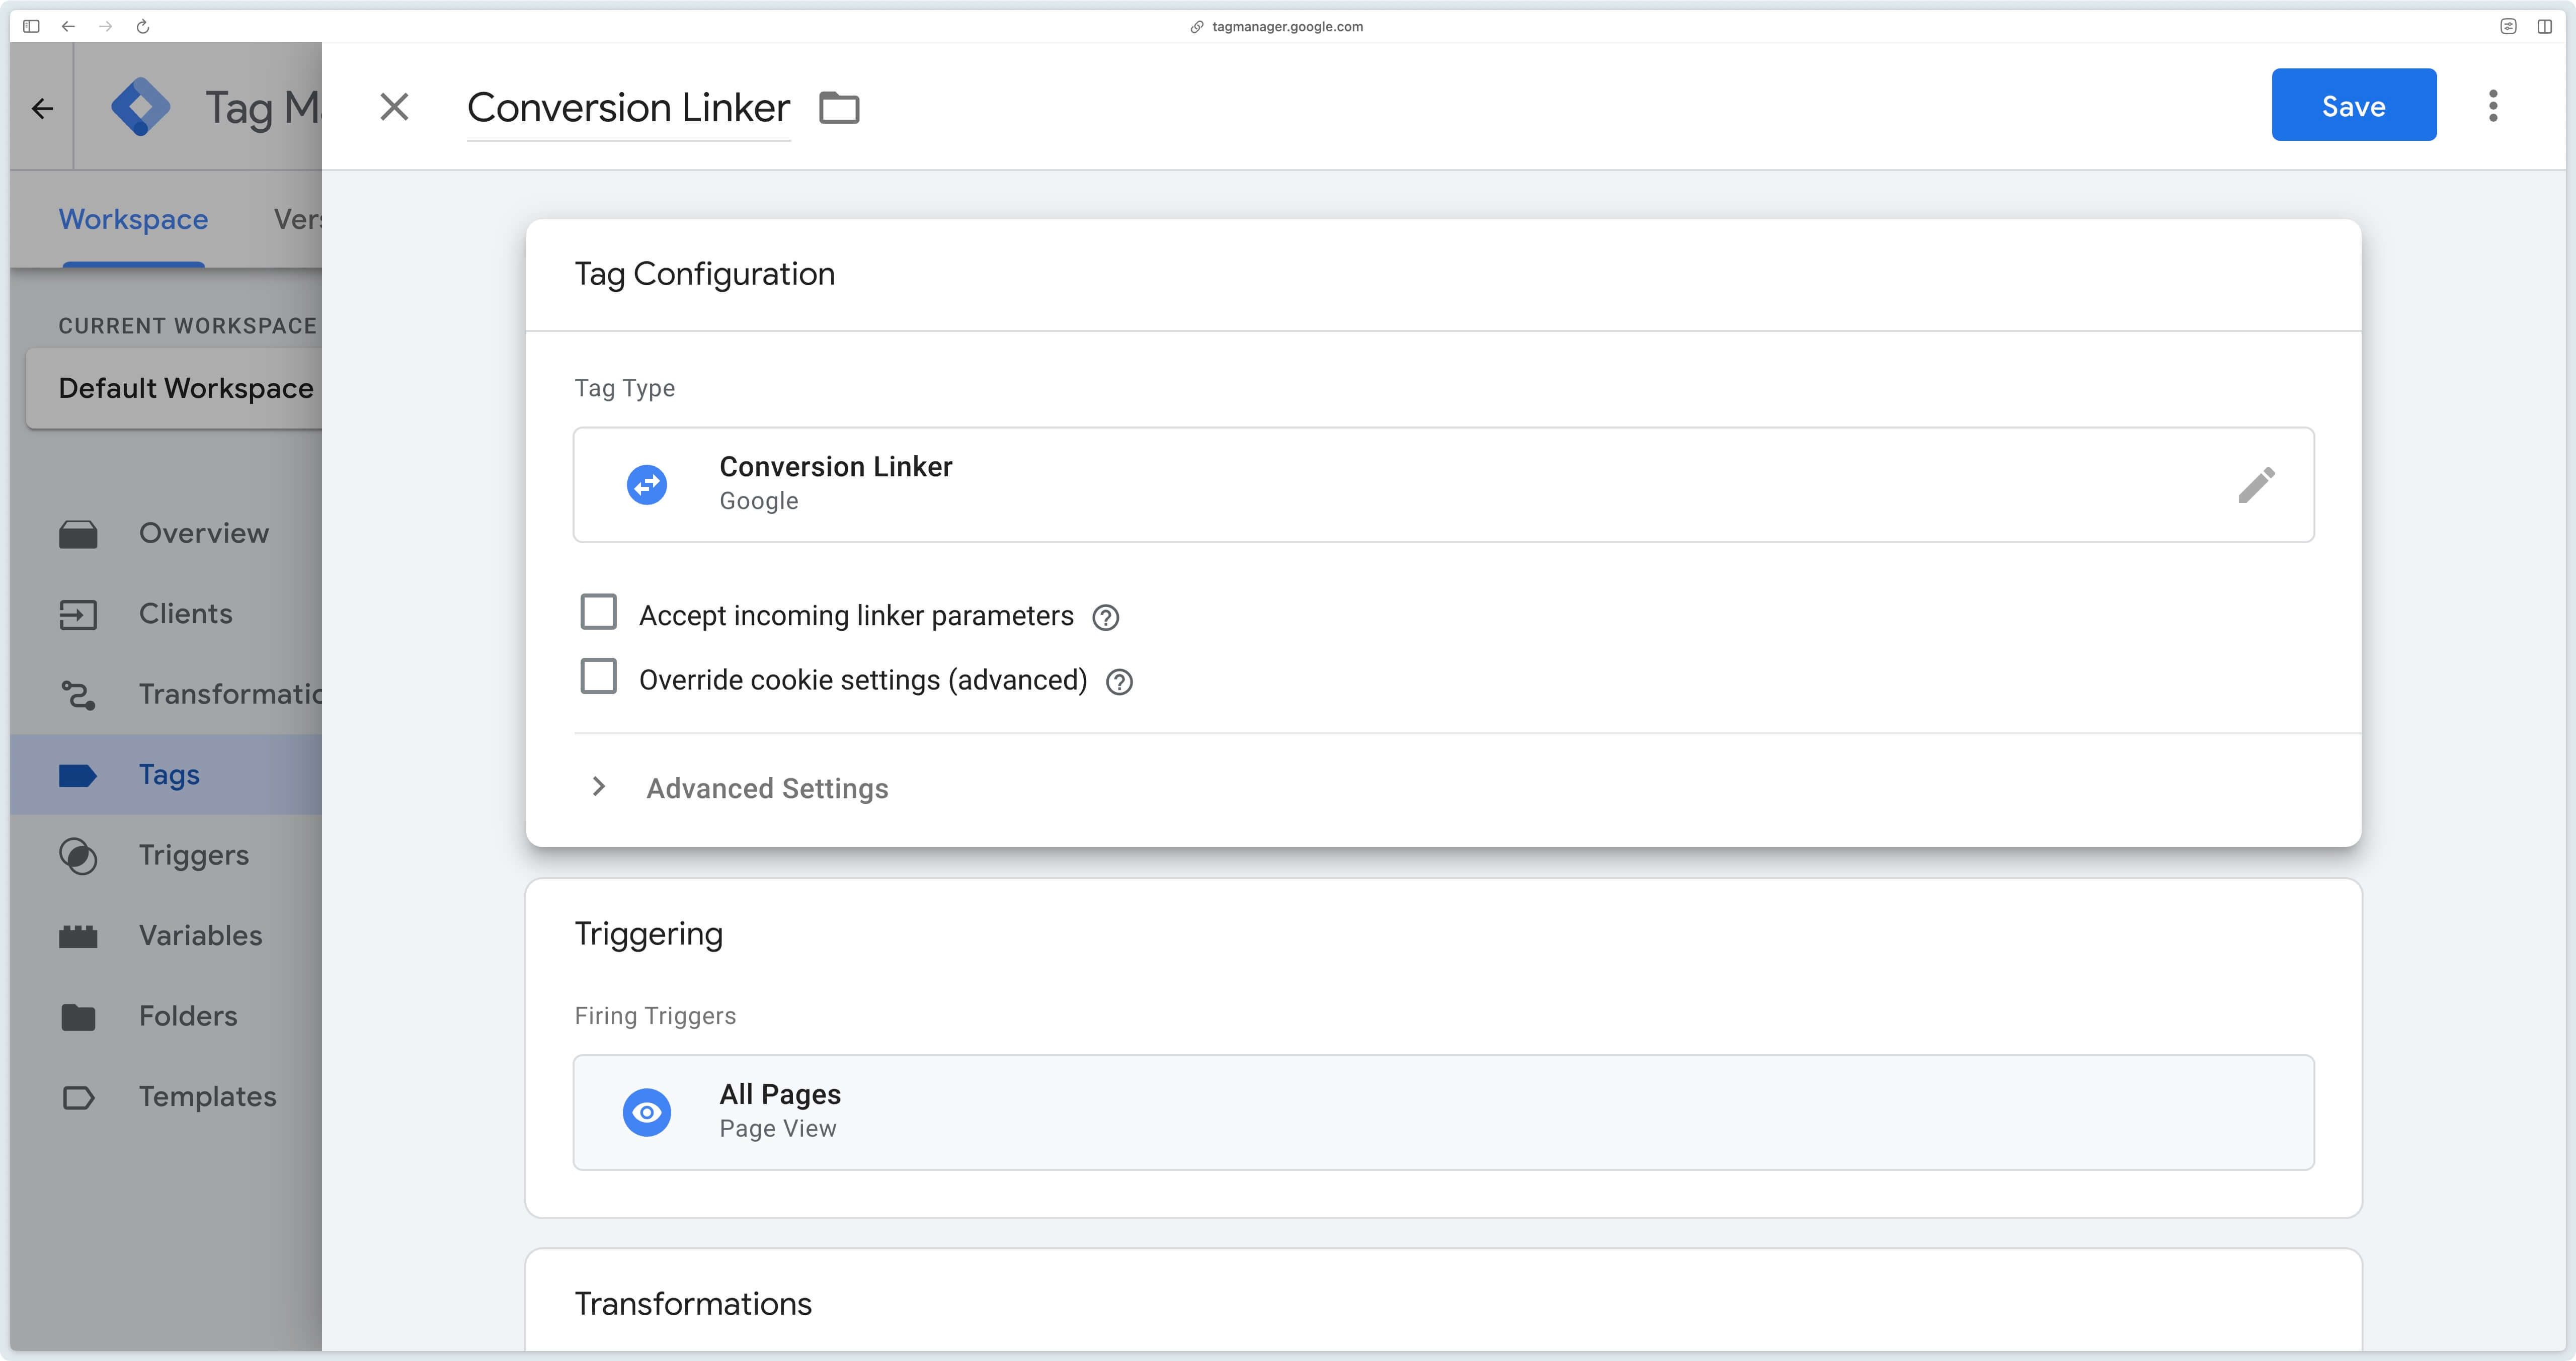
Once this configuration is complete, you should have a ready-to-use tag, as illustrated below:
Configure a Google Ads conversion action in Server-Side
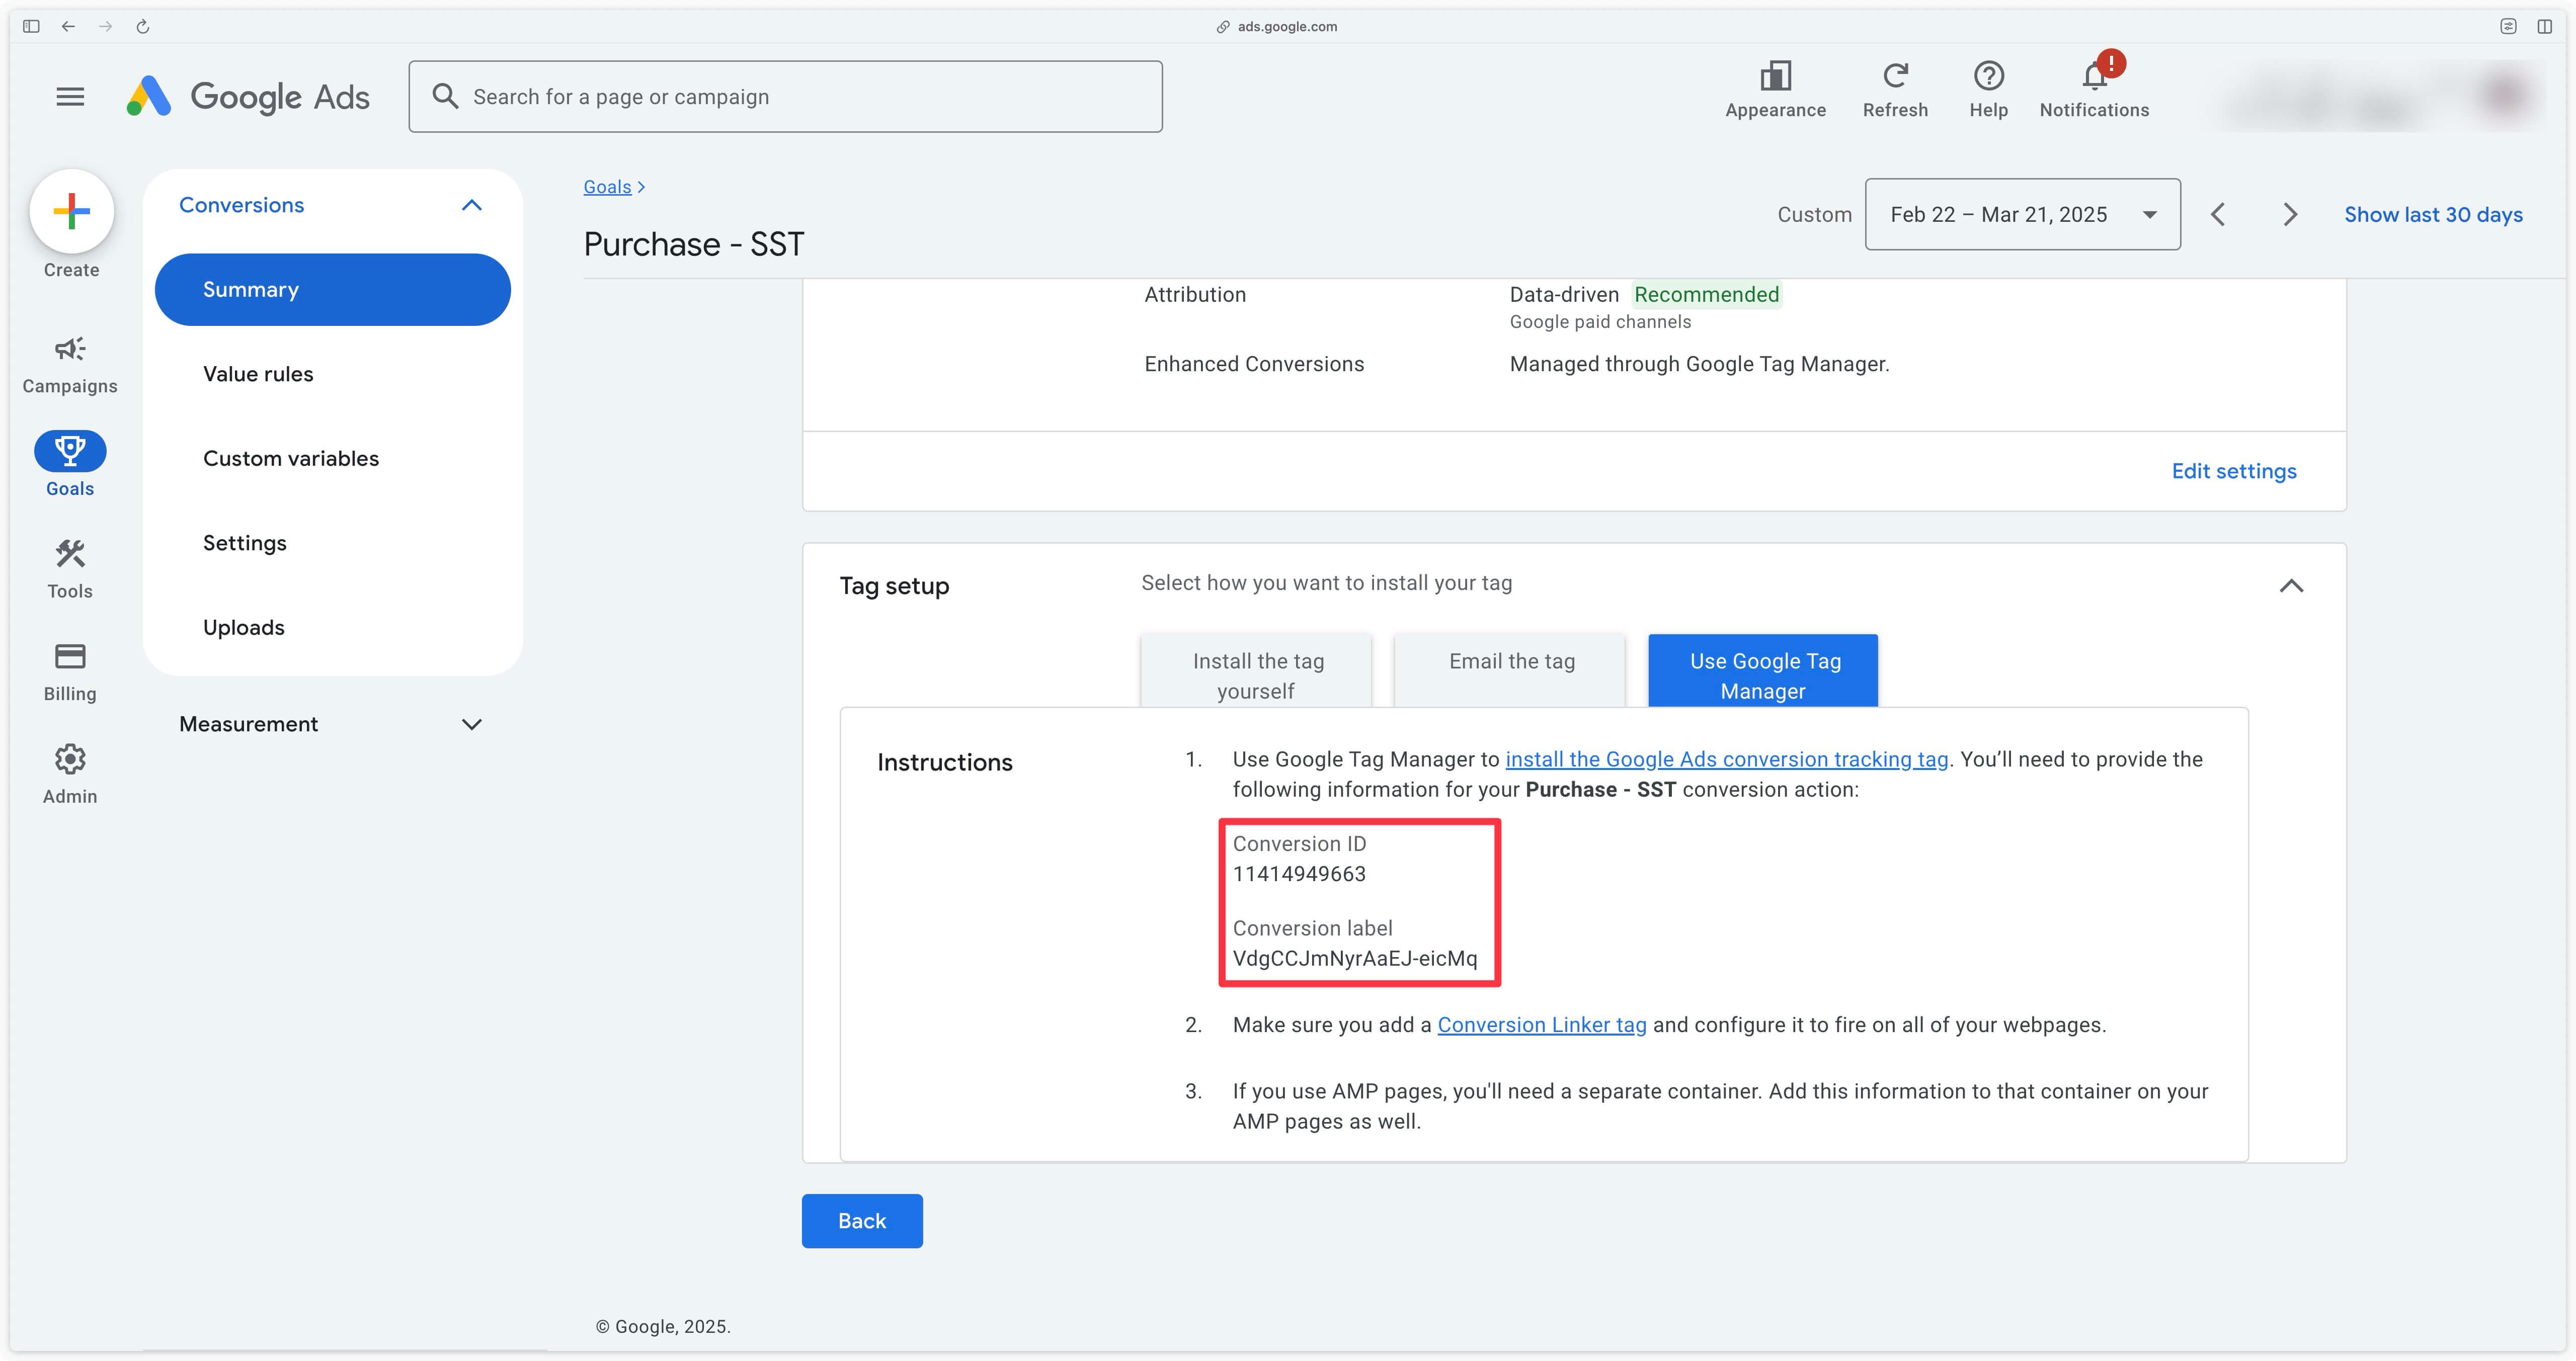
Before installing your Google Ads Conversion Tracking tag in sGTM, you first need to know the exact identifier and label of your conversion action.
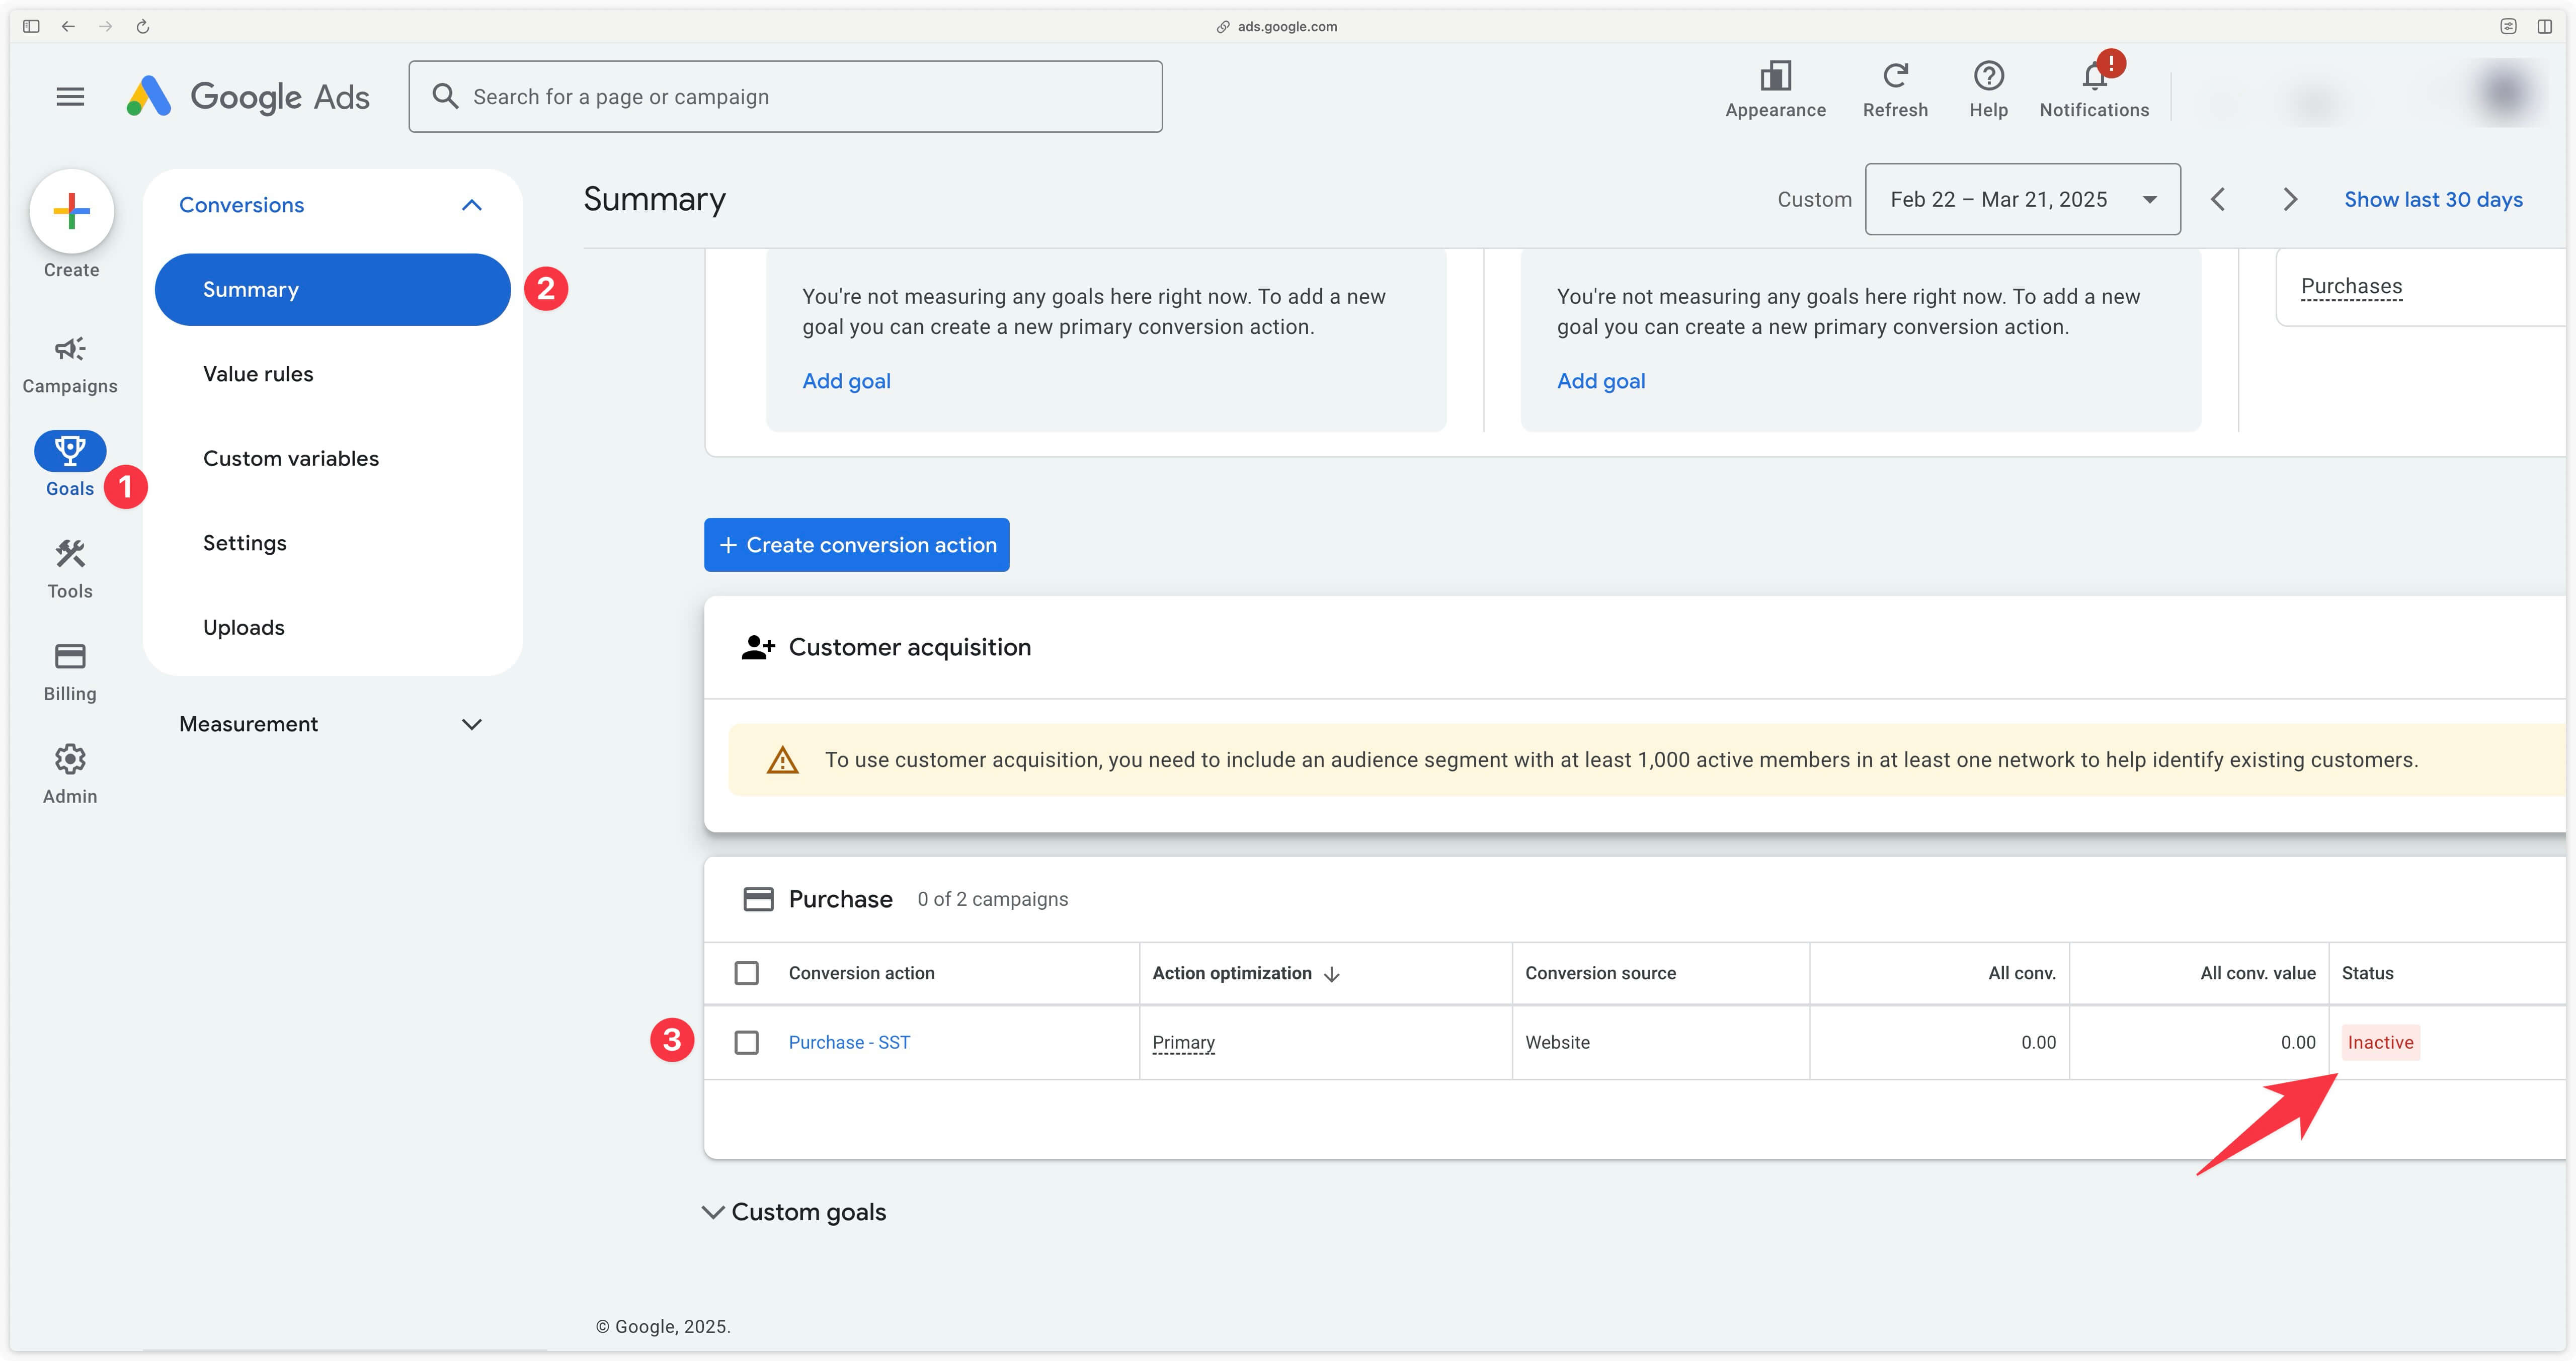
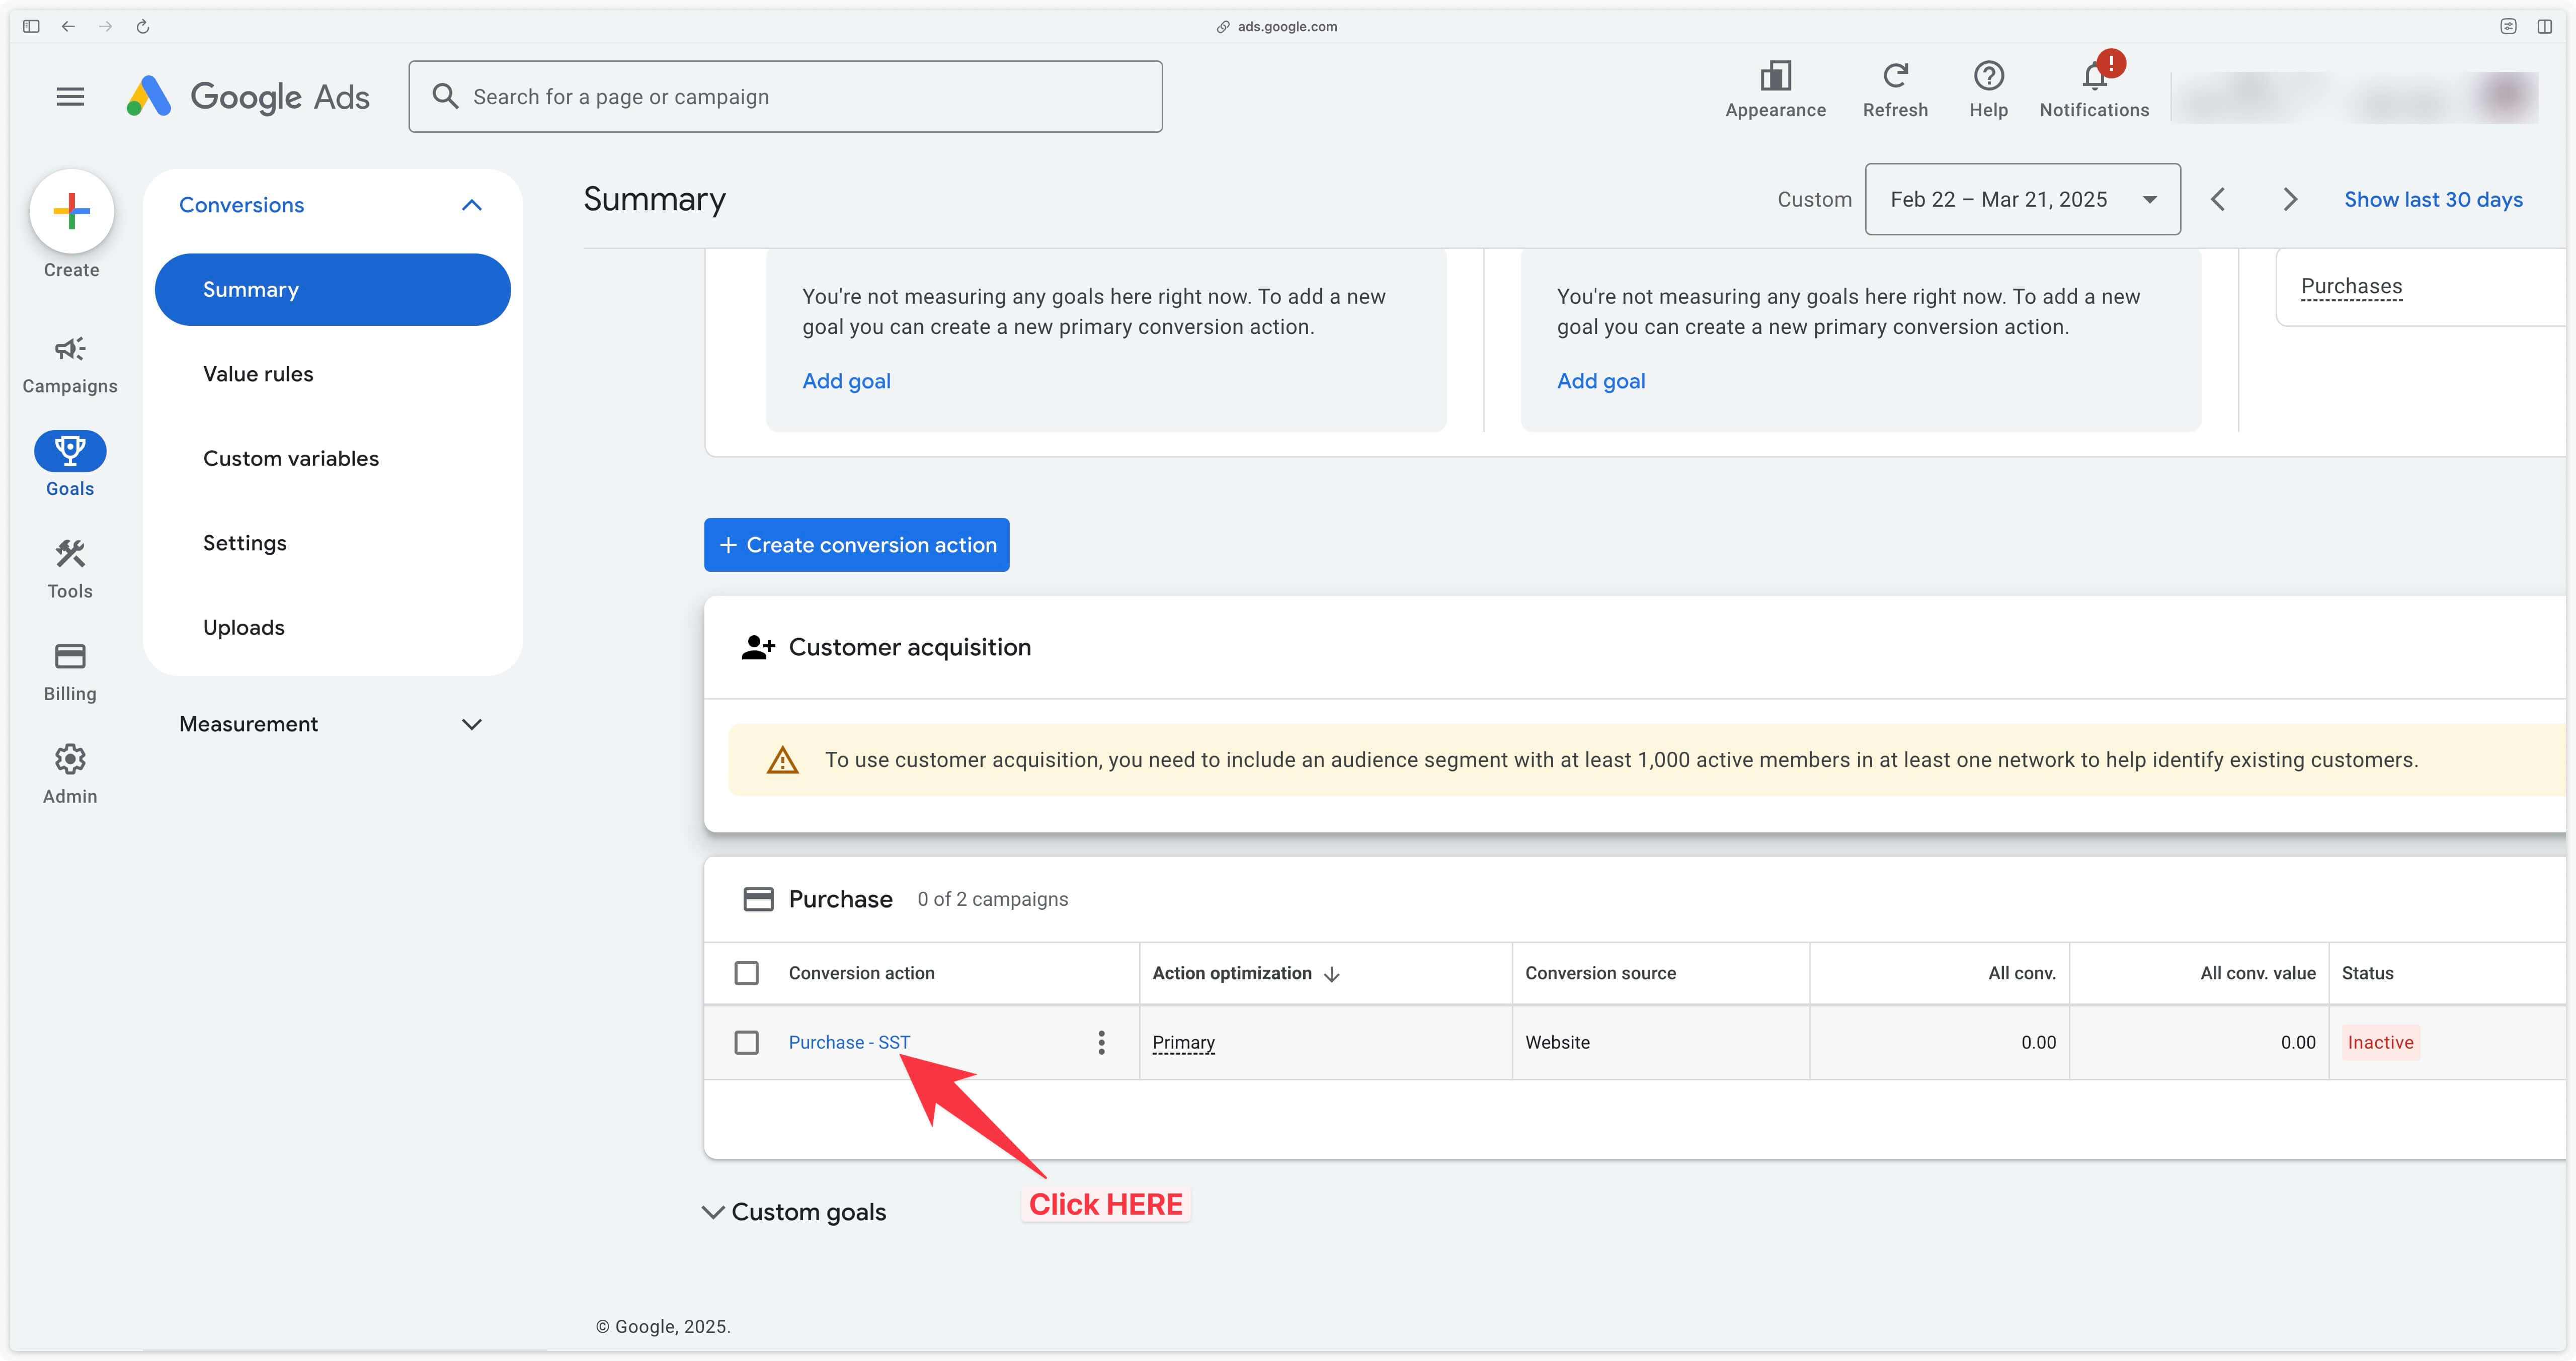
In your Google Ads interface, you can go to Goals > Conversions > Summary and scroll down to find the conversion action you wish to set up in Google Tag Manager Server-Side.
Immediately after creating a conversion action, its status appears as Inactive until Google Ads receives at least one conversion.
To obtain the Conversion ID and Conversion label, simply click on the conversion action and then consult the Details tab.
In the Tag setup section, you’ll see the Use Google Tag Manager option, which will reveal the two pieces of information you’re looking for. Keep this page open, or make a note of this information.
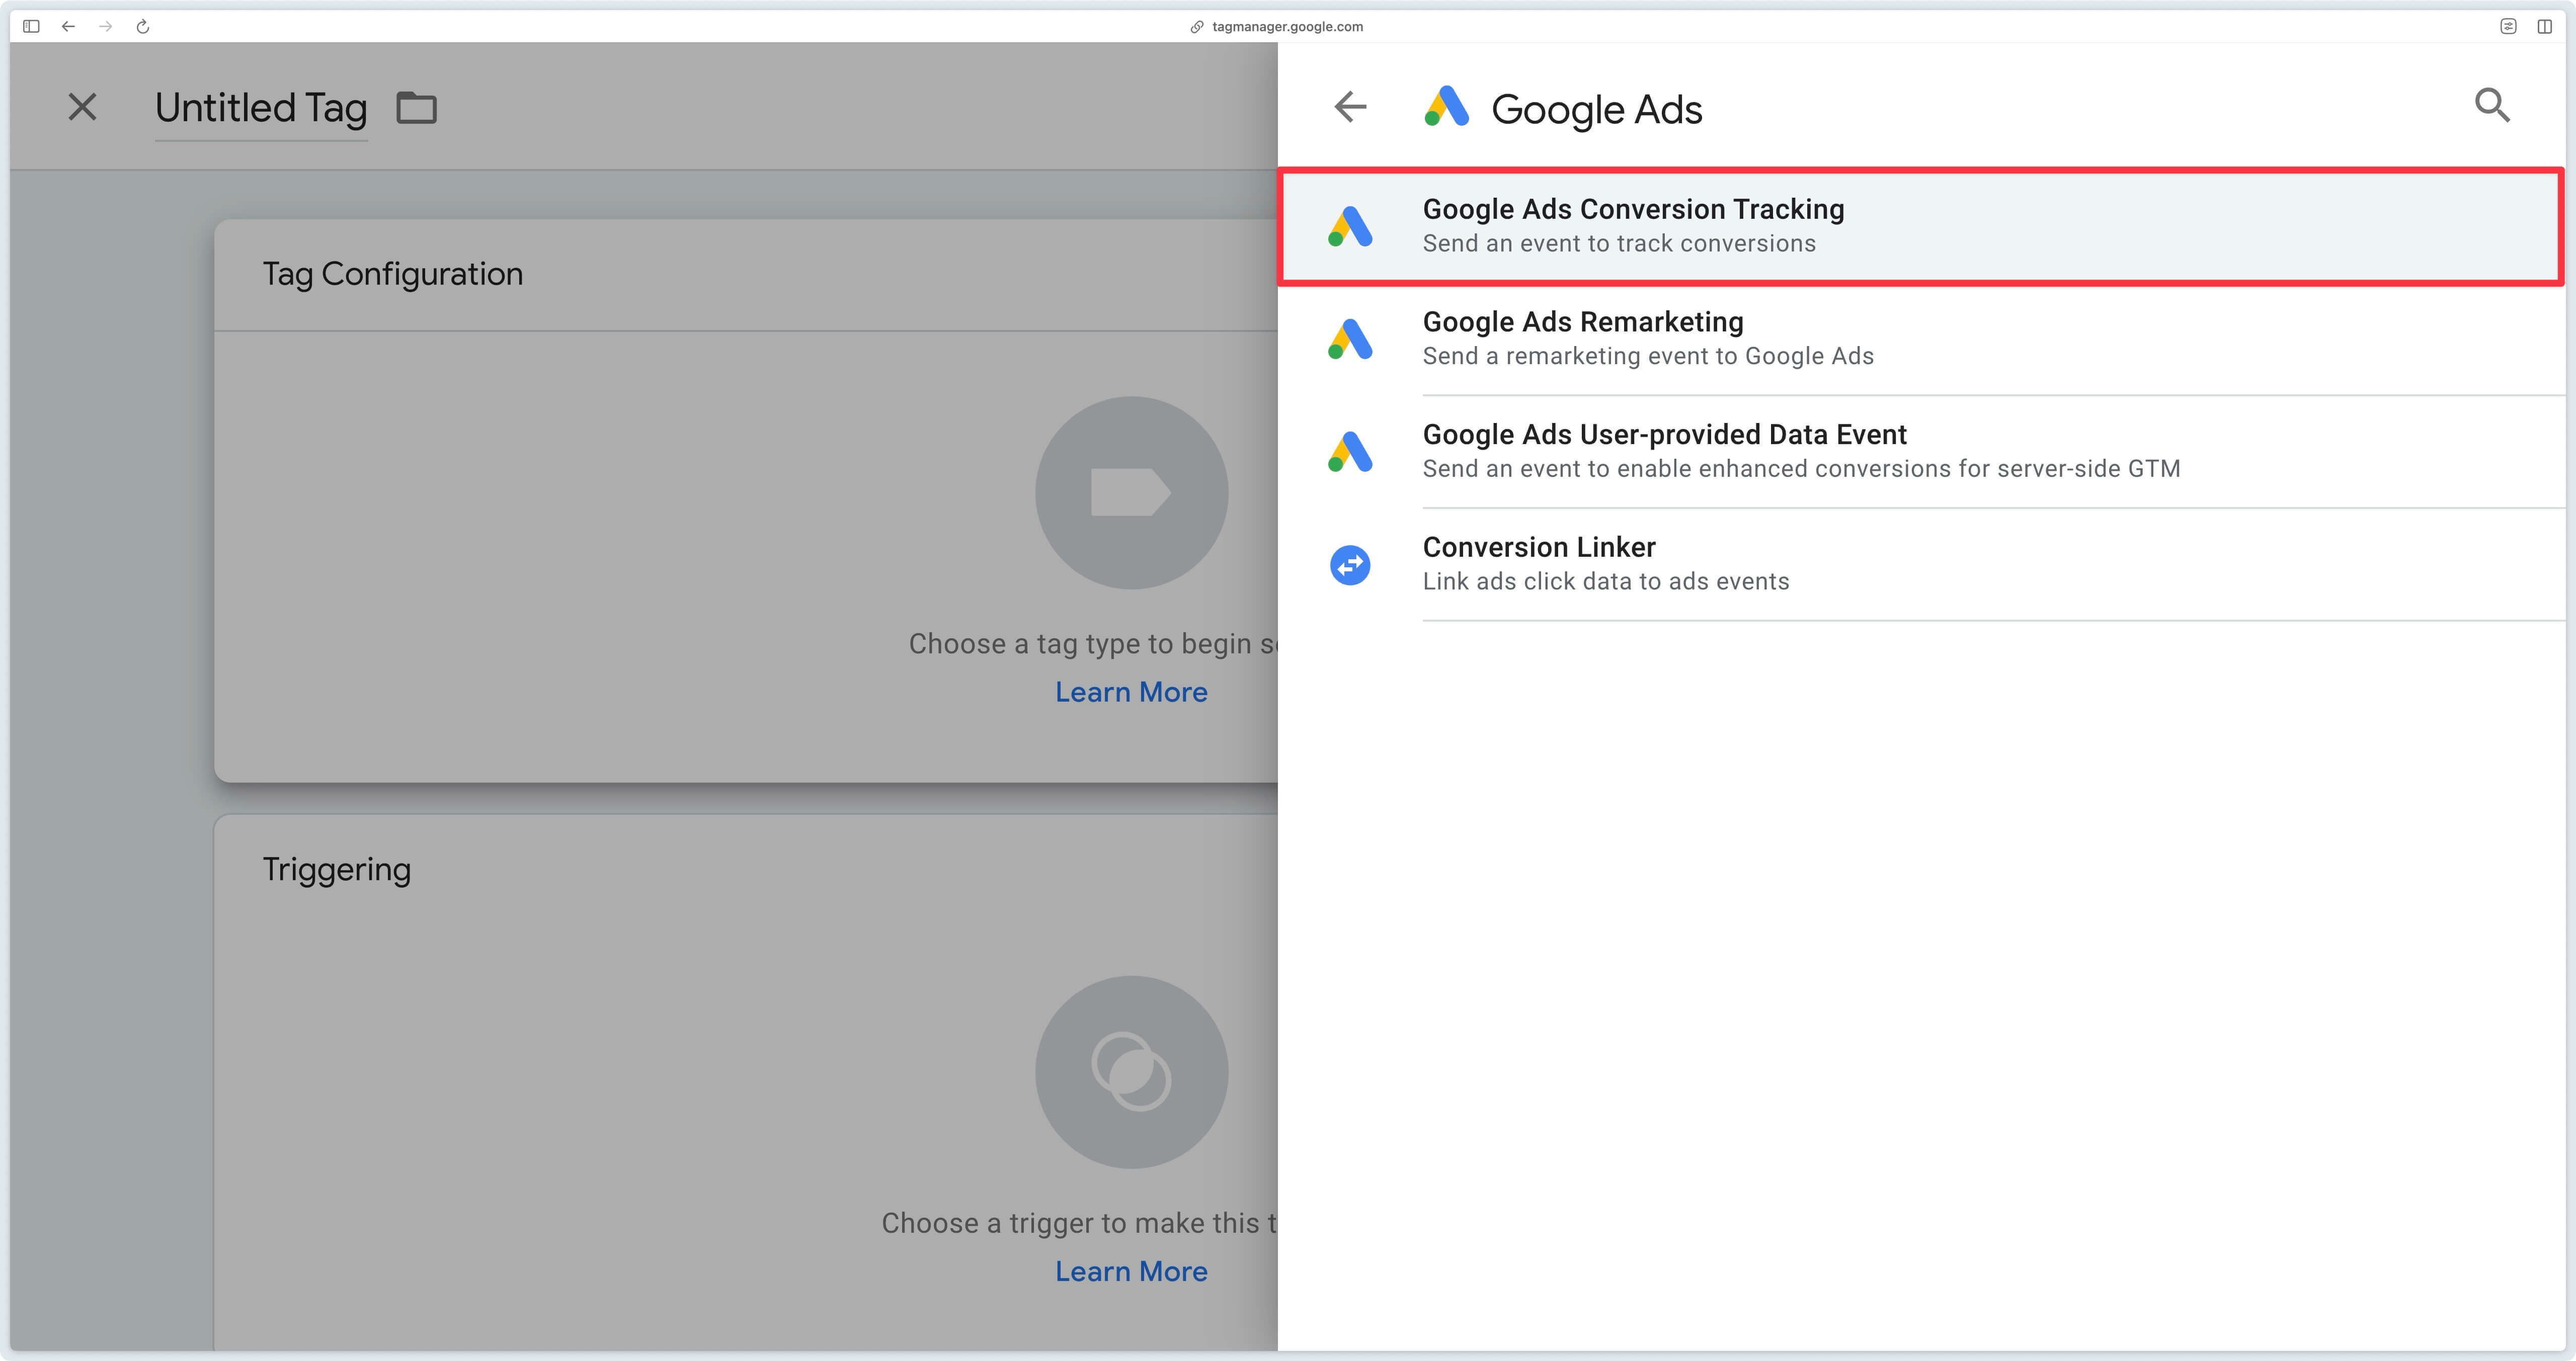
With these elements in hand, you can return to your GTM Server-Side container and create a new tag in the Tags section:
In the Google Ads section, select the Google Ads Conversion Tracking tag.
Then all you need to do is enter the Conversion ID and Conversion label you found earlier, as shown below:
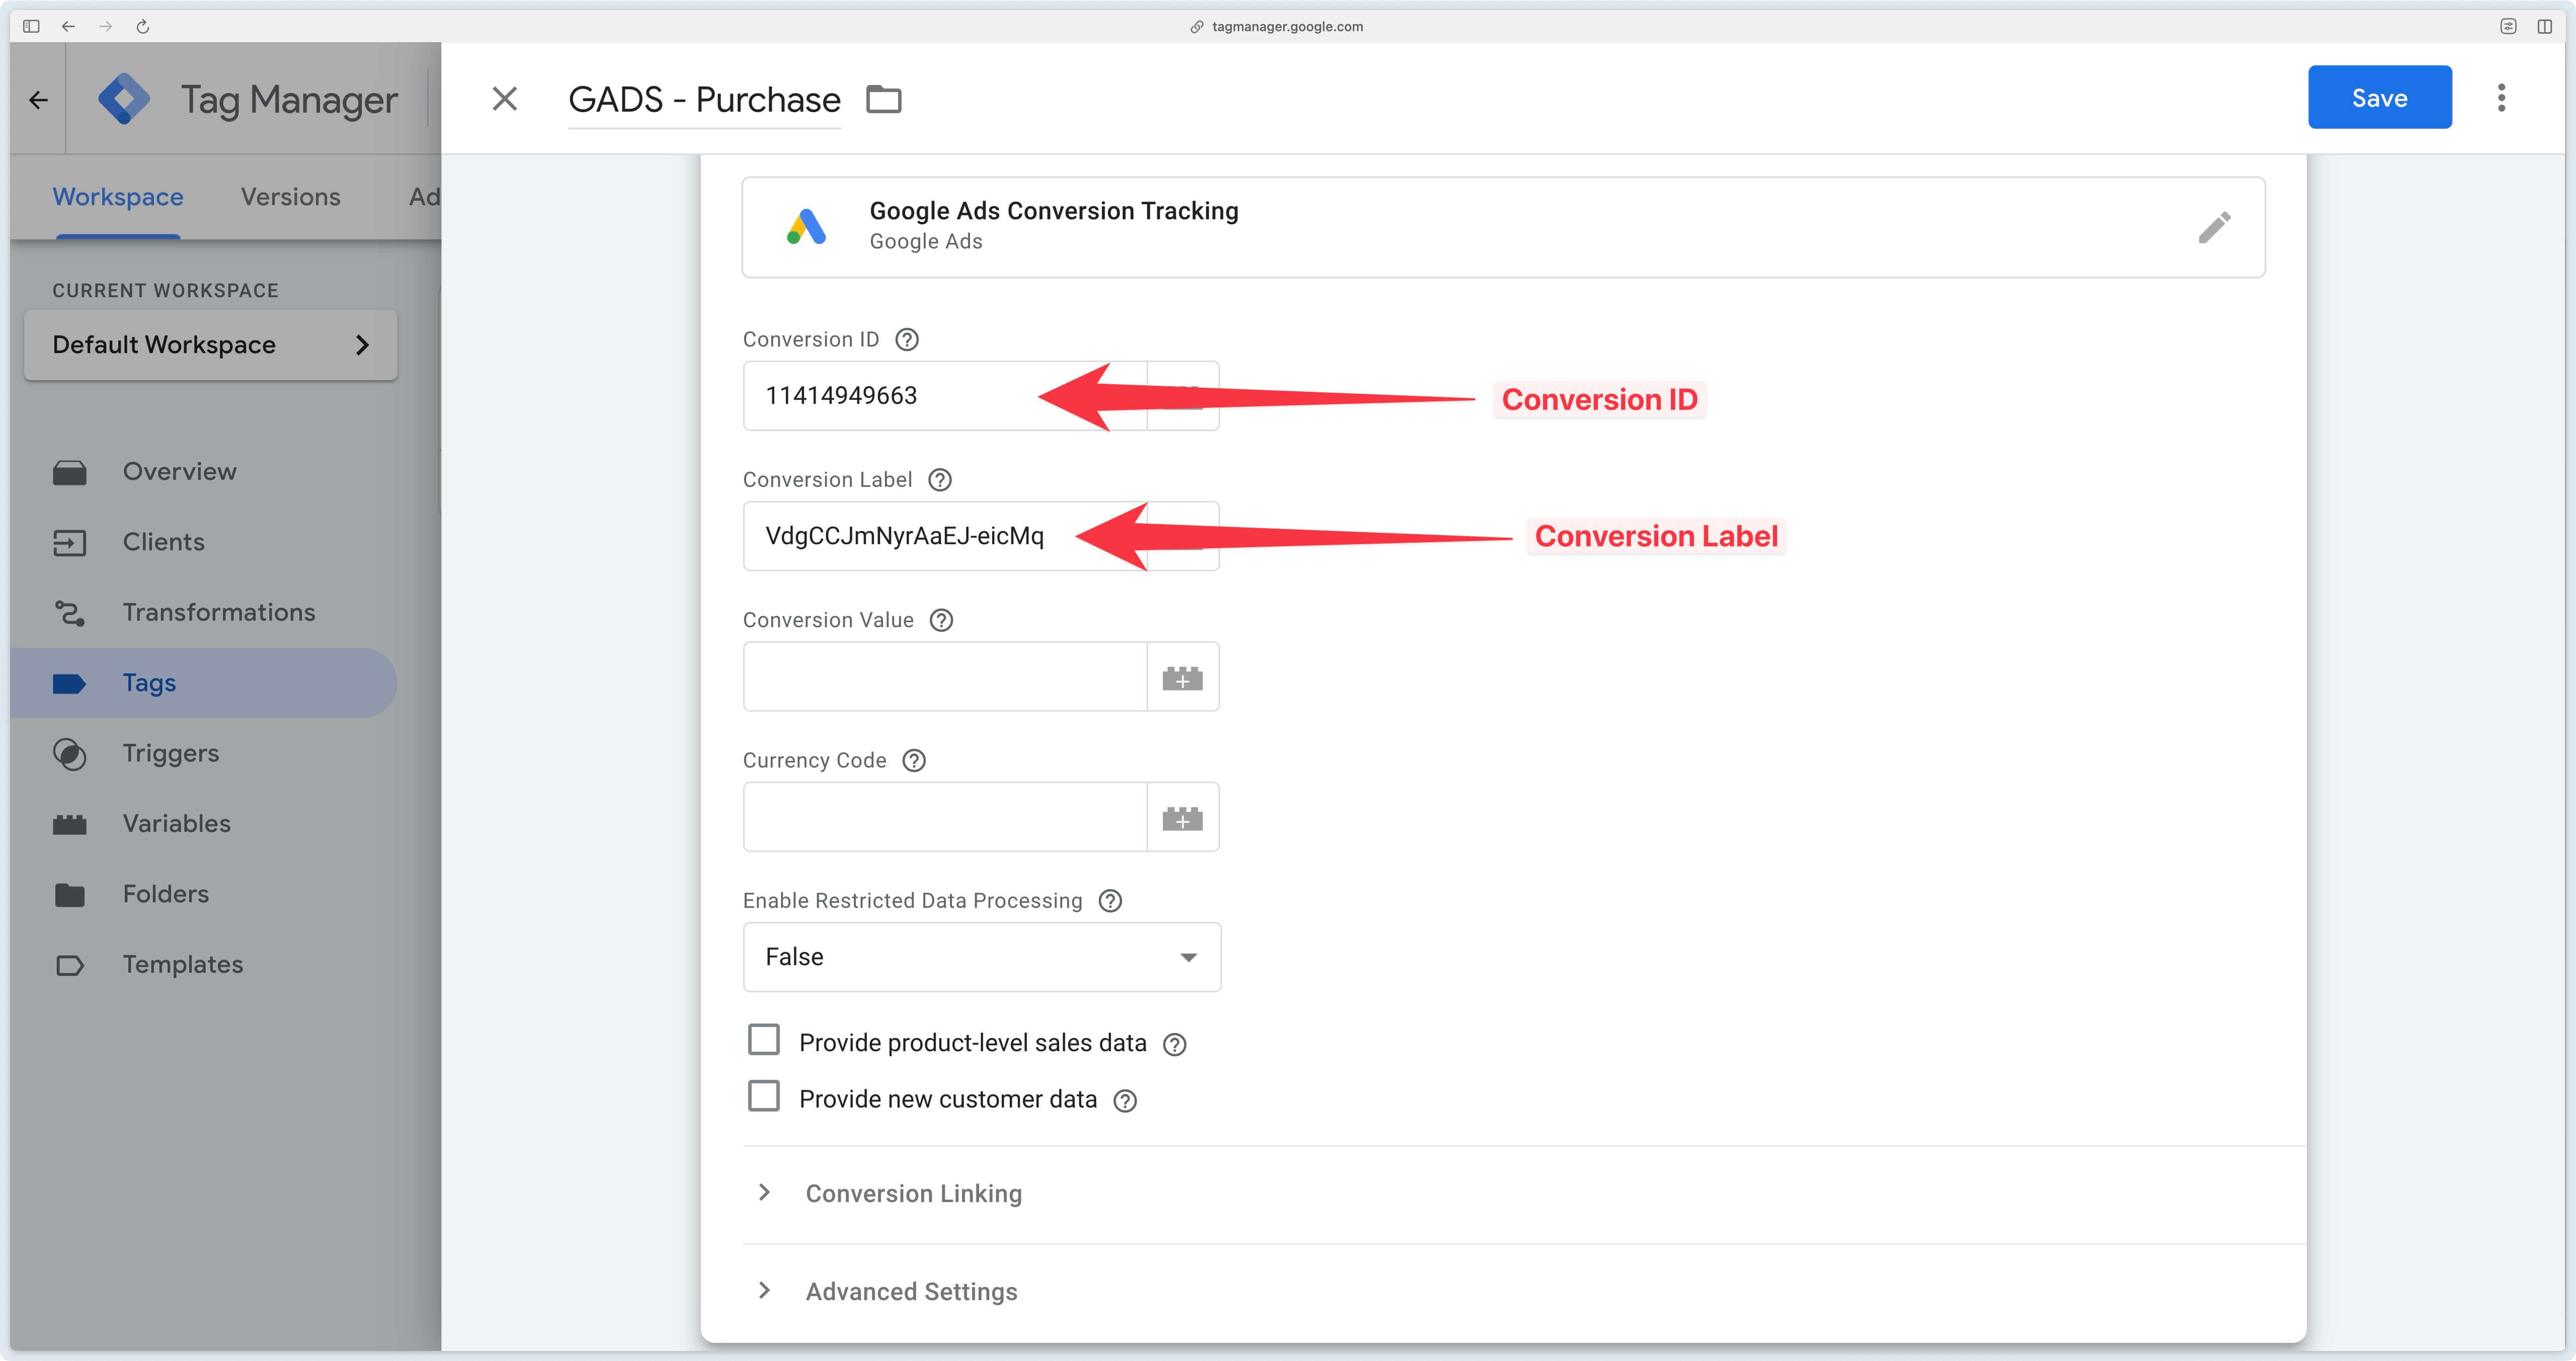
You can leave the Conversion Value and Currency Code fields empty if your GA4 event already sends the value (value parameter) and the currency (currency parameter) at the time of purchase.
If the parameters you send via your GA4 event are not value and currency but for example conversion_value and conversion_currency, the tag won’t recognize them by default, and you will need to create Event Data variables to specify which fields to retrieve.
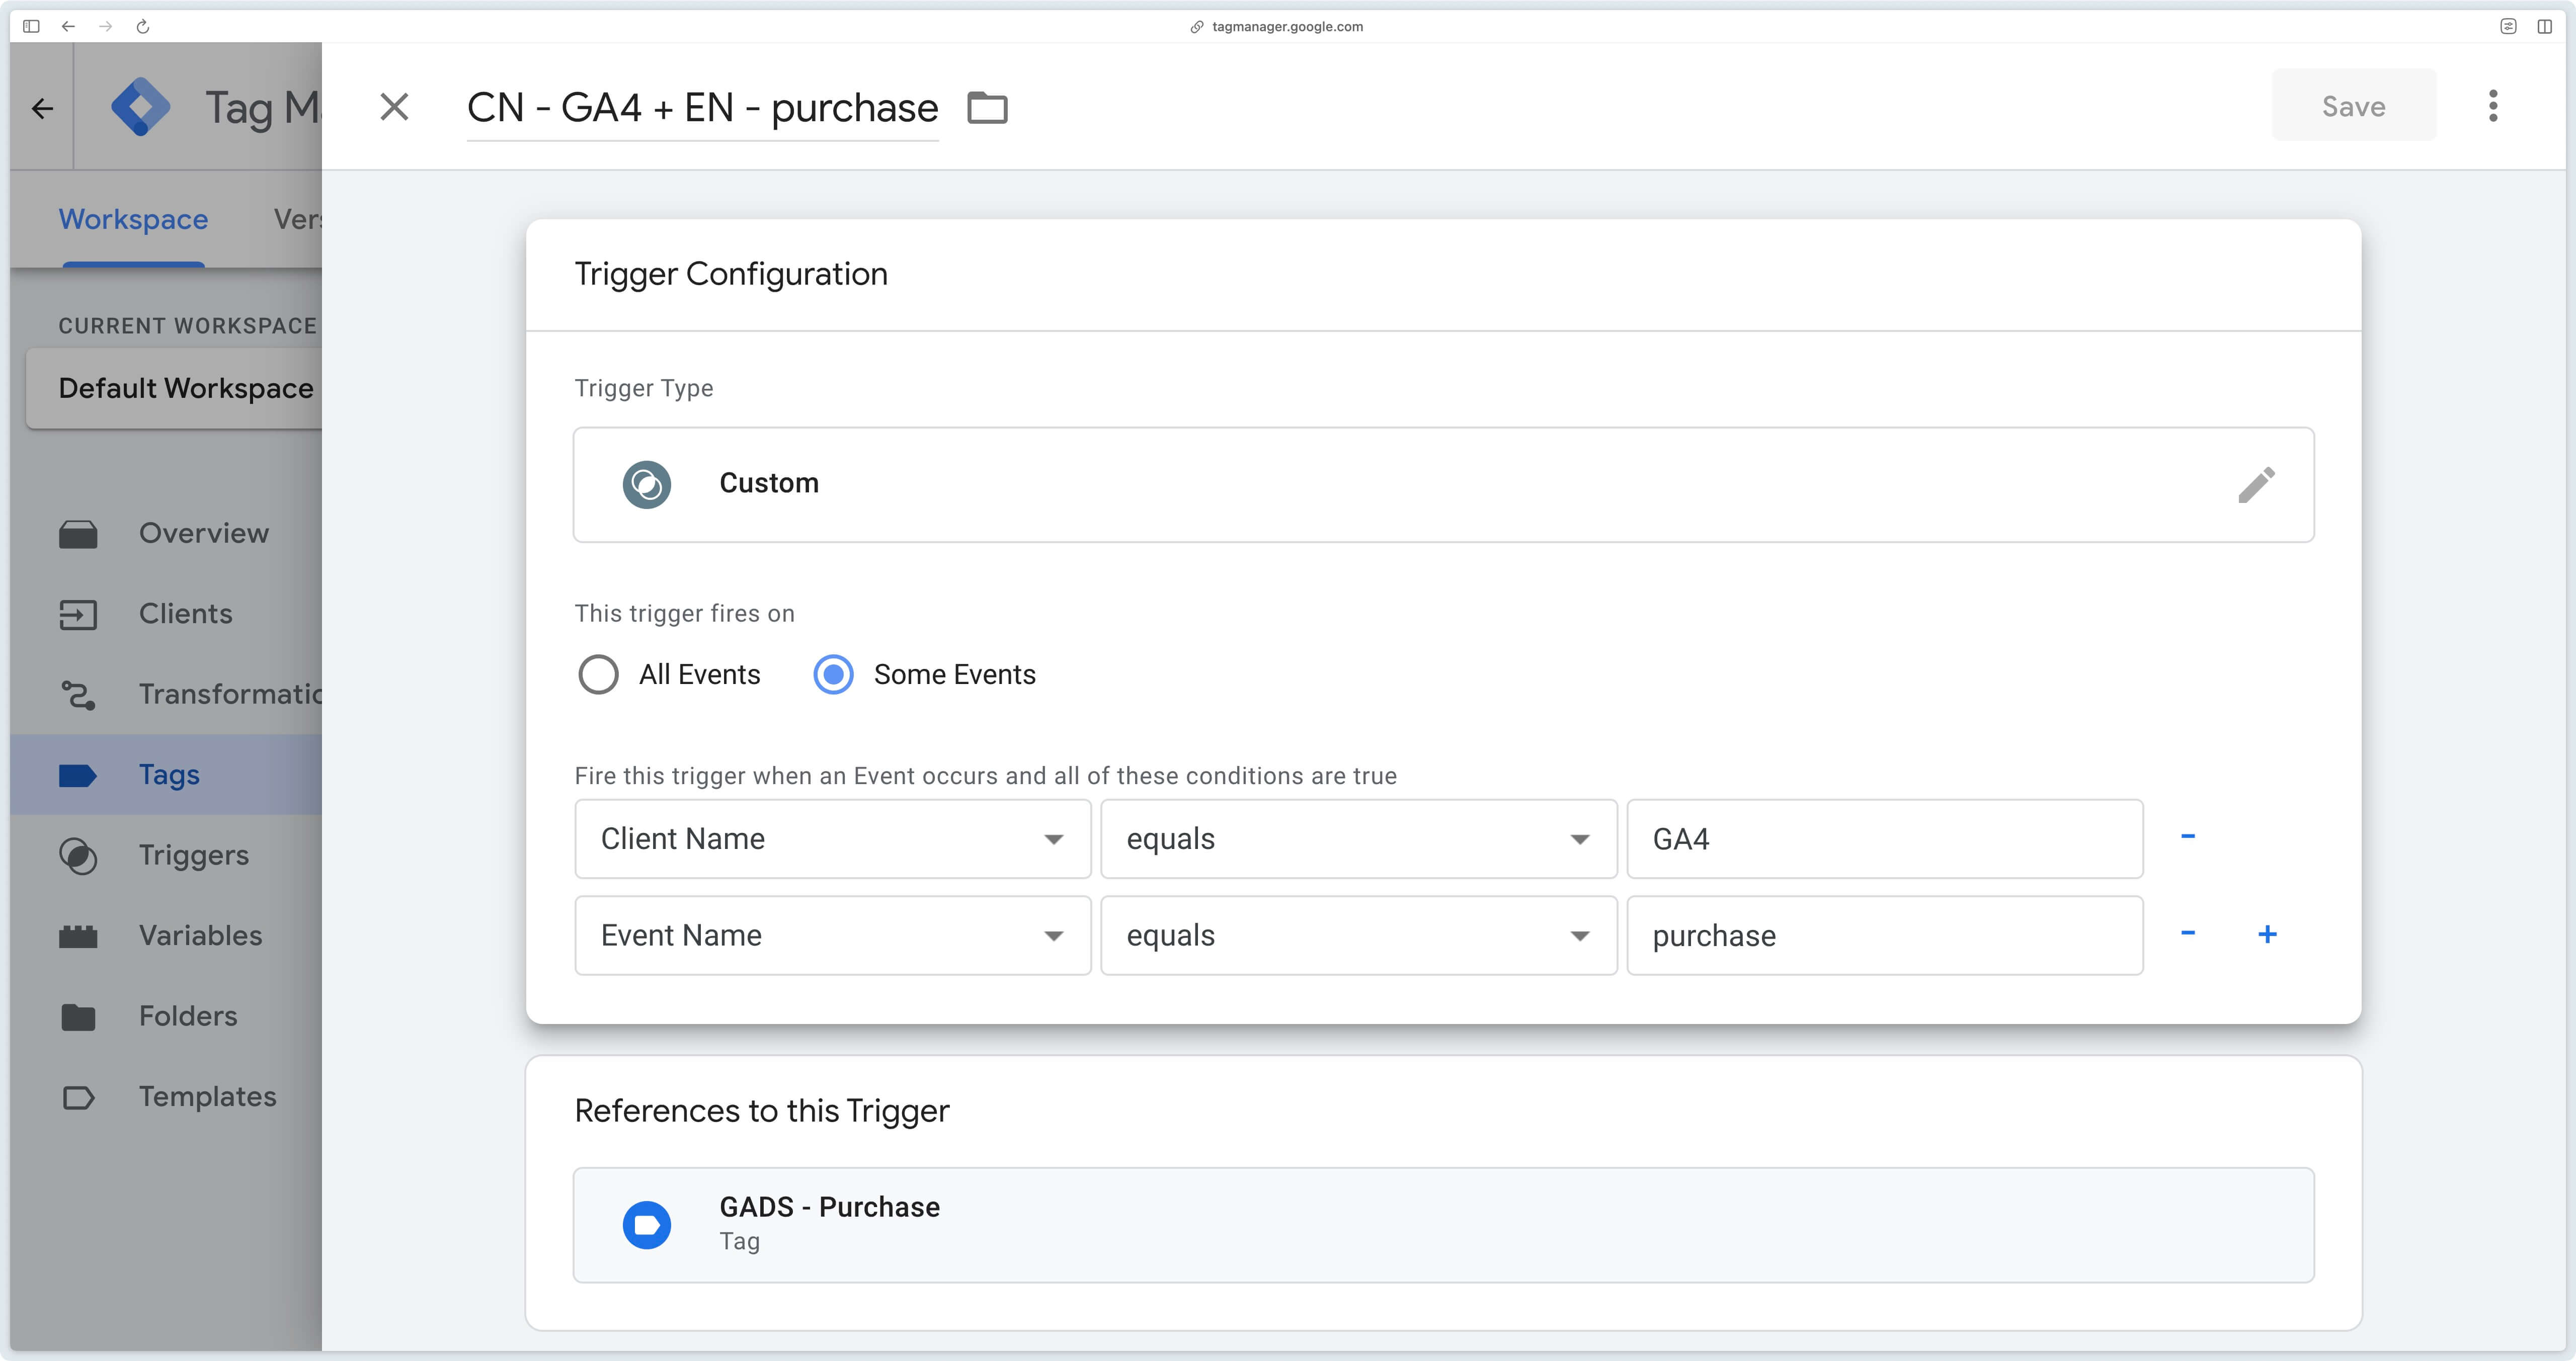
To trigger this tag correctly, you need to make it fire on the GA4 event that corresponds to a purchase. This way, every time a purchase is recorded on the server side, the Google Ads Conversion Tracking tag will send this information to Google Ads.
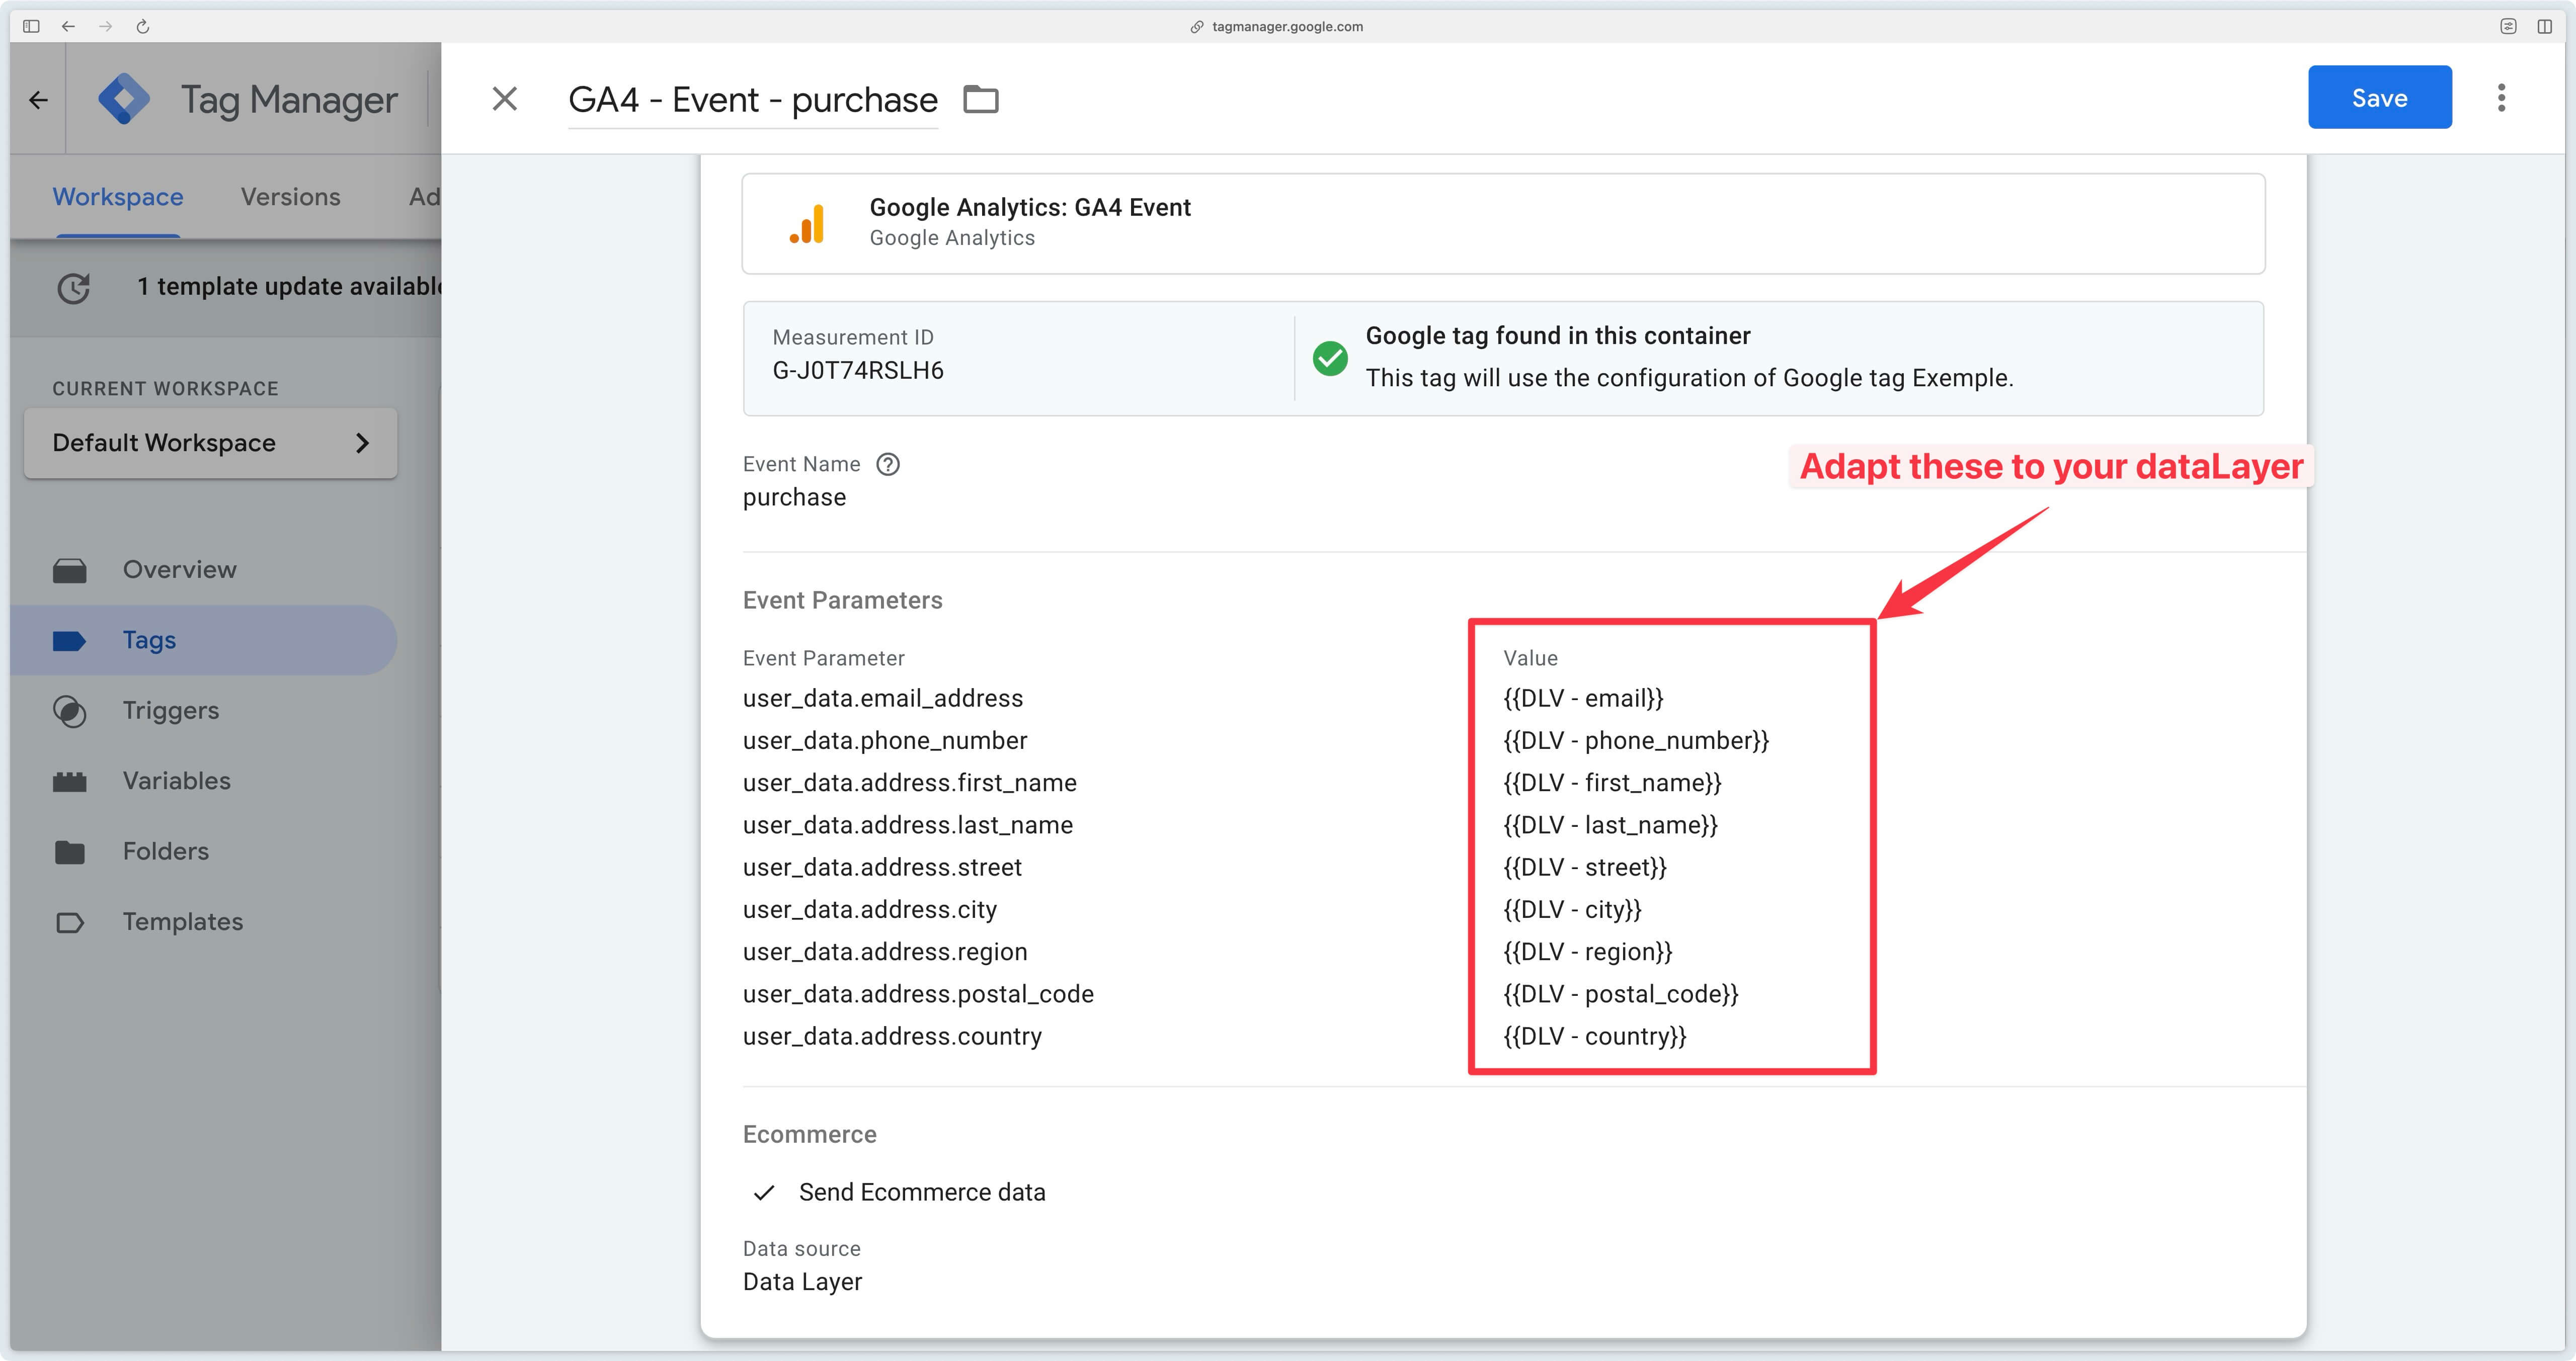
Enhanced conversion tracking
If you’d like to pass on additional information to Google Ads, such as the buyer’s e-mail address or phone number, you can enable enhanced conversions. All you need is for your GA4 event to contain a user_data parameter, which brings together all the user data you want to share. See our documentation on sending user data to the server.
The Google Ads Conversion Tracking tag automatically retrieves this server-side information and sends it to Google Ads, provided that the consent signals managed by Google (ad_storage and ad_user_data) are correctly granted.
This data is only sent to Google Ads if consent is explicitly granted (granted), consistent with the configuration of your Google Consent Mode. Consult our documentation dedicated to consent if necessary.
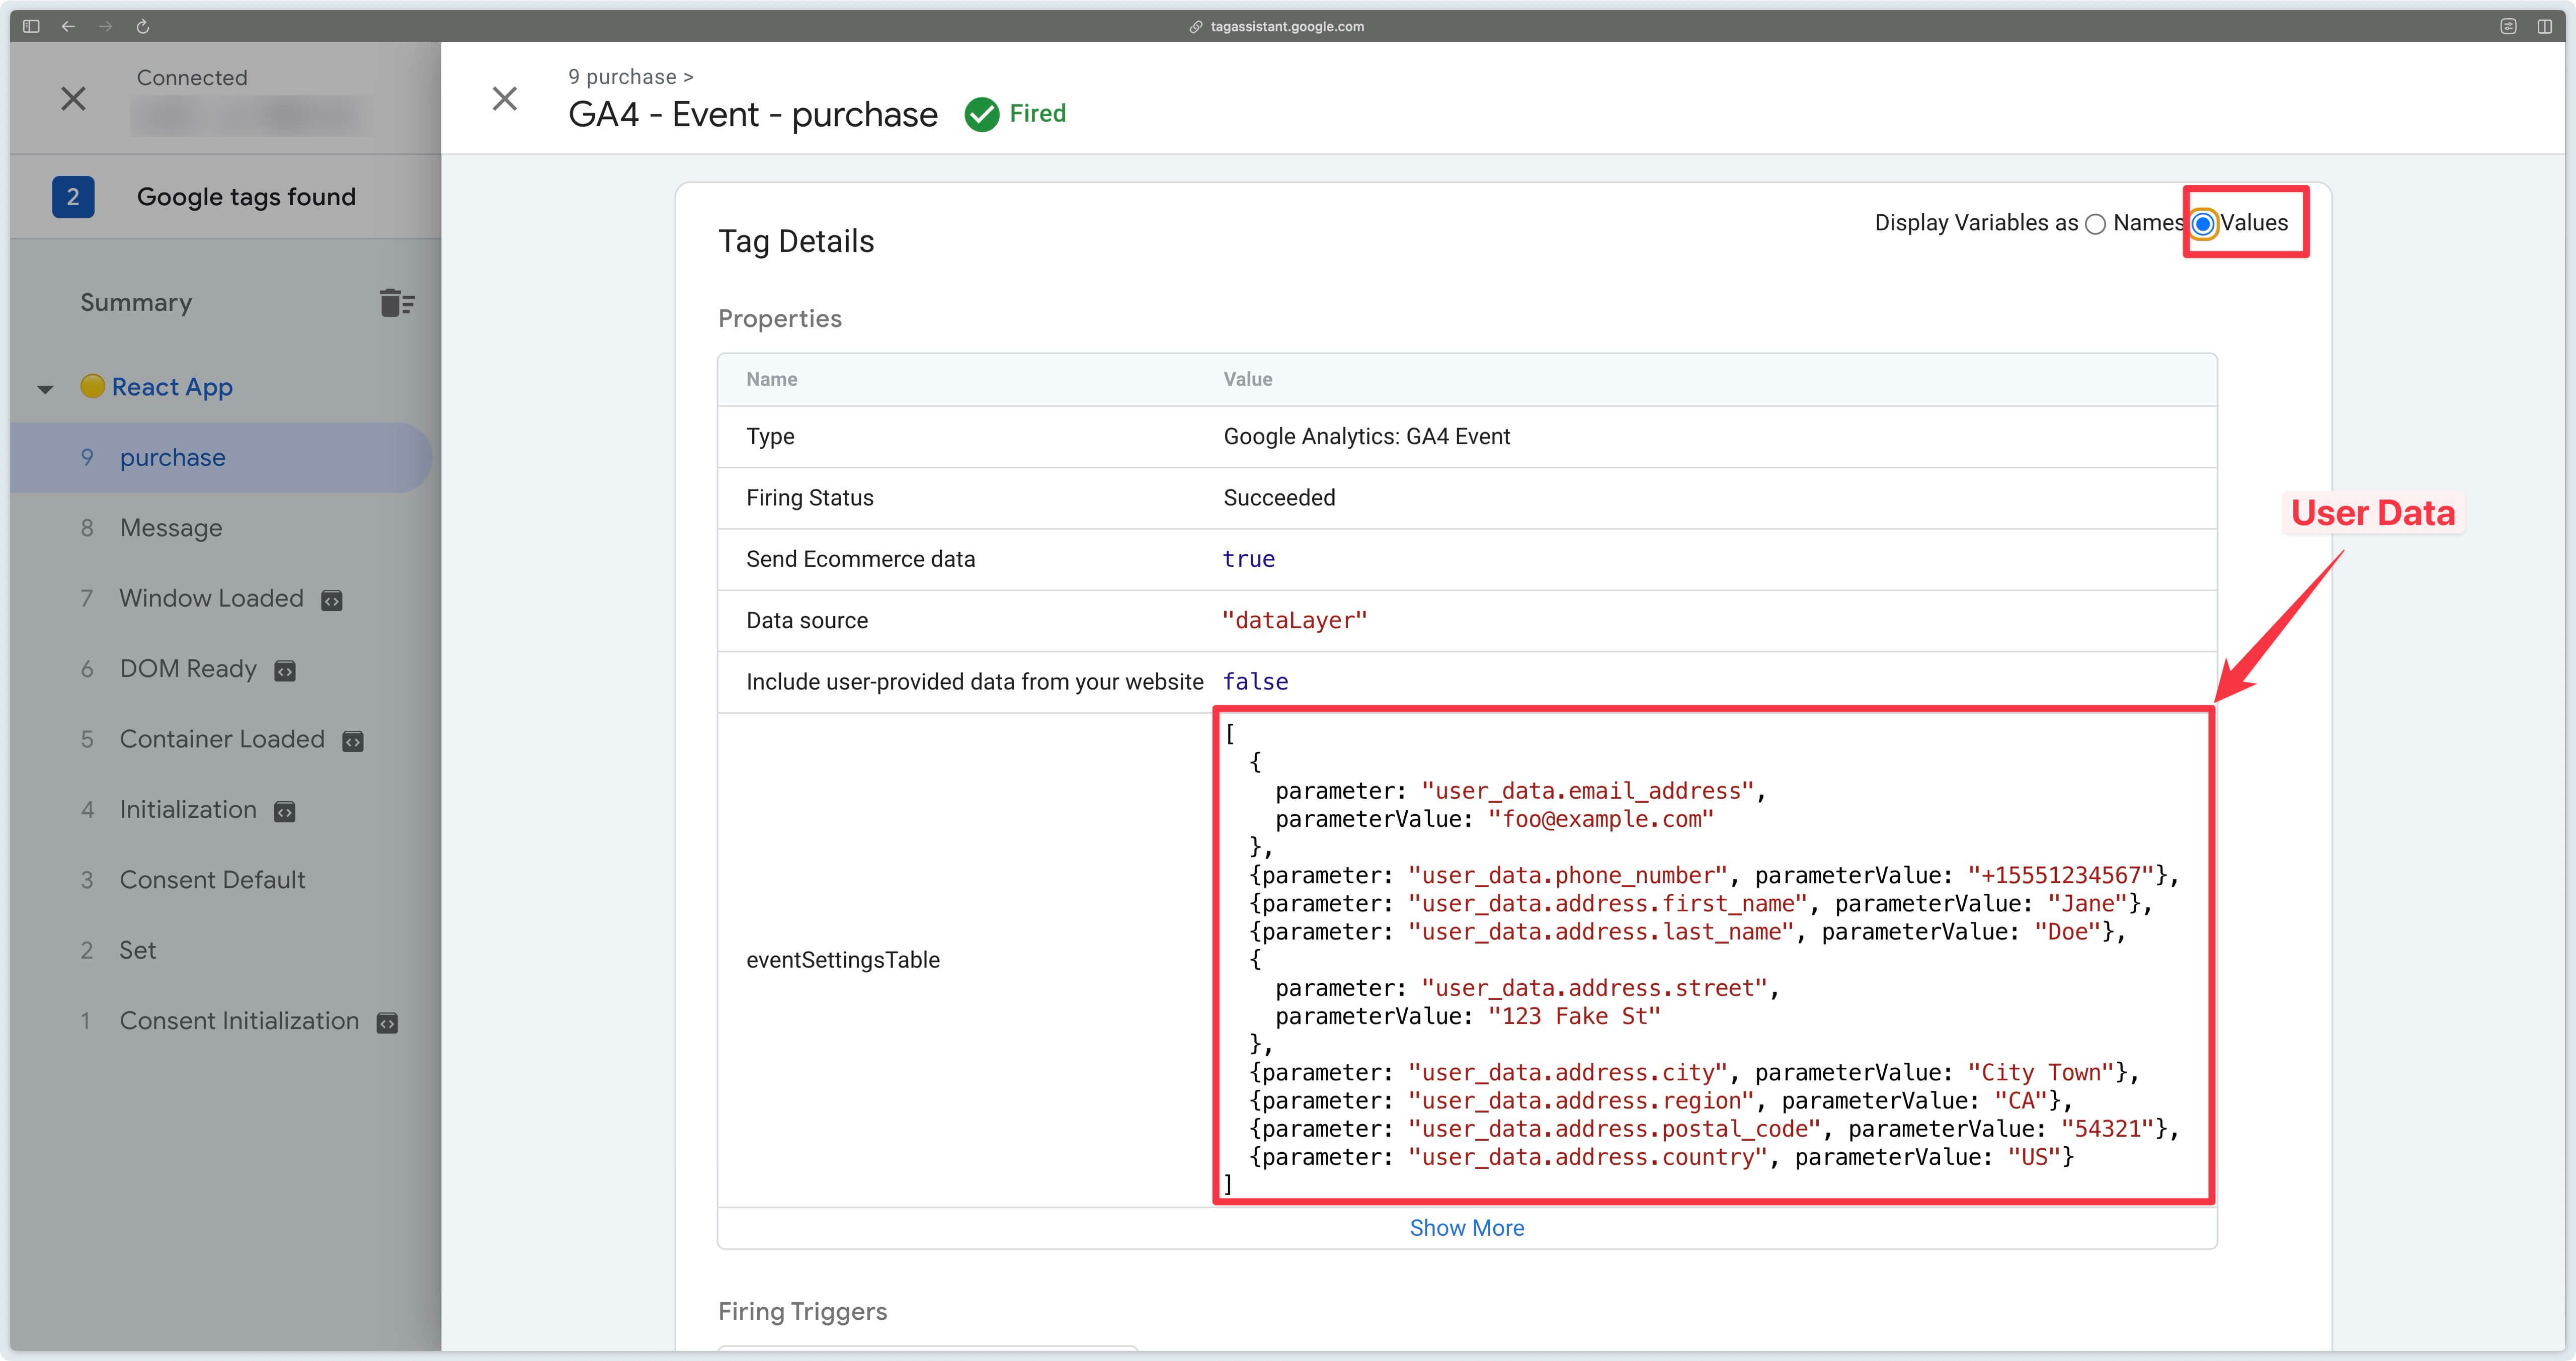
In the example below, the GA4 purchase event is configured in GTM Web to include a user_data parameter. When this event is relayed server-side, the Google Ads Conversion Tracking tag retrieves the information available in user_data and performs a match on the Google Ads side if required.
Bidding differently: new vs. recurring customers
Bidding differently depending on the type of buyer (new or recurring) in Google Ads has several advantages:
- New customers generally have a high potential value if they become loyal. It may make sense to bid more aggressively to acquire them, even if the initial cost is higher.
- A recurring customer has already been acquired. Their acquisition cost is zero, so you can afford to bid less, or target them differently.
- If a new customer has a lower conversion rate, but a higher LTV, the bid can be adjusted accordingly.
- For an existing customer, the conversion rate is often higher, but the incremental value is lower (e.g. they might have bought anyway).
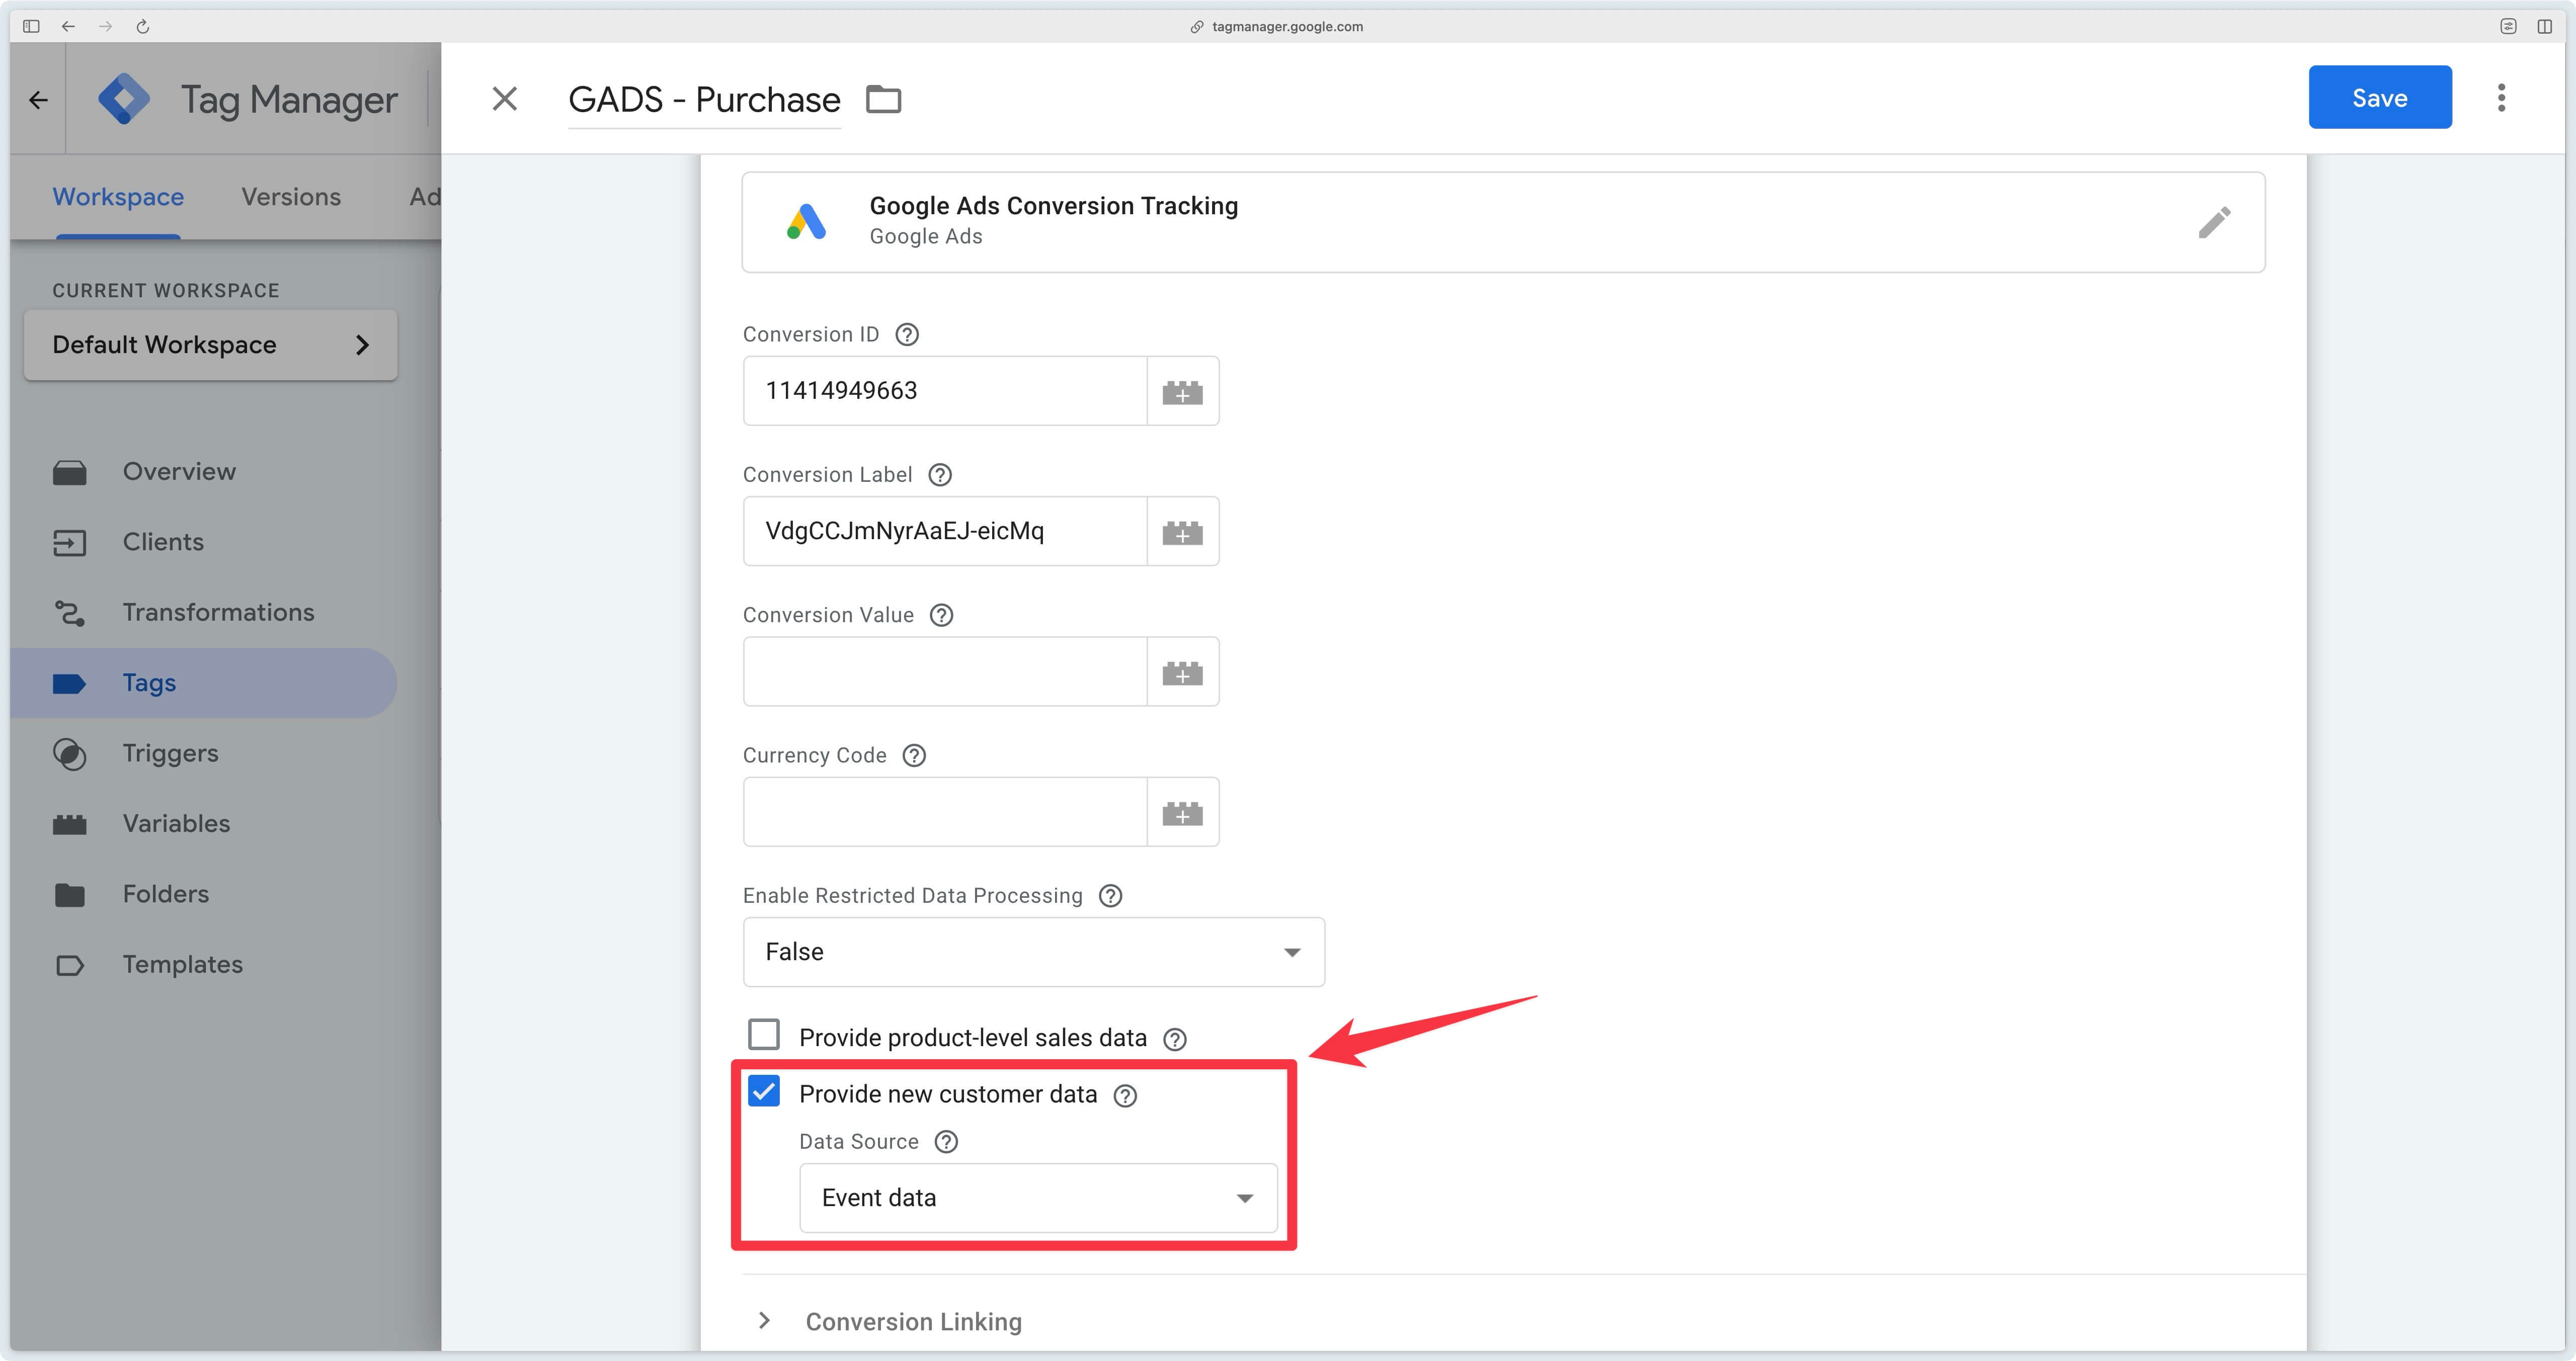
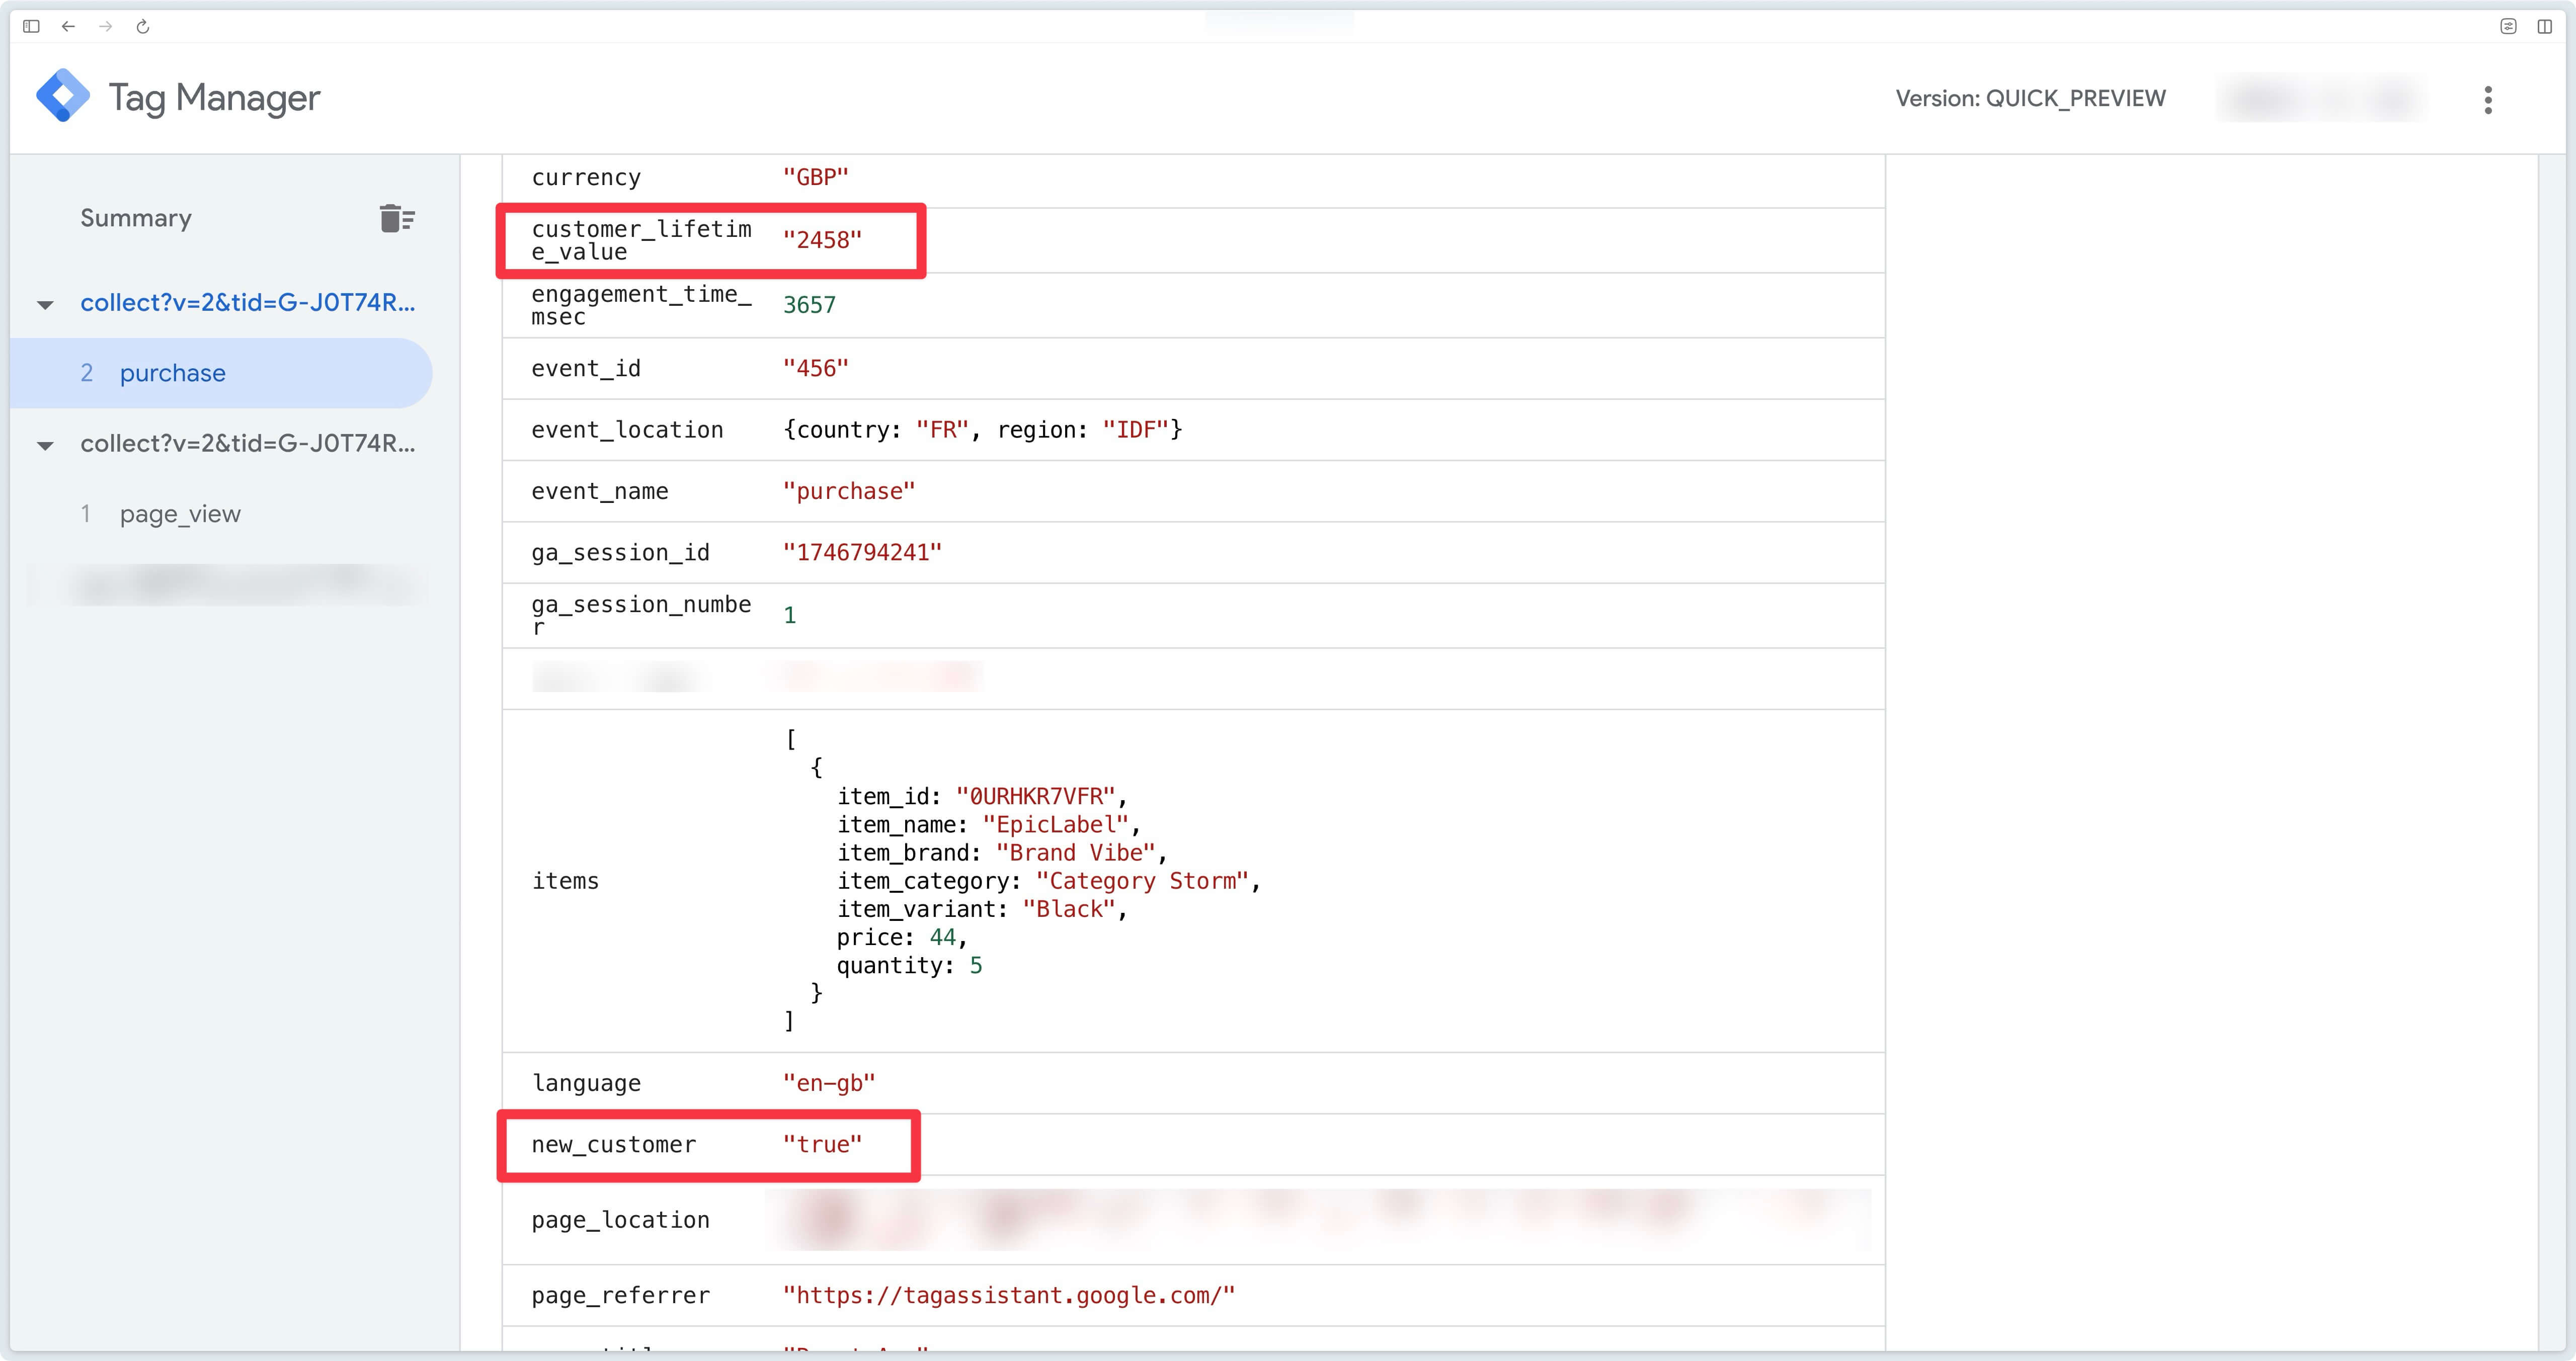
So that Google Ads has all the information it needs to adapt bids, we recommend that you send the new_customer and customer_lifetime_value parameters in your Google Ads conversions.
To do this, you need to transfer this information from your GTM Web container to your GTM Server container. To do this, add these 2 parameters to your GA4 events, as in the example below with the purchase event.
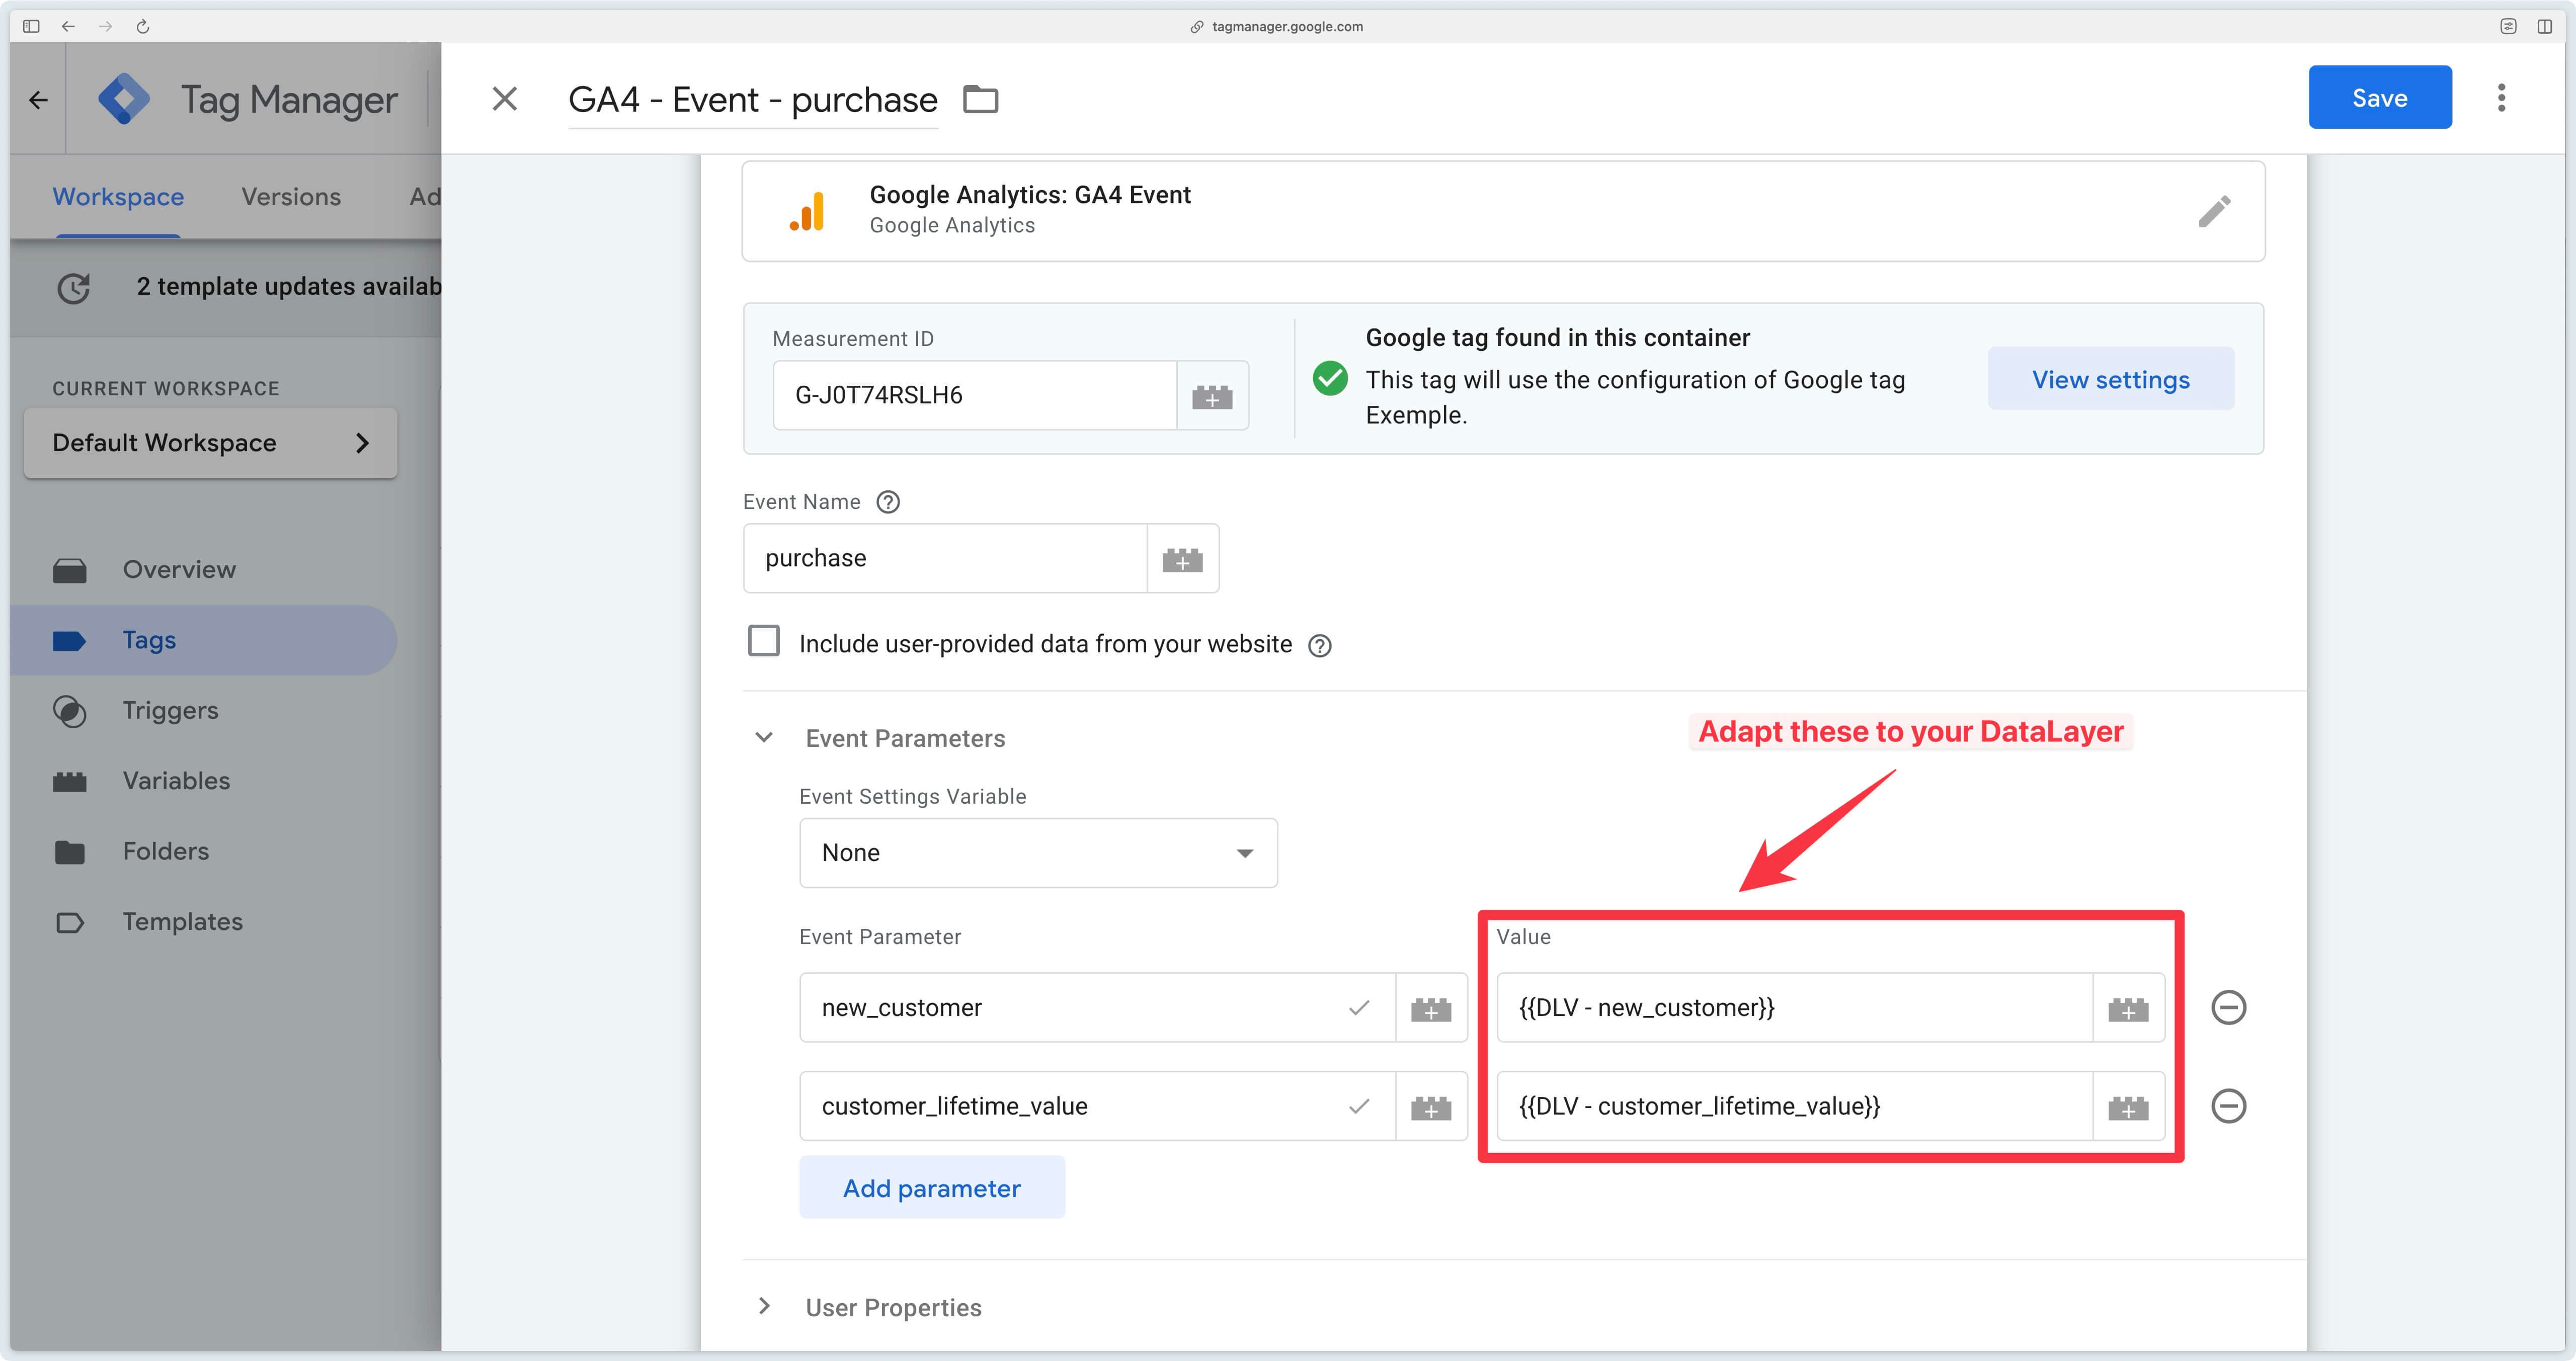
Then, in your Google Ads conversion action in GTM Server, simply check the Provide new customer data checkbox.
Data check
To be sure that your configuration is working as intended, you can perform various checks: GTM Web and Server-Side previews, the Google Ads console, and the Tag Health and Data Monitoring tabs in your Addingwell space.
Check conversions are sent
GTM Web preview
Start by opening the preview of your GTM Web container. On your purchase confirmation page (or any other page where the conversion event is triggered), make sure that the GA4 tag corresponding to the purchase event is triggered, and that it includes user data (e.g. email) if you’re using enhanced conversions.
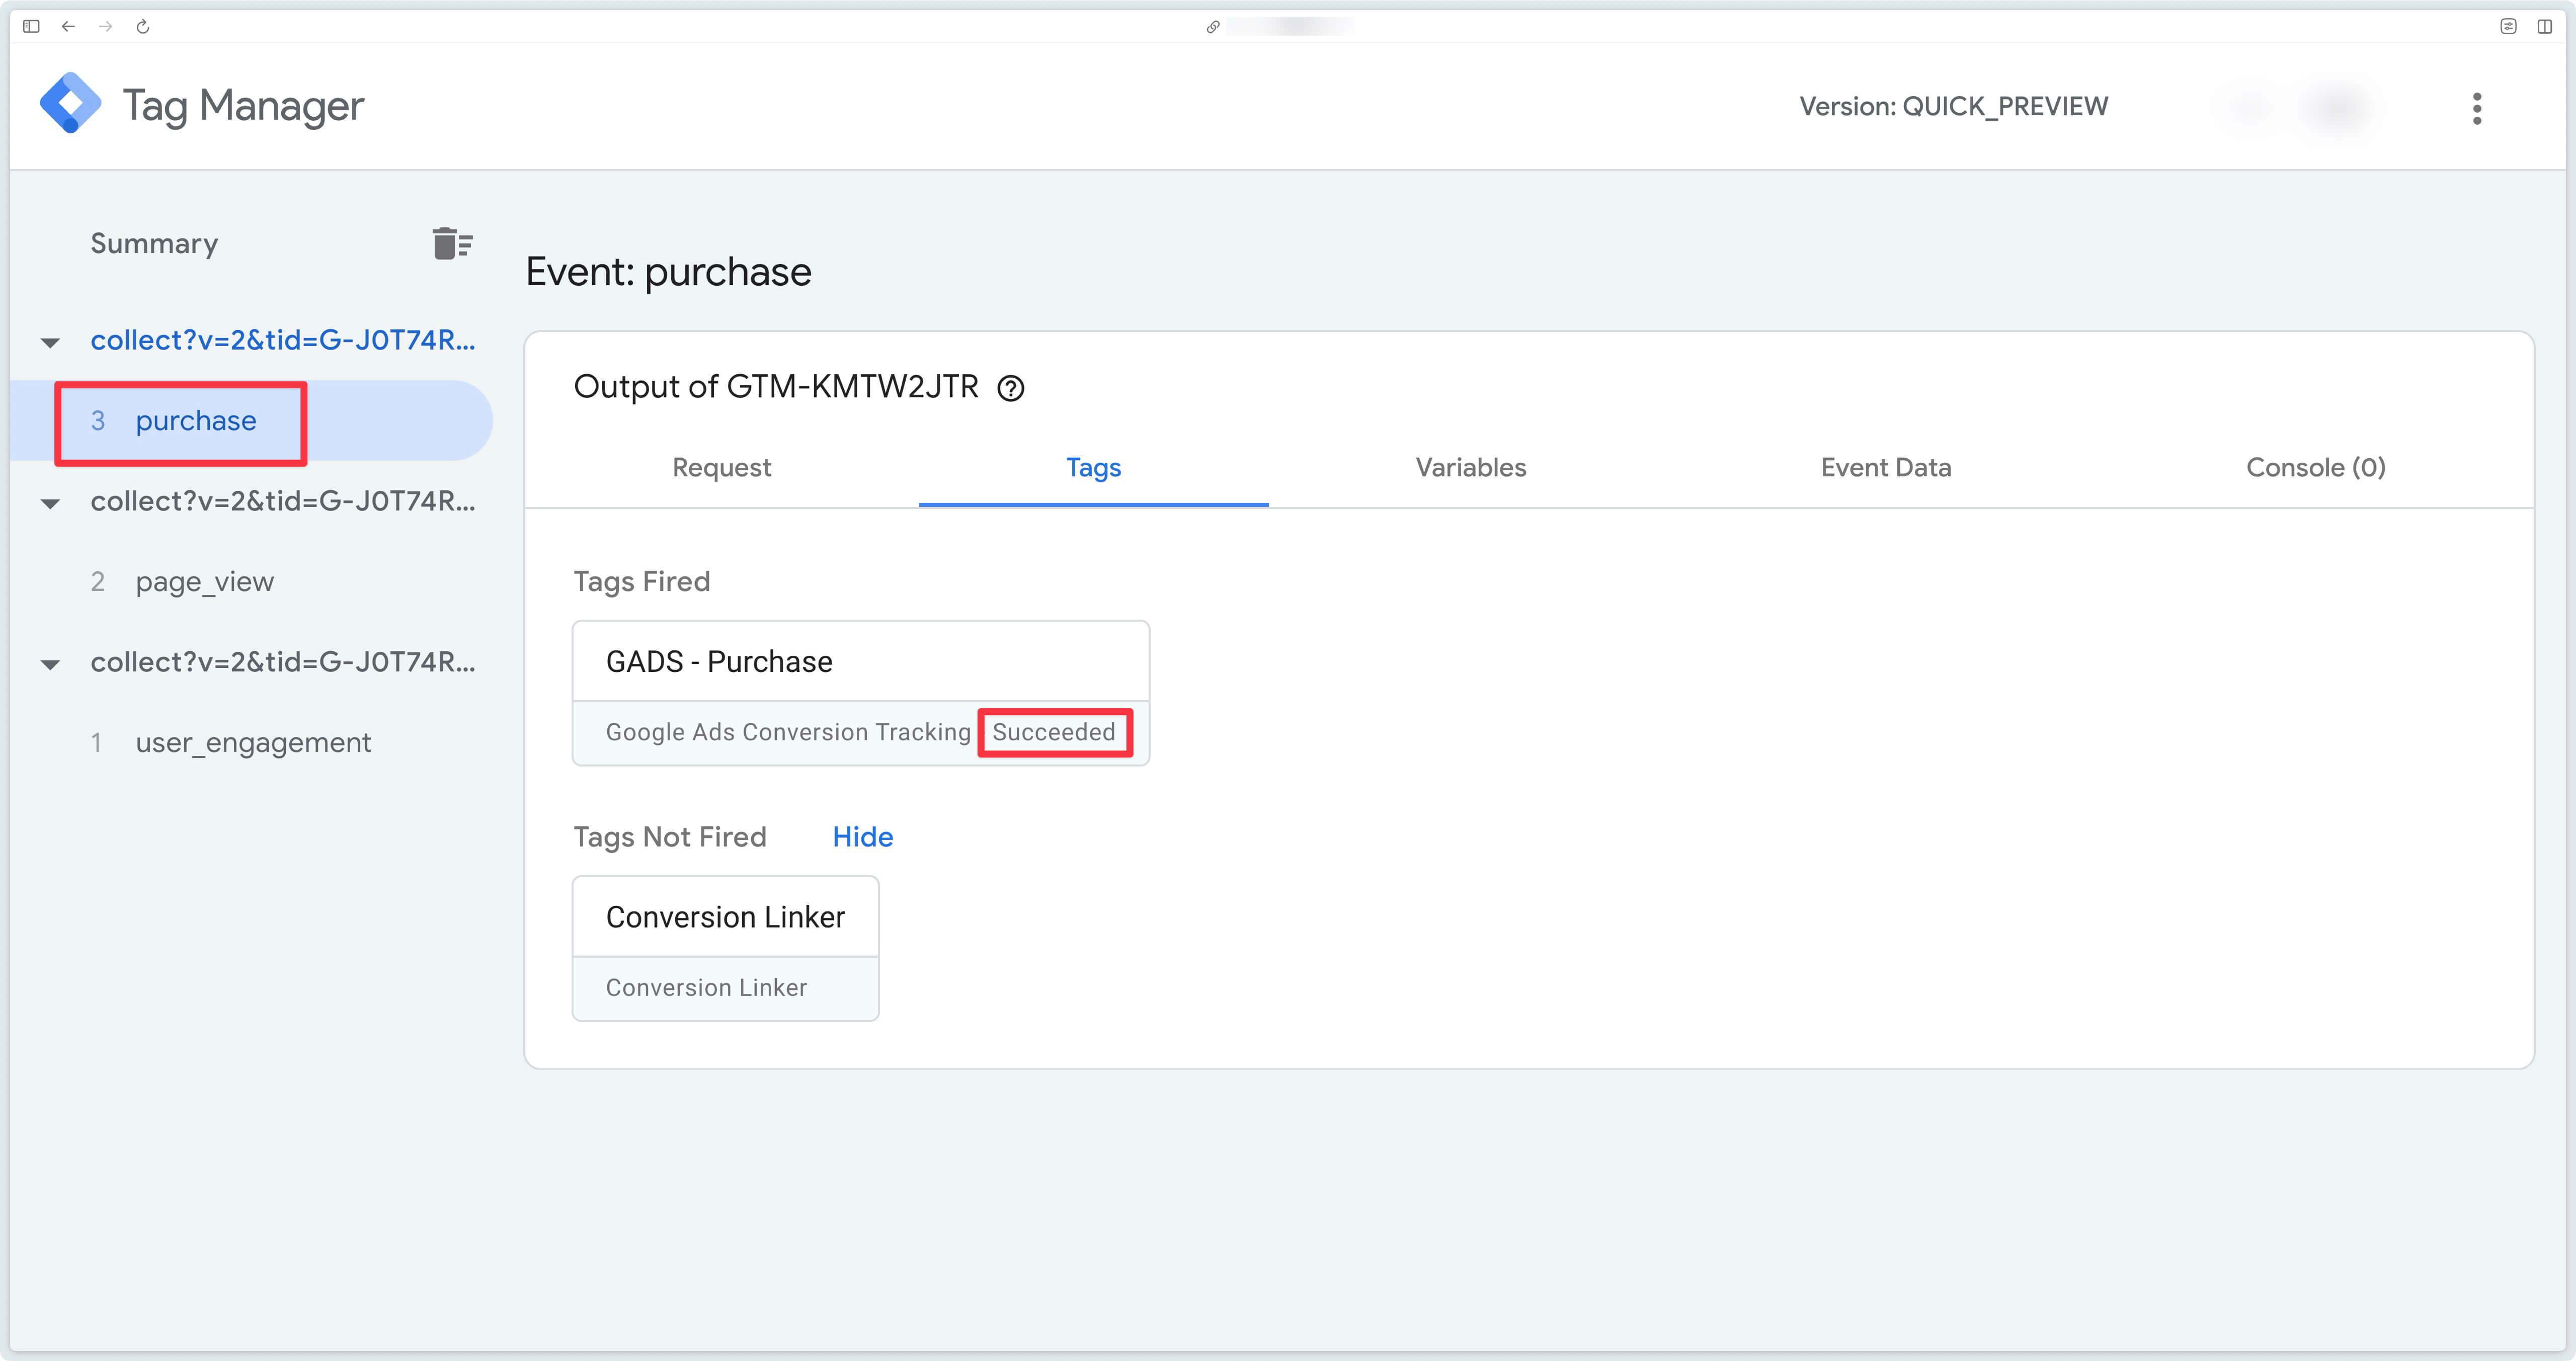
GTM Server preview
When you see the GA4 event arrive in the preview of your sGTM container, check that the Google Ads Conversion Tracking tag is triggered.
You can then look in the Event Data tab for the parameters user_data, value and currency. If they are available, your Google Ads tag has everything it needs to send the conversion to Google Ads.
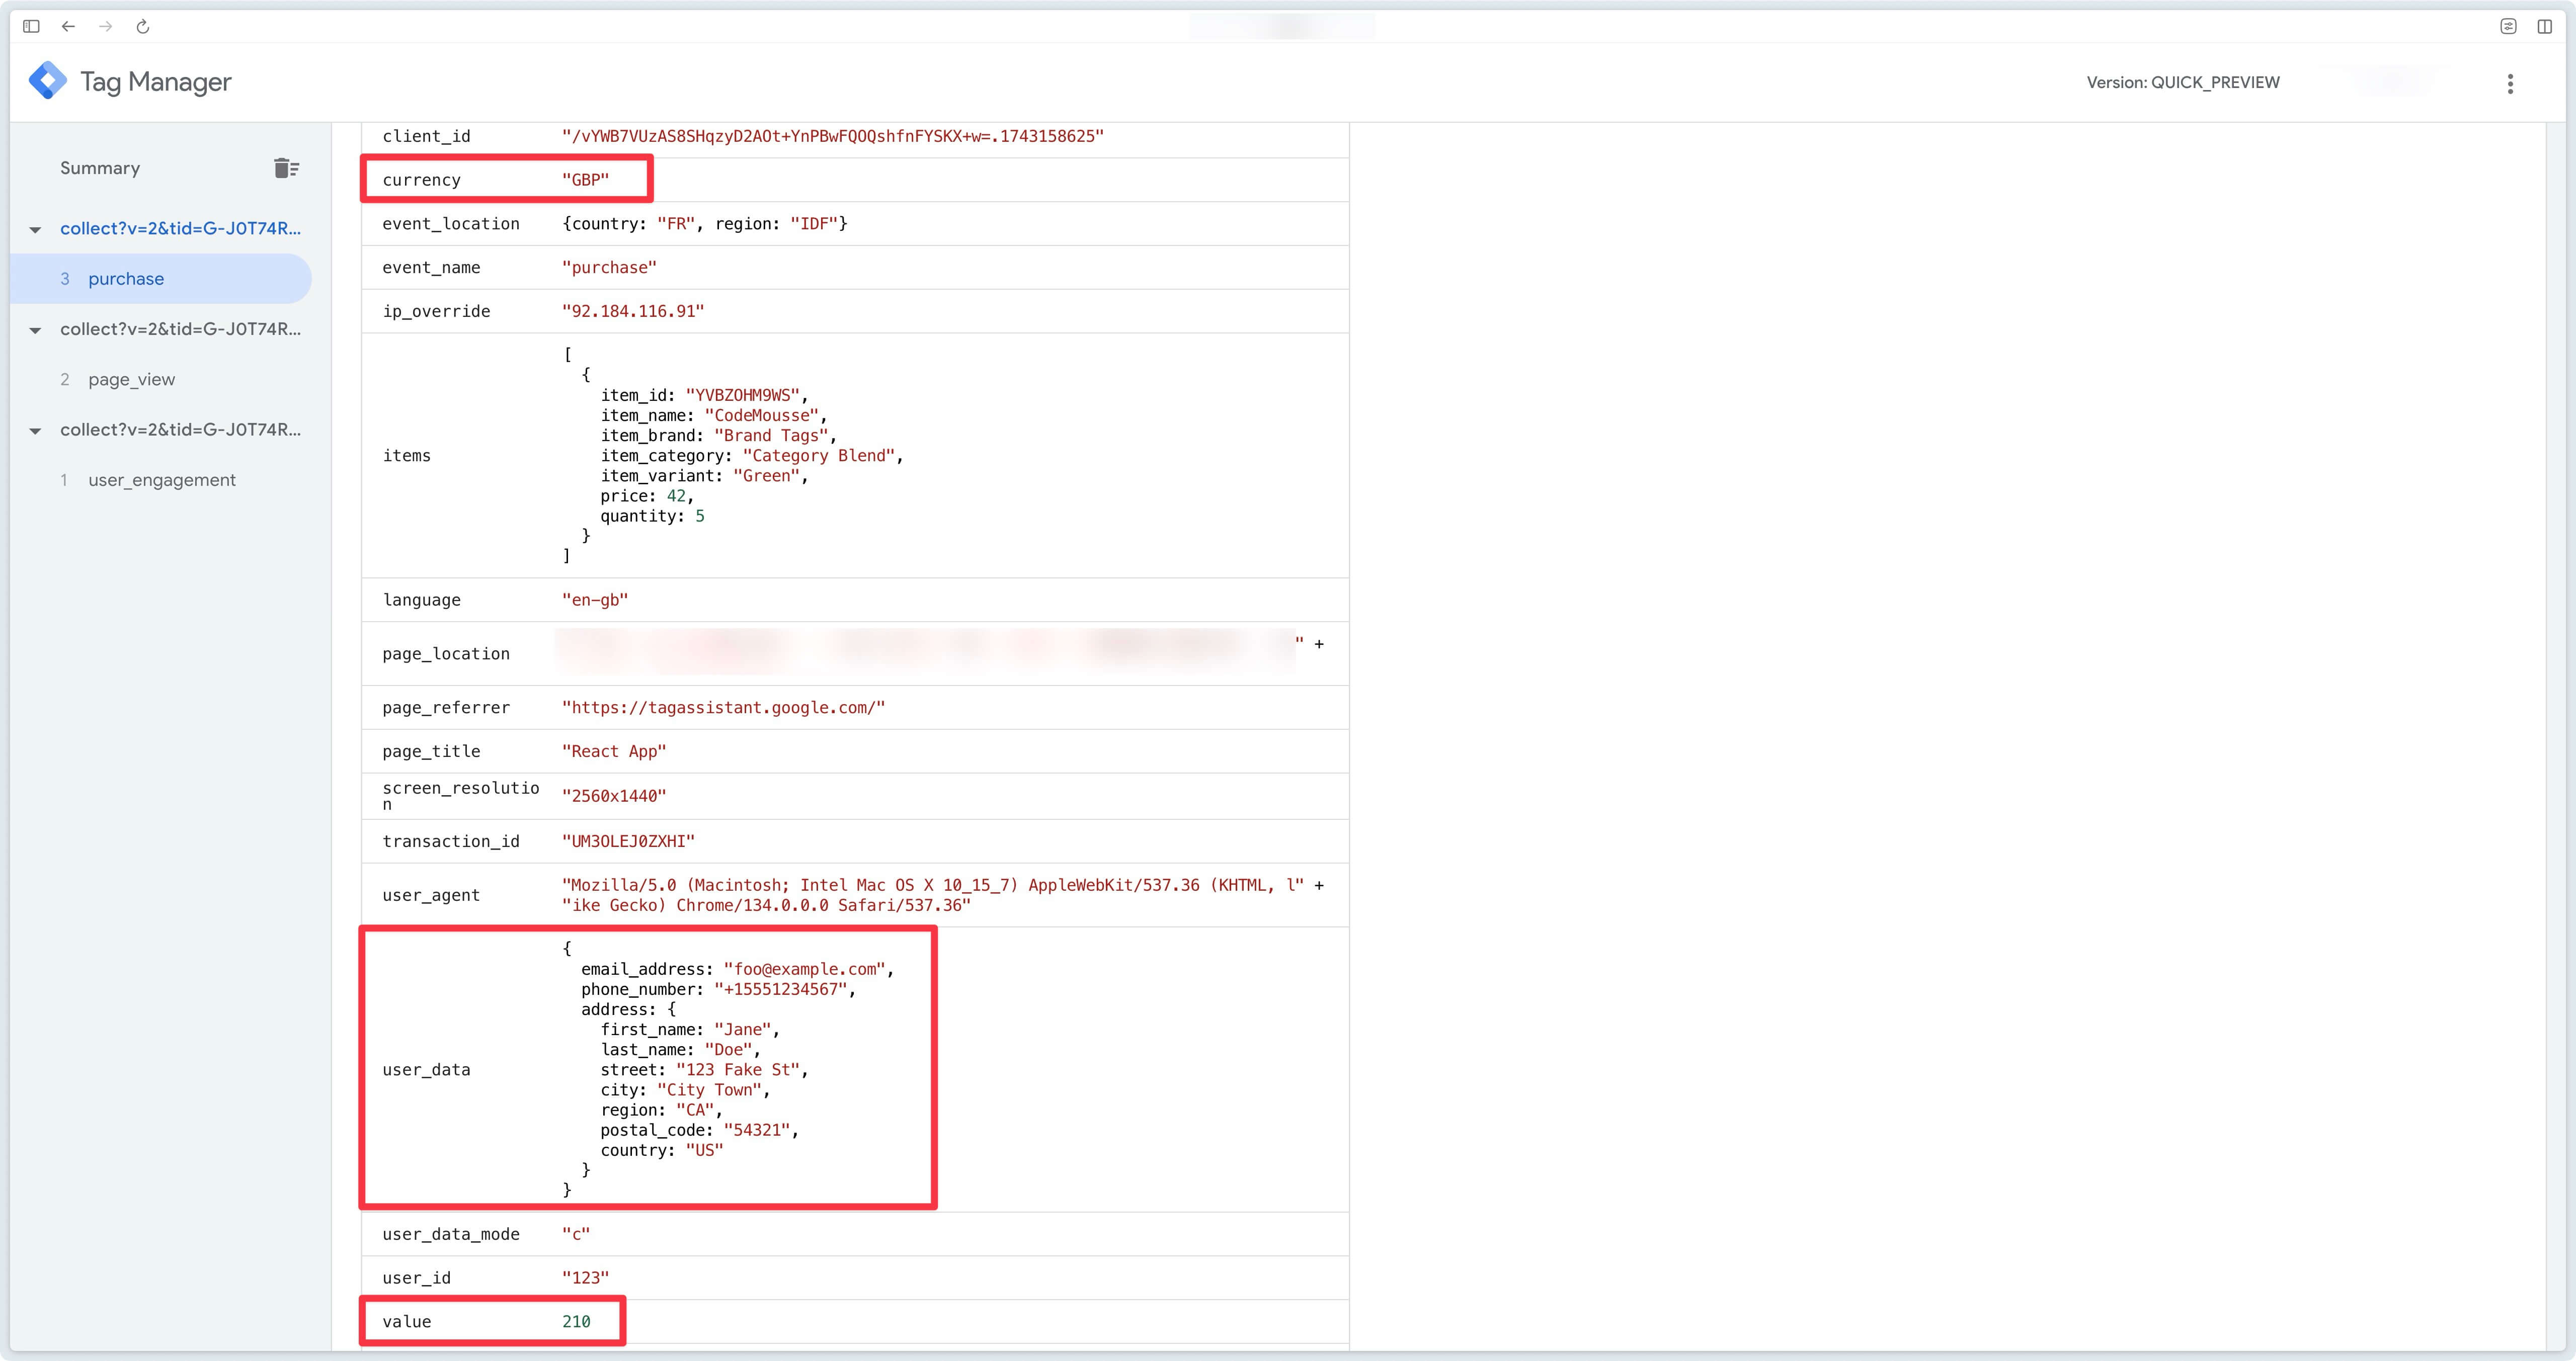
If you bid differently for old vs. new customers, check that the new_customer and customer_lifetime_value parameters are also available.
Check received conversions
Google Ads side
If you’ve just created the conversion action, it may display the message No recent conversions.
This indicates that Google Ads has received the conversion, but that it has not yet been allocated to a campaign. This usually happens when no user has clicked on a Google Ad to reach your website during your tests.
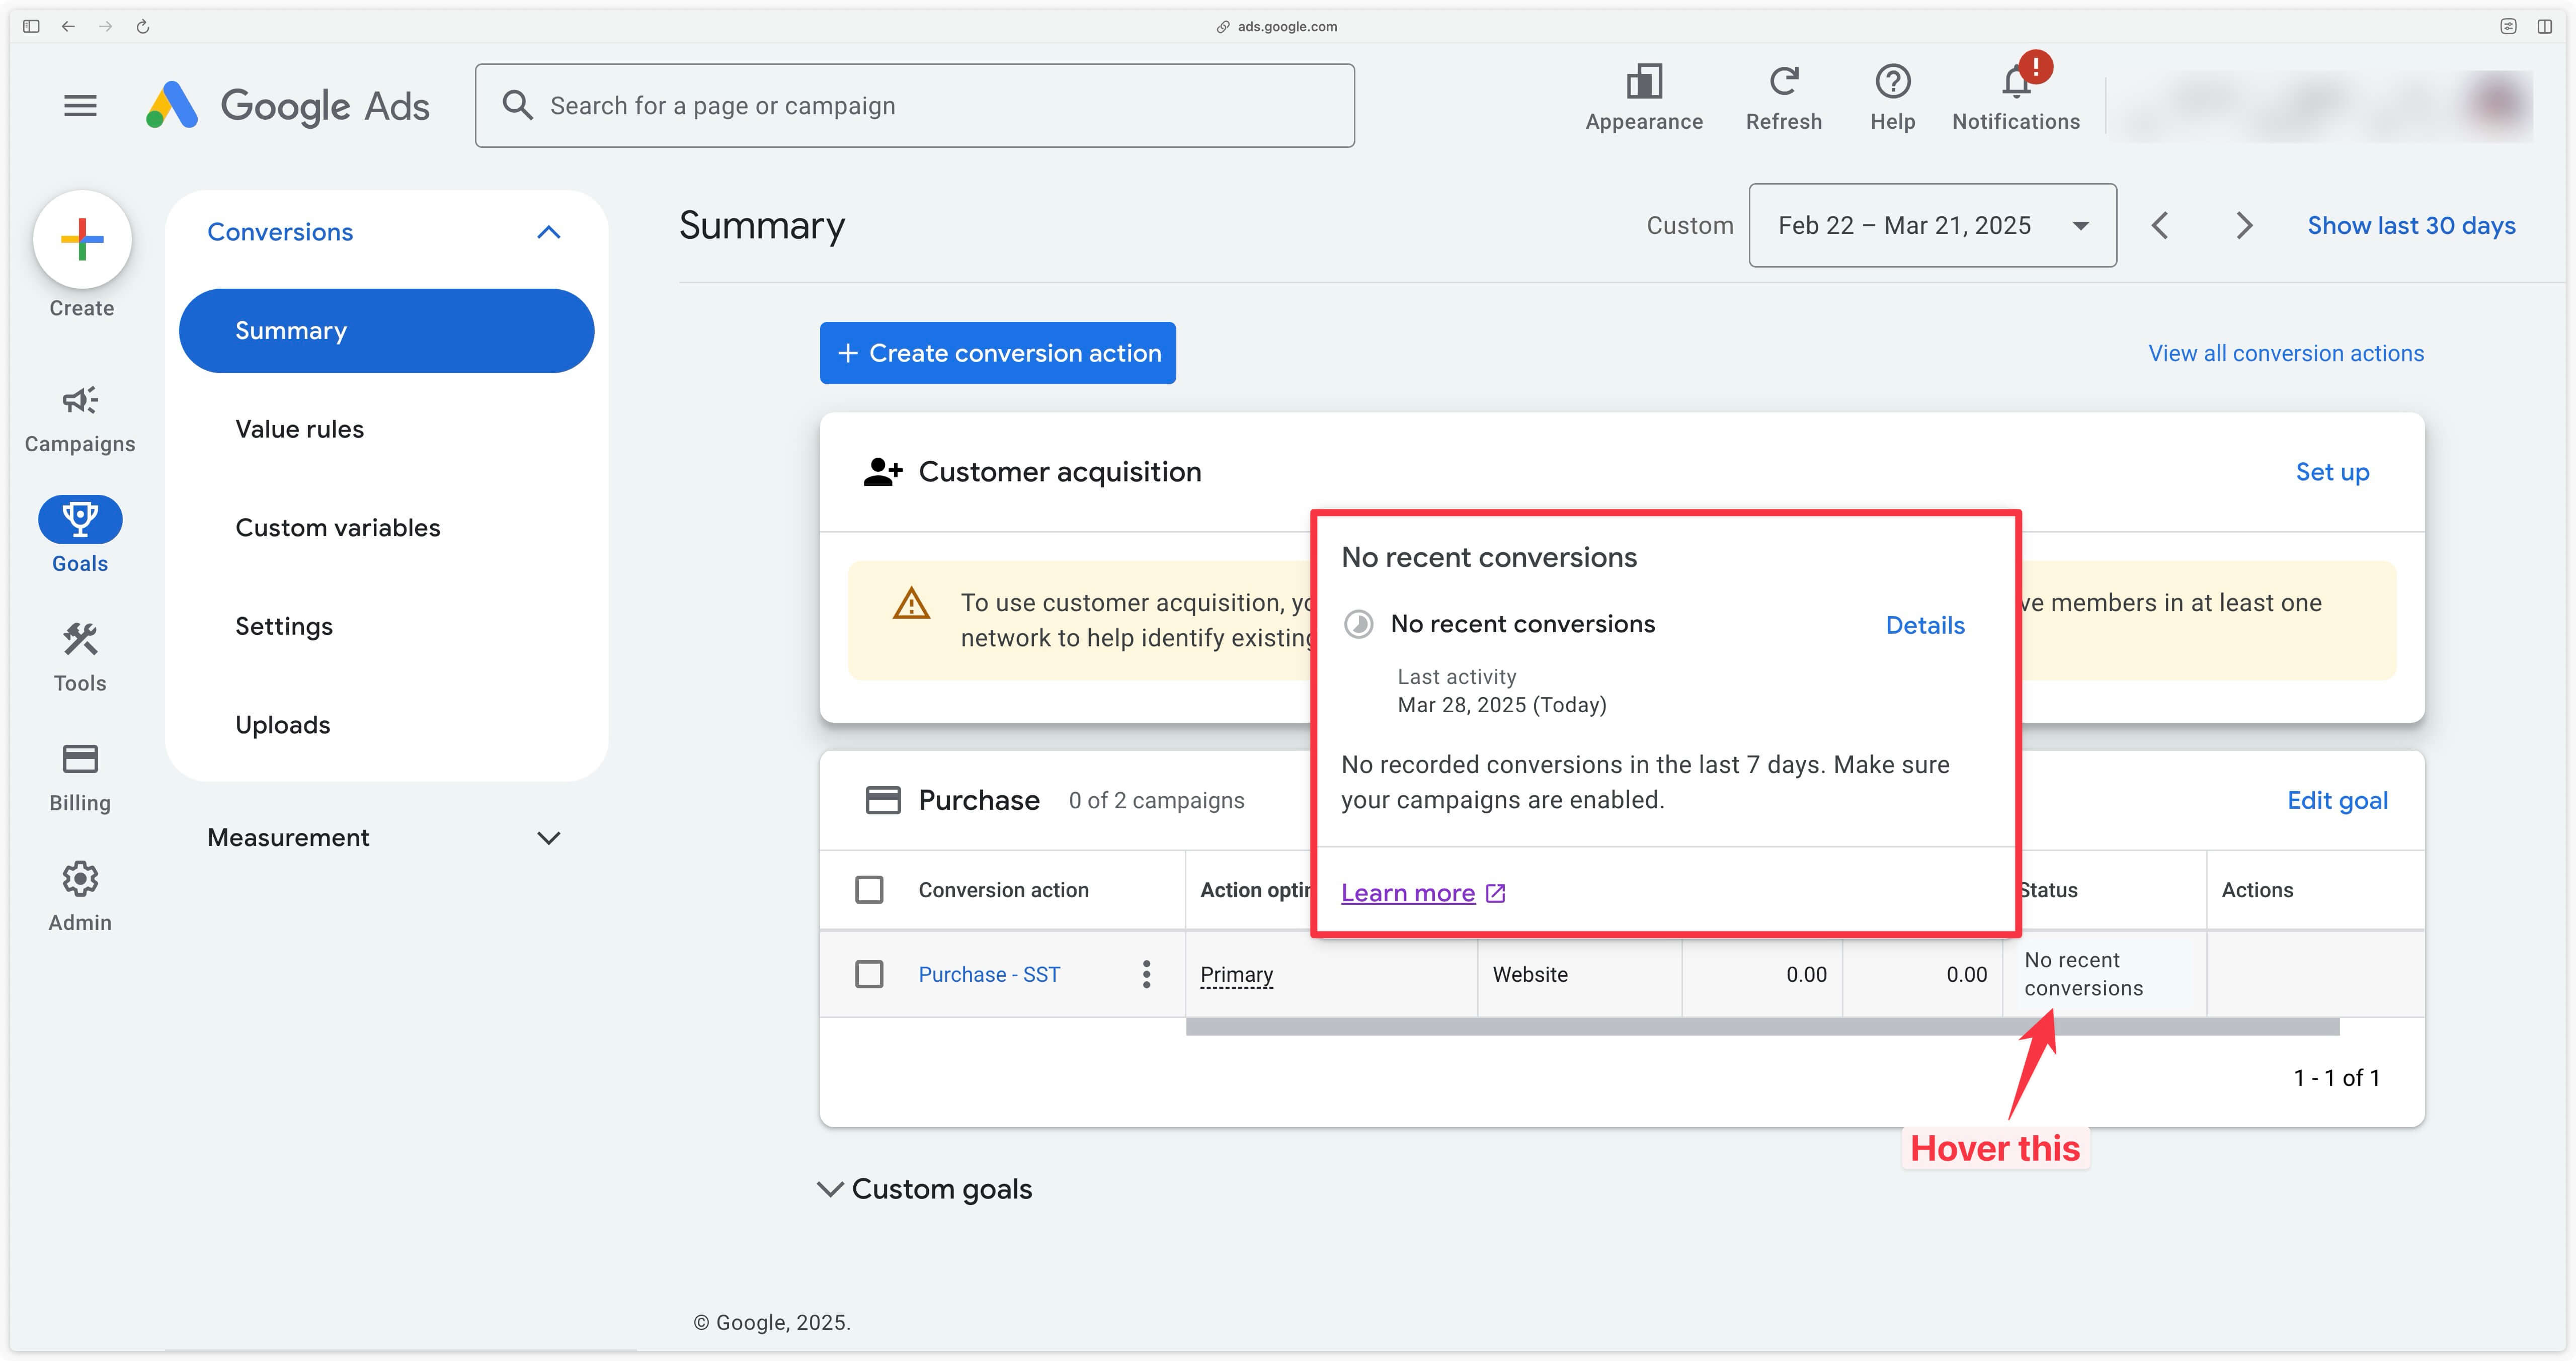
This means that Google Ads has received the conversion but it has not been attributed to Google Ads. This is normal because during your tests you didn’t click on one of your ads to access your website.
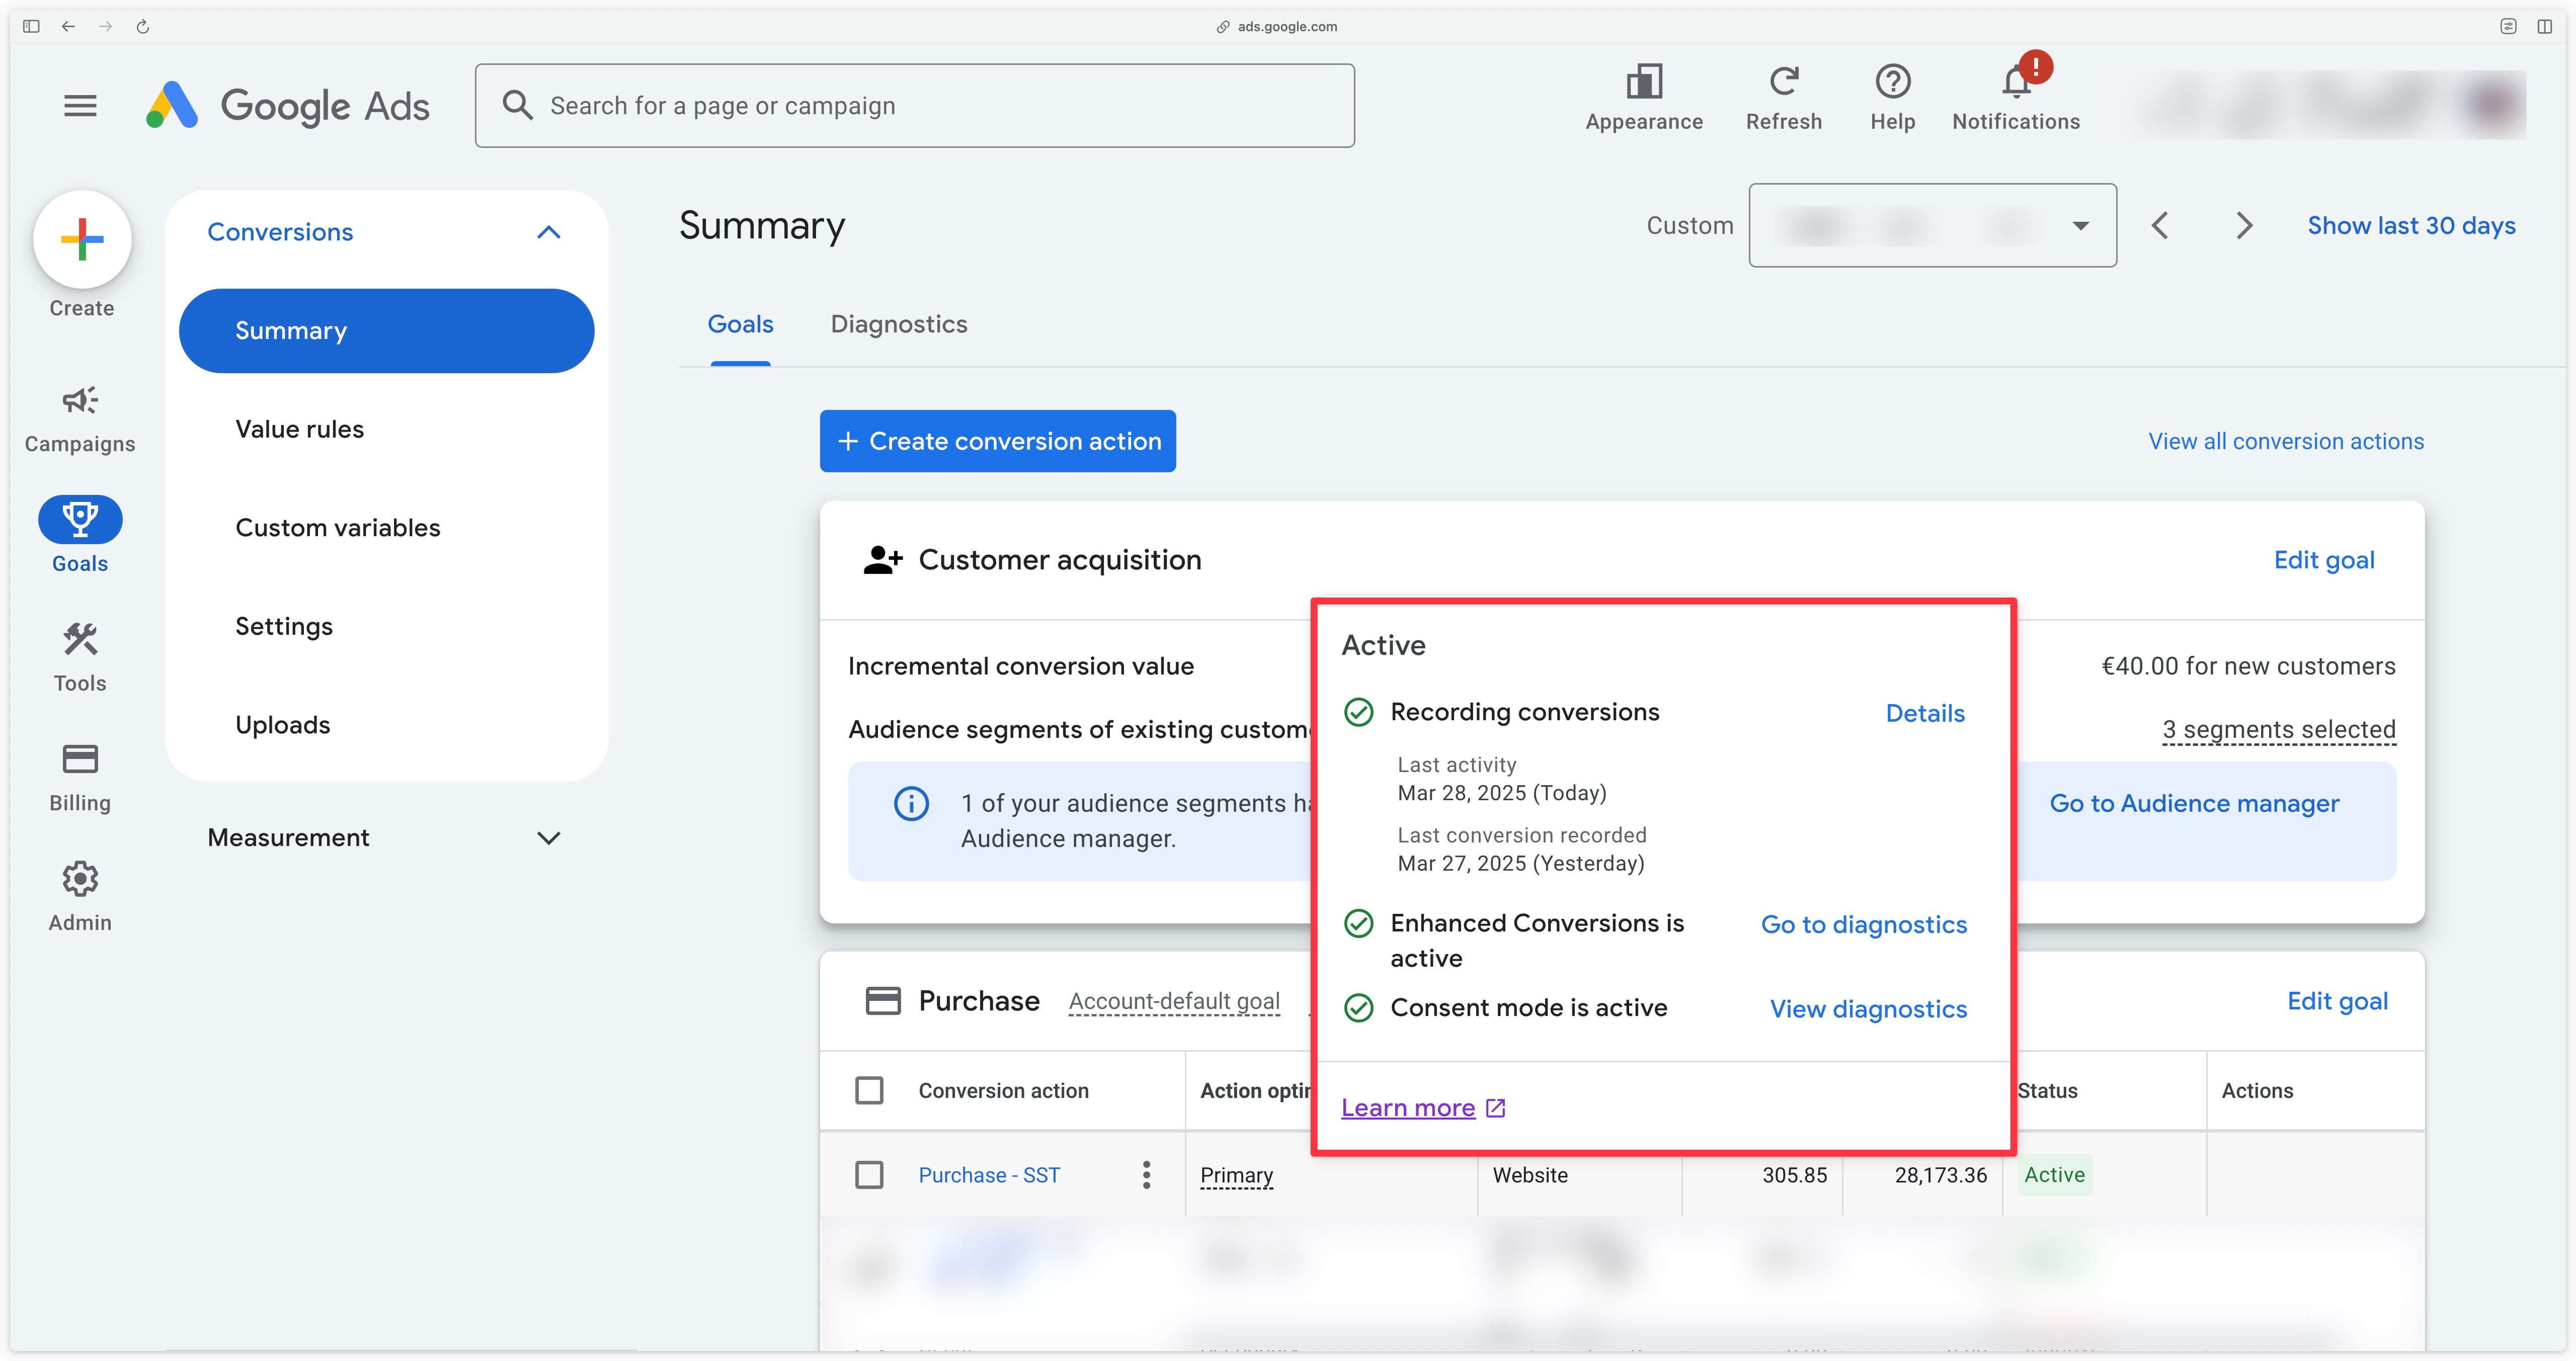
After publishing your GTM containers, and if you have campaigns running, you should observe a switch to the Active state after a few days, confirming that real conversions have been detected and attributed to Google Ads.
Addingwell side via Tag Health: successful requests
In your Addingwell container, the Tag Health tab lets you monitor the status of requests sent to Google Ads. You can check their number and percentage of success over a given period, then click on your Google Ads tag for more details.
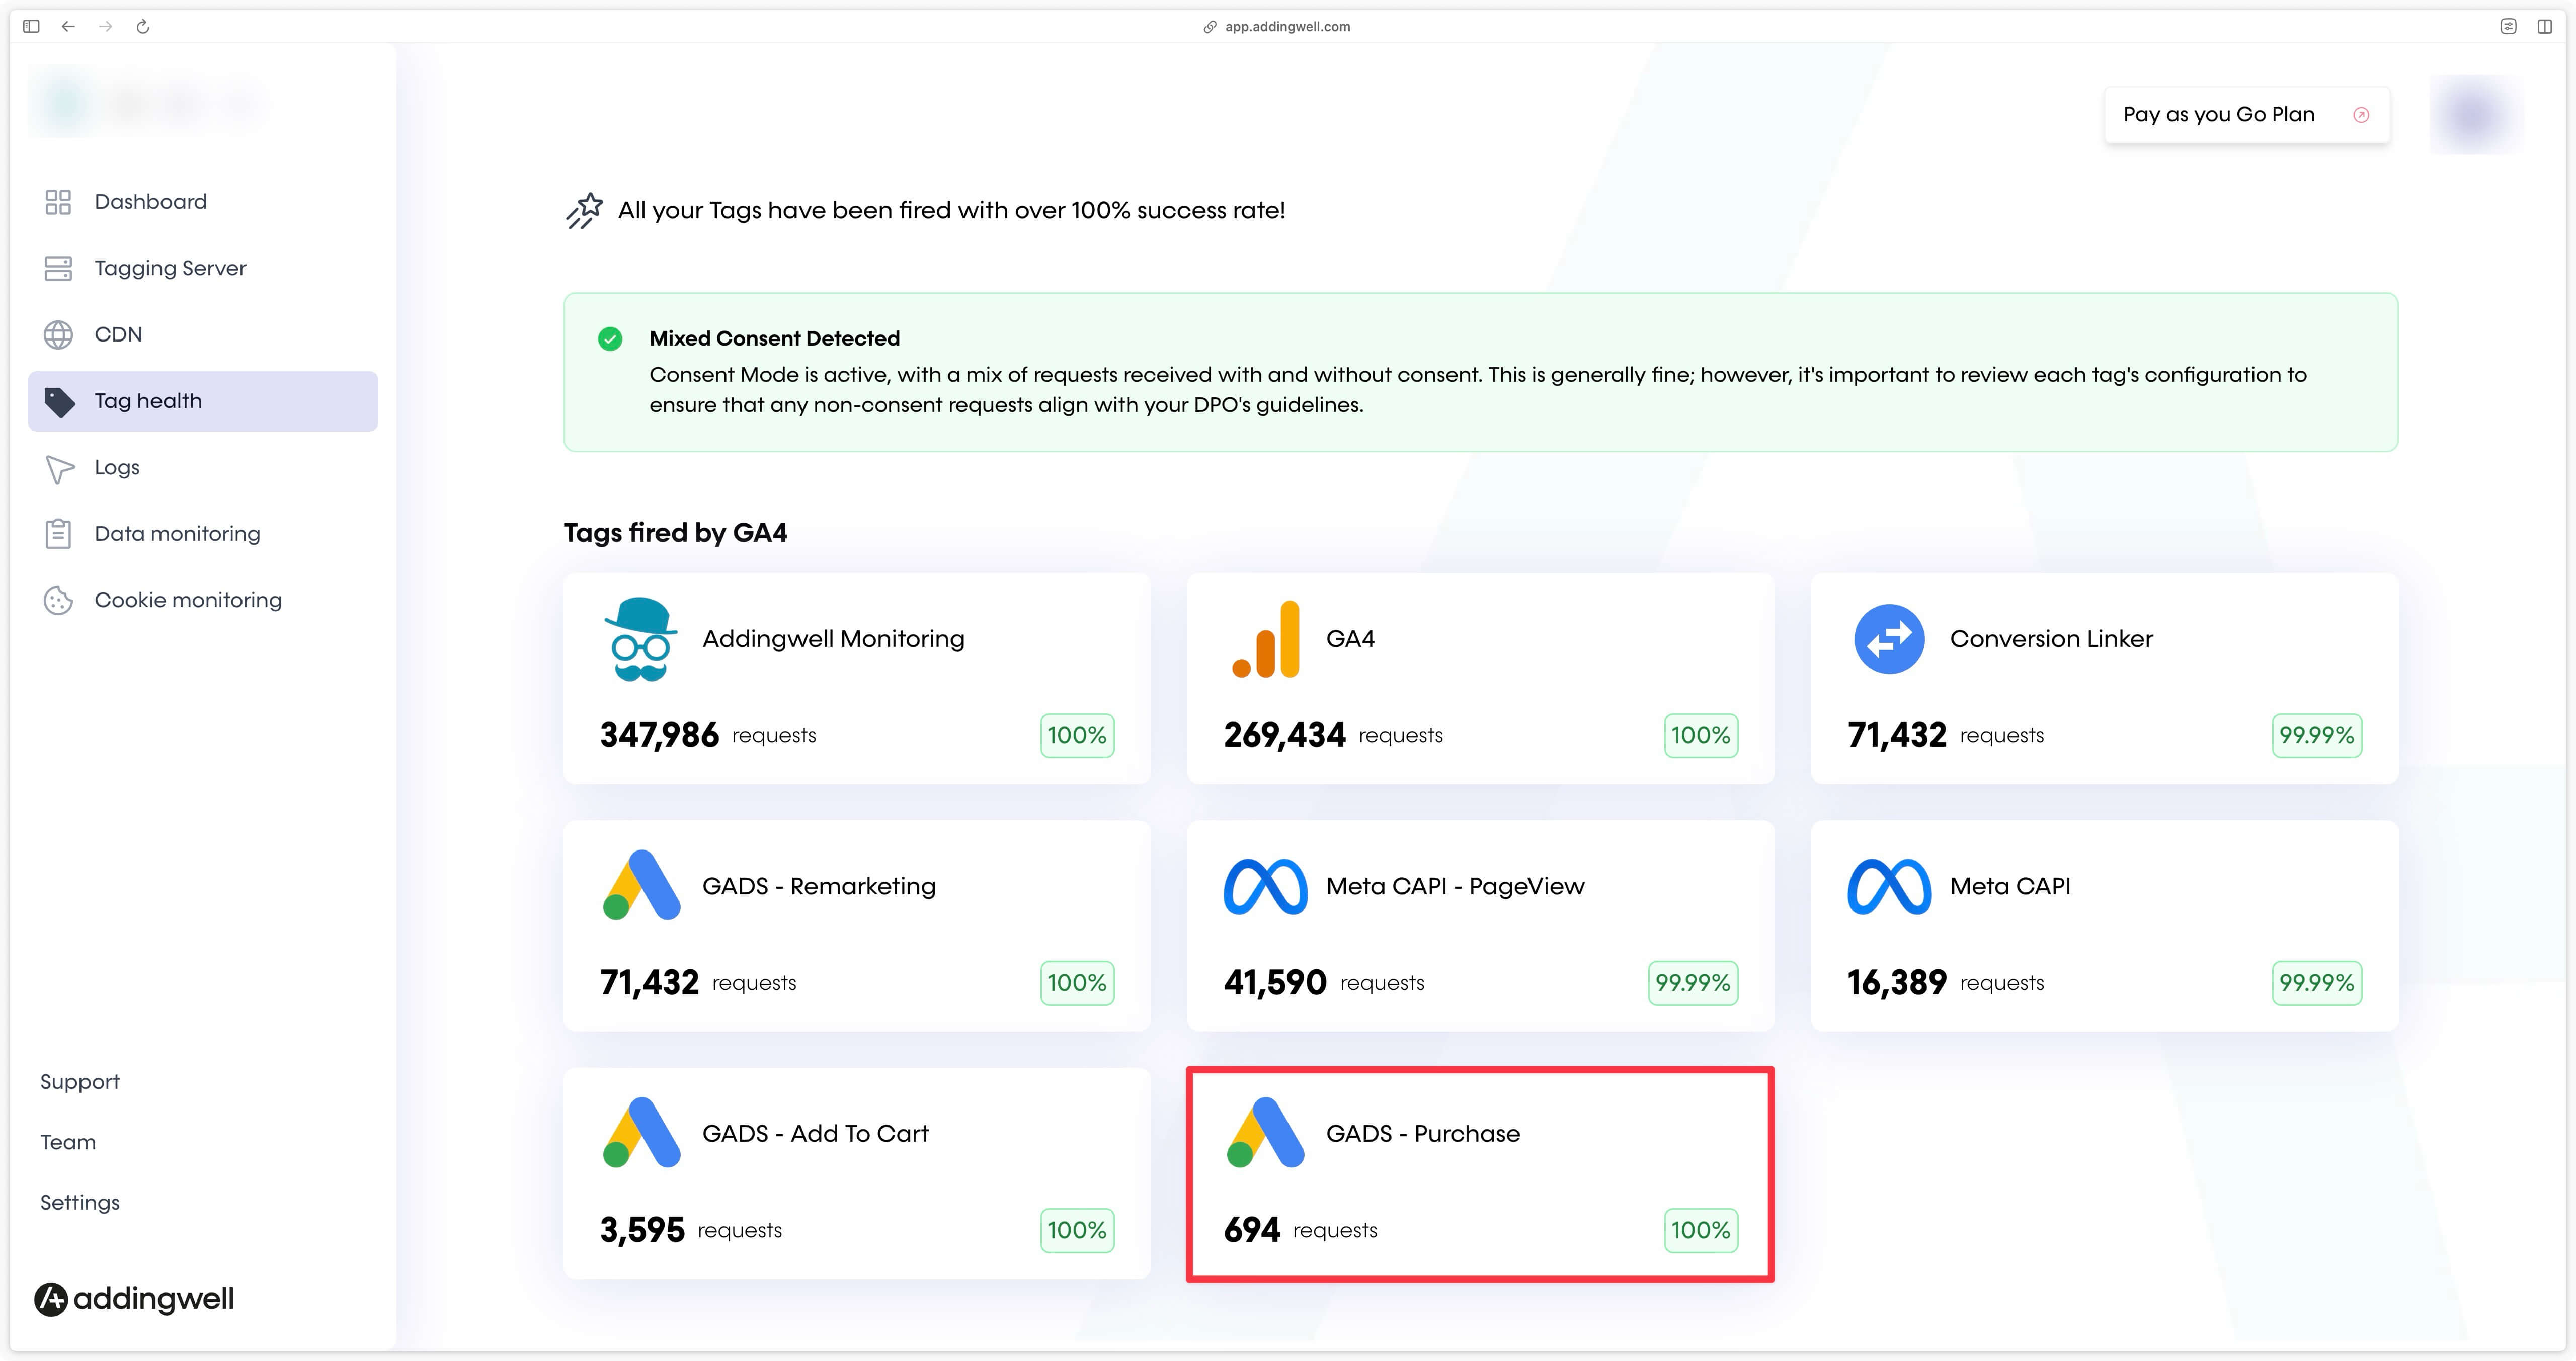
You then get information on each event sent to Google Ads, as well as the percentage of success.
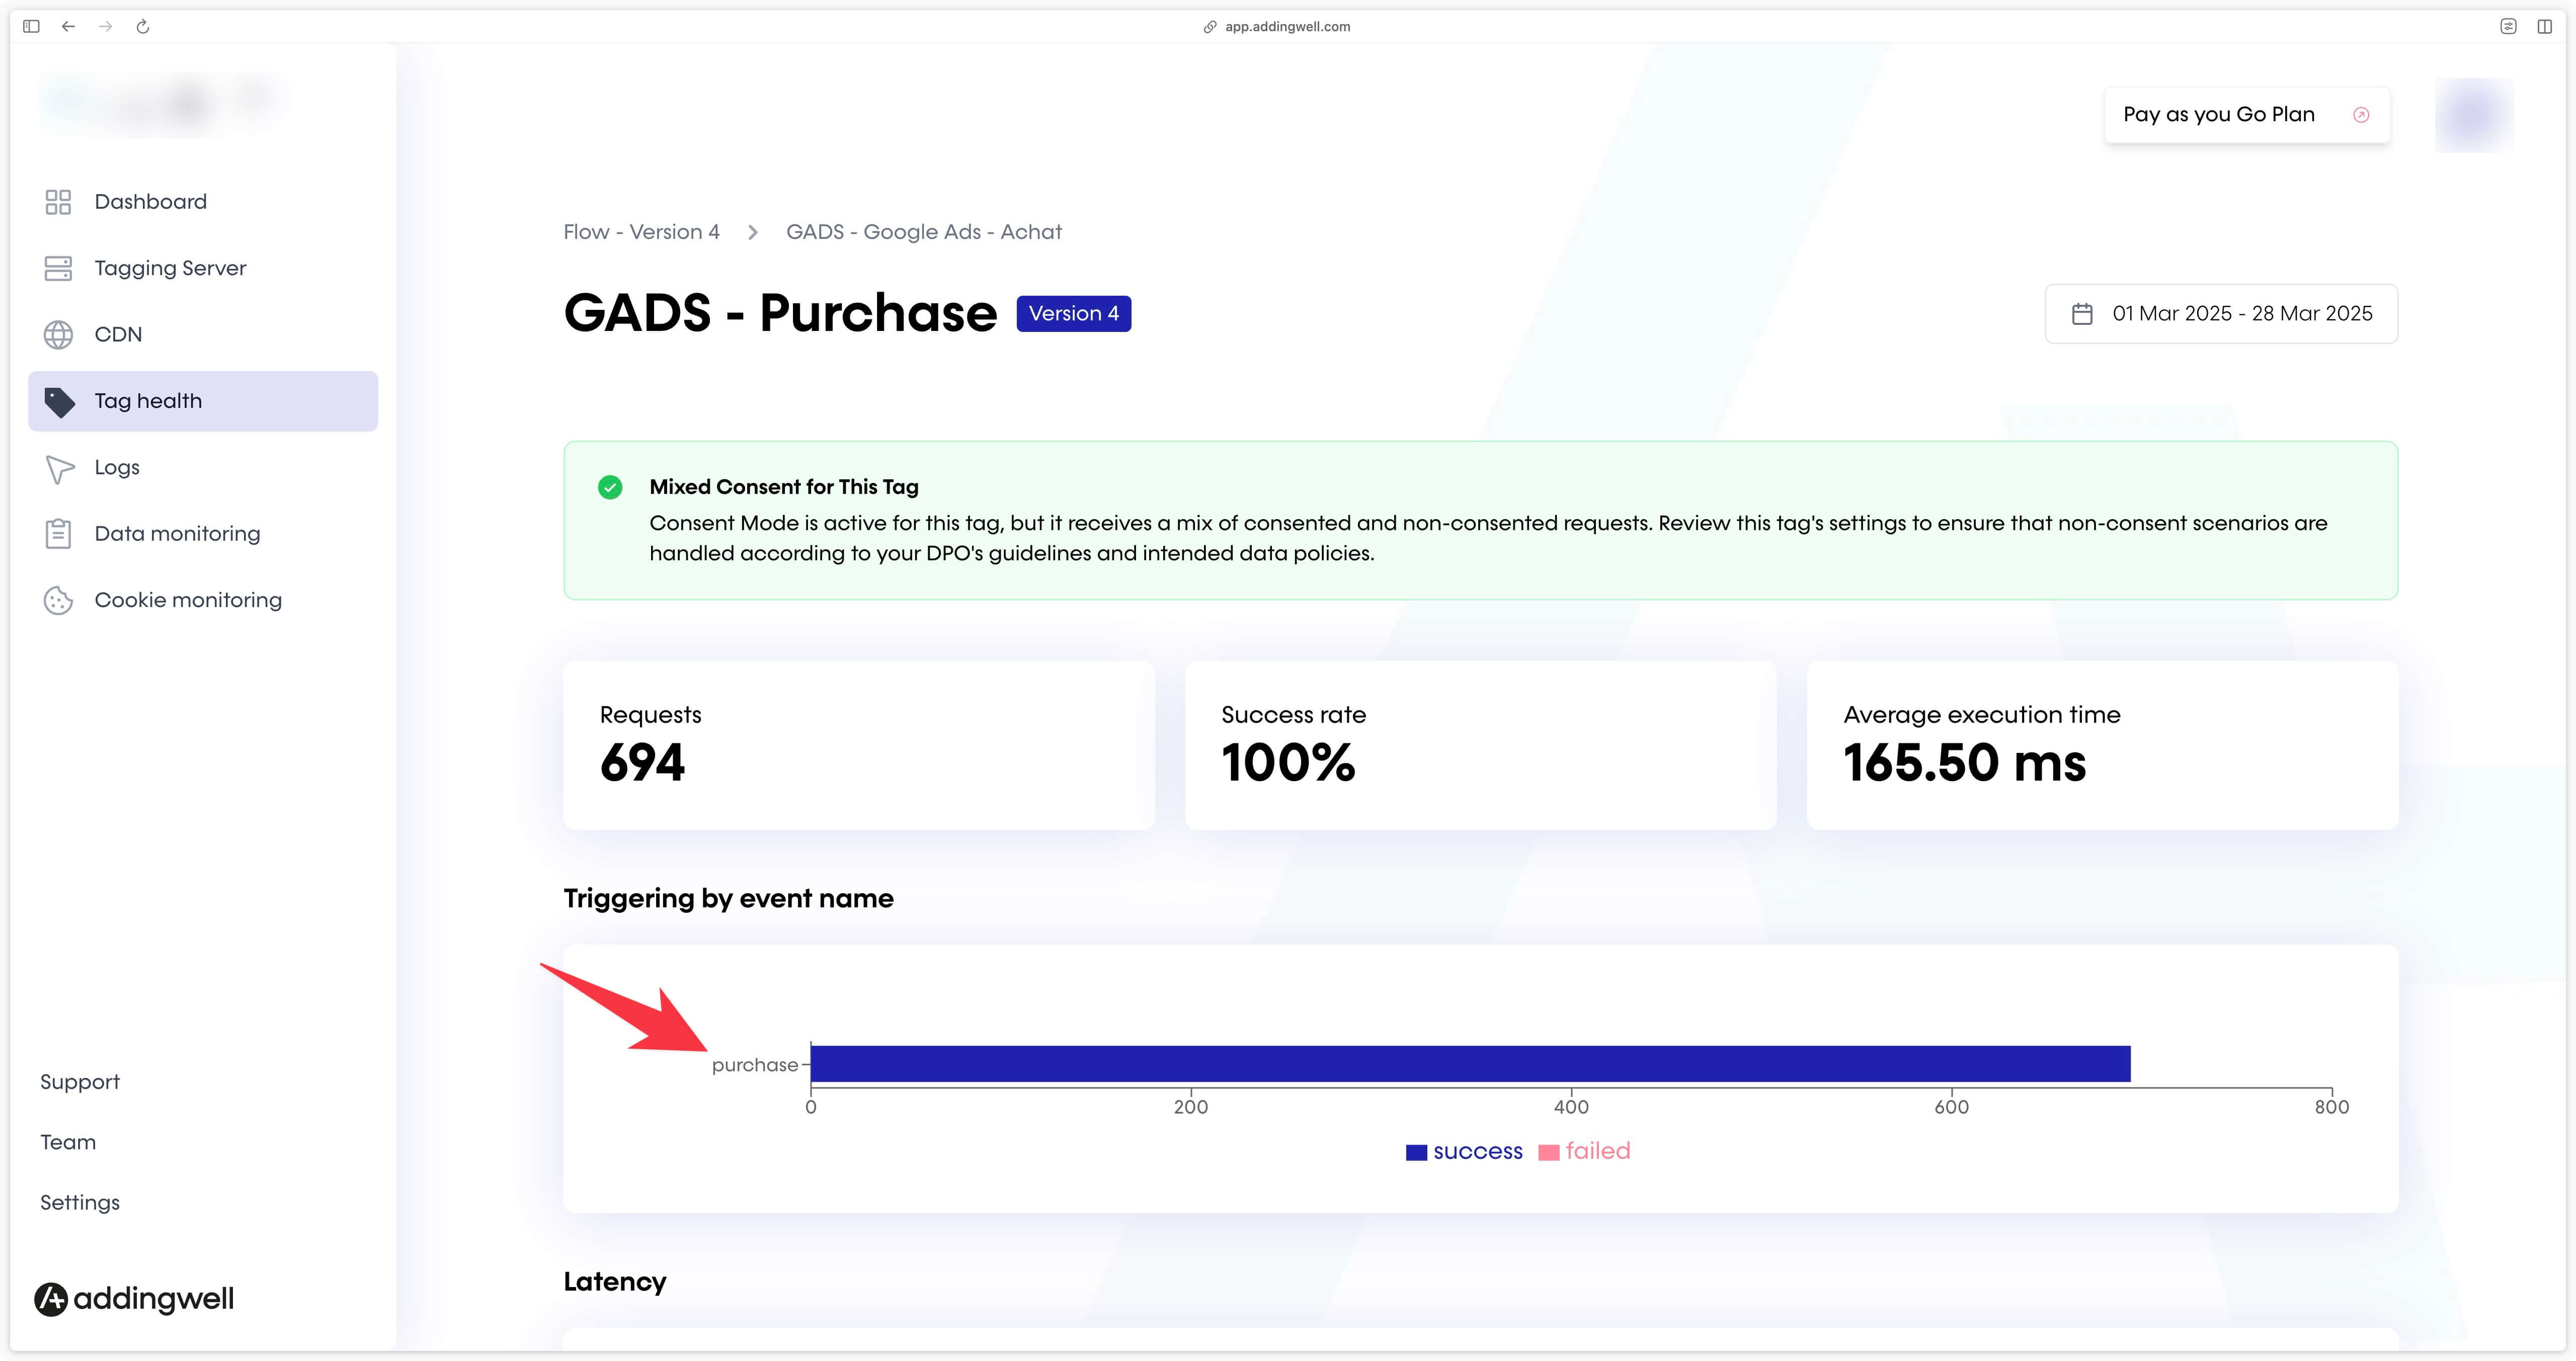
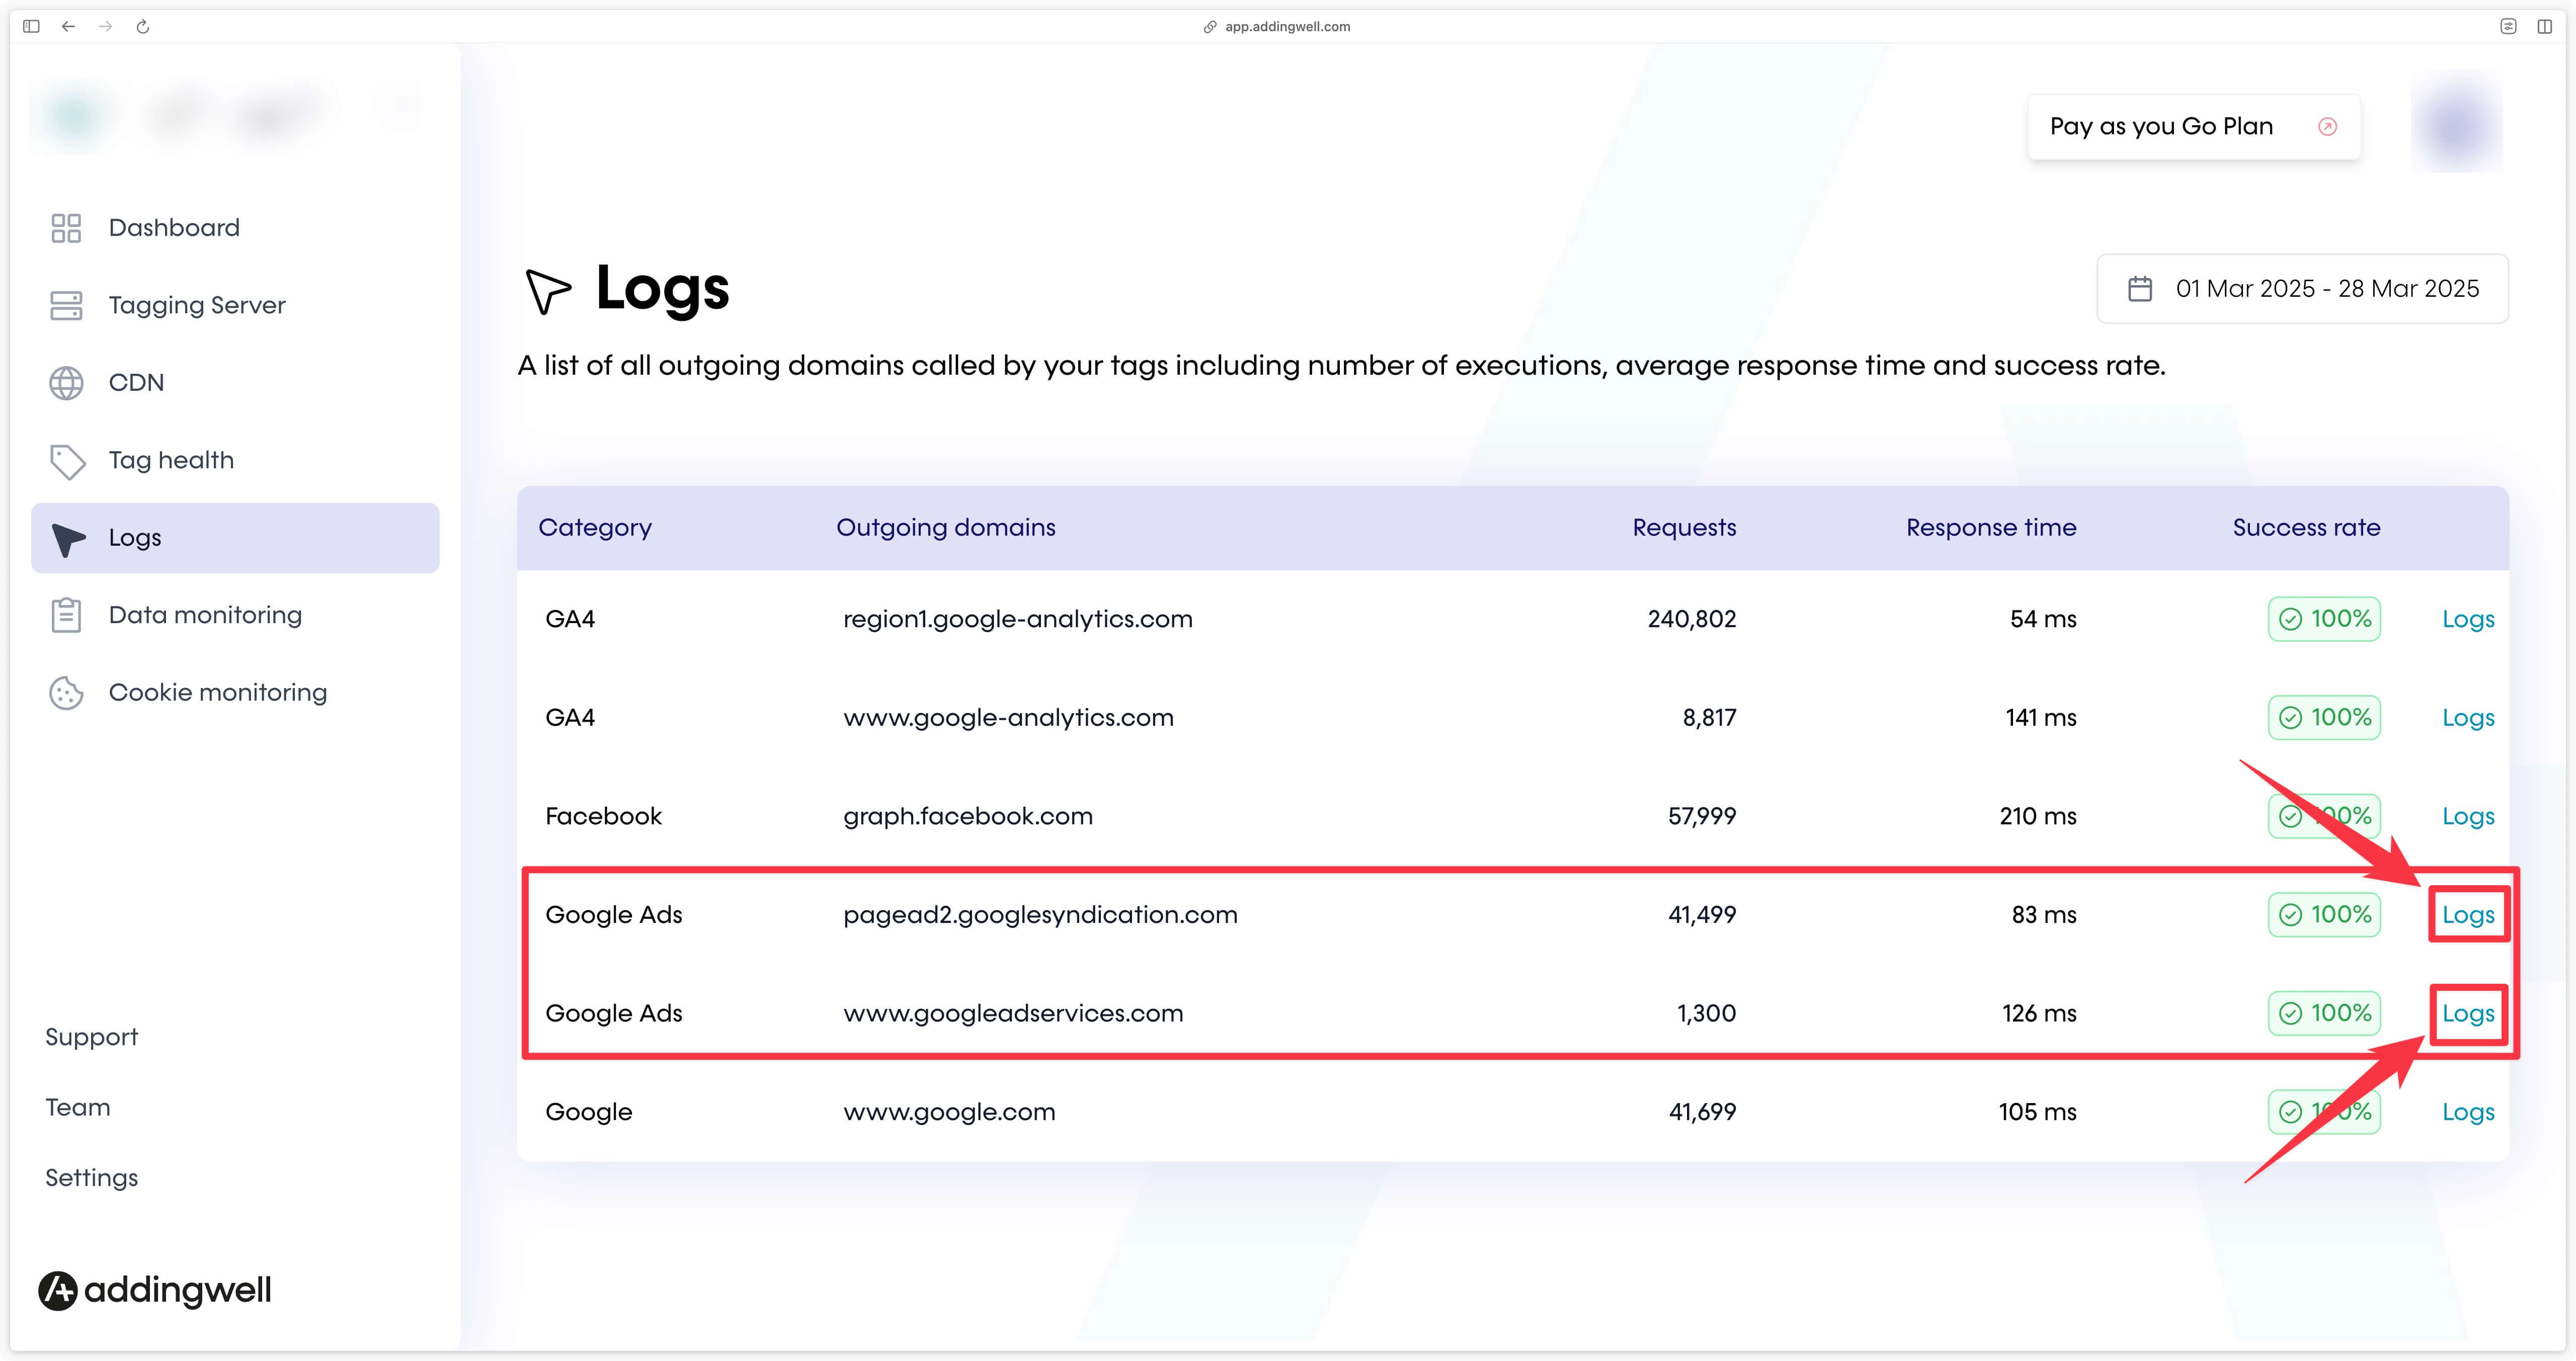
If it’s not 100%, you can examine the logs by going to the Logs tab to identify the cause of any errors.
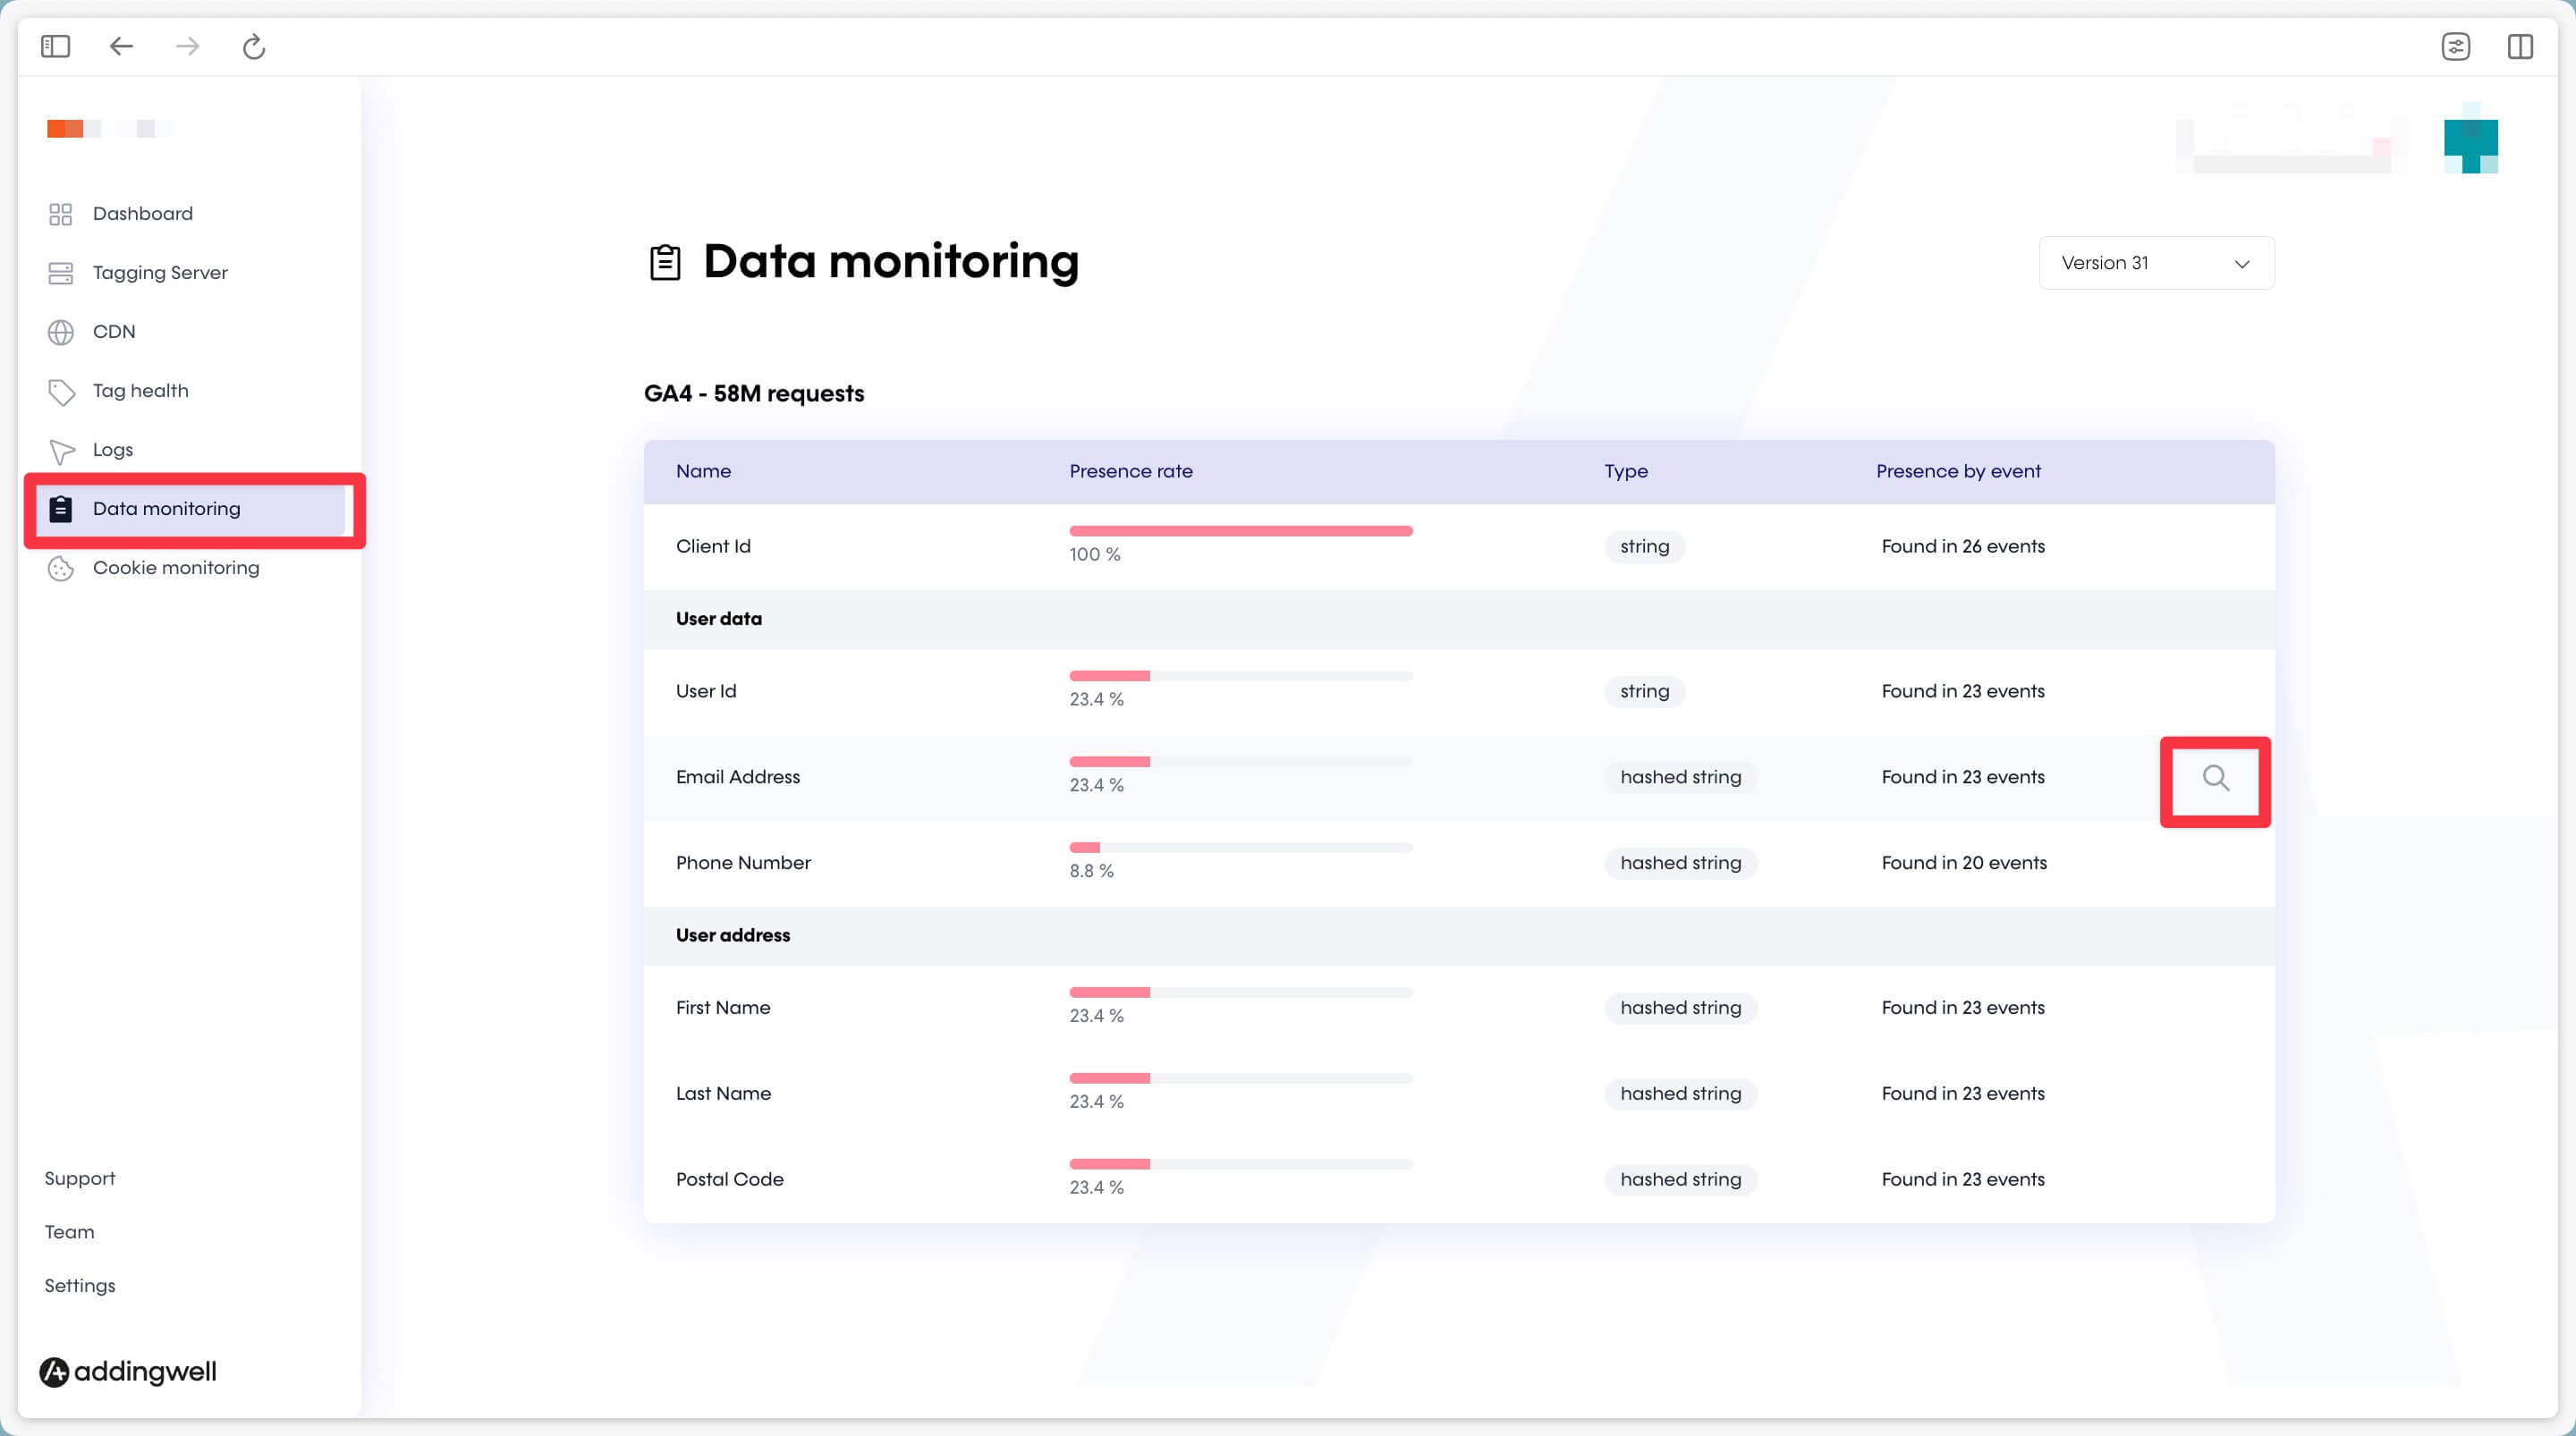
Addingwell side via Data Monitoring
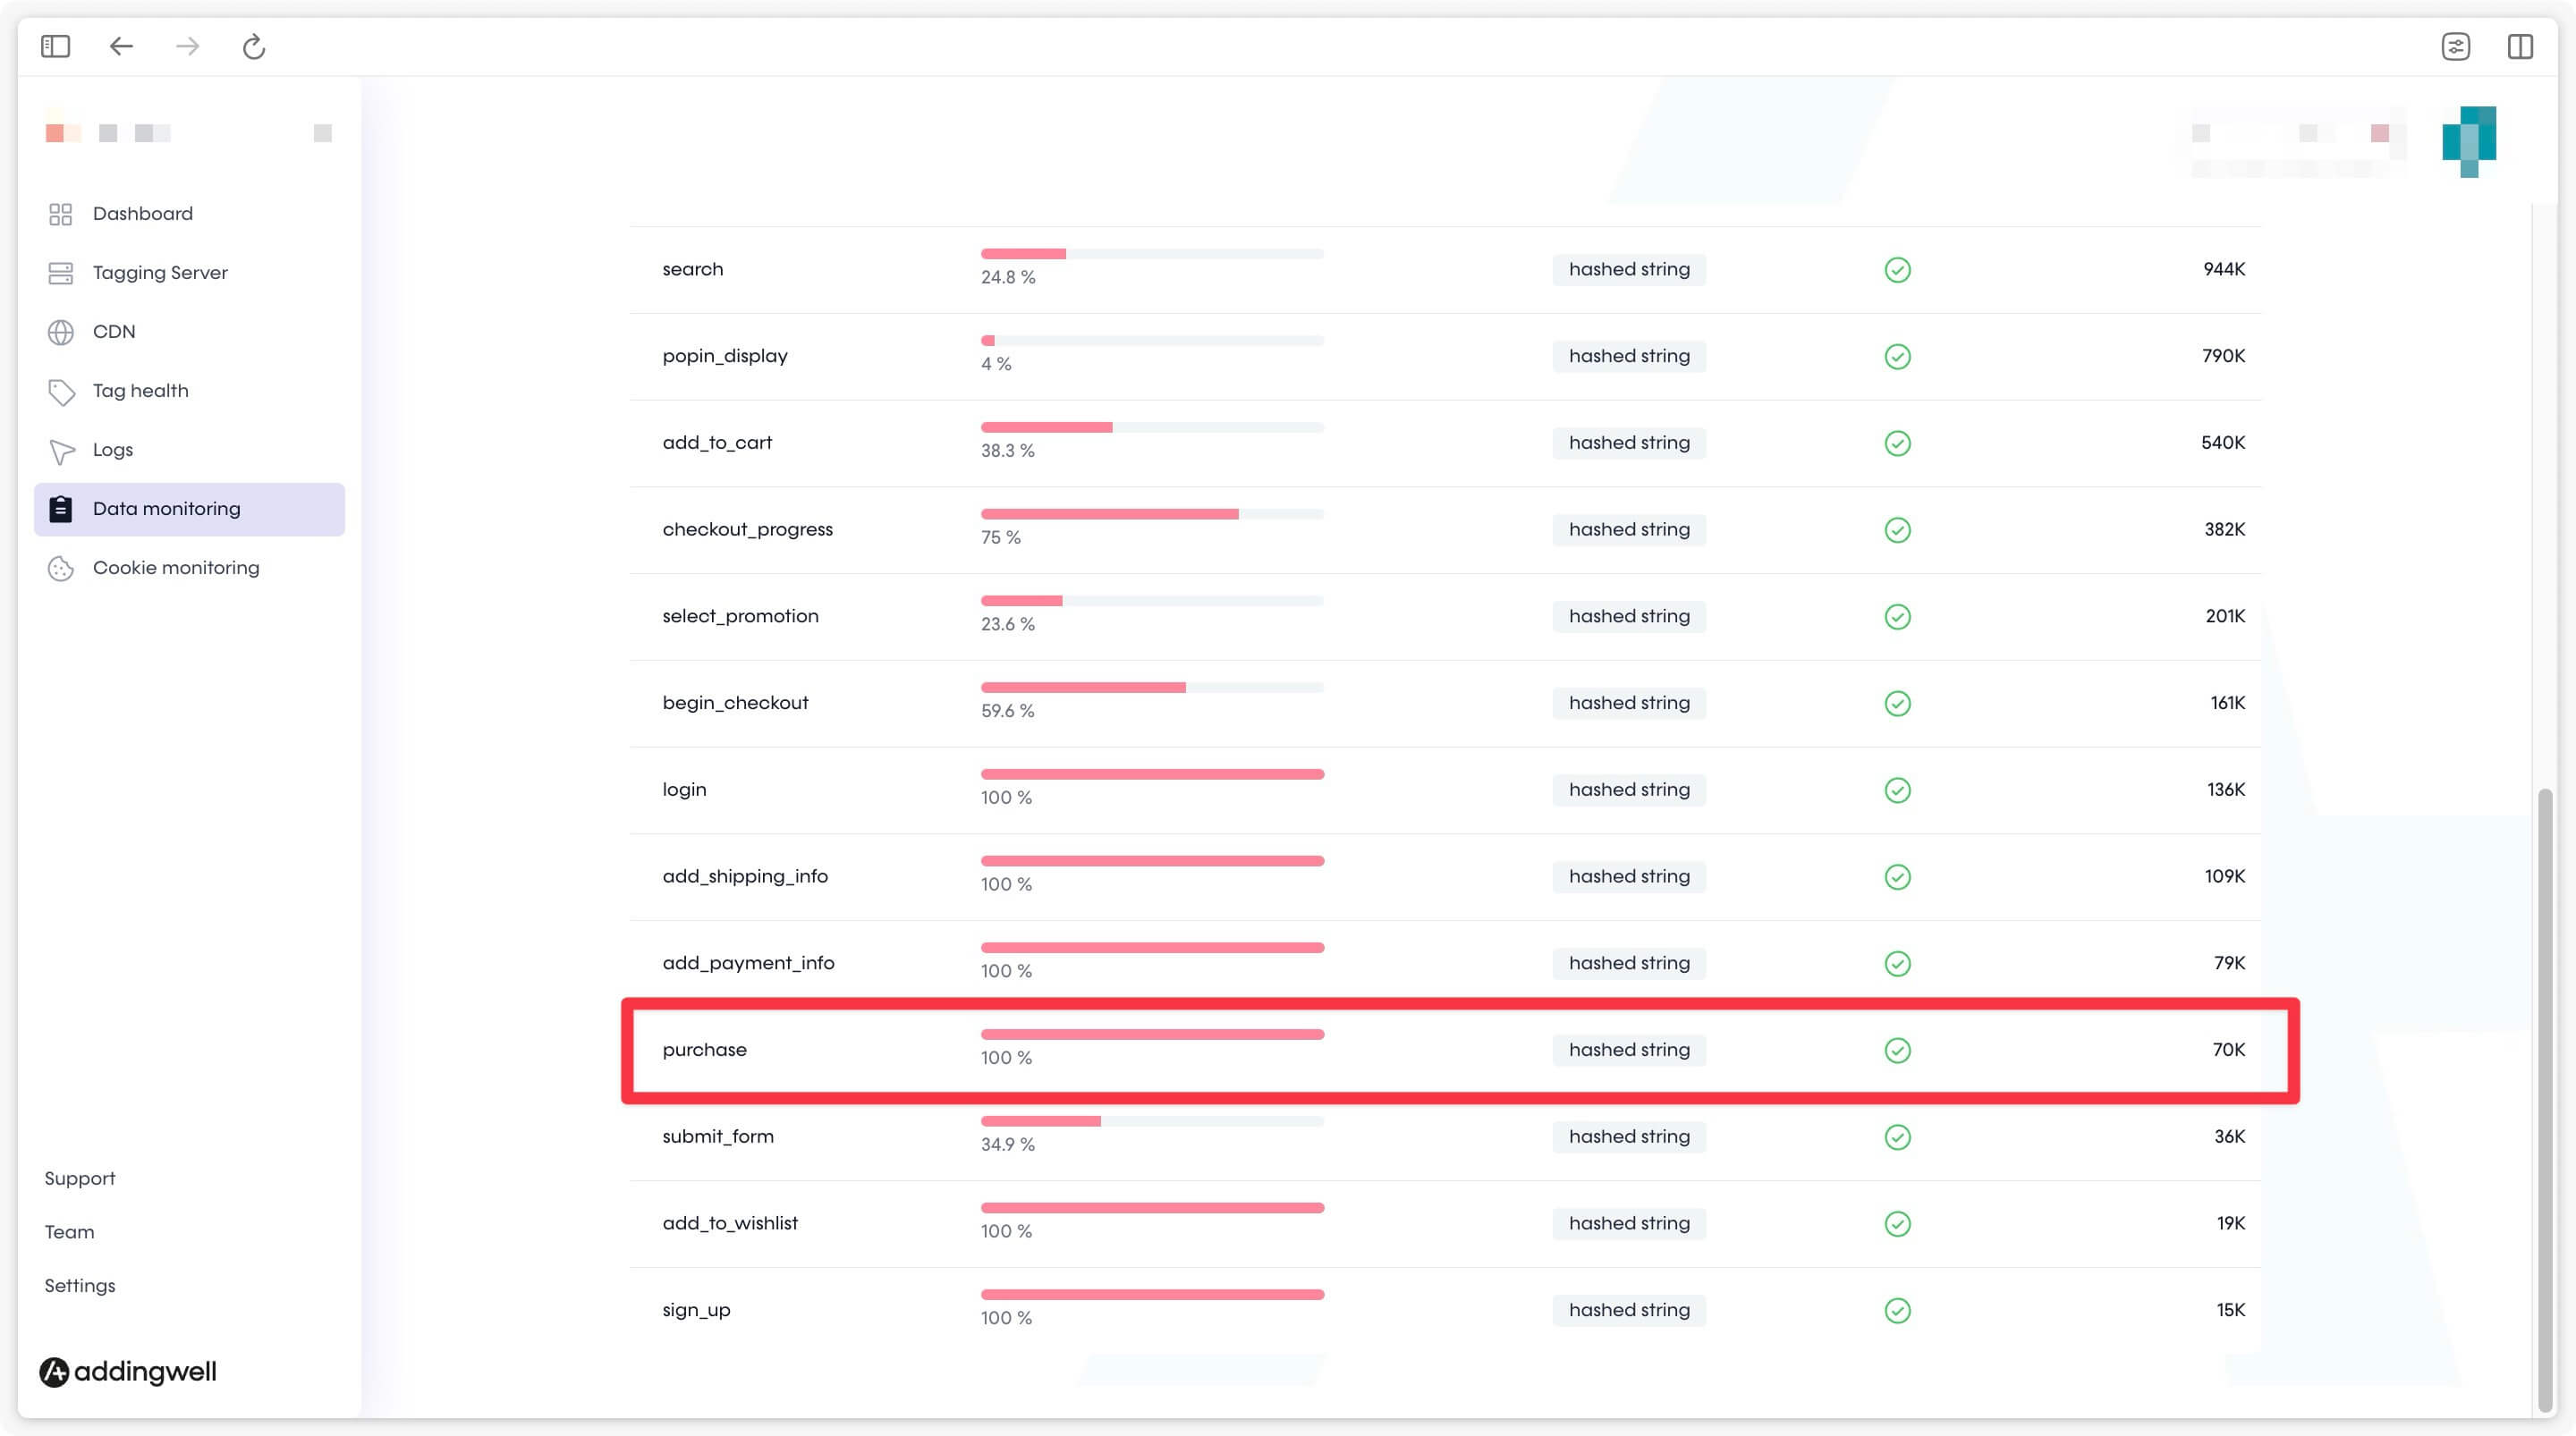
The Data monitoring tab of your Addingwell container summarizes all the user data received by your GA4 client on the server side. In particular, you can see the proportion of events containing e-mail or other information. You can click on the magnifier to see more precisely which events have this data.
Congratulations
After following these steps and monitoring your conversion flows both in Google Tag Manager (web and server-side) and in Google Ads and the Addingwell interface, you should see the correct arrival of your purchase events (or any other conversions) in Google Ads.
If your campaigns are already running and you’ve set up your server-side tag correctly, Google Ads will change the status of your conversion action to Active as soon as users from Google Ads complete a conversion action on your website.
Congratulations, you now have Google Ads tracking based on a server-side configuration, providing greater reliability and control over your data. If you have any questions or problems, please see our FAQ below or contact our support team.